1. המוצר נגמרview
The E-ACE 4.3-inch Dual Lens Car DVR Rearview Mirror Dash Cam is designed to enhance driving safety by providing comprehensive video recording of your journeys. This device integrates a front-facing camera and supports an optional rear-facing camera, offering a wide field of view and continuous recording capabilities. Its sleek design replaces your existing rearview mirror, providing a discreet and integrated solution for vehicle surveillance.
Key features include a 4.3-inch high-definition display, dual-lens recording, night vision, loop recording, and a G-sensor for automatic incident detection.

Image: The E-ACE rearview mirror dash cam displaying both front and rear camera feeds on its integrated screen.
2. תכולת החבילה
אנא בדקו את החבילה עבור הפריטים הבאים:
- E-ACE Rearview Mirror Dash Cam Unit
- מטען לרכב
- Fixed Bandages (for mounting)
- מדריך למשתמש
- קורא כרטיסים
- אופציונלי: אחורי View Camera + Cable (6M or 10M, depending on variant)
- Optional: Buck Line (for parking monitoring power)
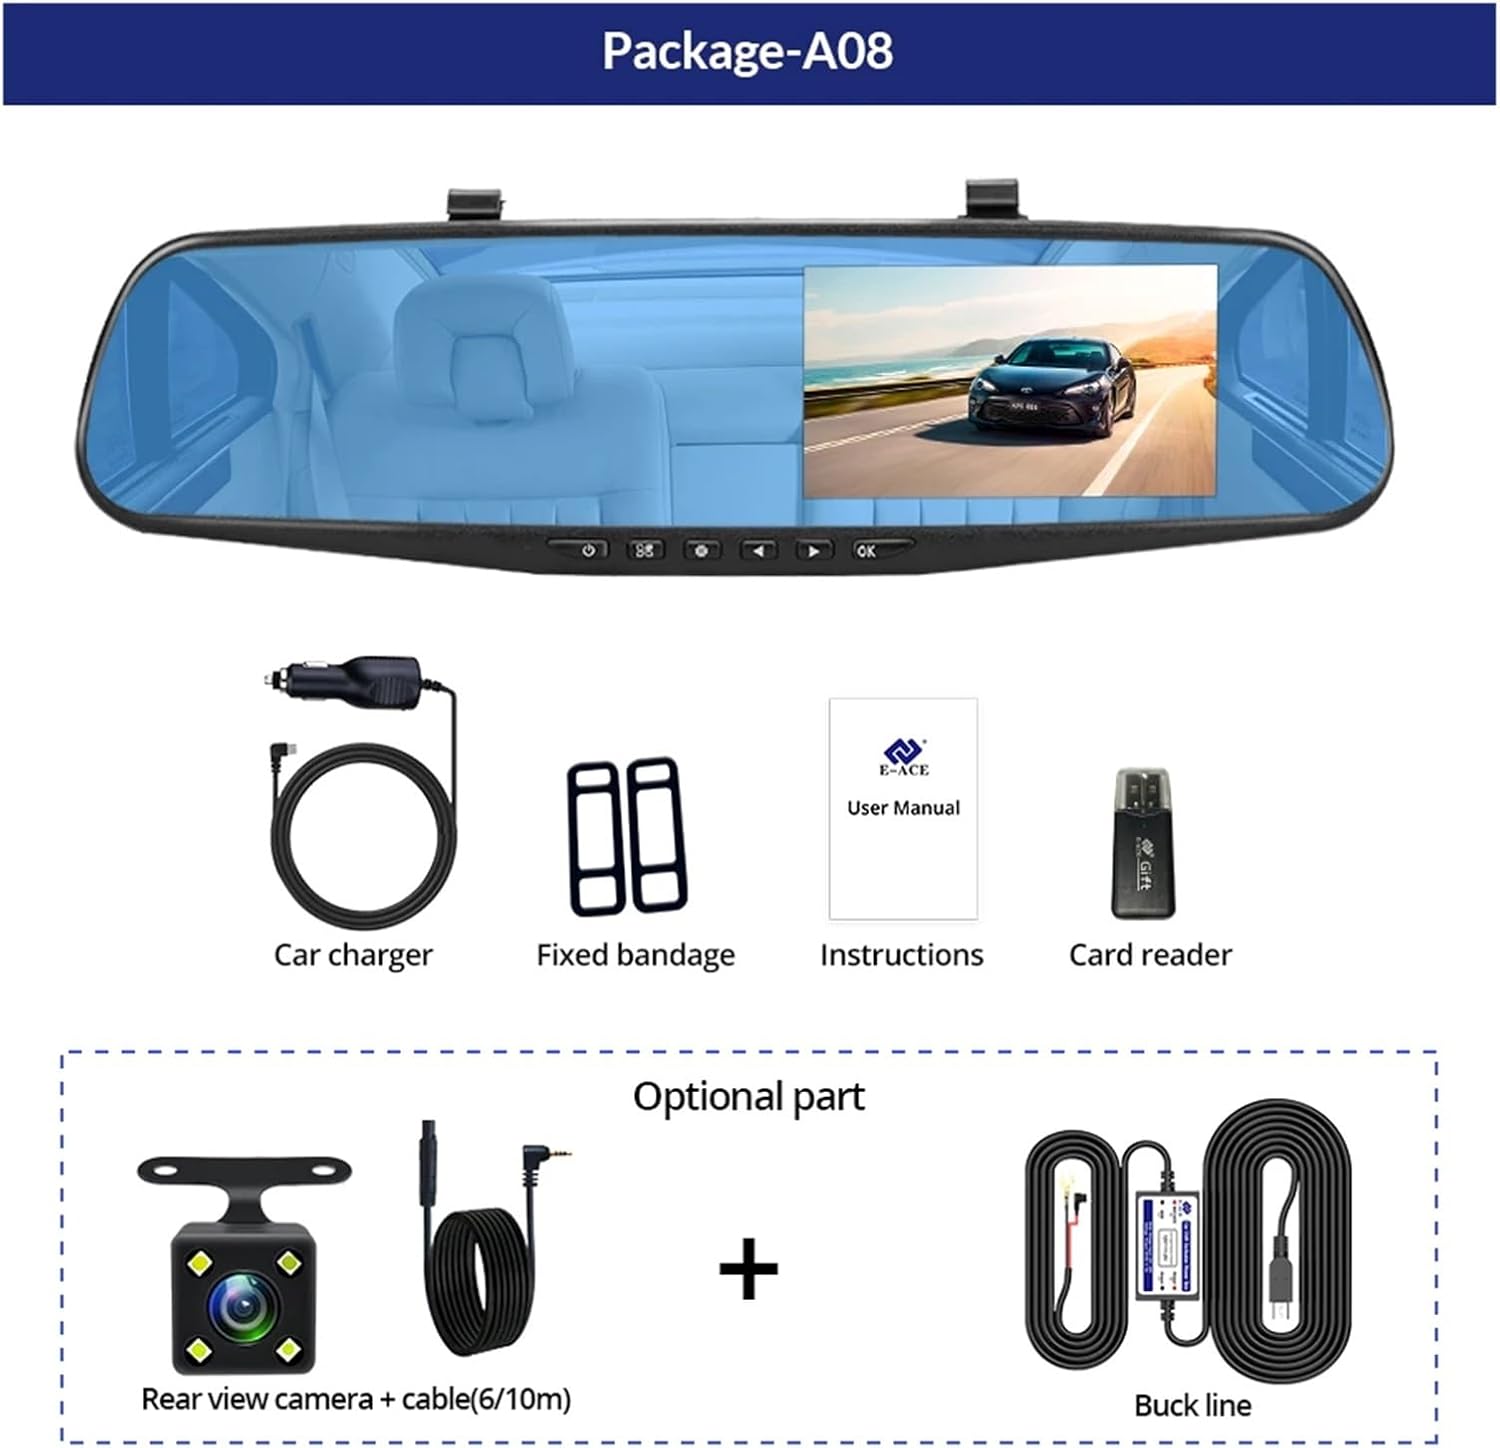
Image: A visual representation of the items included in the E-ACE dash cam package, showing the main unit and accessories.
3. תכונות מוצר
- 4.3-inch High-Definition Display: Provides clear visibility for real-time monitoring and playback.
- עיצוב עדשה כפולה: Captures both front and rear footage simultaneously for comprehensive coverage.
- Built-in Night Vision Technology: Ensures clear recordings in low-light conditions.
- התקנה ידידותית למשתמש: Sleek rearview mirror design integrates seamlessly into your vehicle.
- הקלטת לולאה: דורס אוטומטית את הקובץ הישן ביותרtagכאשר כרטיס הזיכרון מלא, מה שמבטיח הקלטה רציפה.
- G-Sensor Feature: Detects sudden movements or impacts and automatically locks the current video file כדי למנוע את החלפתו.
- ניטור חניה: Records video when motion or impact is detected while the vehicle is parked (requires buck line connection).
- זווית רחבה של 170 מעלות: מספק מגוון רחב view של הדרך קדימה.
- תמונה הפוכה: מציג את המצלמה האחורית view עם הנחיות החניה בעת נסיעה לאחור.

Image: An illustration highlighting the various functional features of the E-ACE dash cam.
4. זיהוי רכיבים
Familiarize yourself with the various parts and controls of your E-ACE dash cam:

Image: A detailed diagram identifying the buttons, ports, and features on the E-ACE dash cam unit.
- לחצן הפעלה/כיבוי: מדליק או מכבה את המכשיר.
- לחצן תפריט: גישה להגדרות ואפשרויות.
- לחצן מצב: Switches between video recording, photo, and playback modes.
- לחצן UP: Navigates up in menus or adjusts settings.
- לחצן למטה: Navigates down in menus or adjusts settings.
- לחצן אישור: Confirms selections or starts/stops recording.
- חריץ כרטיס TF: Insert your MicroSD (TF) card here.
- AV-IN Port: מחבר את המצלמה האחורית.
- יציאת USB: עבור אספקת חשמל והעברת נתונים.
- לחצן איפוס: Resets the device to factory settings (use a thin pin).
- מִיקרוֹפוֹן: Records audio inside the vehicle.
5. התקנה והתקנה
5.1 הכנסת כרטיס הזיכרון
Before installation, insert a high-speed MicroSD (TF) card (Class 10 or higher, up to 64GB recommended) into the TF Card Slot (7) with the contacts facing the screen. Ensure the card is inserted correctly until it clicks into place.
5.2 הרכבת מצלמת הרכבה
- Attach the fixed bandages to the back of the dash cam unit.
- Securely strap the dash cam over your vehicle's existing rearview mirror using the fixed bandages. Ensure it is centered and stable.
5.3 חיבור ספק הכוח
- Connect the car charger to the USB Port (9) on the dash cam.
- חבר את הקצה השני של מטען הרכב לשקע המצית של הרכב שלך.
- Route the power cable neatly along the windshield trim to avoid obstructing your view.
5.4 התקנת המצלמה האחורית (אופציונלי)
- Connect the rear camera cable to the AV-IN Port (8) on the dash cam.
- Route the rear camera cable from the dash cam to the rear of your vehicle. This typically involves tucking the cable under the headliner and along the side pillars.
- Mount the rear camera on the rear windshield or near the license plate using its adhesive or screws. Ensure it has a clear view של הדרך מאחור.
- If using the reverse image function, connect the red wire from the rear camera cable to your vehicle's reverse light power supply.
6. הוראות הפעלה
6.1 הפעלה/כיבוי
- אוֹטוֹמָטִי: The dash cam will automatically power on and start recording when your vehicle's ignition is turned on (if connected to a switched power source).
- ידני: Press and hold the ON/OFF Button (1) to manually power the device on or off.
6.2 פעולה בסיסית
- החלפת מצבים: Press the Mode Button (3) to cycle between Video Recording, Photo, and Playback modes.
- תפריט גישה: In any mode, press the Menu Button (2) to enter the settings menu. Use the UP (4) and Down (5) buttons to navigate, and OK (6) to select.
- התחל/הפסק הקלטה: In Video Recording mode, press the OK Button (6) to manually start or stop recording.
6.3 מצבי תצוגה
While recording, you can typically switch between different display views by pressing the UP or Down buttons:
- מצלמה קדמית בלבד
- מצלמה אחורית בלבד
- Picture-in-Picture (Front main, Rear sub-window)
- Picture-in-Picture (Rear main, Front sub-window)
6.4 הקלטת לולאה
Set the loop recording duration (e.g., 1, 3, or 5 minutes) in the settings menu. When the memory card is full, the oldest unlocked files יוחלף על ידי הקלטות חדשות.
6.5 חיישן G
The G-sensor automatically detects collisions or sudden braking. When triggered, it locks the current video file, preventing it from being overwritten by loop recording. Adjust sensitivity in the settings.
6.6 ניטור חניה (אופציונלי)
If the buck line is installed, the dash cam can monitor your vehicle while parked. When motion or impact is detected, it will automatically record a short video. Enable this feature in the settings.
6.7 הגדרת תאריך ושעה
It is important to set the correct date and time in the system settings for accurate timestampעל ההקלטות שלך.
7. תחזוקה
- ניקוי: Use a soft, dry cloth to clean the lens and screen. Avoid abrasive cleaners or solvents.
- כרטיס זיכרון: Format the MicroSD card regularly (e.g., once a month) within the dash cam's settings to maintain optimal performance and prevent data corruption. Back up important files לפני העיצוב.
- טֶמפֶּרָטוּרָה: Avoid exposing the device to extreme temperatures, as this can affect battery life and component integrity.
- עדכוני קושחה: בדוק את זה של היצרן website periodically for firmware updates that may improve performance or add features.
8. פתרון תקלות
| בְּעָיָה | סיבה אפשרית | פִּתָרוֹן |
|---|---|---|
| מצלמת הדאשבוקס לא נדלקת. | No power supply; faulty charger; loose connection. | Check car charger connection and vehicle's cigarette lighter. Try a different USB cable/charger. |
| ההקלטה נעצרת אוטומטית. | Memory card full; slow memory card; G-sensor sensitivity too high. | Format the memory card. Use a Class 10 or higher MicroSD card. Lower G-sensor sensitivity in settings. |
| וידאו פוtage מטושטש. | סרט מגן על העדשה; עדשה מלוכלכת; מיקוד שגוי. | Remove any protective film. Clean the lens with a soft cloth. |
| מצלמה אחורית לא מציגה. | חיבור רופף; כבל/מצלמה פגומים. | Check the AV-IN connection. Ensure the rear camera is properly installed. |
| Device freezes or crashes. | Software issue; memory card error. | Press the Reset Button (10) with a thin pin. Format the memory card. |
9. מפרטים
- שם הדגם: DMMRUTXB
- לְהַצִיג: 4.3 אינץ'
- מַצלֵמָה: Dual Lens (Front & Rear support)
- רזולוציית וידאו: FHD 1920x1080P (Front)
- תכונות: Loop Recording, G-Sensor, Night Vision, Parking Monitoring, 170-degree wide angle
- אִחסוּן: Supports MicroSD (TF) card, Class 10 or higher (up to 64GB)
- קישוריות: USB, AV-IN (for rear camera)
- משקל פריט: בערך 1.76 אונקיות (50 גרם)
- מידות חבילה: 0.39 x 0.39 x 0.39 אינץ' בערך
- יַצרָן: DMMRUTXB
10. אחריות ותמיכה
For warranty information and technical support, please refer to the documentation provided with your purchase or contact the retailer/manufacturer directly. Keep your purchase receipt as proof of purchase.


