1. הוראות בטיחות
אנא קראו בעיון את כל ההוראות לפני הפעלת המכשיר. שמרו מדריך זה לעיון עתידי.
- ודא את אספקת החשמל כרךtage תואם לתווית הדירוג שעל המכשיר.
- אין לטבול את היחידה הראשית במים או נוזלים אחרים.
- נתק את המכשיר משקע החשמל לפני ניקוי או תחזוקה.
- הרחיקו ידיים וחפצים זרים מחלקים נעים במהלך הפעולה.
- אין להפעיל את המכשיר עם כבל או תקע פגומים. פנו לאנשי שירות מוסמכים לצורך תיקונים.
- מכשיר זה אינו מיועד לשימוש על ידי אנשים עם יכולות פיזיות, חושיות או שכליות מופחתות, או חסרי ניסיון וידע, אלא אם כן הם קיבלו פיקוח או הדרכה בנוגע לשימוש במכשיר על ידי אדם האחראי על בטיחותם.
- Allow the unit to stand upright for at least 24 hours after transportation before plugging it in to allow the refrigerant to settle.
2. המוצר נגמרview
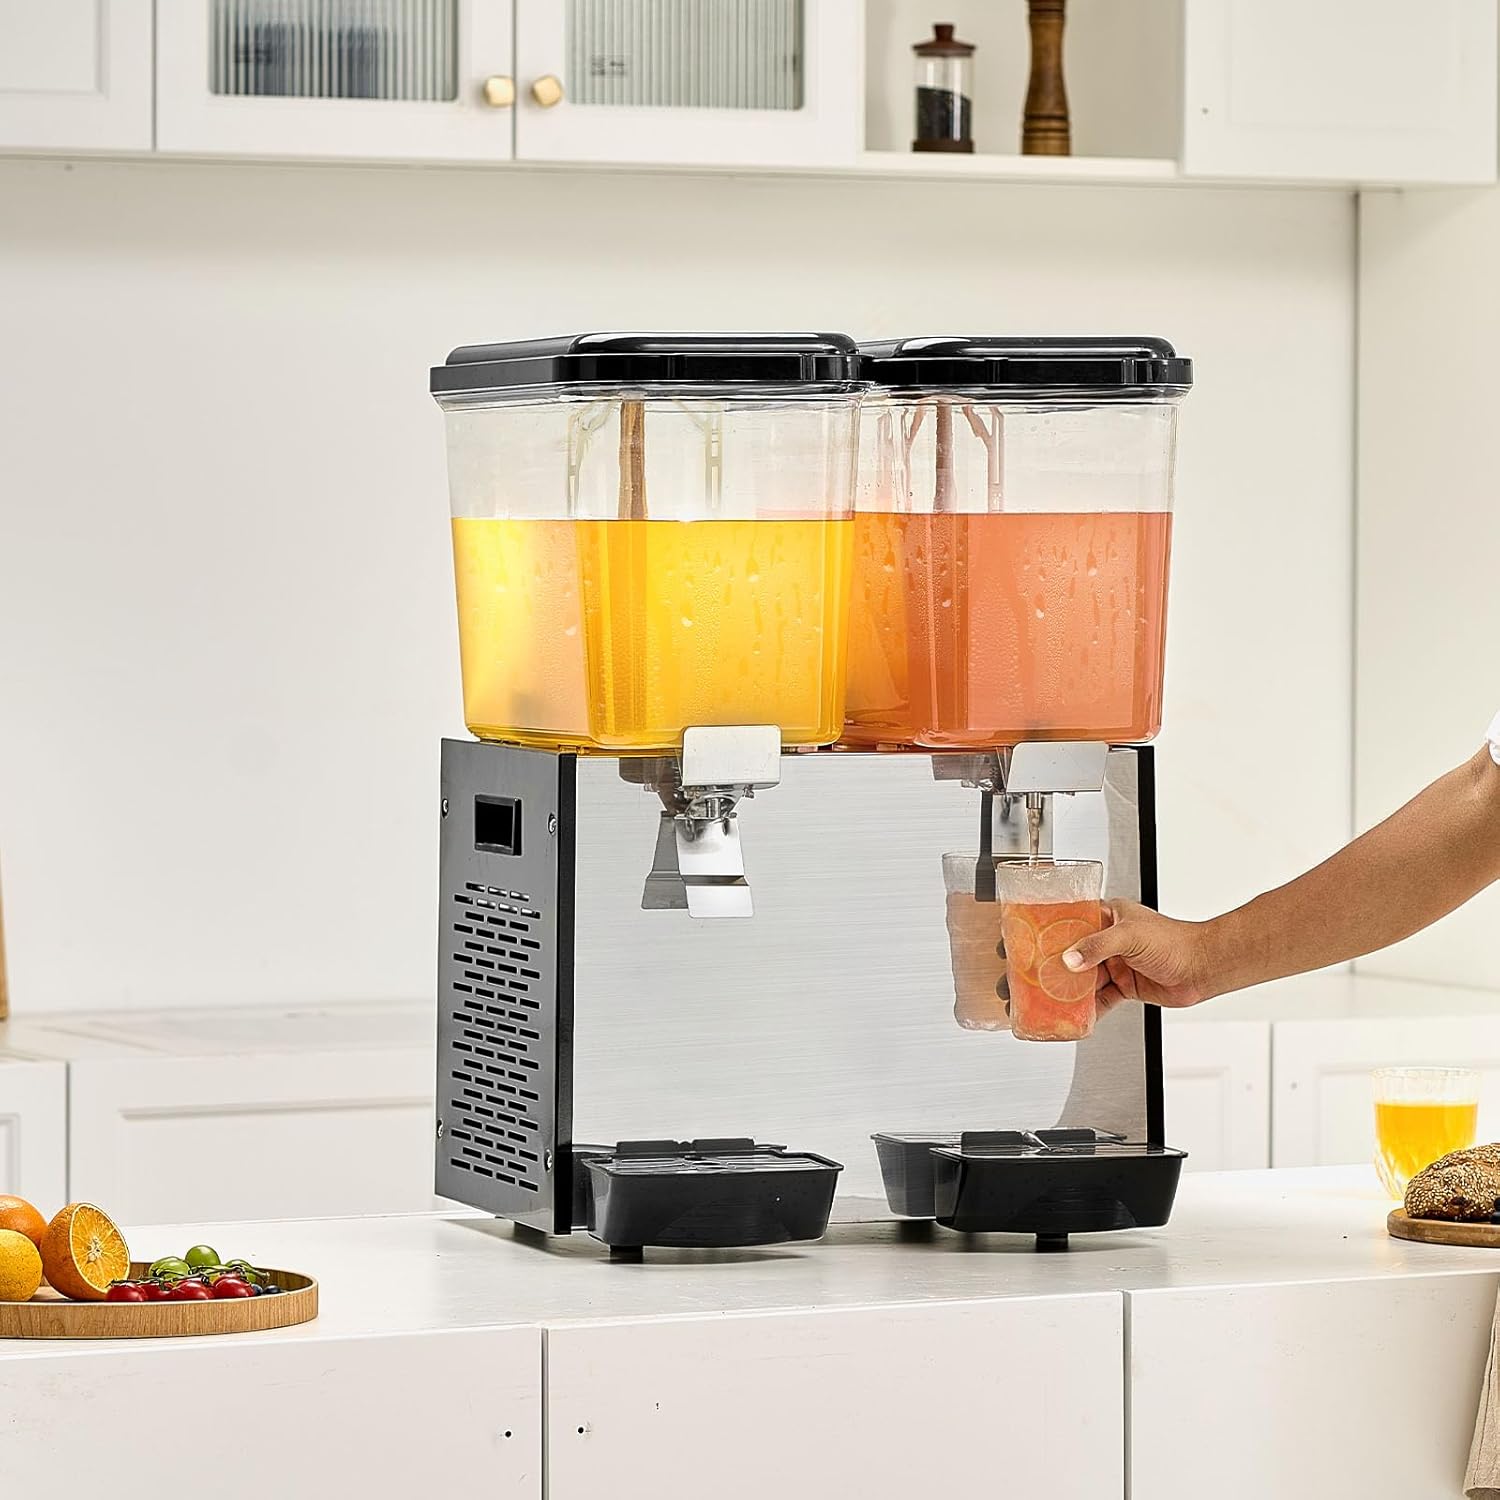
The VEVOR Commercial Beverage Dispenser Model LYJ18LX2 is designed for efficient cooling and dispensing of various cold beverages. It features two 18-liter tanks, a stainless steel body, and a powerful cooling system to maintain beverages at 45-54°F (7-12°C). The unit includes stirring rods to prevent sedimentation and ensure uniform temperature.


3. מפרטים
| תכונה | מִפרָט |
|---|---|
| מספר דגם | LYJ18LX2 |
| מותג | VEVOR |
| חוֹמֶר | פוליקרבונט (PC), נירוסטה |
| צֶבַע | שָׁחוֹר |
| יְכוֹלֶת | 2 x 18 Liters (19 QT per tank) |
| כּוֹחַ | 370W ± 10% |
| טווח טמפרטורות קירור | 45-54°F (7-12°C) |
| מידות המוצר (L x W x H) | 18.3 x 17.9 x 26.4 אינץ' (465 x 455 x 670 מ"מ) |
| משקל פריט | 60.8 פאונד (27.6 ק"ג) |
| בטוח למדיח כלים | Yes (for removable parts) |
| UPC | 197988417798 |
4. תכולת החבילה
בעת פירוק האריזה, אנא ודא שכל הפריטים נמצאים ולא ניזוקו:
- 1 x VEVOR Commercial Beverage Dispenser Main Unit
- 2 x 18L PC Beverage Tanks
- 2 x Stirring Rods
- 2 x Lids
- 2 x Drip Trays (Water Catchment Boxes)
- 2 x Tank Seal Rings
- 4 x O-Ring Seals
- 1 x מדריך הוראות

5. התקנה והתקנה
Follow these steps to set up your beverage dispenser:
- פריקת אריזה: הסר בזהירות את כל הרכיבים מהאריזה.
- מיקום ראשוני: Place the main unit on a stable, level surface. Ensure there is adequate ventilation around the unit.
- Refrigerant Settling: After transportation, allow the unit to stand upright for at least 24 hours before plugging it into a power outlet. This allows the refrigerant to settle, preventing potential damage to the compressor.
- Install Stirring Rods: Insert the stirring rods into the center of each PC tank.
- Install Handles/Spouts: Attach the dispensing handles to the tanks. Ensure the pin of the handle is correctly aligned and secured.
- Place Drip Trays: Position the drip trays (water catchment boxes) directly below each dispensing spout on the main unit.
- מיקום מיכל: Carefully place the assembled PC tanks onto the main unit, ensuring they are securely seated.
- חיבור חשמל: Once all components are assembled and the 24-hour settling period has passed, plug the power cord into a grounded electrical outlet.

6. הוראות הפעלה
- Filling the Tanks: Open the lid of each PC tank. Pour your desired cold beverage into the tanks. Do not overfill past the maximum fill line.
- Secure Lids: Close the lids securely on top of the tanks.
- הפעל קירור: Locate the power switches on the side or back of the unit. Turn on the cooling switch. The unit will begin to cool the beverages to the optimal temperature range of 45-54°F (7-12°C).
- Activate Stirring: If your beverage requires continuous mixing (e.g., juice with pulp), turn on the stirring switch. The stirring rods will rotate to ensure uniform temperature and prevent sedimentation.
- Dispensing Beverages: To dispense a beverage, place a cup under the dispensing spout. Press the stainless steel press switch to release the beverage. Release the switch to stop dispensing.
- ניטור: Periodically check beverage levels and refill as needed.
7. ניקיון ותחזוקה
Regular cleaning and maintenance are essential for hygiene and extending the lifespan of your dispenser.
- כיבוי: נתק תמיד את המכשיר משקע החשמל לפני הניקוי.
- מיכלים ריקים: Drain any remaining beverages from the tanks.
- לְפַרֵק: Remove the lids, PC tanks, stirring rods, and drip trays.
- לשטוף חלקים נשלפים: The PC tanks, lids, stirring rods, and drip trays are dishwasher safe. Alternatively, wash them by hand with warm, soapy water and a soft brush. Rinse thoroughly and allow to air dry completely.
- Clean Spouts: Clean the dispensing spouts thoroughly to prevent residue buildup. Use a small brush if necessary.
- ניקוי היחידה הראשית: נגבו את החלק החיצוני של היחידה הראשית עם מודפסamp מטלית. אין להשתמש בחומרי ניקוי שוחקים או לטבול את היחידה הראשית במים.
- Lubricate Seals: Apply a small amount of food-grade Vaseline to the rubber sealing rings (tank seal rings and O-rings) periodically to maintain their flexibility and prevent leaks.
- הרכיבו מחדש: Once all parts are clean and dry, reassemble the unit. Ensure all seals and components are correctly in place.
8. פתרון תקלות
If you encounter issues with your beverage dispenser, refer to the following common problems and solutions:
- יחידה לא מקררת:
- Ensure the power cord is securely plugged in.
- Check if the cooling switch is turned on.
- Verify that the unit has been allowed to settle for 24 hours after transportation before initial use.
- Ensure adequate ventilation around the unit. - Beverage Not Dispensing:
- Check if the tank contains enough beverage.
- Ensure the dispensing handle is fully pressed.
- Inspect the spout for any blockages. - Leaking from Tank/Spout:
- Ensure the tank is correctly seated on the main unit.
- Check if the rubber sealing rings are properly installed and not damaged. Replace if necessary.
- Ensure the dispensing handle is fully closed after use. - Stirring Rod Not Rotating:
- Check if the stirring switch is turned on.
- Ensure the stirring rod is correctly installed and not obstructed.
עבור בעיות שלא מכוסות כאן, אנא צרו קשר עם תמיכת הלקוחות של VEVOR.
9. אחריות ותמיכה
VEVOR products are designed for durability and performance. For warranty information, product support, or to order replacement parts, please refer to the warranty card included with your purchase or visit the official VEVOR website. When contacting support, please have your model number (LYJ18LX2) and purchase date available.


