1. הקדמה
This manual provides comprehensive instructions for the installation, operation, maintenance, and troubleshooting of the Vivotek FE9391-EHV-V2 12MP Outdoor Fisheye IR Illumination Camera. Please read this manual thoroughly before using the product to ensure proper setup and functionality. Retain this manual for future reference.
2. המוצר נגמרview
2.1 תכונות עיקריות
- 12 Megapixel Effective Still Resolution for high-quality imaging.
- Fisheye Lens with 1.2mm focal length for wide-area surveillance.
- Integrated IR Illumination for clear night vision up to 20 meters.
- WDR Pro technology for optimal image visibility in high contrast lighting.
- H.265/H.264/MJPEG compression for efficient video streaming.
- IP66-rated weather-resistant enclosure for outdoor use.
- Motion-only alert type for event detection.
- Wi-Fi Connectivity Protocol for flexible network integration.
2.2 תכולת החבילה
ודא שכל הפריטים נמצאים בחבילה:
- Vivotek FE9391-EHV-V2 Camera Unit
- Mounting Kit (screws, anchors)
- מחבר עמיד למים
- מדריך התקנה מהירה
- Software CD (or download link information)
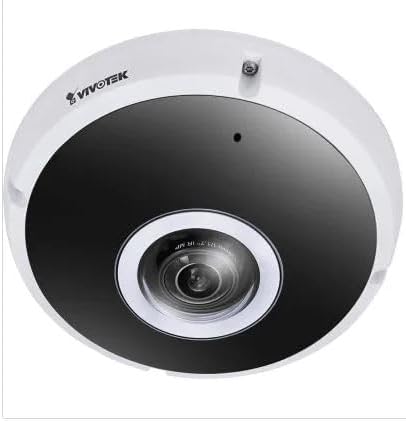
איור 2.1: חזית view of the Vivotek FE9391-EHV-V2 12MP Outdoor Fisheye IR Illumination Camera, showing the lens and IR illuminators.
3. מידע בטיחות
- קרא בעיון את כל ההוראות לפני ההתקנה וההפעלה.
- Ensure the power source matches the camera's requirements (Corded Electric).
- אל תנסה לפרק או לשנות את המצלמה. פעולה זו תגרום לביטול האחריות.
- Avoid pointing the camera directly at strong light sources for extended periods.
- ההתקנה צריכה להתבצע על ידי אנשי מקצוע מוסמכים בהתאם לתקנות החשמל המקומיות.
- Protect cables from being walked on or pinched.
4. התקנה והתקנה
4.1 מיקום הרכבה
Select a suitable outdoor location for mounting. Consider the desired surveillance area, proximity to power, and network connectivity (Wi-Fi or wired Ethernet). The camera is IP66 rated for outdoor use.

Figure 4.1: Dimensional drawing of the Vivotek FE9391-EHV-V2 camera, showing a diameter of 150mm and height of 68.2mm.
4.2 התקנה פיזית
- הכן את משטח ההרכבה: Use the provided mounting template (if included) to mark drill holes.
- חורים לקדוח: קדחו חורי פיילוט והכניסו עוגנים לקיר במידת הצורך.
- אבטח את המצלמה: חברו את בסיס המצלמה בצורה מאובטחת למשטח ההרכבה באמצעות הברגים המצורפים.
- חבר כבלים:
- כּוֹחַ: חבר את כבל החשמל למקור מתח מתאים.
- רֶשֶׁת: Connect an Ethernet cable for wired network access, or ensure Wi-Fi signal strength is adequate for wireless connection. Use the waterproof connector for outdoor Ethernet connections.
- התאם את זווית המצלמה: Loosen the adjustment screws (if applicable) to position the fisheye lens for optimal coverage. Tighten screws once adjusted.

Figure 4.2: An Ethernet cable with an RJ45 connector, used for wired network connectivity.
4.3 תצורת רשת ראשונית
After physical installation and power-up, the camera needs to be configured on your network.
- גלו את המצלמה: Use the Vivotek IP Utility software (available on the manufacturer's webאתר) כדי לגלות את המצלמה ברשת שלך.
- הקצאת כתובת IP: Assign a static IP address or ensure it obtains an IP address via DHCP.
- גִישָׁה Web מִמְשָׁק: פתח א web דפדפן והזן את כתובת ה-IP של המצלמה כדי לגשת אליה web-ממשק תצורה מבוסס.
- כְּנִיסָה לַמַעֲרֶכֶת: Enter the default username and password (refer to the Quick Installation Guide for defaults). Change the default password immediately for security.
- Wi-Fi Setup (if applicable): Navigate to the network settings and configure the Wi-Fi connection if you are using wireless connectivity.
5. הוראות הפעלה
5.1 בשידור חי View
Once configured, you can access the live video feed through the web interface or compatible Vivotek surveillance software.
- Web דפדפן: התחבר למצלמה web interface and navigate to the "Live View"סעיף.
- Surveillance Software: Add the camera to your Vivotek NVR or VMS (Video Management Software) for centralized monitoring.
- אפליקציה לנייד: Download the Vivotek mobile app and add your camera for remote viewing.

איור 5.1: דוגמהample of surveillance footage from multiple cameras displayed on a tablet device, demonstrating remote monitoring capabilities.

Figure 5.2: A monitor displaying a split-screen view of four camera feeds, labeled CAM1 through CAM4, illustrating a typical surveillance setup.
5.2 הקלטה ואחסון
המצלמה תומכת במגוון אפשרויות הקלטה:
- אחסון מקומי: Insert a microSD card (not included) into the camera's slot for edge recording. Configure recording schedules and event triggers (e.g., motion detection).
- מקליט וידאו ברשת (NVR): Connect the camera to a compatible NVR for continuous or event-based recording.
- אחסון בענן: Some Vivotek models or third-party services may offer cloud storage integration. Refer to the camera's web interface for specific options.
5.3 זיהוי תנועה והתראות
הגדר אזורי זיהוי תנועה והגדרות רגישות במצלמה web interface. When motion is detected, the camera can trigger actions such as:
- Recording video to local storage or NVR.
- Sending email notifications with snapshots.
- Uploading footage to an FTP server.
6. תחזוקה
- ניקוי עדשות: נגבו בעדינות את עדשת המצלמה בעזרת מטלית רכה ונקייה. עבור לכלוך עיקש, השתמשו בתמיסת ניקוי עדשות המיועדת למשטחים אופטיים. אין להשתמש בחומרי ניקוי שוחקים.
- ניקיון דיור: נקו את בית המצלמה בעזרת מודעהamp מטלית. הימנעו משימוש בחומרי ניקוי חזקים או ממסים.
- עדכוני קושחה: Regularly check the Vivotek website for firmware updates. Updating firmware can improve performance, add features, and enhance security.
- בדיקת כבלים: בדקו מעת לעת את כל הכבלים לאיתור סימני בלאי או נזק, במיוחד עבור התקנות חיצוניות.
- בדיקה סביבתית: ודא שסביבת ההפעלה של המצלמה נשארת בטווחי הטמפרטורה והלחות שצוינו.
7. פתרון תקלות
7.1 אין הזנת וידאו
- בדוק כוח: Ensure the camera is receiving power. Verify power adapter and cable connections.
- חיבור רשת: Confirm the Ethernet cable is securely connected or that the Wi-Fi signal is strong and the camera is connected to the correct network.
- כתובת IP: Verify the camera's IP address and ensure it is not conflicting with another device on the network.
- חומת אש: Check if any firewall settings on your network or computer are blocking access to the camera.
7.2 איכות תמונה ירודה
- עדשה נקייה: ודא שעדשת המצלמה נקייה וחופשיה מאבק או כתמים.
- תנאי תאורה: Adjust camera settings for optimal exposure in varying light conditions. Ensure IR illuminators are functioning at night.
- הגדרות רזולוציה: Verify that the video resolution and quality settings are configured appropriately in the camera's web מִמְשָׁק.
- רוחב פס רשת: Insufficient network bandwidth can lead to choppy or low-quality video. Check network load.
7.3 זיהוי תנועה לא עובד
- הפעל זיהוי תנועה: Ensure motion detection is enabled in the camera's settings.
- Sensitivity and Zones: Adjust motion detection sensitivity and define detection zones correctly.
- לוח ההקלטות: Verify that the recording schedule is active for motion-triggered events.
8. מפרטים
| תכונה | פְּרָט |
|---|---|
| מספר דגם | FE9391-EHV-V2 |
| רזולוציית סטילס אפקטיבית | 12 מגה פיקסל |
| עֲדָשָׁה | 1.2mm Fisheye Lens |
| IR Illumination Range | 20 מ' |
| טכנולוגיית WDR | WDR Pro |
| דחיסת וידאו | H.265 / H.264 / MJPEG |
| פרוטוקול קישוריות | Wi-Fi |
| דירוג הגנה בינלאומי | IP66 |
| מקור כוח | חשמלי עם כבלים |
| מידות המוצר (L x W x H) | 5.9 x 5.9 x 2.68 אינץ' (150 x 150 x 68.2 מ"מ) |
| יַצרָן | Vivotek Inc. |
| שימושים מומלצים | אבטחת חוץ |
9. אחריות ותמיכה
For warranty information, technical support, and additional resources, please visit the official Vivotek webלאתר או לפנות למחלקת שירות הלקוחות שלהם.
- יַצרָן: Vivotek Inc.
- Webאֲתַר: www.vivotek.com (לְשֶׁעָבַרampהקישור, הקישור בפועל עשוי להשתנות)
- מַגָע: עיין ב webאתר לקבלת פרטי יצירת קשר עם תמיכה אזורית.
Please have your model number (FE9391-EHV-V2) and purchase date available when contacting support.


