1. הקדמה
The Logitech Scribe is an AI-powered whiteboard camera designed to integrate physical whiteboard content into video meetings. It is compatible with leading video conferencing services such as Microsoft Teams Rooms and Zoom Rooms. The Scribe utilizes built-in artificial intelligence and a custom lens to broadcast whiteboard content with enhanced clarity, ensuring remote participants have an unobstructed view. It supports standard dry erase markers and whiteboard surfaces up to 6 feet by 4 feet.
Content sharing can be initiated via a wireless share button or a meeting room touch controller, such as Logitech Tap.

איור 1: חזית view of the Logitech Scribe Whiteboard Camera.
2. מה בקופסה
ודא שכל הרכיבים נמצאים באריזה:
- Logitech Scribe Camera Unit
- תושבת הרכבה
- חומרת הרכבה (ברגים, עוגנים)
- מתאם USB ל-Ethernet
- מזרק PoE (Power over Ethernet)
- כבל Ethernet
- Wireless Share Button (with AAAA batteries)
- תבנית התקנה

Figure 2: Contents of the Logitech Scribe package.
3. התקנה
Proper installation is crucial for optimal performance. Follow these steps for setting up your Logitech Scribe:
- הרכבת המצלמה: Use the provided installation template to position the camera above the whiteboard. Secure the mounting bracket to the wall using the appropriate hardware. Ensure the camera is centered and at the correct height for your whiteboard dimensions (up to 6 ft x 4 ft).
- חיבור המצלמה: The Scribe connects to a computer via a USB to Ethernet adapter and a Power over Ethernet (PoE) injector. Connect the Ethernet cable from the camera unit to the PoE injector, then from the PoE injector to the USB to Ethernet adapter. Finally, connect the USB adapter to your meeting room computer.
- ניהול כבלים: Route cables neatly to maintain a professional appearance and prevent accidental disconnections. The mounting bracket includes channels for cable routing.

איור 3: אחורי view of the Logitech Scribe, illustrating mounting and connection points.

Figure 4: Illustration of cable routing through the Logitech Scribe mounting base.
4. הוראות הפעלה
The Logitech Scribe is designed for intuitive operation during video conferences.
- Initiating Whiteboard Sharing: To share whiteboard content, press the wireless share button or use your meeting room's touch controller (e.g., Logitech Tap). The Scribe will automatically detect and broadcast the whiteboard feed to your video meeting.
- תכונות AI: The Scribe's built-in AI enhances whiteboard content clarity and provides a transparency effect. This allows meeting participants to see 'through' the presenter, ensuring an unobstructed view of the writing on the whiteboard.
- Whiteboard Area: The camera is optimized to capture whiteboards up to 6 feet by 4 feet. Ensure your whiteboard content stays within these dimensions for optimal capture.
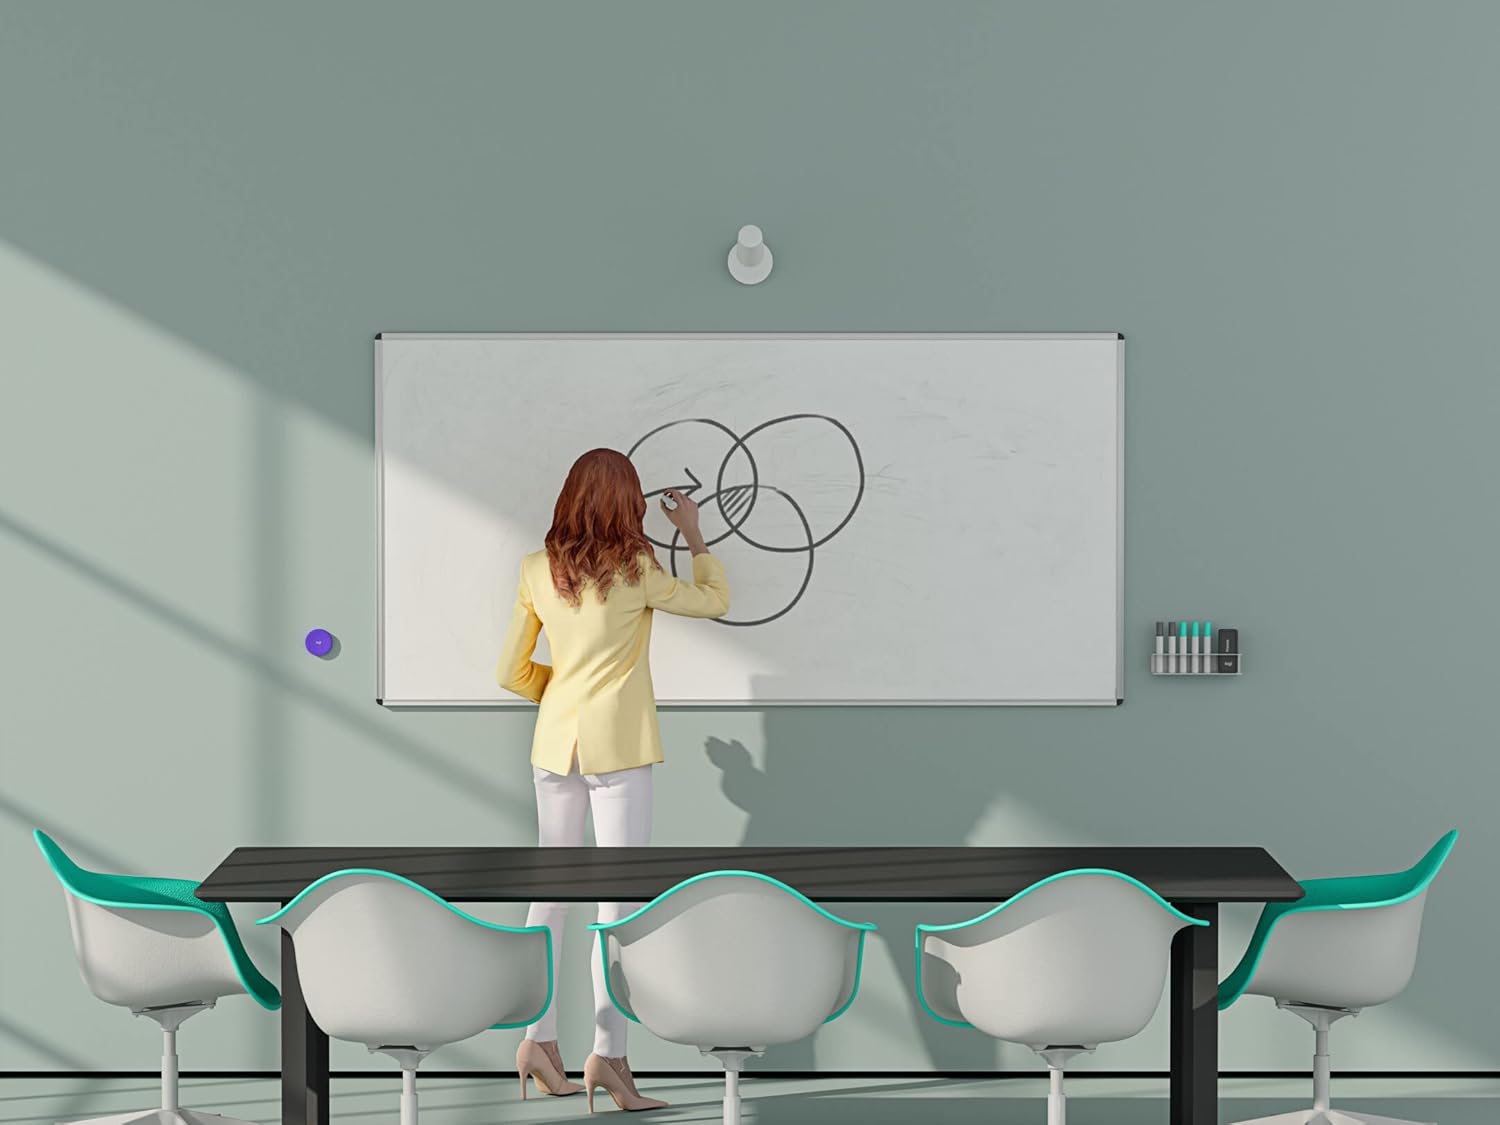
Figure 5: The Logitech Scribe camera unit alongside its wireless share button.

Figure 6: A user interacting with a whiteboard while the Logitech Scribe captures the content for remote participants.

Figure 7: The Logitech Scribe camera integrated into a meeting room environment.
5. תחזוקה
To ensure the longevity and optimal performance of your Logitech Scribe, follow these maintenance guidelines:
- ניקוי: Gently wipe the camera lens and body with a soft, dry, lint-free cloth. Avoid using abrasive cleaners or solvents.
- טיפול בלוח לבן: Use only dry erase markers on your whiteboard. Regularly clean the whiteboard surface to prevent marker residue buildup, which can affect the Scribe's image clarity.
- עדכוני קושחה: Periodically check for and install firmware updates for the Logitech Scribe through the Logitech Sync application. Updates can improve performance, add features, and resolve issues.
- Wireless Share Button Batteries: The wireless share button requires AAAA batteries. Replace them when the indicator light suggests low power or the button becomes unresponsive.

Figure 8: Underside of the wireless share button, indicating the battery compartment.
6. פתרון תקלות
If you encounter issues with your Logitech Scribe, consider the following troubleshooting steps:
- Image Distortion/Fuzzy Output: If the whiteboard image appears distorted or fuzzy, use the Logitech Sync application to calibrate the camera. The app allows you to set four points on the raw camera image to correct fisheye distortion. Ensure these settings are saved and not inadvertently altered.
- No Image/Connectivity Issues:
- Verify all cables (USB, Ethernet) are securely connected between the camera, PoE injector, USB to Ethernet adapter, and the computer.
- Ensure the PoE injector is receiving power.
- Check if the computer recognizes the Scribe as a camera device.
- Restart the computer and the video conferencing application.
- Share Button Unresponsive:
- Check the batteries in the wireless share button and replace them if necessary.
- Ensure the share button is within range of the Scribe camera.
- Content Not Clear: Ensure you are using fresh, high-quality dry erase markers. Faded markers may not be captured clearly by the camera's enhancement features.
7. מפרטים
| תכונה | מִפרָט |
|---|---|
| מספר דגם | 960-001332 |
| מידות המוצר | 23.35 x 4.69 x 5.87 אינץ' |
| משקל פריט | 2.4 פאונד |
| רזולוציית לכידת וידאו | 1080p |
| טכנולוגיית חיישן צילום | CCD |
| טכנולוגיית קישוריות | USB |
| Supported Whiteboard Area | Up to 6 ft x 4 ft |
| מקור כוח | Power over Ethernet (PoE) |
| Wireless Share Button Batteries | נדרשת סוללת AAAA אחת |
8. אחריות ותמיכה
Logitech products are manufactured to high quality standards and are covered by a limited hardware warranty. For detailed warranty information, product support, and additional resources, please visit the official Logitech support webאתר. תוכלו למצוא שם שאלות נפוצות, מדריכים לפתרון בעיות ופרטי קשר של שירות לקוחות.
למידע העדכני ביותר, אנא עיינו במדריך הרשמי של Logitech webהאתר או התיעוד המצורף למוצר שלך.


