1. המוצר נגמרview
The Retekess TR510 is a long-range FM broadcast transmitter designed for various applications such as church parking lots, drive-in movies, and public address systems. It features multiple audio input methods, including dual microphone inputs, RCA, and USB drive support, along with three preset frequency buttons for ease of use.
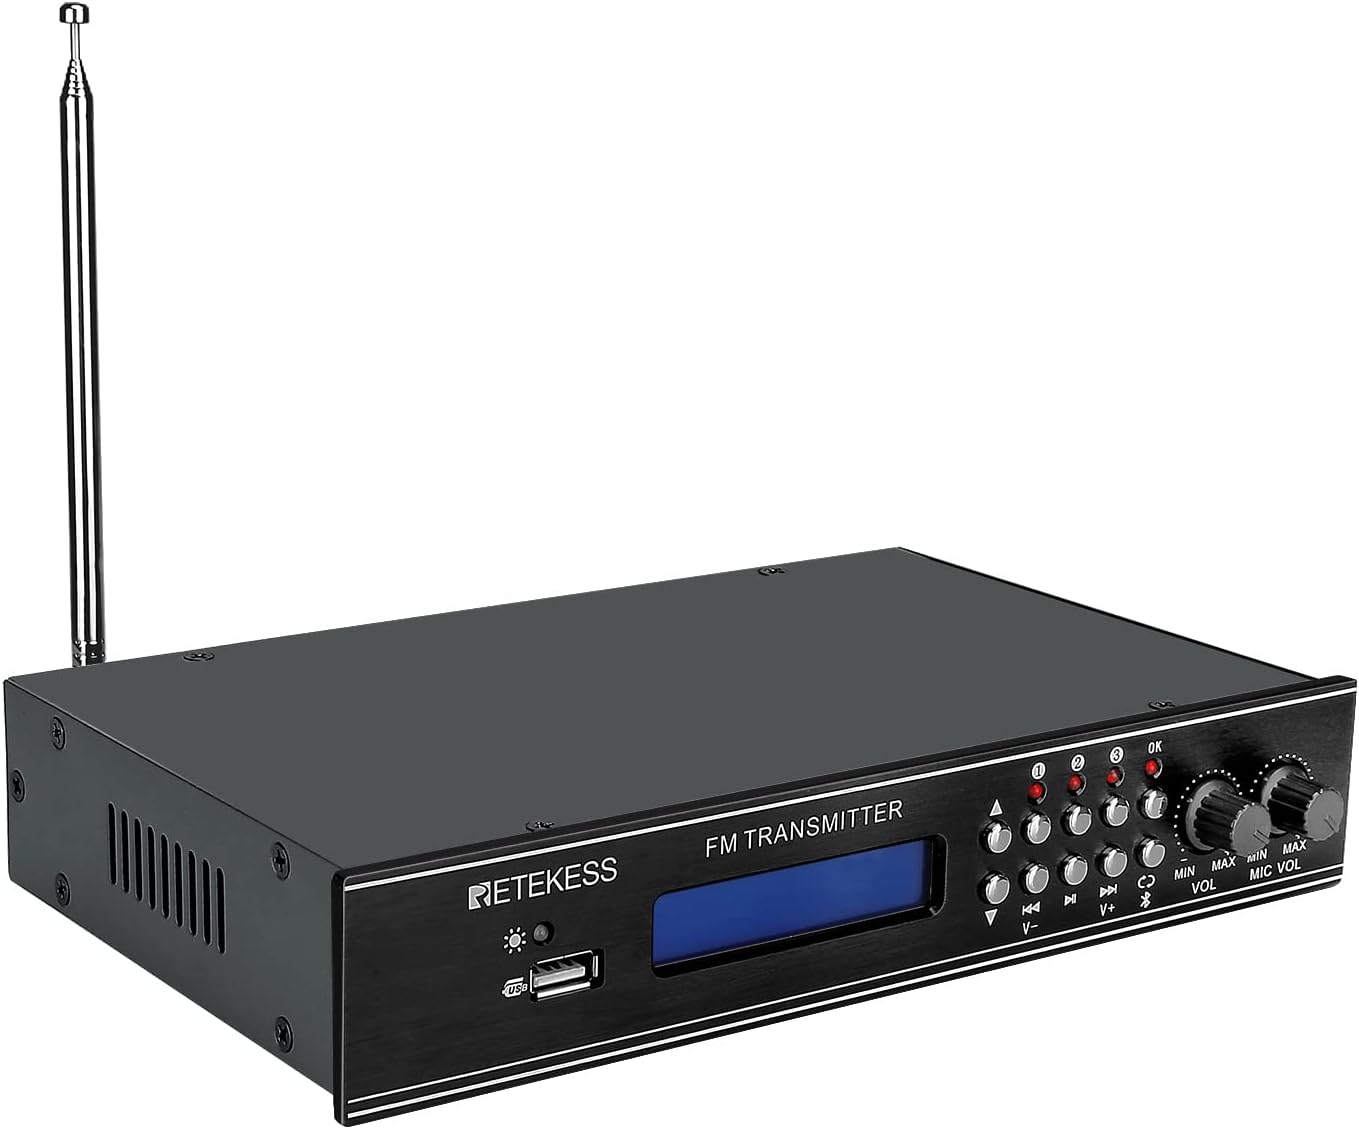
תמונה 1.1: חזית view of the Retekess TR510 FM Transmitter, showing the display, control buttons, and antenna.

Image 1.2: The Retekess TR510 FM Transmitter depicted in various use cases, including church, school, meeting, drive-in movie, and tour guide settings.
2. תכולת החבילה
אנא ודא שכל הפריטים נמצאים בחבילה:
- 1 x TR510 FM Transmitter
- 1 x כבל AUX
- 1 x מתאם חשמל
- מדריך למשתמש באנגלית אחת (מסמך זה)

Image 2.1: The Retekess TR510 FM Transmitter shown with its power adapter, AUX cable, and user manual.
3. מידע בטיחות
This device is FCC certified (FCC ID: 2A3NOTR510) and operates within the 87.9-91.9 MHz FM frequency range. To ensure safe operation and prevent potential interference, please observe the following:
- Avoid operating the device near other wireless equipment that may use similar frequencies to prevent interference.
- אל תפתח את המכשיר גasinז. הפנה את כל הטיפולים לצוות מוסמך.
- הקפידו על אוורור נאות כדי למנוע התחממות יתר.
- השתמש רק במתאם החשמל המצורף.
4. הוראות התקנה
Follow these steps to set up your TR510 FM Transmitter:
- חבר את האנטנה: Screw the provided FM antenna into the 'ANT' connector on the rear panel of the transmitter. Ensure it is securely fastened.
- חבר חשמל: Plug the DC input cable from the power adapter into the 'DC INPUT 12V/1A' port on the rear panel. Then, plug the power adapter into a standard electrical outlet.
- חיבור מקור שמע: בחר אחת משיטות הקלט הבאות:
- קלט RCA: Connect your audio source (e.g., TV, soundboard) to the 'AUX' RCA ports (red for right, white for left) on the rear panel using an RCA cable.
- כניסת AUX: Connect your audio source (e.g., iPod, MP3 player, computer) to the 'AUX' 3.5mm jack on the rear panel using the provided AUX cable.
- USB Drive Input: הכנס כונן USB המכיל אודיו fileליציאת ה-USB בלוח הקדמי.
- כניסת מיקרופון: Connect up to two microphones to the 'MIC1' and 'MIC2' 6.35mm jacks on the rear panel.
- הפעלה: Flip the 'ON/OFF' power switch on the rear panel to the 'ON' position. The display on the front panel will illuminate.

Image 4.1: Close-up of the rear panel of the TR510, highlighting the DC input, RCA, AUX, and microphone input ports, along with the antenna connection.

Image 4.2: An individual using a microphone, demonstrating a common input method for the TR510 transmitter.
5. הוראות הפעלה
Once the transmitter is set up, follow these steps to begin broadcasting:
- Select Frequency: Use the 'V-' and 'V+' buttons on the front panel to adjust the FM broadcasting frequency. The selected frequency will be displayed on the blue backlit screen.
- Preset Frequencies: The TR510 features three preset frequency buttons (1, 2, 3). To save a frequency, tune to the desired frequency, then press and hold one of the preset buttons for three seconds until the indicator light confirms storage. To recall a preset frequency, simply press the corresponding button briefly.
- Adjust Audio Volume: Use the 'VOL' knob on the front panel to adjust the overall audio output volume.
- כוונן את עוצמת הקול של המיקרופון: Use the 'MIC VOL' knob on the front panel to adjust the volume of the connected microphones independently.
- בחר מקור קלט: Use the input selection buttons (e.g., AUX, USB, Bluetooth) to switch between different audio sources.

Image 5.1: Front panel of the TR510, showing the three preset station buttons and independent adjustment knobs for audio and microphone volume.
סרטון 5.1: אוברview demonstrating the features and connectivity options of the Retekess TR510 FM Transmitter, including its various input methods and control interface.
6. תחזוקה
To ensure the longevity and optimal performance of your Retekess TR510 FM Transmitter, follow these maintenance guidelines:
- ניקוי: Use a soft, dry cloth to clean the exterior of the transmitter. Avoid using liquid cleaners or solvents, as they may damage the finish or internal components.
- אִחסוּן: כאשר המשדר אינו בשימוש למשך תקופות ממושכות, יש לאחסן אותו במקום קריר ויבש, הרחק מאור שמש ישיר וטמפרטורות קיצוניות.
- טיפול באנטנה: Handle the antenna carefully to prevent bending or breaking. Ensure it is fully extended for optimal signal transmission during operation.
7. פתרון תקלות
If you encounter issues with your TR510 FM Transmitter, refer to the following common problems and solutions:
| בְּעָיָה | סיבה אפשרית | פִּתָרוֹן |
|---|---|---|
| אין כוח | מתאם החשמל אינו מחובר או פגום; כבה את המכשיר. | Ensure the power adapter is securely connected and plugged into a working outlet. Verify the power switch on the rear panel is in the 'ON' position. |
| אין פלט שמע | Incorrect input selected; audio cable loose or faulty; volume too low. | Check that the correct input source is selected. Ensure audio cables are securely connected. Increase the 'VOL' and 'MIC VOL' knobs. |
| Poor signal quality or limited range | Antenna not fully extended or improperly connected; interference from other devices; environmental obstructions. | Ensure the antenna is fully extended and securely connected. Try adjusting the antenna position. Minimize obstructions between the transmitter and receiver. Select a clear frequency. |
| המיקרופון לא עובד | Microphone not connected; 'MIC VOL' too low; faulty microphone. | Ensure the microphone is properly plugged into 'MIC1' or 'MIC2'. Increase the 'MIC VOL' knob. Test with another microphone if available. |
| Audio is mono despite stereo input | The TR510 is designed for mono FM transmission. | The device transmits in mono. This is a design characteristic. |
8. מפרטים
| תכונה | פְּרָט |
|---|---|
| מספר דגם | FF9255A |
| מידות המוצר | 9.25 x 5.63 x 1.73 אינץ' |
| משקל פריט | 1.91 פאונד |
| מותג | רטקס |
| טכנולוגיית קישוריות | עזר, USB |
| מקור כוח | AC |
| חוֹמֶר | אֲלוּמִינְיוּם |
| טווח תדרים | 87.9-91.9 מגה-הרץ |
| הסמכת FCC | FCC ID: 2A3NOTR510 |
| תכונות מיוחדות | 3 Preset Stations, Dual MIC/AUX/USB Input |
9. אחריות ותמיכה
For warranty information or technical support, please refer to the official Retekess webאתר או צרו קשר ישירות עם שירות הלקוחות שלהם. שמרו את קבלת הרכישה שלכם לצורך תביעות אחריות.


