המוצר נגמרview
The Canon EOS Rebel T6 (EOS 1300D) is a compact DSLR camera featuring an 18MP APS-C CMOS sensor and a DIGIC 4+ image processor. It supports Wi-Fi and NFC wireless connectivity and includes enhanced creative filters. The camera is capable of continuous shooting at 3 frames per second and recording Full HD 1080p video at 30 frames per second. Its 9-point autofocus system includes a center cross-type AF point for improved accuracy. A contrast-detection focusing system is available for movie recording and Live View מִבצָע.
This camera kit includes the Canon EOS 1300D Digital SLR Camera Body, a Canon EF-S 18-55mm f/3.5-5.6 III Standard Zoom Lens, a 58mm 2X Professional Telephoto Lens, and a 58mm High Definition 0.45x Wide Angle Lens. Additional accessories such as a camera bag, memory card, flash, filters, tripod, and cleaning kit are also included.

Image: Canon EOS Rebel T6 DSLR Camera with the standard 18-55mm lens attached, showing the front view.
תחילת העבודה: הגדרה ראשונית
1. טעינה והתקנת הסוללה
Insert the LP-E10 Lithium-Ion Battery Pack into the LC-E10 Battery Charger. Plug the charger into a power outlet. The charging indicator light will show the charging status. Once fully charged, remove the battery and insert it into the camera's battery compartment, ensuring it clicks into place.
2. חיבור עדשה
Remove the body cap from the camera and the rear cap from the lens. Align the red or white index mark on the lens with the corresponding mark on the camera body. Turn the lens clockwise until it locks into place. For the 58mm 2X Professional Telephoto Lens and 58mm High Definition 0.45x Wide Angle Lens, these are accessory lenses that attach to the front filter thread of your primary 18-55mm lens.

Image: A wide-angle converter lens attached to the front of a standard camera lens, which is mounted on a Canon DSLR body.
3. הכנסת כרטיס הזיכרון
Open the memory card slot cover. Insert the SanDisk 16GB SDHC Class 10 Memory Card with the label facing the correct direction until it clicks. Close the cover securely.
4. חיבור רצועת הצוואר
Thread the EW-400D Neck Strap through the strap lugs on both sides of the camera body and secure it according to the instructions provided with the strap.
5. Applying Screen Protectors
Clean the camera's LCD screen thoroughly. Carefully peel off the backing from the Ultra Clear screen protector and align it with the LCD screen. Gently apply it, smoothing out any air bubbles.

Image: Illustrates the application of a screen protector to a camera's LCD display, along with other electronic devices.
6. Setting Up the Tripod
Extend the legs of the 50-Inch Photo/Video Tripod or Flexible Tripod. Attach the camera to the tripod's quick-release plate (if applicable) or directly to the tripod screw mount at the bottom of the camera. Ensure the camera is securely fastened.
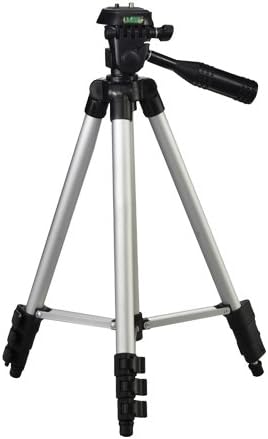
Image: A standard silver and black camera tripod with adjustable legs and a pan-tilt head.
7. Attaching the Digital Slave Flash
Mount the Digital Slave Flash onto the camera's hot shoe or use the included bracket for off-camera flash. Refer to the flash unit's specific instructions for power and synchronization settings.
8. Attaching the Lens Hood and Filters
Screw the 58mm Multi-Coated UV Filter onto the front of your lens. Then, attach the 58mm Hard Tulip Shaped Lens Hood to the front of the filter or lens, twisting until it locks into place. The lens hood helps to prevent flare and protect the front element of the lens.
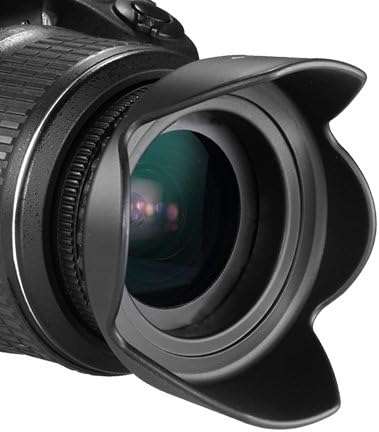
Image: A black tulip-shaped lens hood mounted on the front of a camera lens.
הפעלת המצלמה
1. הפעלה ובקרות בסיסיות
Turn the power switch to the ON position. The 3.0" 920k-Dot LCD Monitor will display shooting information. Use the control dial and directional buttons to navigate menus and settings. The back of the camera features buttons for ISO, AF, WB, Menu, and Display.

Image: The rear panel of the Canon EOS Rebel T6 DSLR camera, displaying the LCD screen, viewfinder, and various control buttons such as ISO, AF, WB, and Menu.
2. Selecting Shooting Modes
Rotate the mode dial on top of the camera to select your desired shooting mode. Available modes include Scene Intelligent Auto Mode for automatic settings, and Basic+ and Creative Auto Modes for more control over image appearance.
3. מיקוד וצילום
תסתכל דרך המשקפת האופטית viewמאתר או השתמש ב-Live View on the LCD screen. Press the shutter button halfway down to activate the 9-point autofocus system. Once focus is achieved, press the shutter button fully to take a picture. The camera supports continuous shooting at 3 frames per second for capturing action.
4. כוונון רגישות ה-ISO
Press the ISO button on the camera's rear to adjust the ISO sensitivity. The camera offers an extended ISO range up to 12800, allowing for shooting in various lighting conditions.
5. הקלטת סרטונים
Switch the camera to video recording mode. Press the dedicated video recording button to start and stop recording Full HD 1080p video at 30 frames per second.
6. שימוש ב-Wi-Fi וב-NFC
The camera features built-in Wi-Fi and NFC connectivity. Use these functions to connect to compatible smartphones or tablets for remote shooting, image transfer, and sharing. Refer to the camera's on-screen menu for detailed connection instructions.
7. תמונה File Formats (RAW vs. JPEG)
The Canon EOS Rebel T6 can capture images in both RAW and JPEG formats. RAW files retain more image data for post-processing flexibility, while JPEG files are compressed and ready for immediate use. To switch between these formats, navigate to the camera's menu settings, typically under the "Image quality" or "Recording function" section. Select the desired format (e.g., RAW, L (Large) JPEG, or RAW+L) for your photos.
תחזוקה וטיפול
1. ניקוי המצלמה והעדשות
Use the provided 3 Piece Deluxe Cleaning kit to keep your camera and lenses free from dust and smudges. Use a blower brush for dust on the lens and sensor, and a microfiber cloth for lens elements and the camera body. For stubborn smudges on lenses, use a specialized lens cleaning solution sparingly on a microfiber cloth. Avoid touching the sensor directly.

Image: Demonstrates the use of a cleaning swab for a camera sensor and a microfiber cloth for cleaning a lens.
2. Storing Your Equipment
When not in use, store the camera and lenses in the Deluxe Medium Camera and Video Bag to protect them from dust, moisture, and physical damage. Keep memory cards organized and protected in the 6 Piece SD/SDHC Memory Card Hard Plastic Case. Always use the Universal Lens Cap Keeper to prevent loss of lens caps.

Image: A compact case designed to store and protect multiple SD and SDHC memory cards.
פתרון בעיות
המצלמה לא מופעלת
- ודא שהסוללה טעונה במלואה ומוכנסת כהלכה.
- ודא שמכסה תא הסוללה סגור היטב.
תמונות מטושטשות
- ודא שהעדשה מחוברת כראוי ונקייה.
- Ensure the camera is focusing correctly; half-press the shutter button to confirm autofocus.
- Check shutter speed settings, especially in low light, to prevent motion blur. Consider using a tripod.
Cannot Transfer Photos via Wi-Fi/NFC
- Ensure Wi-Fi/NFC is enabled on both the camera and the receiving device.
- Confirm that the Canon Camera Connect app (or equivalent) is installed and updated on your smartphone/tablet.
- Check network settings and permissions on both devices.
Switching from RAW to JPEG
To change the image recording quality from RAW to JPEG, access the camera's menu. Navigate to the "Image quality" or "Recording function" settings. From there, you can select a JPEG option (e.g., L for Large JPEG) or a combination like RAW+L if you wish to save both formats simultaneously.
מפרטים
| תכונה | מִפרָט |
|---|---|
| שם הדגם | Canon EOS Rebel T6 (EOS 1300D) |
| סוג חיישן | חיישן CMOS APS-C 18MP |
| מעבד תמונה | דיג'יק 4+ |
| צג LCD | 3.0" 920k-Dot LCD |
| הקלטת וידאו | Full HD 1080p ב-30 פריימים לשנייה |
| מערכת פוקוס אוטומטי | 9-Point AF with Center Cross-Type Point |
| טווח ISO (מורחב) | 100 - 12800 |
| צילום רציף | 3 פריימים לשנייה |
| קישוריות | Built-In Wi-Fi with NFC |
| תואמים תואמים | קנון EF, קנון EF-S |
| נתמך File פוּרמָט | RAW, JPEG |
| סוג סוללה | סוללת ליתיום-יון LP-E10 |
אחריות ותמיכה
For warranty information and technical support, please refer to the documentation provided with your camera at the time of purchase or visit the official Canon support webאתר. שמור את הוכחת הרכישה שלך לצורך תביעות אחריות.
משאבים מקוונים: For additional guides, firmware updates, and FAQs, visit the official Canon support page for the EOS Rebel T6 (EOS 1300D) camera.


