1. הקדמה
Welcome to the user manual for your HP EliteBook 2560p laptop. This document provides essential information for setting up, operating, maintaining, and troubleshooting your device. Please read this manual thoroughly to ensure proper use and to maximize the lifespan of your laptop.
2. מידע בטיחות
To prevent injury, damage to the product, or loss of data, observe the following safety precautions:
- השתמש רק במתאם החשמל המצורף למחשב הנייד שלך.
- אין לחשוף את המחשב הנייד לטמפרטורות קיצוניות, לחות או אור שמש ישיר.
- הימנעו מהנחת חפצים כבדים על המחשב הנייד.
- הרחק נוזלים מהמכשיר.
- אל תנסה לפרק או לתקן את המחשב הנייד בעצמך. פנה לאנשי שירות מוסמכים.
- הקפידו על אוורור נאות כדי למנוע התחממות יתר.
3. תכולת החבילה
ודא שכל הפריטים נמצאים בחבילה שלך:
- HP EliteBook 2560p Laptop
- מתאם מתח AC וכבל חשמל
- חבילת סוללות
- תיעוד (מדריך זה, מידע על אחריות)
4. המוצר נגמרview
Familiarize yourself with the components of your HP EliteBook 2560p.
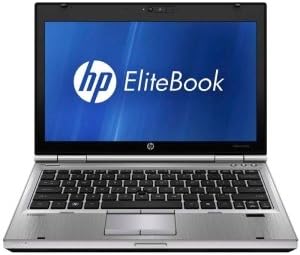
איור 4.1: חֲזִית view of the HP EliteBook 2560p laptop. This image shows the laptop open, revealing the 12.5-inch display, keyboard, and touchpad. The screen displays the "HP EliteBook" logo.
4.1. Front and Top Components
- 12.5-inch HD Anti-Glare LED Display: For visual output.
- מִקלֶדֶת: Standard QWERTY layout for text input.
- לוח מגע: For cursor control and navigation.
- Webפִּקָה: Integrated for video conferencing and imaging.
- Fingerprint Reader (FPR): לשיפור האבטחה.
4.2. Side and Rear Components
- יציאות USB 2.0: לחיבור התקנים היקפיים.
- DVD+/-RW Optical Drive: לקריאה וכתיבה של תקליטורים/DVD.
- מחבר חשמל: לחיבור מתאם ה-AC.
- יציאת אתרנט: עבור חיבור רשת קווית.
- יציאות תצוגה: לחיבור צגים חיצוניים.
- שקעי אודיו: עבור אוזניות ומיקרופון.
5. התקנה
5.1. חיבור ספק הכוח
- חבר את כבל המתח AC למתאם AC.
- חבר את מתאם ה-AC לשקע חשמלי מוארק.
- Connect the DC output plug of the AC adapter to the power connector on your laptop.
- אפשר לסוללה להיטען במלואה לפני השימוש הראשוני, או השתמש במחשב הנייד כשהוא מחובר לחשמל.
5.2. Initial Boot-Up and Operating System Setup
- פתח את מכסה המחשב הנייד.
- Press the power button, typically located above the keyboard.
- פעל לפי ההוראות שעל המסך כדי להשלים את הגדרת Windows 7 Professional, כולל בחירת שפה, יצירת חשבון משתמש ותצורת רשת.
6. הוראות הפעלה
6.1. הפעלה וכיבוי
- כדי להפעיל: לחץ על לחצן ההפעלה.
- לכבות: Click the Start button, then select "Shut Down."
- לאתחל: Click the Start button, then select "Restart."
- לישון: Close the lid or click the Start button and select "Sleep."
6.2. Using the Touchpad
The touchpad allows you to control the cursor on the screen.
- בֶּרֶז: לחיצה אחת ללחיצה, לחיצה כפולה ללחיצה כפולה.
- גרור: Tap and hold, then drag your finger across the touchpad.
- גְלִילָה: השתמשו בשתי אצבעות כדי לגלול אנכית או אופקית.
6.3. Connecting to a Wireless Network (Wi-Fi)
- לחץ על סמל הרשת במגש המערכת (בפינה הימנית התחתונה של המסך).
- בחר את רשת ה-Wi-Fi הרצויה מהרשימה.
- לחץ על "התחבר" והזן את מפתח אבטחת הרשת (סיסמה) אם תתבקש.
6.4. Using the Optical Drive
The integrated DVD+/-RW drive allows you to read and write CDs and DVDs.
- לחץ על כפתור הוצאה בכונן כדי לפתוח את המגש.
- Place a disc gently onto the tray, label side up.
- Push the tray back into the laptop until it clicks shut.
7. תחזוקה
7.1. ניקוי המחשב הנייד
- תמיד כבו ונתקו את המחשב הנייד מהחשמל לפני ניקוי.
- השתמש במטלית רכה נטולת מוך מעט דampנשטפו במים או בחומר ניקוי מיוחד למסך.
- עבור המקלדת והמארז, השתמשו במטלית רכה. הימנעו מכימיקלים חזקים.
- השתמש באוויר דחוס כדי לנקות אבק מפתחי אוורור וחריצים במקלדת.
7.2. טיפול בסוללה
- הימנעו מפריקת הסוללה באופן מלא לעתים קרובות.
- אחסנו את המחשב הנייד במקום קריר ויבש אם לא נעשה בו שימוש למשך תקופות ממושכות.
- If the battery is removable, ensure it is securely seated.
7.3. עדכוני תוכנה
בדוק באופן קבוע אם קיימים עדכוני מערכת הפעלה (Windows Update) ועדכוני מנהלי התקנים מתמיכה של HP והתקן אותם. webאתר כדי להבטיח ביצועים ואבטחה מיטביים.
8. פתרון תקלות
| בְּעָיָה | פתרון אפשרי |
|---|---|
| המחשב הנייד לא נדלק. | Ensure the AC adapter is securely connected and the power outlet is functional. Check battery charge. |
| אין חיבור Wi-Fi. | Verify Wi-Fi is enabled (check physical switch or function key). Restart router and laptop. Re-enter Wi-Fi password. |
| המסך ריק. | Connect an external monitor to check if the display is faulty. Adjust brightness settings. Restart the laptop. |
| המערכת איטית או לא מגיבה. | Close unnecessary applications. Check for malware. Ensure sufficient free disk space. Restart the laptop. |
עבור בעיות מורכבות יותר, פנו לתמיכה של HP webאתר או צור קשר עם שירות הלקוחות.
9. מפרטים
| תכונה | פְּרָט |
|---|---|
| דֶגֶם | HP EliteBook 2560p (LJ467UT#ABA) |
| מעבד | Intel Core i5-2520M |
| לְהַצִיג | 12.5-inch HD Anti-Glare LED (1366 x 768 pixels) |
| אַיִל | זיכרון DDR3 בנפח 4 ג'יגה-בייט (1333 מגה-הרץ) |
| אִחסוּן | כונן קשיח בנפח 320 GB |
| כונן אופטי | DVD+/-RW |
| גרָפִיקָה | המשולב Intel Graphics |
| אַלחוּט | 802.11a/b/g/n, Bluetooth |
| נמלים | USB 2.0 (x1), DisplayPort, VGA, Ethernet, Audio Jacks |
| מַעֲרֶכֶת הַפעָלָה | Windows 7 Professional 64 סיביות |
| Webפִּקָה | מְשׁוּלָב Webפִּקָה |
| בִּטָחוֹן | קורא טביעות אצבע |
| חיי סוללה | עד 8.5 שעות (ממוצע) |
| מידות (LxWxH) | 16.5 x 13.5 x 4.5 אינץ' |
| מִשׁקָל | 6.8 פאונד |
10. אחריות ותמיכה
For information regarding your product's warranty, please refer to the warranty document included with your purchase or visit the official HP support webאֲתַר.
HP provides various support resources, including online documentation, driver downloads, and customer service contact options.
- תמיכה של HP Webאֲתַר: www.hp.com/support
- צור קשר עם התמיכה: עיין ב-HP website for regional contact numbers and chat options.


