
1. הקדמה
The Daitsu Velar ceiling fan combines design, technology, and sustainability to provide comfort throughout the year. Its natural FSC-certified wooden blades, sourced from responsibly managed forests, add warmth to any room while committing to the protection of the planet's forest resources.
This manual provides detailed instructions for the safe installation, operation, and maintenance of your Daitsu Velar ceiling fan. Please read it thoroughly before installation and keep it for future reference.
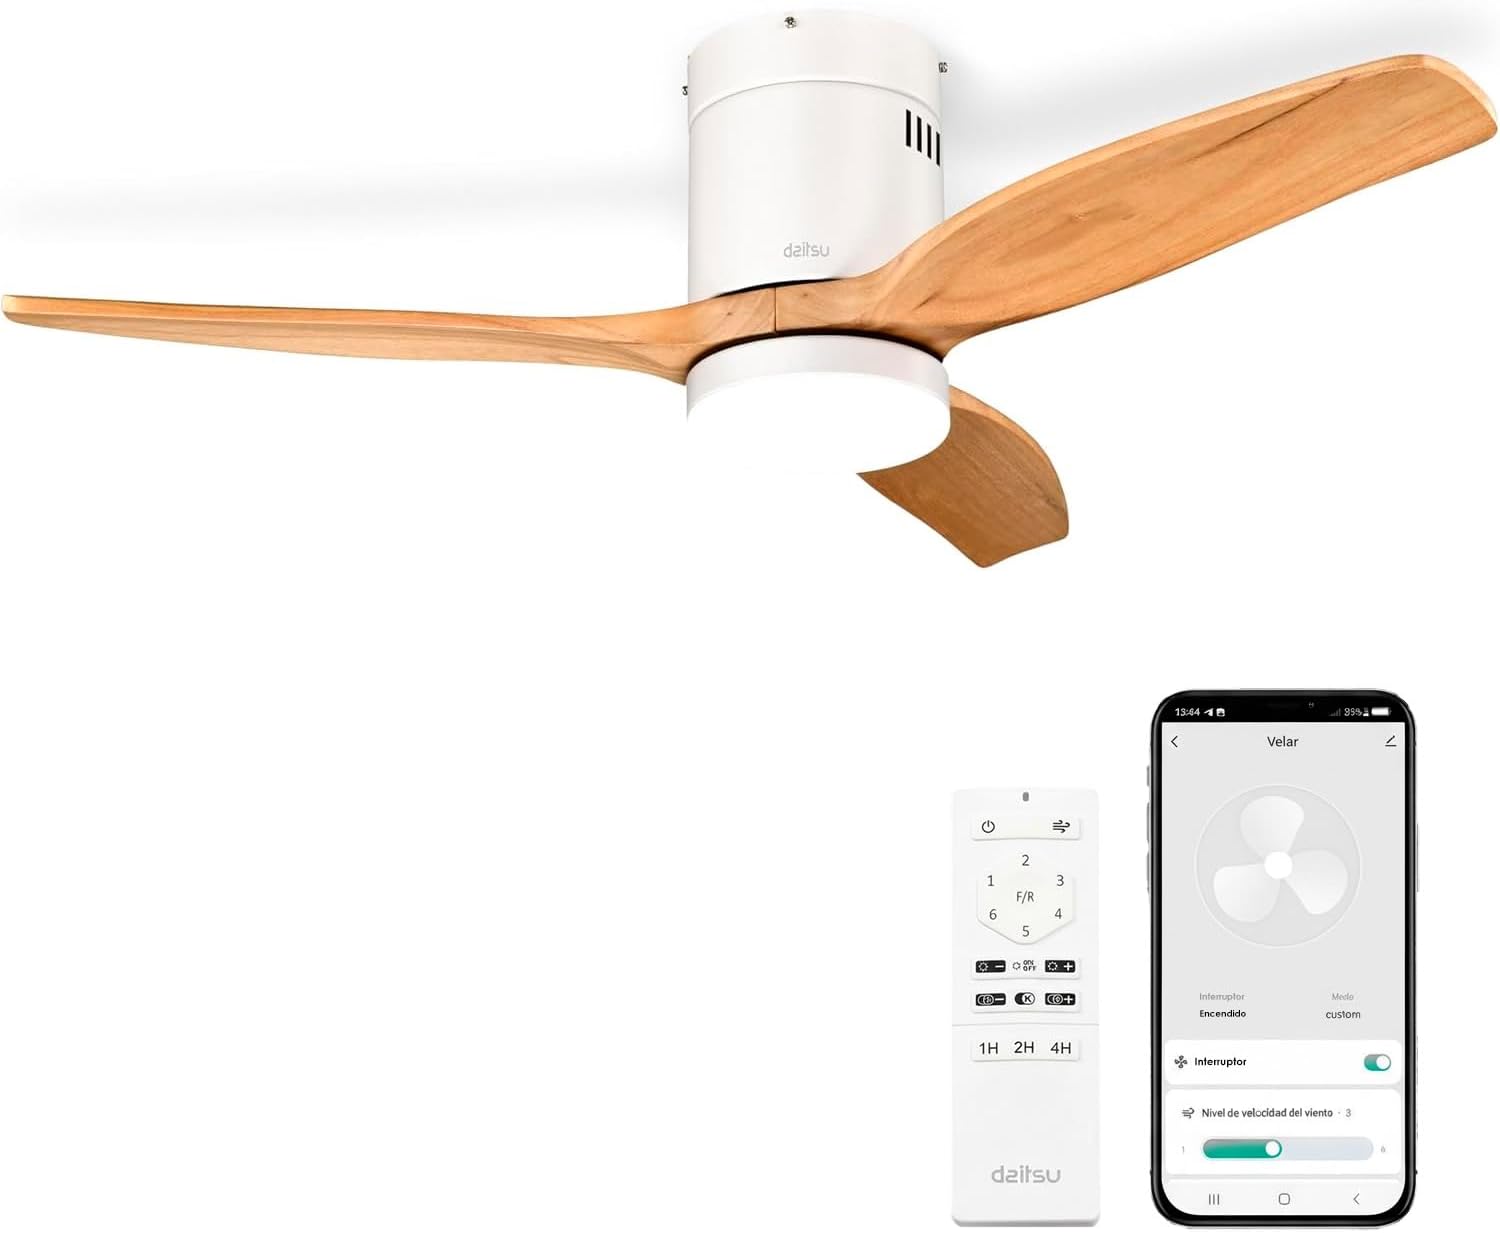
Image 1.1: Daitsu Velar Ceiling Fan in a living room setting.
2. מידע בטיחות
הוראות בטיחות חשובות:
- קרא בעיון את כל ההוראות לפני ההתקנה והשימוש.
- ודא שספק הכוח מנותק במפסק הראשי לפני התקנה או תחזוקה.
- ההתקנה חייבת להתבצע על ידי חשמלאי מוסמך בהתאם לתקנות החשמל המקומיות.
- מבנה ההרכבה חייב להיות מסוגל לשאת את משקל המאוורר (כ-4.6 ק"ג).
- Ensure the fan blades are at least 2.3 meters (7.5 feet) from the floor and have at least 0.5 meters (1.6 feet) clearance from walls or other obstructions.
- אין להכניס חפצים למסלול הלהבים המסתובבים.
- Do not attempt to repair or modify the fan yourself. Contact qualified service personnel.
- מכשיר זה מיועד לשימוש פנימי בלבד.
3. תכולת החבילה
לפני תחילת ההתקנה, יש לוודא שכל הרכיבים קיימים ולא ניזוקו:
- להבי מאוורר (3x)
- Motor and Ceiling Mount Bracket
- LED Light Kit (plate + diffuser)
- Wireless Remote Control and Wall Mount Holder
- Mounting Screws (for ceiling and blades)
- מדריך הוראות (מסמך זה)

תמונה 3.1: דוגמהample of product packaging, indicating included components.
4. התקנה והתקנה
כלים נדרשים: Screwdriver, wire strippers, electrical tape, ladder, drill (if necessary).
- ניתוק חשמל: כבה את החשמל במפסק הראשי כדי למנוע התחשמלות.
- התקנת תושבת הרכבה: Securely attach the ceiling mount bracket to a ceiling joist or a suitable electrical junction box capable of supporting the fan's weight. Use the provided mounting screws.
- תִיוּל: Connect the fan's electrical wires to the household wiring according to the wiring diagram in the full installation guide (not provided here, but typically included with the product). Ensure all connections are secure and insulated.
- מכלול מנוע: הרם בזהירות את מכלול מנוע המאוורר ותלה אותו על תושבת ההרכבה.
- חיבור להב: Attach the three wooden blades to the motor housing using the provided screws. Ensure they are securely fastened.
- LED Light Kit Installation: Connect the LED light kit wiring and attach the light plate and diffuser to the bottom of the fan motor housing.
- התקנת חופה: החלק את החופה עד לתקרה וחבר אותה היטב כדי לכסות את החיווט ואת תושבת ההרכבה.
- שחזור חשמל: החזר את החשמל למפסק הראשי.
- הגדרת שלט רחוק: Insert batteries into the remote control. The fan should be ready for operation.
- Wi-Fi App Setup (Daitsu Connect):
- Download the "Daitsu Connect" app from your smartphone's app store.
- Follow the in-app instructions to pair your fan with your mobile device. This typically involves putting the fan into pairing mode (refer to the full app manual for specific steps).
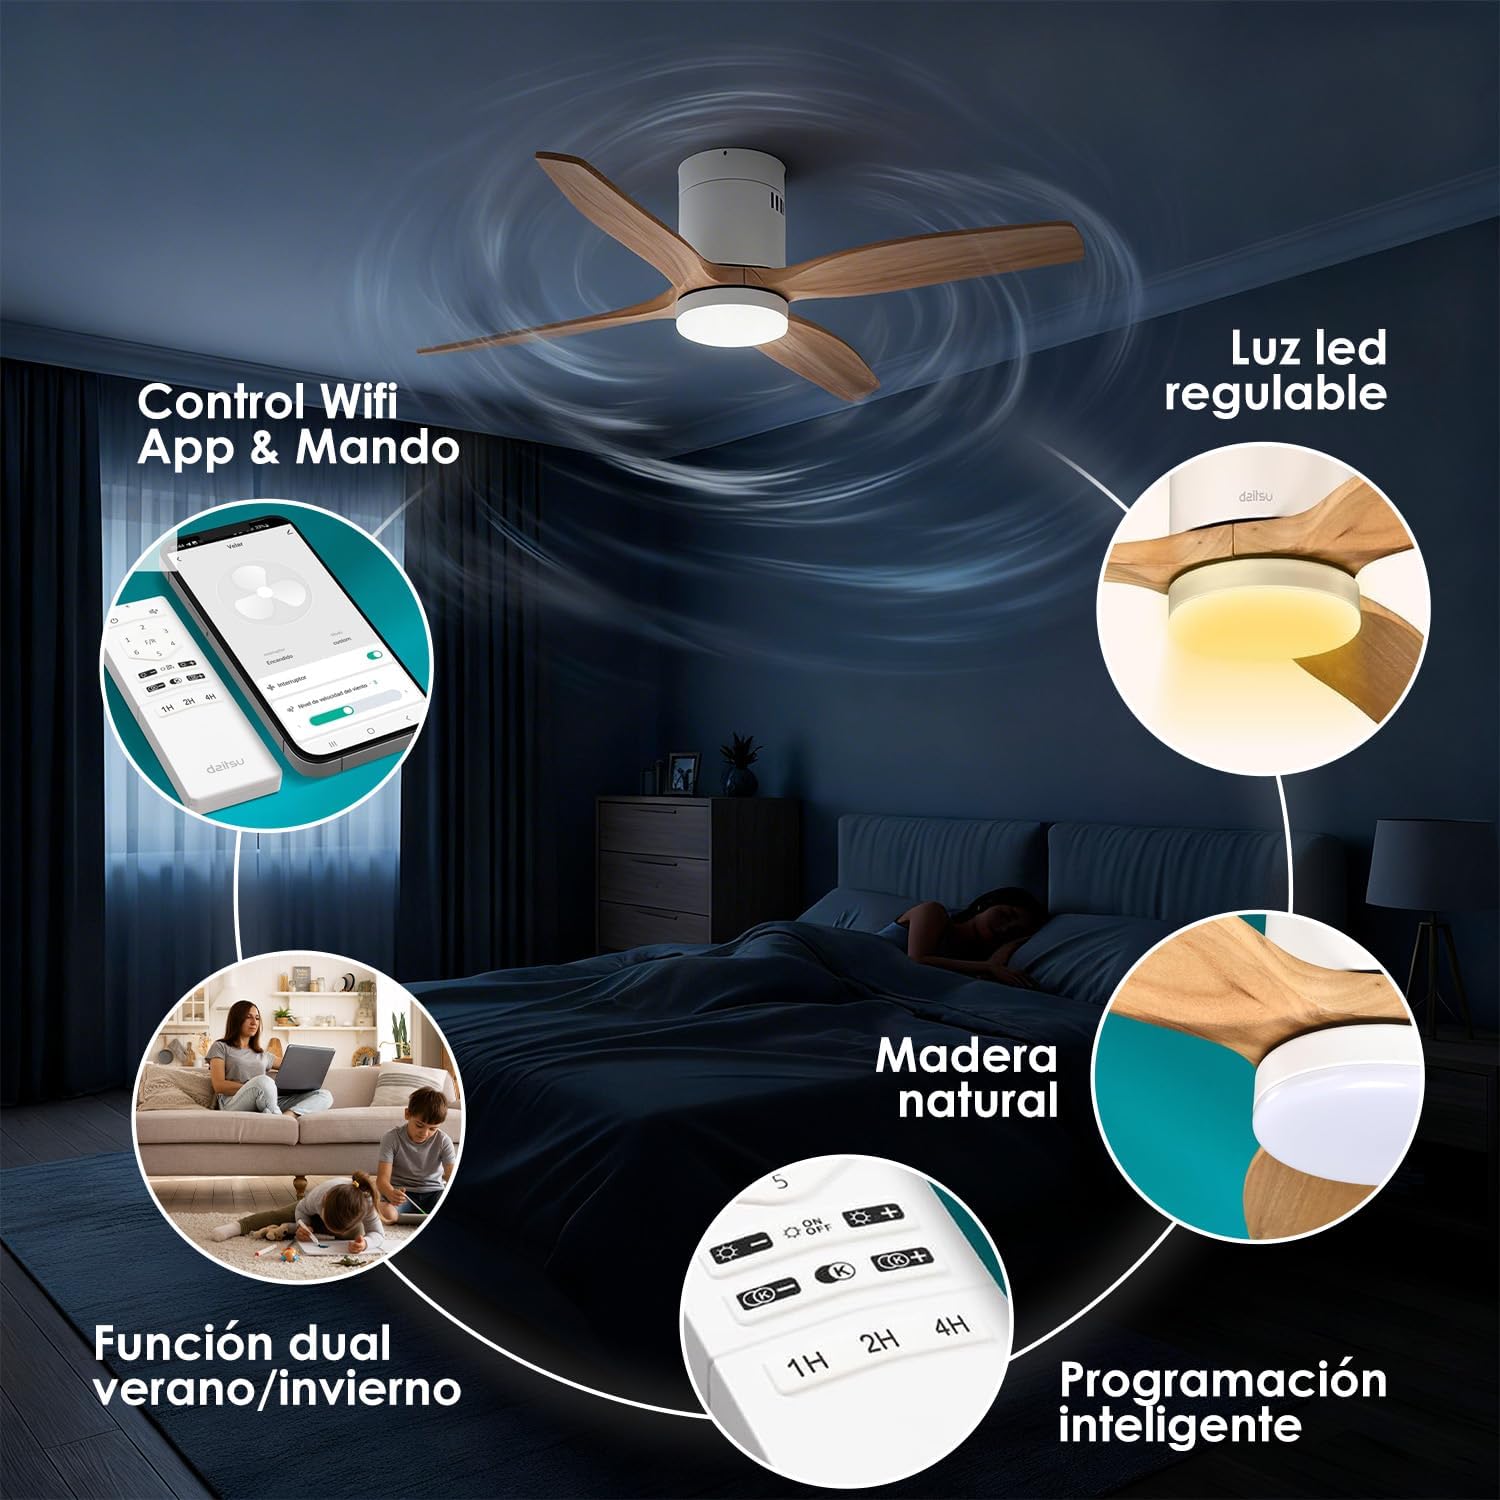
תמונה 4.1: נגמרview of fan features, including Wi-Fi App & Remote Control.
5. הוראות הפעלה
Your Daitsu Velar ceiling fan can be controlled using the included wireless remote control or the Daitsu Connect mobile application.
5.1. פונקציות שלט רחוק

Image 5.1: Remote control and Daitsu Connect App interface.
- הפעלה/כיבוי: הקש על כּוֹחַ לחצן כדי להפעיל או לכבות את המאוורר והאור.
- מהירות מאוורר: Use the speed buttons (1-6) to select one of the six available fan speeds. There is also a variable mode that alternates between low levels for a more natural air sensation.
- Summer/Winter Function (F/R): הקש על F/R button to switch between summer and winter modes.
- מצב קיץ: הלהבים מסתובבים נגד כיוון השעון, דוחפים את האוויר כלפי מטה ליצירת בריזה מקררת.
- מצב חורף: Blades rotate clockwise, drawing cool air up and pushing warm air down from the ceiling, optimizing heating efficiency.
- בקרת אור:
- אור הדלקה/כיבוי: לחץ על כפתור התאורה כדי להדליק או לכבות את נורת ה-LED.
- התאמת בהירות: השתמש ב- + ו - buttons to adjust the light intensity (9 levels).
- התאמת טמפרטורת צבע: השתמש ב- K+ ו K- buttons to change the color temperature from cool to warm (9 levels).
- פונקציית טיימר: Set the fan to automatically turn off after 1, 2, or 4 hours using the respective timer buttons (1H, 2H, 4H).

Image 5.2: Summer/Winter function diagram for optimal air circulation.

Image 5.3: LED light adjustability with 9 intensity and color temperature levels.
5.2. Daitsu Connect App Control
The Daitsu Connect app provides full control over all fan functions, including speed, light, mode, and timer, directly from your mobile device. It also allows for personalized hourly programming to automate operation based on your daily or weekly routines.
- פונקציונליות מלאה: Access all remote control features and more.
- תזמון מתקדם: Program specific on/off times and settings for different days.
- פונקציית זיכרון: The fan automatically remembers its last state (speed, light, color temperature, and mode) if power is interrupted or turned off from the switch. Upon power restoration, it will resume the last settings.

Image 5.4: Key features including 6 speeds, programming, light levels, and dual control.
6. תחזוקה
תחזוקה שוטפת מבטיחה ביצועים אופטימליים ומאריכה את תוחלת החיים של המאוורר שלכם.
- ניקוי:
- תמיד נתק את החשמל לפני הניקוי.
- נגבו את בית המאוורר ולהביו בעזרת מטלית רכהamp בַּד. אין להשתמש בחומרי ניקוי שוחקים או ממסים.
- Dust the blades regularly to maintain balance and efficiency.
- בדיקת להב: בדקו מעת לעת שכל ברגי הלהב מהודקים היטב. ברגים רופפים עלולים לגרום לרעידות ולרעשים.
- מקור אור: The integrated LED light is designed for long life. If it requires replacement, contact customer support.
7. פתרון תקלות
אם אתם נתקלים בבעיות עם המאוורר שלכם, עיינו בבעיות הנפוצות ובפתרונות הבאים:
| בְּעָיָה | סיבה אפשרית | פִּתָרוֹן |
|---|---|---|
| המאוורר לא מופעל. | No power, loose wiring, remote control battery dead. | Check circuit breaker. Ensure wiring is secure. Replace remote control batteries. |
| מניפה מתנדנדת. | Loose blade screws, unbalanced blades, improper mounting. | Tighten all blade screws. Ensure blades are balanced (a balancing kit may be required). Recheck mounting bracket security. |
| האור לא עובד. | Loose wiring, LED module failure. | Check light kit wiring connections. If issue persists, contact customer support for LED module replacement. |
| השלט רחוק לא מגיב. | Dead batteries, interference, remote not paired. | Replace batteries. Ensure no obstructions. Re-pair remote if necessary (refer to full manual). |
| בעיות חיבור לאפליקציית Wi-Fi. | Incorrect Wi-Fi password, poor signal, fan not in pairing mode. | Verify Wi-Fi password. Ensure fan is within Wi-Fi range. Follow app instructions to put fan in pairing mode. |
If the problem persists after attempting these solutions, please contact Daitsu customer support.
8. מפרטים
| תכונה | פְּרָט |
|---|---|
| מותג | Daitsu |
| מספר דגם | וולאר |
| גוֹדֶל | Ø122cm (suitable for rooms up to 25m²) |
| מידות (D x B x H) | 106.5 cm x 106.5 cm x 31.5 cm (Note: The Ø122cm refers to the blade span, while 106.5cm might be the housing dimensions or a different measurement.) |
| מִשׁקָל | 4.6 קילוגרם |
| צֶבַע | White with Wooden Blades |
| מספר להבים | 3 |
| מקור כוח | חשמלי עם כבלים |
| כרך ידtage | 240 וולט |
| צריכת חשמל | 30 וואט |
| קיבולת זרימת אוויר | 121 מטר מעוקב לדקה |
| מספר מהירויות | 6 |
| רמת רעש | 34 Decibels (Ultra-silent DC motor) |
| תכונות מיוחדות | Natural wooden blades, Remote control, App control (Wi-Fi), Dimmable LED light (18W, 9 intensity levels, 9 color temperatures), Summer/Winter function, Smart memory function, Programmable auto-off. |
| שימוש מומלץ | Air circulation, Ventilation (Indoor use only) |

Image 8.1: Dimensions for the Ø122cm model.
9. אחריות ותמיכה
אַחֲרָיוּת: מוצר זה מגיע עם אחריות יצרן למשך 3 שנים.
תמיכת לקוחות: For technical assistance, warranty claims, or any questions regarding your Daitsu Velar ceiling fan, please contact Daitsu customer service through their official webאתר או פרטי הקשר שסופקו עם מסמכי הרכישה שלך.
Please have your model number (VELAR) and proof of purchase ready when contacting support.