1. הקדמה
This user manual provides comprehensive instructions for the installation, operation, and maintenance of your Urageuxy WS0320 Wireless Weather Station. This system is designed to monitor various indoor and outdoor environmental conditions, including temperature, humidity, wind speed, wind direction, UV index, rainfall, and barometric pressure. Please read this manual thoroughly before using the device to ensure proper setup and functionality.
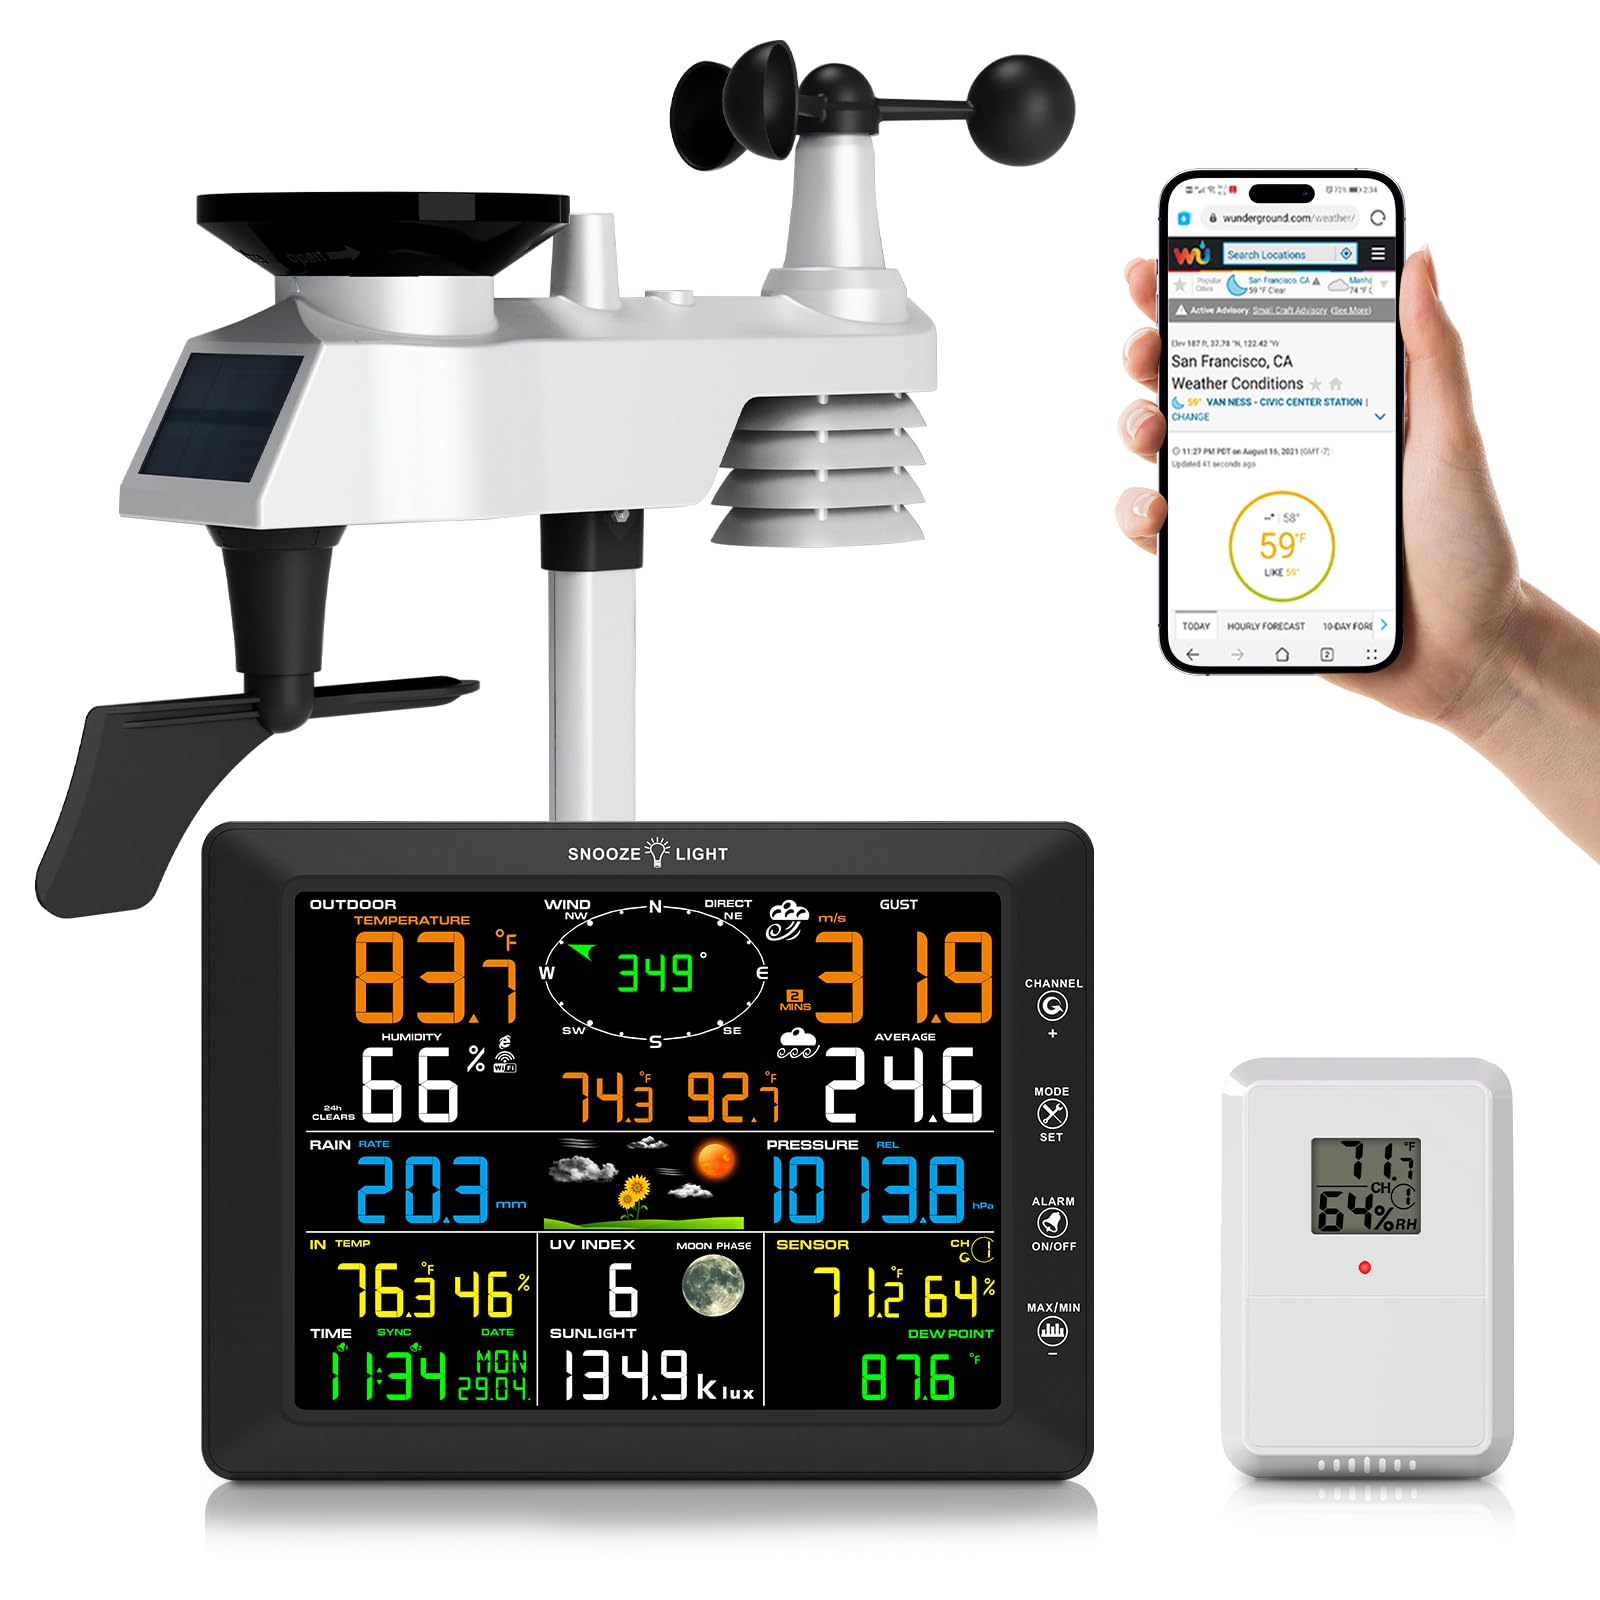
Image 1.1: Urageuxy WS0320 Weather Station, showing the main display console and the integrated outdoor sensor.
2. תכולת החבילה
ודא שכל הרכיבים המפורטים להלן כלולים בחבילה שלך:
- 1x Weather Station Console (Display Unit)
- 1x 7-IN-1 Integrated Outdoor Sensor
- 1x Remote Thermo-hygrometer Sensor
- 1x Foot Mounting (with pole insert)
- 1x Mounting Bracket Back Plate (for pole mount)
- 1x Mounting Pole
- 2x Pole mounting nuts (M3) / bolts (Ø3)
- 4x Pole mounting nuts (M5) / bolts (Ø5)
- 4x Tapping screws
- 1x מדריך הוראות

Image 2.1: Visual representation of all items included in the weather station package.
3. המוצר נגמרview
3.1. קונסולת תצוגה
The main display console features an 8.3-inch color LCD screen that presents all collected weather data. It includes readings for indoor/outdoor temperature and humidity, wind speed and direction, rainfall, UV index, barometric pressure, time, date, and moon phase. The console also supports customizable alerts and adjustable backlight levels.

תמונה 3.1: חזית view of the display console with all weather parameters shown.

תמונה 3.2: מפורט view of the display console, highlighting buttons, ports, and mounting options.
3.2. 7-IN-1 Integrated Outdoor Sensor
This robust outdoor sensor unit measures wind speed, wind direction, rainfall, UV index, light intensity, outdoor temperature, and humidity. It is designed to withstand various weather conditions and transmits data wirelessly to the display console up to 328 feet (100 meters) in open areas. The unit is powered by a solar panel and backup batteries.

Image 3.3: Components of the 7-IN-1 outdoor sensor.
3.3. Remote Thermo-Hygrometer Sensor
An additional remote sensor is included to monitor temperature and humidity in a separate indoor or outdoor location. This allows for monitoring conditions in areas such as greenhouses, basements, garages, or baby rooms.

Image 3.4: The weather station system, including the remote sensor, demonstrating its wireless capabilities.
4. התקנה
4.1. ספק כוח
מסוף תצוגה: The display console can be powered by the included AC adapter or by 3x AAA batteries (not included) for backup. It is recommended to use the AC adapter for continuous operation.
חיישן חיצוני: The 7-IN-1 outdoor sensor is primarily powered by its integrated solar panel. It also requires 3x AA batteries (not included) for backup power during periods of low light or nighttime operation.
חיישן מרחוק: The remote thermo-hygrometer sensor requires 2x AA batteries (not included).

Image 4.1: Power supply options for the display console and outdoor sensor.
4.2. התקנת חיישן חיצוני
Install the 7-IN-1 outdoor sensor in an open area to ensure accurate readings for wind, rain, and sunlight. The sensor should be mounted on a pole or fence using the provided mounting hardware. Ensure the wind vane is oriented correctly (facing North) for accurate wind direction readings. The transmission range is up to 328 feet (100 meters) without obstacles.
- Assemble the mounting pole and attach the foot mounting or mounting bracket back plate.
- Securely attach the outdoor sensor unit to the mounting pole.
- Install the required AA batteries into the outdoor sensor's battery compartment.
- Mount the assembled sensor in your desired outdoor location, ensuring it is level using the built-in level indicator.
- Orient the wind vane to face North.
4.3. Remote Sensor Installation
Install 2x AA batteries into the remote thermo-hygrometer sensor. Place this sensor in the desired secondary monitoring location, ensuring it is within range of the main display console.
4.4. Display Console Placement
Place the display console indoors in a location where it is easily visible. It can be placed on a desktop using its integrated stand or mounted on a wall using the hanging holes. Avoid direct sunlight or heat sources that could affect indoor temperature readings.
4.5. קישוריות WiFi
The weather station supports 2.4G Wi-Fi connectivity for uploading data to online weather services like Weather Underground, WeatherCloud, and PWS weather. Follow these general steps to connect:
- Ensure your display console is powered on. The WiFi icon on the console should be flashing.
- Using a computer or smartphone, connect to the Wi-Fi network named "WeatherHome" broadcast by the console.
- פתח א web browser and navigate to the console's setup page (usually an IP address like 192.168.1.1 or similar, refer to the full instruction manual for the exact address).
- Configure your home 2.4G Wi-Fi network details (SSID and password) on the setup page.
- Once connected, the console will attempt to upload data. You may need to create accounts on Weather Underground or WeatherCloud and enter your Station ID and Key on the console's web interface to enable data upload to these services.

Image 4.2: Steps for connecting the weather station to your home Wi-Fi network and online weather services.
5. הוראות הפעלה
5.1. תכונות תצוגה
The 8.3-inch color display provides real-time data. Key information displayed includes:
- טמפרטורה ולחות חיצוניים: Current readings from the 7-IN-1 outdoor sensor.
- טמפרטורה ולחות פנימיים: Current readings from the display console's internal sensor.
- מהירות וכיוון הרוח: Real-time wind data, including gust speed and average speed.
- יְרִידַת גְשָׁמִים: Daily, weekly, monthly, and total rainfall accumulation.
- UV Index & Sunlight: Ultraviolet radiation level and light intensity.
- לחץ ברומטרי: לחץ אטמוספרי נוכחי ומגמה היסטורית.
- תחזית מזג האוויר: תחזית מבוססת סמלים ל-12-24 השעות הקרובות.
- זמן תאריך: Automatically synchronized via Wi-Fi.
- שלב הירח: שלב הירח הנוכחי.
- Dew Point & Feels Like: Calculated values based on temperature and humidity.
5.2. כוונון התאורה האחורית
The display console features a 4-level adjustable backlight (High, Medium, Low, Off). When the backlight is on, press the נודניק / אור key to cycle through the three brightness levels. To turn the backlight on permanently from the off state, press and hold the נודניק / אור מקש לשלוש שניות.

Image 5.1: Backlight adjustment levels.
5.3. Customizable Alerts
The weather station allows you to set customizable alerts for various parameters, including wind, rain, temperature, humidity, and UV index. Refer to the full instruction manual for detailed steps on setting specific alert thresholds.
5.4. Data Upload to Weather Services
Once connected to Wi-Fi and configured with your Weather Underground or WeatherCloud accounts, the station will automatically upload real-time and historical weather data. You can access this data remotely via their respective websites or mobile applications.

Image 5.2: Accessing live weather data through Wi-Fi on various devices.
6. תחזוקה
6.1. ניקיון
- מסוף תצוגה: נגב את הצג ואת ה-casinז עם רך, דamp בַּד. הימנע מחומרי ניקוי שוחקים.
- חיישן חיצוני: Periodically check the rain collector for debris (leaves, insects) and clean as necessary to ensure accurate rainfall measurements. Ensure the wind cups and wind vane spin freely. Gently wipe the solar panel to maintain charging efficiency.
6.2. החלפת סוללה
Replace batteries in the outdoor sensor, remote sensor, and display console (if using battery backup) when the low battery indicator appears on the display. Always use fresh, high-quality batteries of the specified type (AA for sensors, AAA for console backup).
6.3. כיול חיישן
The weather station supports manual calibration for certain parameters to ensure reliable accuracy. Refer to the advanced settings section of the full instruction manual for detailed calibration procedures.
7. פתרון תקלות
| בְּעָיָה | סיבה אפשרית | פִּתָרוֹן |
|---|---|---|
| לא מוצגים נתוני חוץ. | Outdoor sensor not powered or out of range. | Check outdoor sensor batteries. Ensure sensor is within 328ft (100m) of the console and free from major obstructions. Re-pair the sensor if necessary (refer to full manual). |
| Incorrect wind direction. | Outdoor sensor not oriented North. | Re-orient the outdoor sensor so the wind vane points North. |
| Rainfall readings are inaccurate. | אוסף גשם חסום על ידי פסולת. | Clean the rain collector funnel and tipping bucket mechanism. |
| חיבור ה-Wi-Fi נכשל. | Incorrect Wi-Fi password, 5G network, or console too far from router. | Ensure you are connecting to a 2.4G Wi-Fi network. Double-check password. Move console closer to the router. Restart console and router. |
| Data not uploading to Weather Underground/Cloud. | Incorrect Station ID/Key or network issue. | Verify your Station ID and Key on the console's web interface. Check your internet connection. Ensure accounts are active. |
| התצוגה עמומה או כבויה. | Backlight setting, power issue. | Press the SNOOZE/LIGHT button to adjust backlight. Check AC adapter connection or replace AAA batteries. |
8. מפרטים
| תכונה | פְּרָט |
|---|---|
| מספר דגם | WS0320 |
| סוג תצוגה | צג LCD צבעוני |
| מידות תצוגה | 8.47 אינץ' רוחב x 6.22 אינץ' גובה x 0.87 אינץ' עומק |
| קישוריות | Wi-Fi (2.4G) |
| טווח חיישנים חיצוניים | עד 100 מטרים (328 רגל) באוויר הפתוח |
| דיוק טמפרטורה | ±2°F |
| Power Source (Console) | AC Adapter, 3x AAA batteries (backup, not included) |
| מקור כוח (חיישן חיצוני) | Solar Panel, 3x AA batteries (backup, not included) |
| מקור כוח (חיישן מרחוק) | סוללות 2x AA (לא כלולות) |
| חוֹמֶר | אקרילוניטריל בוטאדיאן סטירן (ABS) |
| רכיבים כלולים | Weather Station Console, 7-IN-1 Outdoor Sensor, Remote Sensor, Mounting Hardware, Instruction Manual |
9. אחריות ותמיכה
For warranty information and technical support, please refer to the contact details provided in the original product packaging or visit the official Urageuxy website. Customer reviews indicate responsive support for product issues.