
1. המוצר נגמרview
The MOUNTUP Ultrawide Monitor Wall Mount (MU-WM49) is designed to securely hold ultrawide and standard monitors ranging from 22 to 49 inches. This heavy-duty mount supports monitors weighing between 4.4 lbs (2 kg) and 44 lbs (20 kg) for flat screens, and 4.4 lbs (2 kg) and 33 lbs (15 kg) for curved screens. It features full motion capabilities, allowing for optimal viewing angle adjustments and space-saving benefits.

Image 1.1: The MOUNTUP Ultrawide Monitor Wall Mount with a curved monitor, showcasinהעיצוב והפונקציונליות שלו.
2. מידע בטיחות
אנא קראו והבינו את כל ההוראות לפני ההתקנה והשימוש. אי ביצוע הוראות אלה עלול לגרום לפציעה אישית או נזק לרכוש.
- קיבולת משקל: Do not exceed the maximum weight capacity of 44 lbs (20 kg) for flat monitors or 33 lbs (15 kg) for curved monitors.
- סוג קיר: This mount is designed for installation on wood studs, brick walls, or concrete walls. אין להתקין על קיר גבס בלבד.
- תאימות VESA: Ensure your monitor has VESA mounting patterns of 75x75mm or 100x100mm. If your monitor does not have VESA holes, a VESA adapter (not included) may be required.
- הַרכָּבָה: שני אנשים מומלצים להתקנה בטוחה.
- כְּלֵי עֲבוֹדָה: השתמש בכלים מתאימים להתקנה.
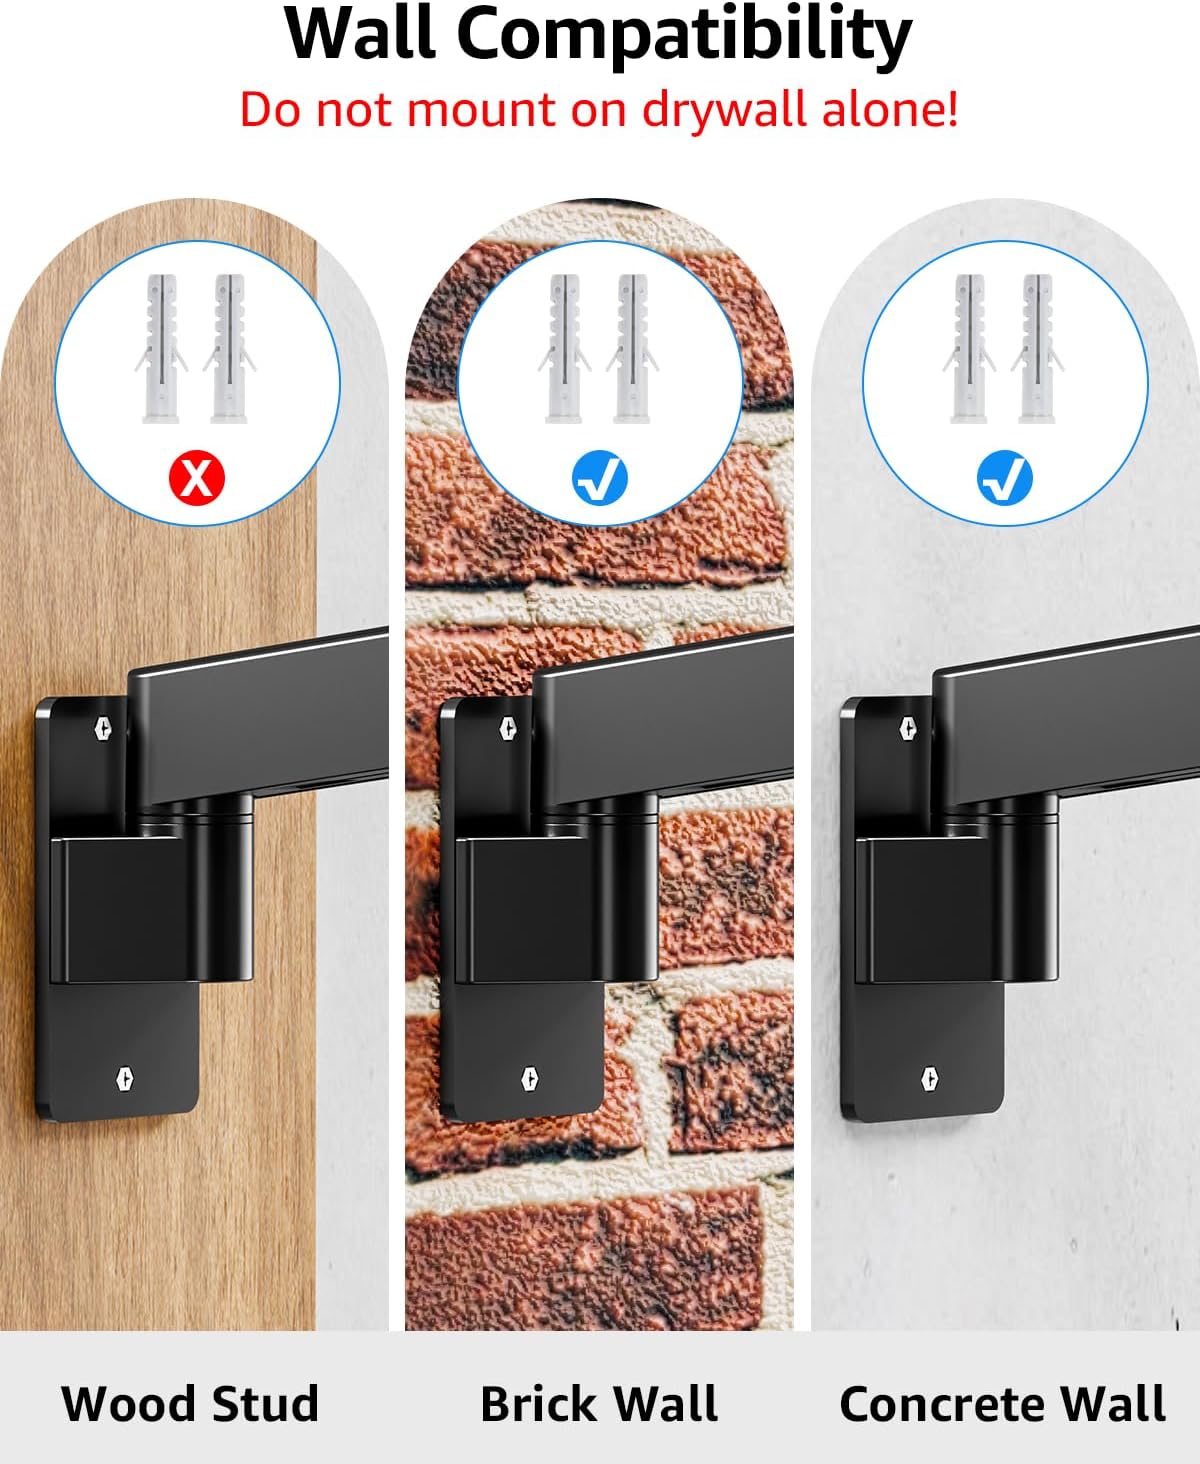
Image 2.1: Diagram illustrating compatible wall types (wood stud, brick, concrete) and explicitly warning against mounting on drywall alone.
3. מפרטים
| תכונה | מִפרָט |
|---|---|
| מותג | הרכבה |
| דֶגֶם | MU-WM49 |
| תאימות גודל צג | 22 - 49 אינץ' |
| Weight Capacity (Flat Monitors) | 2 - 20 ק"ג (4.4 - 44 ליברות) |
| Weight Capacity (Curved Monitors) | 2 - 15 ק"ג (4.4 - 33 ליברות) |
| תאימות VESA | 75x75 מ"מ, 100x100 מ"מ |
| סוג הרכבה | מתקן קיר |
| סוג תנועה | הטיה, סיבוב, סיבוב, כוונון גובה, תנועה מלאה |
| זווית הטיה | +90° / -45° |
| זווית מסתובבת | ±90° (at wall plate), ±135° (at arm joint), ±90° (at VESA plate) |
| רוֹטַציָה | 360° (for monitors under 42"), ±10° (for 42"-49" monitors) |
| טווח כוונון גובה | 13 אינץ' |
| הארכה מהקיר | 4.2 אינץ' (מכווץ) עד 23.4 אינץ' (מורחב) |
| חוֹמֶר | סגסוגת פלדה |
| צֶבַע | שָׁחוֹר |
| משקל פריט | 7.94 פאונד (3.6 ק"ג) |

Image 3.1: Visual representation of the mount's compatibility, including screen size range, weight limits for flat and curved monitors, and VESA patterns.
4. התקנה והתקנה
Follow these steps carefully to install your MOUNTUP Monitor Wall Mount. All necessary mounting hardware and detailed instructions are included with your product.
4.1. רשימת טרום התקנה
- Verify your monitor's weight and VESA pattern are within the mount's specifications.
- Identify a suitable wall location (wood stud, brick, or concrete).
- Gather necessary tools (e.g., drill, stud finder, level, screwdriver, Allen wrenches).
- Ensure all parts listed in the package contents are present.
4.2. הרכבת לוח הקיר
- Locate a wood stud using a stud finder, or identify a solid brick/concrete area.
- Mark the desired height for the wall plate. Use a level to ensure it is straight.
- Drill pilot holes according to the wall plate's screw pattern and your wall type.
- Secure the wall plate to the wall using the provided lag bolts.
4.3. Attaching the VESA Plate to Your Monitor
- הנח בזהירות את הצג כשפניו כלפי מטה על משטח רך ונקי.
- Attach the detachable VESA plate to the back of your monitor using the appropriate screws and spacers.
- For monitors between 42" and 49" that will be used in landscape orientation, tighten the rotation screw on the VESA plate to secure the monitor's rotation to ±10° before hanging. For monitors under 42", remove this screw for full 360° rotation.

Image 4.1: Guide on how to adjust the rotation angle for monitors based on their size (under 42" for 360° rotation, 42"-49" for ±10° rotation).
4.4. Hanging the Monitor
- With assistance, carefully lift the monitor and hook the VESA plate onto the arm mechanism.
- Secure the monitor to the arm using the safety screws or clips as indicated in the detailed manual.
5. הוראות הפעלה
Once installed, your MOUNTUP Monitor Wall Mount offers extensive flexibility for positioning your screen.
5.1. כוונון מיקום הצג
- התאמת גובה: The gas spring arm allows for smooth vertical movement within a 13-inch range. Gently push or pull the monitor to the desired height.
- הארכה והסרה: Extend the arm up to 23.4 inches from the wall or retract it to a minimum of 4.2 inches.
- הטיה: Adjust the monitor's vertical angle from +90° (upward) to -45° (downward) to reduce glare or optimize viewing.
- לְהִסְתוֹבֵב: Pivot the monitor horizontally at various points: ±90° at the wall plate, ±135° at the arm joint, and ±90° at the VESA plate.
- רוֹטַציָה: Rotate the monitor 360° for portrait or landscape viewing (for monitors under 42"). For larger monitors (42"-49"), rotation is limited to ±10°.

Image 5.1: Illustration of the mount's ability to freely position the screen, highlighting the 13-inch height range, 23.4-inch maximum extension, and 4.2-inch retraction from the wall.

Image 5.2: Visual guide to the mount's full motion capabilities, detailing swivel angles at different joints, tilt range, and 360° rotation.
5.2. כוונון מתח
The gas spring tension may need adjustment to properly support your monitor's weight. If the monitor rises too easily or drops down, adjust the tension screw located on the arm.
- הצג מתרומם (בהיר מדי): Turn clockwise (-) to reduce tension for a lighter monitor.
- הצג נופל (כבד מדי): Turn counter-clockwise (+) to increase tension for a heavier monitor.
Keep the arm in a horizontal position while adjusting tension. Turn the screw in small increments (e.g., 360° each time) and test the monitor's movement until it holds its position stably.

Image 5.3: Detailed instructions on how to adjust the tension of the monitor arm using an Allen wrench to ensure proper weight support.
5.3. ניהול כבלים
The mount features integrated cable management channels to keep your workspace tidy and free of clutter. Route your monitor's power and video cables through these channels along the arm.

Image 5.4: The monitor arm with cables neatly routed through its integrated management system, contributing to a clean desk setup.
6. תחזוקה
Regular maintenance ensures the longevity and safe operation of your monitor wall mount.
- ניקוי: נגבו את התושבת בעזרת מטלית רכהamp מטלית. הימנעו מחומרי ניקוי שוחקים או ממסים.
- בְּדִיקָה: בדקו מעת לעת את כל הברגים והברגים כדי לוודא שהם מהודקים היטב. הדקו מחדש במידת הצורך.
- סִיכָה: No lubrication is typically required for the moving parts. If movement becomes stiff, contact support.
7. פתרון תקלות
If you encounter issues with your MOUNTUP Monitor Wall Mount, refer to the following common solutions:
- מעקב אחר שקיעה או אי שמירה על מיקום: Adjust the gas spring tension as described in Section 5.2. Ensure the monitor's weight is within the specified range.
- קושי בהזזת הזרוע: Check if the tension is too high (if the monitor is too light) or if any bolts are overtightened. Adjust tension or loosen bolts slightly.
- Monitor Not Level: Ensure the VESA plate is securely attached to the monitor and the arm. For monitors 42"-49", ensure the rotation screw is tightened to prevent unwanted rotation beyond ±10°.
- הר מרגיש לא יציב: Re-check all wall mounting screws and bolts for tightness. Confirm the mount is installed on a solid wall structure (wood stud, brick, or concrete) and not drywall alone.
8. אחריות ותמיכה
MOUNTUP provides reliable support for its products. If you require M6 or M8 screws for TV mounting, or have any questions or concerns regarding installation, operation, or parts, please contact MOUNTUP customer support. Refer to the product packaging or the MOUNTUP official webאתר ליצירת קשר.