
1. הקדמה
This manual provides instructions for the assembly, operation, and maintenance of the MONTECH X5M Micro ATX Gaming PC Case. The X5M is designed for high airflow and features pre-installed ARGB fans, a glass side panel, and an integrated GPU holder.
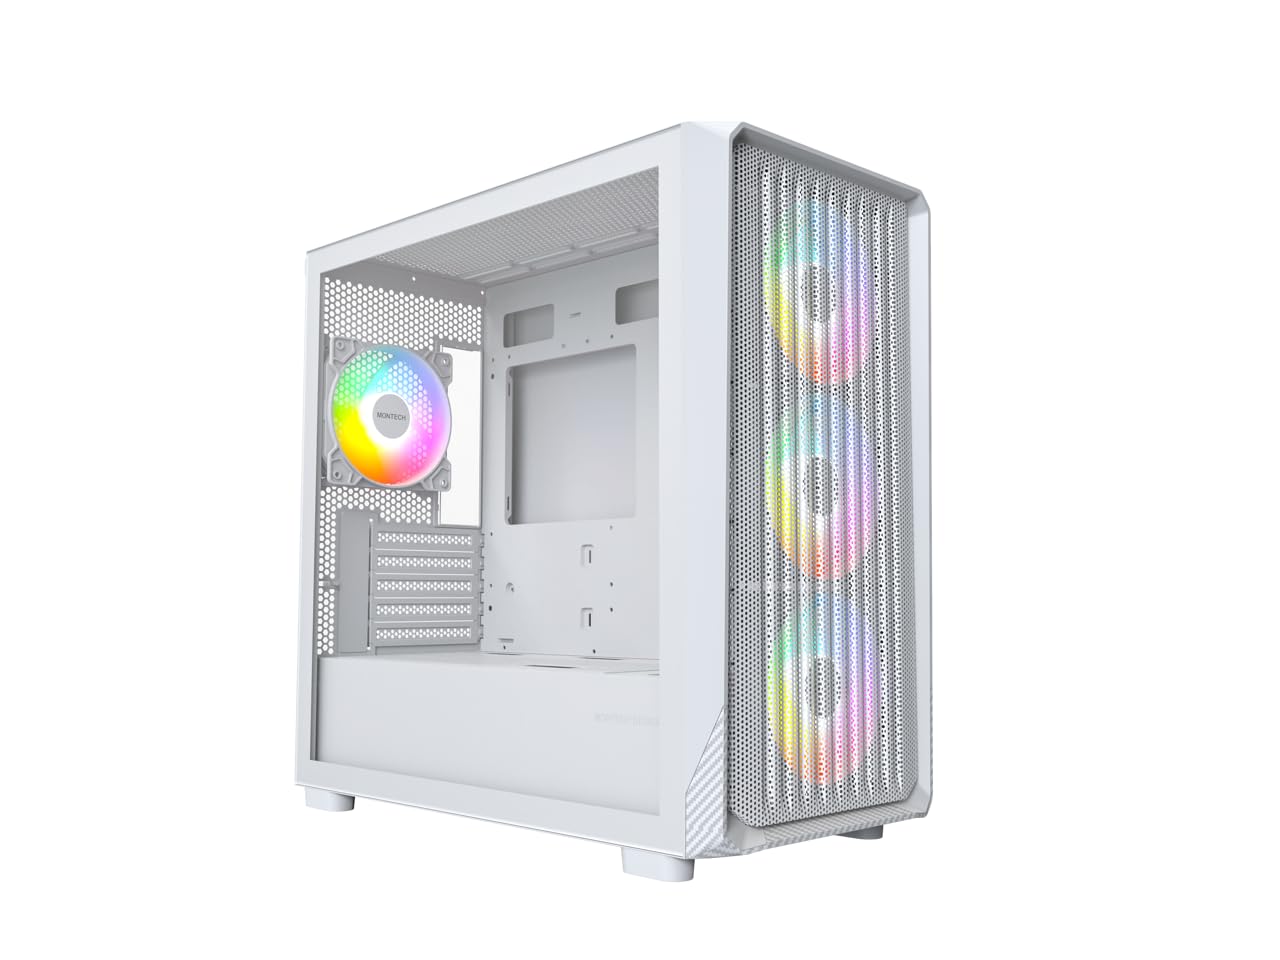
Figure 1: MONTECH X5M Micro ATX Gaming PC Case (White variant).
2. תכונות עיקריות
- Integrated GPU Holder: An adjustable GPU support stand is included to provide physical support for graphics cards.
- עיצוב זרימת אוויר גבוהה: Optimized structure for efficient cooling.
- Pre-installed ARGB Fans: Four 120mm ARGB fans are pre-installed for immediate cooling and customizable lighting.
- פאנל צד מזכוכית מחוסמת: מספק ברור view של רכיבים פנימיים.
- Carbon Fiber Print Accents: Aesthetic detailing on the front panel.
- קישוריות רב-תכליתית: Front I/O panel includes USB 2.0, USB 3.0, USB Type-C, and audio ports.

איור 2: מעלview of the MONTECH X5M case highlighting internal layout and ARGB fans.
3. מפרטים
| מותג | מונטק |
| שם הדגם | X5M |
| סוג מקרה | Micro ATX Mid Tower |
| תאימות לוח אם | מיקרו ATX |
| מאווררים מותקנים מראש | 4 מאווררי ARGB בגודל 120 מ"מ |
| תמיכה באורך ה-GPU | עד 405 מ"מ |
| תמיכה בגובה קירור המעבד | עד 165 מ"מ |
| PSU Length Support | עד 230 מ"מ |
| מפרצי אחסון | Up to 2 HDDs & 4 SSDs |
| יציאות קלט / פלט קדמיות | 1x USB 2.0, 1x USB 3.0, 1x USB Type-C, Mic & Audio, LED Button, Power Button |
| שיטת קירור | אֲוִיר |
| תמיכת רדיאטור AIO | Top: Up to 360mm; Front: Up to 360mm |
| חוֹמֶר | Plastic with Carbon Fiber Accents, Tempered Glass |
| משקל פריט | 14.3 פאונד (6.49 ק"ג) |

Figure 3: Close-up of the carbon fiber print detailing on the front panel of the X5M case.
4. התקנה והתקנה
Follow these steps for installing components into your MONTECH X5M PC case. Ensure your system is powered off and unplugged before beginning any installation.
4.1. הכנת התיק
- Carefully remove the tempered glass side panel by unscrewing the thumb screws and sliding it off.
- הסר את הפאנל הצדדי האחורי כדי לגשת לאזור ניהול הכבלים.
4.2. התקנת לוח אם
- התקן את מגן ה-I/O (אם אינו מחובר מראש ללוח האם) בפתח האחורי של המארז.
- Align your Micro ATX motherboard with the standoffs inside the case.
- אבטחו את לוח האם באמצעות הברגים המצורפים.
4.3. התקנת יחידת ספק כוח (PSU)
- Place the PSU into the dedicated compartment at the bottom rear of the case.
- אבטחו את ספק הכוח באמצעות ברגים מחלקו האחורי של המארז.
4.4. Storage Device Installation (HDDs/SSDs)
The X5M supports up to 2 HDDs and 4 SSDs.
- כונני SSD בגודל 2.5 אינץ': Mount SSDs onto the designated brackets behind the motherboard tray or on the PSU shroud.
- כוננים קשיחים בגודל 3.5 אינץ': Install HDDs into the drive cage located under the PSU shroud.
4.5. התקנת כרטיס מסך (GPU)
- הסר את כיסויי חריצי ה-PCIe הדרושים מחלקו האחורי של המארז.
- Insert the GPU into the appropriate PCIe slot on your motherboard.
- אבטח את ה-GPU בעזרת ברגים.
- Adjust the integrated GPU support stand to provide stability for your graphics card.
4.6. התקנת מאוורר ורדיאטור
The X5M comes with four 120mm ARGB fans pre-installed. Additional fans or AIO radiators can be installed as follows:
- רֹאשׁ: Supports 3x 120mm or 2x 140mm fans, or AIO radiators up to 360mm.
- חֲזִית: Supports 3x 120mm or 2x 140mm fans, or AIO radiators up to 360mm.
- אֲחוֹרִי: תומך במאוורר 1x120 מ"מ.
- מעטה PSU: תומך ב-2 מאווררים בגודל 120 מ"מ.

Figure 4: Illustration of airflow within the MONTECH X5M case and the pre-installed ARGB fans.

Figure 5: Diagram detailing fan and radiator support locations and sizes within the X5M case.
4.7. ניהול כבלים
נצלו את פתחי ניתוב הכבלים ואת נקודות הקשירה שמאחורי מגש לוח האם כדי לארגן את הכבלים. זה משפר את זרימת האוויר ואת האסתטיקה.
4.8. חיבורי לוח קלט/פלט קדמי
Connect the front panel cables (USB 2.0, USB 3.0, USB Type-C, HD Audio, Power Switch, Reset Switch, LED) to the corresponding headers on your motherboard. Refer to your motherboard manual for specific header locations.

Figure 6: Front I/O panel of the MONTECH X5M, showing USB 2.0, USB 3.0, USB Type-C, Mic & Audio jacks, LED button, and Power button.
5. תפעול
5.1. הפעלה
After all components are installed and cables connected, replace the side panels. Connect your monitor, keyboard, mouse, and power cable. Press the Power Button on the front I/O panel to start your system.
5.2. בקרת מאוורר ARGB
ניתן לשלוט במאווררי ARGB המותקנים מראש בשתי דרכים:
- Dedicated LED Button: Use the LED button on the front I/O panel to cycle through 25 built-in lighting modes.
- סנכרון לוח אם: Connect the ARGB cables to a compatible 5V 3-pin ARGB header on your motherboard. Use your motherboard's RGB software (e.g., ASUS Aura Sync, MSI Mystic Light Sync, GIGABYTE RGB Fusion, ASRock Polychrome Sync) to synchronize and customize lighting effects.
6. תחזוקה
תחזוקה שוטפת מסייעת להבטיח ביצועים אופטימליים ואורך חיים של רכיבי המחשב שלך.
- ניקוי מסנן אבק: Periodically remove and clean the dust filters (located on the top, front, and bottom) to maintain optimal airflow. Use compressed air or a soft brush.
- ניקוי חיצוני: נגב את המשטחים החיצוניים עם רך, דamp בַּד. הימנע מחומרי ניקוי שוחקים.
- ניקוי פנים: With the system powered off and unplugged, use compressed air to remove dust from internal components and fans.
7. פתרון תקלות
- המערכת לא נדלקת:
- ודא שכבל החשמל מחובר היטב לספק הכוח ולשקע בקיר.
- Check that the PSU switch is in the "ON" position.
- Verify all front panel connectors (especially the Power Switch) are correctly attached to the motherboard.
- Confirm the 24-pin ATX and 8-pin CPU power cables are securely connected to the motherboard.
- Fans Not Spinning / RGB Not Lighting Up:
- Check that all fan power cables are securely connected to the fan hub or motherboard headers.
- Ensure ARGB cables are properly connected to the fan hub or a compatible 5V 3-pin ARGB header on the motherboard.
- If using motherboard synchronization, verify that the RGB software is installed and configured correctly.
- Try cycling through modes using the dedicated LED button on the front panel.
- אין פלט תצוגה:
- Ensure your monitor cable is connected to the graphics card (GPU) and not the motherboard's integrated graphics port (unless you are using integrated graphics).
- הכנס מחדש את כרטיס המסך לחריץ ה-PCIe שלו.
- Check that the GPU power cables are securely connected.
8. אחריות ותמיכה
8.1. מידע על אחריות
The MONTECH X5M PC Case comes with a אחריות יצרן לשנה. This warranty covers defects in materials and workmanship under normal use. For specific terms and conditions, please refer to the official Montech webאתר או צור קשר עם תמיכת הלקוחות.
8.2. תמיכת לקוחות
For further assistance, technical support, or warranty claims, please visit the official Montech website or contact their customer service department. You can find contact information on the Montech webאֲתַר: www.montechpc.com