
1. אמצעי הגנה חשובים
Please read these instructions carefully before using your Salter Retro 4-Slice Toaster. Keep this manual for future reference.
- אל תיגע במשטחים חמים. השתמש תמיד בידיות או ידיות.
- כדי להגן מפני התחשמלות, אין לטבול את הכבל, התקעים או הטוסטר במים או בנוזל אחר.
- יש צורך בהשגחה צמודה כאשר כל מכשיר נמצא בשימוש על ידי ילדים או בקרבתו.
- נתק מהשקע כאשר אינו בשימוש ולפני ניקוי. מניחים להתקרר לפני ששמים או מורידים חלקים.
- אין להפעיל כל מכשיר עם כבל או תקע פגומים, או לאחר שהמכשיר פגום או ניזוק בכל דרך שהיא.
- אין להשתמש בחוץ.
- אל תתנו לכבל להיות תלוי על קצה השולחן או השיש, או לגעת במשטחים חמים.
- אין להניח על או ליד מבער גז או חשמלי חם, או בתנור מחומם.
- אל תשתמש במכשיר לשימוש אחר מהשימוש המיועד.
- Oversize foods, metal foil packages, or utensils must not be inserted into a toaster as they may involve a risk of fire or electric shock.
- שריפה עלולה להתרחש אם טוסטרים מכוסים או נוגעים בחומר דליק, לרבות וילונות, וילונות, קירות וכדומה, כאשר הם פועלים.
- אל תנסה לעקור מזון כאשר הטוסטר מחובר לחשמל.
- Always unplug the toaster before cleaning the crumb tray.
2. המוצר נגמרview
The Salter Retro 4-Slice Toaster is designed for efficient and convenient toasting. It features four wide slots, allowing you to toast various bread types, including bagels and crumpets. With 6 browning levels and dedicated functions for defrosting, reheating, and canceling, you can achieve your desired toast consistency every time.
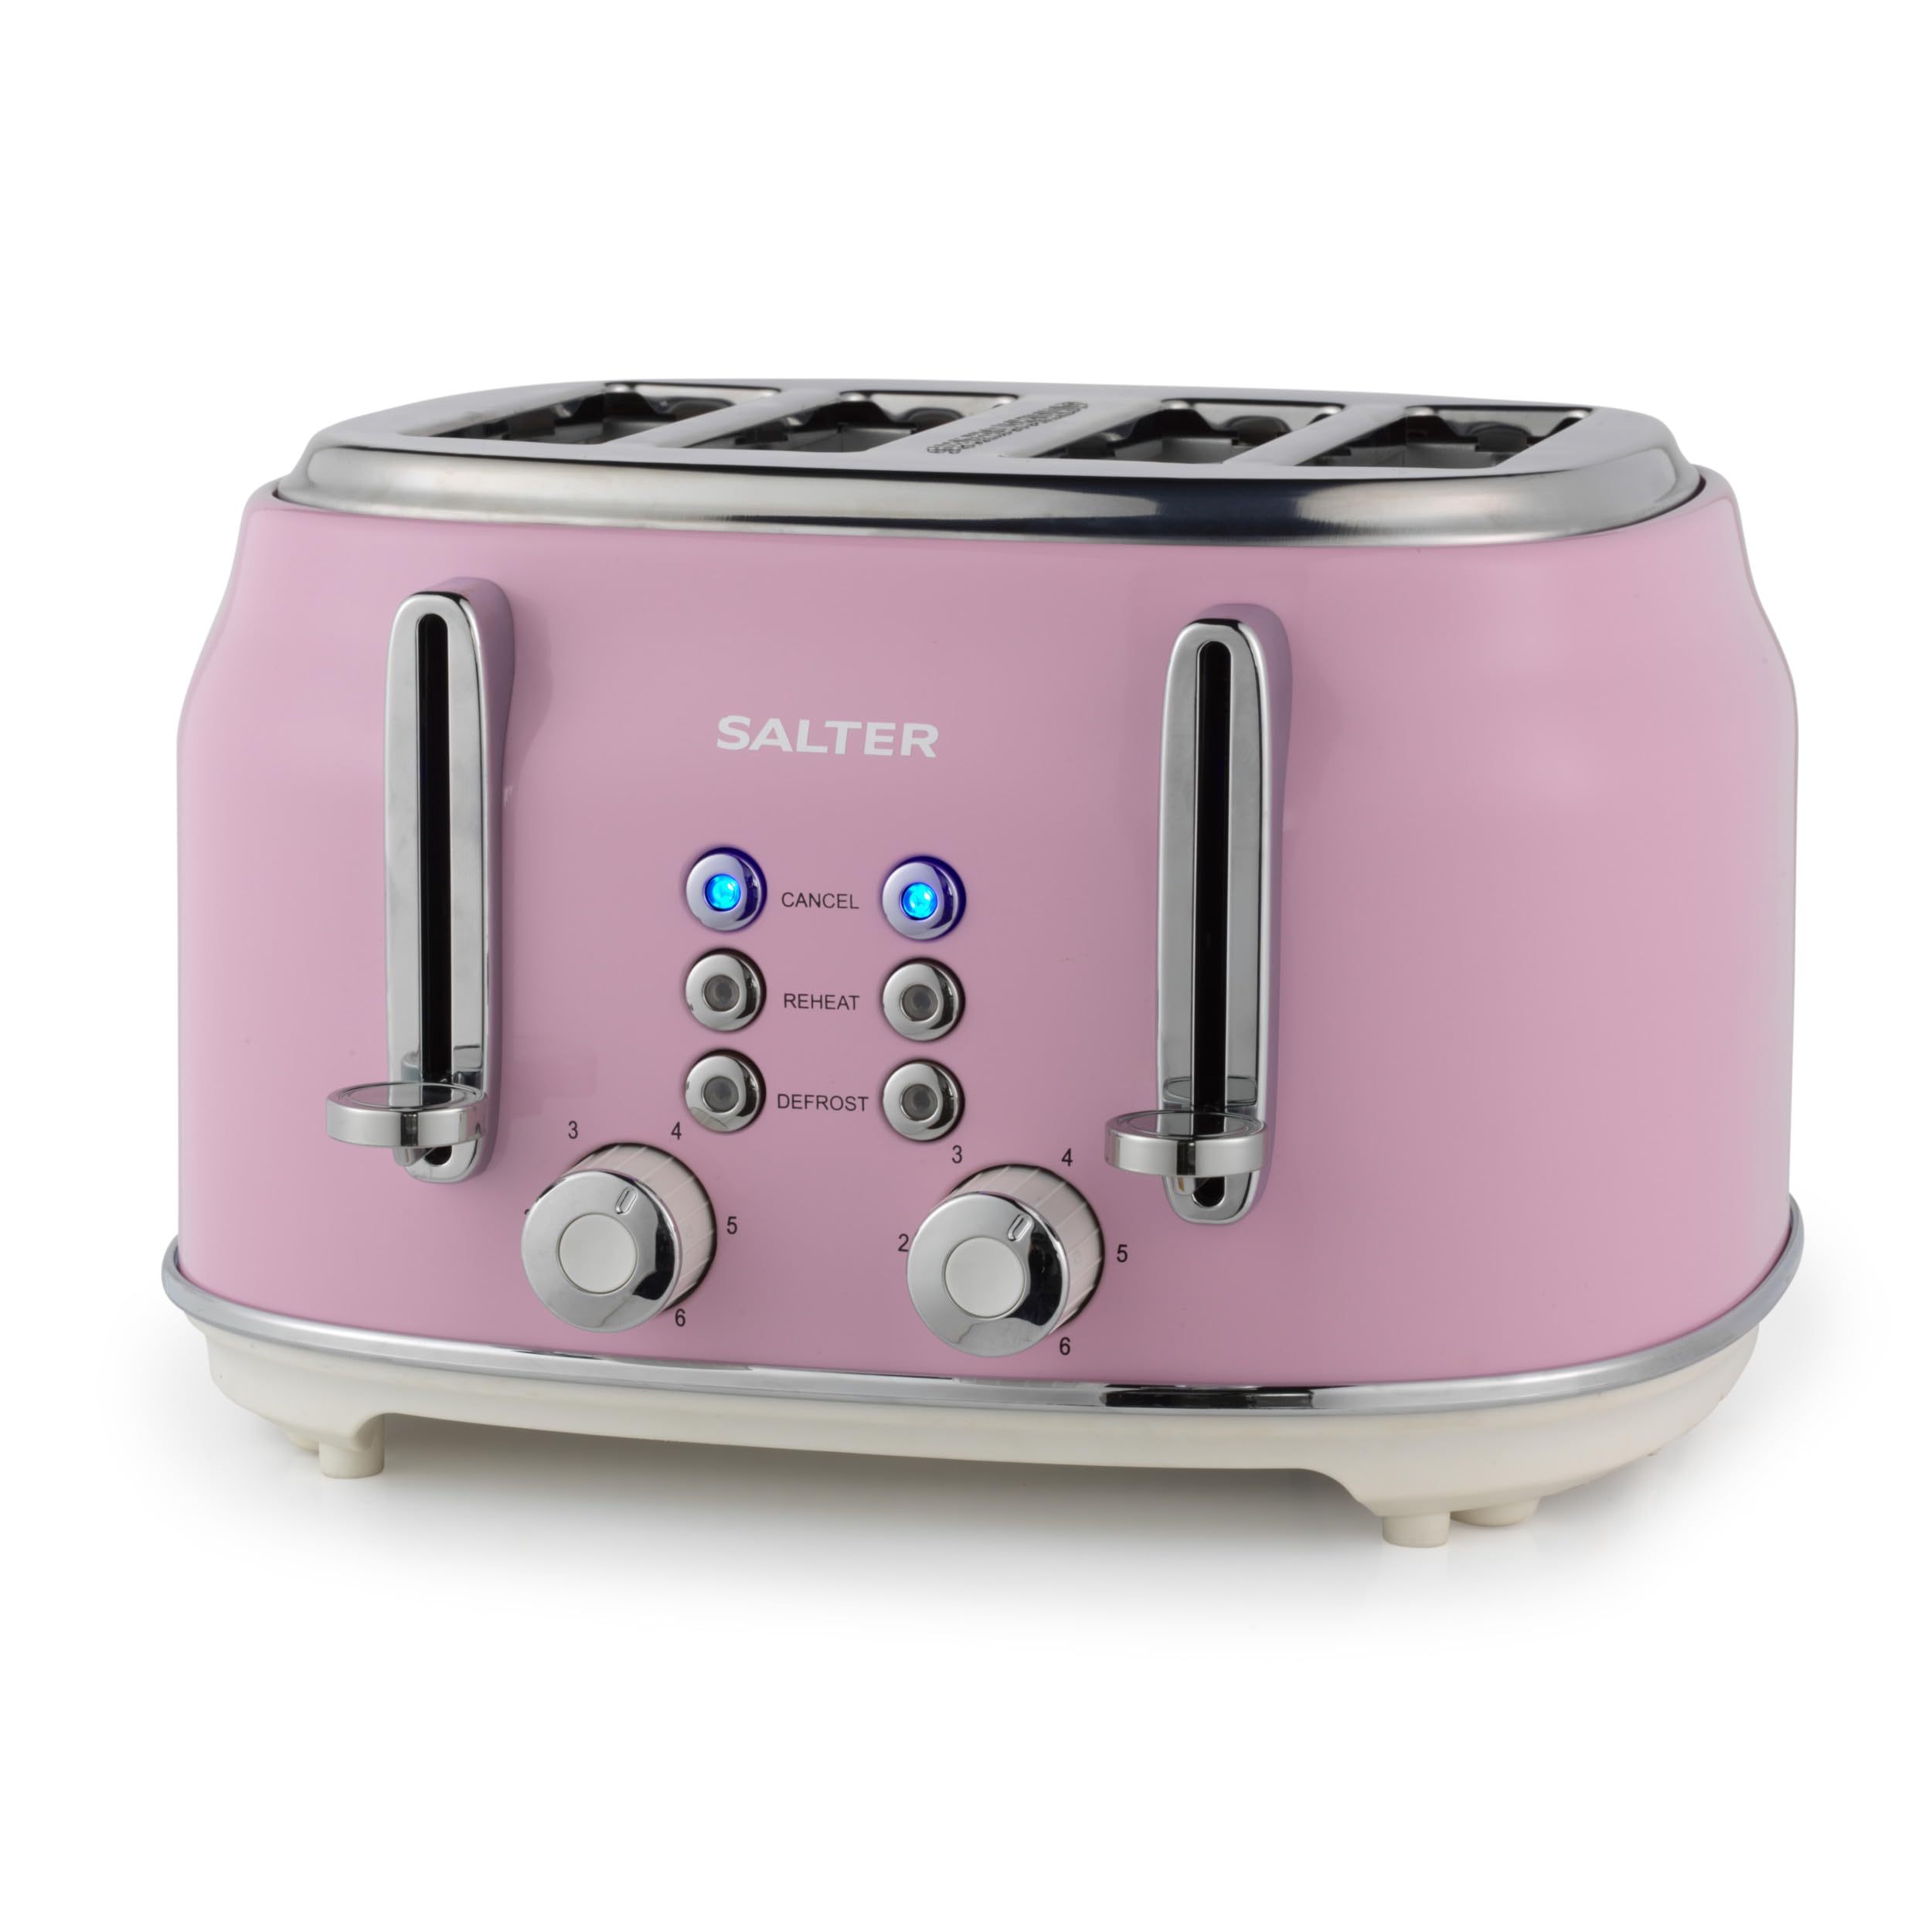
Image: The Salter Retro 4-Slice Toaster in a stylish pink finish, featuring chrome levers and control knobs, positioned on a kitchen counter.
3. התקנה
- פרק את הטוסטר והסר את כל חומרי האריזה.
- הניחו את הטוסטר על משטח יציב, עמיד בחום ויבש, הרחק מחומרים דליקים.
- Ensure the crumb tray is correctly inserted at the bottom of the toaster.
- Before first use, operate the toaster without bread on the highest browning setting to burn off any manufacturing residues. This may produce a slight odor and smoke, which is normal. Ensure adequate ventilation.
4. הוראות הפעלה
4.1. קליית לחם
- Insert up to four slices of bread into the toaster slots. The wide slots accommodate various bread types.
- Select your desired browning level using the browning control dial (1-6). Level 1 is for light toast, and Level 6 is for dark toast.
- Press down the toast lever until it locks into place. The indicator light will illuminate, and the toasting cycle will begin.
- Once the toasting cycle is complete, the toast will automatically eject, and the lever will return to its original position.

Image: Close-up of the toaster's control panel, showing the browning level dial and the 'Cancel', 'Reheat', and 'Defrost' buttons.
4.2. פונקציות מיוחדות
The toaster includes three special functions:
- לְבַטֵל: Press the 'CANCEL' button to stop the toasting cycle at any time. The toast will immediately eject.
- לחמם מחדש: Use the 'REHEAT' button to warm up previously toasted bread without further browning. Insert the toast, press the lever, then press 'REHEAT'.
- לְהַפְשִׁיר: The 'DEFROST' function allows you to toast frozen bread. Insert frozen bread, press the lever, then press 'DEFROST'. The toaster will automatically adjust the toasting time.

Image: The toaster with the 'CANCEL' button glowing blue, indicating the function is active or has been pressed.
4.3. High-Lift Ejection
The high-lift ejection feature allows you to easily retrieve smaller items like crumpets or bagels without burning your fingers. Simply lift the toast lever further up after the toasting cycle is complete.

Image: A hand demonstrating the high-lift function by pushing the toast lever upwards to raise the toast higher from the slots.
5. תחזוקה וניקיון
ניקוי קבוע מבטיח ביצועים אופטימליים ומאריך את חיי הטוסטר שלכם.
5.1. Cleaning the Crumb Tray
- ודאו שהטוסטר מנותק מהחשמל ושהוא קר לחלוטין.
- משכו החוצה את מגש הפירורים הנשלף הממוקם בתחתית הטוסטר.
- לזרוק את הפירורים שהצטברו.
- נגב את המגש עם מודעהamp הסר את הבד וייבש אותו היטב לפני הכנסתו מחדש.
- לעולם אל תפעיל את הטוסטר ללא מגש הפירורים במקומו.

Image: A hand pulling out the removable crumb tray from the bottom of the toaster, showing accumulated crumbs.
5.2. ניקוי החלק החיצוני
- נגבו את החלק החיצוני של הטוסטר בעזרת מטלית רכהamp בַּד. אין להשתמש בחומרי ניקוי שוחקים או בכריות קרצוף.
- ודאו שהטוסטר יבש לחלוטין לפני חיבורו מחדש לחשמל.
6. פתרון תקלות
| בְּעָיָה | סיבה אפשרית | פִּתָרוֹן |
|---|---|---|
| הטוסטר לא נדלק. | Not plugged in; power outlet faulty; toast lever not fully depressed. | Check power connection; try a different outlet; ensure toast lever is fully locked down. |
| לחם תקוע בטוסטר. | Bread slice too thick or uneven. | Unplug the toaster and carefully remove the bread using non-metallic tongs. Do not use metal objects. |
| הטוסט בהיר/כהה מדי. | הגדרת רמת ההשחמה שגויה. | Adjust the browning control dial to a higher or lower setting for future use. |
| עשן עולה מהטוסטר. | Crumbs accumulated; food stuck; first use burn-off. | Unplug immediately. Clean crumb tray. Remove any stuck food. If first use, ensure ventilation. |
7. מפרטים
- מספר דגם: EK5739PNKVDE
- מותג: סלטר
- צֶבַע: וֶרֶד
- חוֹמֶר: אֲלוּמִינְיוּם
- כּוֹחַ: 1630W
- מספר פרוסות: 4
- הגדרות השחמה: 6
- מאפיינים מיוחדים: Wide Slots, Defrost, Reheat, Cancel Functions, Removable Crumb Tray, High-Lift Ejection, Auto-Centering
- מִשׁקָל: 3 קילוגרם
8. אחריות ותמיכה
Your Salter Retro 4-Slice Toaster comes with a standard manufacturer's warranty. For detailed warranty information, product support, or to inquire about replacement parts, please refer to the warranty card included in your product packaging or visit the official Salter website. Do not attempt to repair the appliance yourself, as this may void the warranty and pose a safety risk.