REVODATA I3006-P-A-HS-S
מצלמת אבטחה REVODATA 5MP POE IP Dome (דגם: I3006-PA-HS-S) מדריך למשתמש
הוראות מקיפות להתקנה, הפעלה ותחזוקה.
1. הקדמה
This manual provides essential information for the proper installation, configuration, and operation of your REVODATA 5MP POE IP Dome Security Camera, model I3006-P-A-HS-S. Please read this manual thoroughly before using the product to ensure optimal performance and safety.

Image 1.1: REVODATA 5MP POE IP Dome Security Camera.
2. תכולת החבילה
ודא שכל הפריטים המפורטים להלן כלולים בחבילה שלך. אם פריטים חסרים או פגומים, אנא צור קשר עם תמיכת הלקוחות.
- 1 x REVODATA 5MP POE IP Dome Security Camera
- מדריך למשתמש אחד (מסמך זה)
- 1 x Screws Set for mounting

Image 2.1: Illustration of package contents and camera dimensions. The image shows the camera, user manual, package box, screws set, and details like the 3.6mm lens, audio port, DC power port (support 12V 2A), and RJ45 port (support POE).
3. תכונות מוצר
The REVODATA I3006-P-A-HS-S camera offers a range of advanced features for reliable indoor security surveillance:
- רזולוציית HD של 5MP: Equipped with a 1/3-inch CMOS sensor, providing clear 5.0-megapixel images and videos at 25 frames per second.
- POE and DC Power Support: Features a built-in POE template (48V 802.3af) for simplified wiring, and an auxiliary 12V 2A DC power interface for non-POE setups.
- מיקרופון מובנה: Captures audio around the camera, enhancing surveillance with sound information.
- IR-CUT Infrared Night Vision: Integrated IR-CUT technology with 3 Array LEDs ensures clear day and night vision, with an effective range of 10-20 meters in total darkness.
- H.265/H.264 Dual Encoding: Utilizes H.265 compression to reduce bandwidth and storage requirements by approximately 50% compared to H.264, while maintaining image quality.
- זיהוי תנועה: Records only when motion is detected, optimizing storage space.
- P2P Remote View: Access live and recorded footage remotely via the Linklemo mobile app (iOS/Android) or VMS software (Windows).

תמונה 3.1: נגמרview of camera features including 5MP resolution, 3.6mm lens, night vision, P2P, POE, audio, detection alarm, and H.265/H.264 encoding.
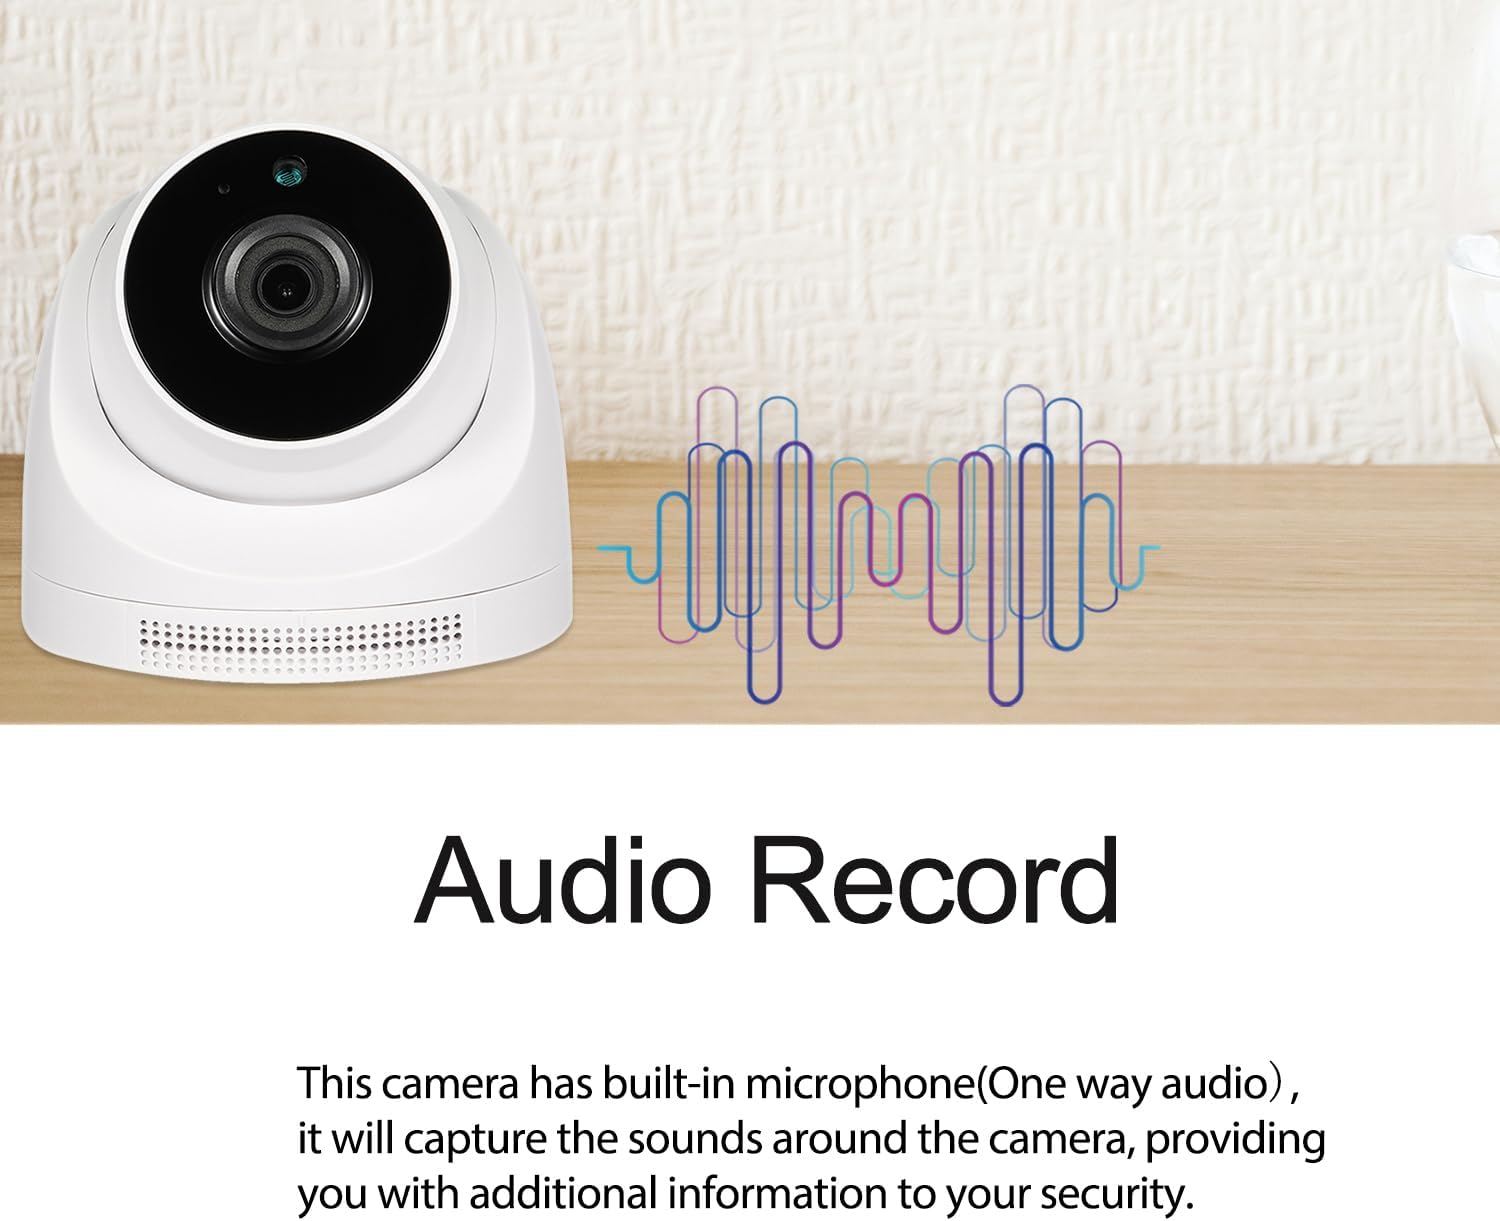
Image 3.2: The camera features a built-in microphone for one-way audio recording, capturing sounds for enhanced security.

Image 3.3: Demonstration of IR Night Vision. Infrared LEDs activate in low light conditions, switching the camera from color to black and white for clear visibility in darkness.

Image 3.4: Explains POE (Power Over Ethernet) support with a POE cable illustration and the benefits of H.265/H.264 dual encoding for reduced bandwidth and storage.

Image 3.5: Real-world comparison of camera footage during the day and at night, showcasing the effectiveness of night vision.
4. התקנה
4.1 התקנה פיזית
The camera is designed for indoor use and supports wall mounting.
- בחר מיקום פנימי מתאים להרכבת המצלמה.
- Use the provided screws set to securely mount the camera to the wall. Ensure the camera is positioned to cover the desired surveillance area.
4.2 חיבור חשמל ורשת
The camera offers two power options: Power over Ethernet (POE) or a standard DC power supply.
- חיבור POE: Connect an Ethernet cable from a POE-enabled switch or NVR to the camera's RJ45 port. This will provide both power and network connectivity.
- חיבור מתח DC: If not using POE, connect a 12V 2A DC power adapter (not included) to the camera's DC power port, and then connect an Ethernet cable from your router/switch to the camera's RJ45 port for network access.

Image 4.1: Diagram showing the camera connected via an Ethernet cable to an NVR, illustrating the POE connection method.
5. הוראות הפעלה
Your REVODATA camera can be accessed and managed through VMS software on Windows, a web browser interface, or the Linklemo smartphone application.
5.1 Connecting to VMS Software (Windows)
Follow these steps to connect your camera to the VMS software on a Windows computer:
- התקן את תוכנת ה-VMS במחשב Windows שלך.
- Launch the VMS software. The default username is 'admin' and the default password is 'admin'.
- Use the device manager to search for and add your camera to the software.
- לאחר הוספה, תוכלו view the live feed and configure camera settings.
5.2 Connecting via Web מִמְשָׁק
כדי לגשת למצלמה web interface, you will need its IP address. This can be found using the VMS software or a network scanning tool.
- פתח א web דפדפן (למשל, כרום, פיירפוקס).
- Enter the camera's IP address into the address bar.
- Log in using the default username 'admin' and default password '123456'.
- אתה יכול עכשיו view the live feed and adjust various camera settings through the web מִמְשָׁק.
5.3 Connecting to Smartphone APP (Linklemo)
The Linklemo app allows for remote viewing and management on iOS and Android devices.
- Download and install the 'Linklemo' app from your device's app store.
- הירשמו לחשבון או התחברו אם כבר יש לכם אחד.
- Add your device by scanning the QR code on the camera or manually entering its ID.
- Ensure your phone and the camera are on the same network during the initial pairing process.
- לאחר הוספה, תוכלו view live video, receive motion detection alerts, and manage settings.
Notice: This device does not support Cloud Storage. Please do not purchase Cloud Storage from the 'Linklemo' app.
Video 5.1: This video demonstrates how to connect the REVODATA camera to VMS software, access its web interface via a browser, and set up the Linklemo smartphone application for remote viewאינג וניהול.

Image 5.2: Screenshots illustrating the user interface for both the Linklemo mobile application and the VMS desktop software, showing live camera feeds.

Image 5.3: Depicts the camera's remote viewing capabilities on both a smartphone and a computer monitor.

Image 5.4: A visual representation of the camera's one-way audio feature, showing sound waves and a conversation being captured.
6. תצורה והגדרות
The camera's settings can be adjusted via the VMS software or web interface. Key configuration areas include:
6.1 הגדרות וידאו
- Adjust stream type (Main Stream), encoding format (H.265/H.264), resolution (up to 2880x1616P), and frame rate (25 fps).
- Configure video quality and bitrate control.
6.2 הגדרות שמע
- Enable/disable audio, adjust input volume.
6.3 OSD (On-Screen Display) Settings
- Enable/disable OSD, set date/time format, and position.
6.4 הגדרות תמונה
- Adjust brightness, contrast, saturation, sharpness.
- Configure IR-CUT mode (Auto, Day, Night), and infrared lamp הגדרות.
6.5 ניהול אזעקות
- זיהוי תנועה: Configure detection areas, sensitivity, and alarm actions (e.g., send email, push notification to app).
- גילוי אנושי: Specific detection for human figures, reducing false alarms.

Image 6.1: Illustrates the motion detection alarm feature, showing a detected human figure and a notification on a smartphone.

Image 6.2: Shows the motion detection feature highlighting a person within the surveillance area, triggering an alert.
6.6 הגדרות רשת
- Configure IP address settings (DHCP/Static), RTSP, ONVIF, HTTP, Email, and FTP settings for advanced integration.
7. תחזוקה
7.1 טיפול כללי
- נקו את עדשת המצלמה באופן קבוע בעזרת מטלית רכה ויבשה כדי להבטיח איכות תמונה ברורה.
- Avoid exposing the camera to extreme temperatures or direct water spray.
7.2 תחזוקת מערכת
- עדכוני קושחה: בדוק את זה של היצרן website periodically for firmware updates to improve performance and security.
- תצורת גיבוי: It is recommended to back up your camera's configuration settings regularly.
- שחזר לברירות המחדל של היצרן: If experiencing persistent issues, you may restore the camera to its factory default settings. Note that this will erase all custom configurations.
8. פתרון תקלות
אם נתקלת בבעיות עם המצלמה שלך, עיין בבעיות הנפוצות ובפתרונות הבאים:
| בְּעָיָה | סיבה אפשרית | פִּתָרוֹן |
|---|---|---|
| אין פיד תמונות/וידאו | בעיית חשמל, ניתוק רשת, כתובת IP שגויה. | Check power supply (POE or DC adapter). Verify Ethernet cable connection. Ensure correct IP address is used in software/browser. |
| איכות תמונה ירודה | Dirty lens, low resolution setting, poor lighting. | Clean the lens. Increase resolution setting in video configuration. Ensure adequate lighting or verify night vision is active. |
| זיהוי תנועה לא עובד | Detection area not configured, sensitivity too low, alarm schedule incorrect. | Configure motion detection areas and sensitivity. Check alarm schedule settings. |
| Cannot connect via Linklemo app | Incorrect login details, device not added, network issues. | Verify app login credentials. Ensure camera is added to the app. Check Wi-Fi/mobile data connection. |
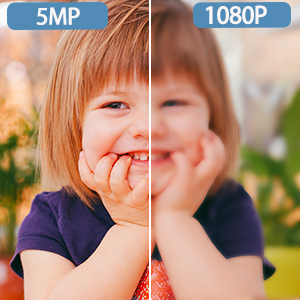
Image 8.1: A visual comparison demonstrating the superior clarity of 5MP resolution compared to 1080P.
9. מפרטים
| תכונה | מִפרָט |
|---|---|
| דֶגֶם | I3006-P-A-HS-S |
| הַחְלָטָה | 5MP (2880x1616P) |
| חיישן | 1 / 3 אינץ 'CMOS |
| עֲדָשָׁה | 3.6mm, Manual Focus |
| קצב פריימים | 25 פריימים לשנייה |
| דחיסת וידאו | H.265/H.264 |
| שֶׁמַע | Built-in Microphone (1-way audio) |
| ראיית לילה | Infrared (3 Array LEDs), 10-20m range |
| ספק כוח | POE (48V 802.3af) or DC 12V 2A |
| קישוריות | אתרנט |
| מכשירים תואמים | Smartphone (iOS, Android), Windows PC |
| סוג הרכבה | מתקן קיר |
| שימוש בפנים/חוץ | מקורה |
| חוֹמֶר | פּלָסטִי |
| מידות (L x W x H) | 4.33 x 4.33 x 4.01 אינץ' |
| משקל פריט | 10.6 אונקיות |
| טמפרטורת הפעלה | עד 60 מעלות צלזיוס |

Image 9.1: Displays different angles of the camera and suggested indoor applications such as living rooms, pet monitoring, baby rooms, and offices.

Image 9.2: Highlights the 10-20M night vision capability powered by 3 Array LEDs, showing a split view of a room in day and night conditions.
10. אחריות ותמיכה
For warranty information, technical support, or any product-related inquiries, please refer to the contact details provided on the REVODATA official website or your purchase platform. Keep your purchase receipt as proof of purchase.