
מָבוֹא
This manual provides essential information for the installation, operation, and maintenance of your KICKER CXA400.1 Mono Class D Car Amplifier and CXARC Remote Bass Control. Please read this manual thoroughly to ensure proper use and to achieve optimal performance from your audio system.

תמונה: למעלה view of the KICKER CXA400.1 Mono Class D Car Ampחיים יותר.
The KICKER CXA400.1 amplifier is designed for efficient power delivery to subwoofers, featuring a Class-D power plant and a compact design. The KICKER CXARC remote control allows for convenient adjustment of bass levels.
מידע בטיחות
Always observe the following safety precautions when installing and operating your ampחיים יותר:
- Disconnect the vehicle's battery negative terminal before making any electrical connections.
- ודא שכל החיווט מנותב ומאובטח כראוי כדי למנוע נזק או קצר חשמלי.
- השתמש בחוטי חשמל והארקה בעובי מתאים כפי שצוין בסעיף ההתקנה.
- הימנע מהרכבה של amplifier in locations exposed to excessive heat, moisture, or vibration.
- אל תפעיל את amplifier if it is damaged or malfunctioning. Refer to the troubleshooting section or contact KICKER support.
- Prolonged exposure to high sound pressure levels can cause permanent hearing loss. Use caution when adjusting volume levels.
תוכן החבילה
ודא שכל הפריטים נמצאים בחבילה שלך:
- KICKER CXA400.1 Mono Class D Car Ampחיים יותר
- KICKER CXARC Remote Bass Control
- Mounting Hardware (screws, vertical mounting brackets)
- מדריך למשתמש (מסמך זה)
התקנה והתקנה
התקנה נכונה היא קריטית לביצועים ובטיחות אופטימליים. אם אינך בטוח לגבי חלק כלשהו בתהליך ההתקנה, התייעץ עם מתקין מקצועי.
הרכבה של Ampחיים יותר
The CXA400.1 amplifier features a compact design and includes vertical mounting hardware for flexible installation options. Choose a location that is dry, well-ventilated, and protected from direct sunlight or excessive heat. Ensure there is sufficient space around the ampמגבר לזרימת אוויר.
חיבורי חיווט
All wiring should be done with the vehicle's battery disconnected. Use high-quality power, ground, and speaker wires of appropriate gauge.

תְמוּנָה: View of the KICKER CXA400.1 amplifier showing RCA input/output and control panel.
- חיבור חשמל: Connect the main power wire from the battery (with an inline fuse) to the ampמסוף 12V + של המפיץ.
- חיבור הארקה: חבר חוט הארקה קצר ועבה מה- amplifier's GND terminal to a clean, bare metal point on the vehicle's chassis.
- הפעלה מרחוק: חבר את amplifier's REM terminal to the remote turn-on output of your head unit.
- אות כניסה: The CXA400.1 accepts both low-level (RCA) and high-level (speaker wire) input signals. It can accept up to 40 volts of speaker-level input, eliminating the need for line-out converters in many cases. Connect your head unit's RCA outputs to the amplifier's INPUT terminals for low-level input, or use the high-level input if your head unit does not have RCA outputs.
- פלט רמקול: חברו את הסאב/וופר שלכם ל amplifier's speaker output terminals. Ensure correct polarity.

תמונה: צד view of the KICKER CXA400.1 ampספק כוח המציג חיבורי חשמל, הארקה, שלט רחוק ורמקול.
הגדרות ראשוניות
After all connections are made, reconnect the vehicle's battery. Before playing audio, set the amplifier's gain control to its minimum position. Adjust other settings like crossover and bass boost as needed for your specific audio setup.
הפעלת ה Amplifier and Bass Knob
The KICKER CXA400.1 amplifier offers several adjustable features to fine-tune your audio experience. The CXARC remote bass control provides convenient real-time adjustments.
השג שליטה
בקרת ההגבר תואמת את amplifier's input sensitivity to the output level of your head unit. Start with the gain at minimum and slowly increase it until you hear distortion, then back off slightly. This ensures maximum clean signal from your head unit.
הגדרות מוצלבות
ה amplifier features a variable 12dB low-pass crossover (50Hz–200Hz). This filter allows only frequencies below the set point to pass to the subwoofer, preventing higher frequencies from reaching it and improving overall sound clarity. Adjust this to blend smoothly with your main speakers.
מסנן תת קול
A 24dB/octave subsonic filter set at 25Hz helps protect your subwoofer by removing extremely low, inaudible frequencies that can cause excessive cone excursion and potential damage. It also improves efficiency by preventing the amplifier from wasting power on these frequencies.
KickEQ Bass Boost
The KickEQ offers a variable 0-6dB bass boost centered at 40Hz. Use this feature to enhance low-frequency response. Adjust carefully to avoid distortion and speaker damage.
CXARC Remote Bass Control
The CXARC remote bass control connects to your CXA400.1 amplifier and allows you to adjust the bass level conveniently from the driver's seat. This provides on-the-fly control over your subwoofer's output without needing to access the ampליפר ישירות.
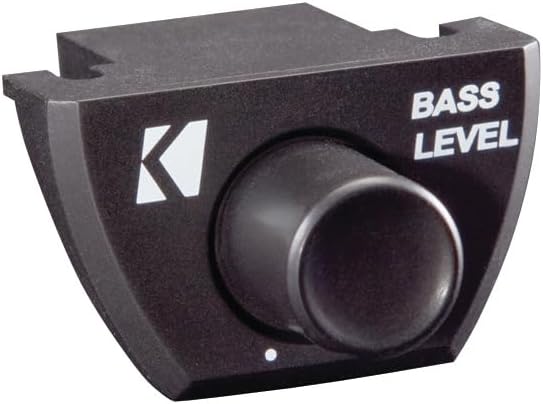
Image: The KICKER CXARC Remote Bass Control knob.
תַחזוּקָה
Your KICKER amplifier and bass knob require minimal maintenance to ensure long-lasting performance.
- ניקוי: נגבו מעת לעת את amplifier and remote with a soft, dry cloth to remove dust and dirt. Do not use harsh chemicals or abrasive cleaners.
- חיבורים: Occasionally check all wiring connections to ensure they are secure and free from corrosion. Loose connections can lead to poor performance or damage.
- אוורור: ודא כי ampצלעות הקירור של המפיץ אינן חסומות כדי לאפשר פיזור חום תקין.
פתרון בעיות
If you experience issues with your KICKER ampעבור מפיץ אנרגיה, עיין בבעיות הנפוצות והפתרונות הבאות:
- אין כוח: Check the inline fuse on the power wire, ensure the ground connection is solid, and verify the remote turn-on wire is receiving 12V when the head unit is on.
- אין צליל: Check all input and output connections. Ensure the gain is not set to minimum. Verify the head unit is sending an audio signal. Check speaker wires for shorts or open circuits.
- סאונד מעוות: Reduce the gain setting. Check for proper crossover and bass boost settings. Ensure the input signal is not overdriven.
- Ampהתחממות יתר של המאיץ: ודא אוורור נאות סביב amplifier. Check the impedance of your speakers; ensure it matches the ampהיכולות של liifier.
- Remote Bass Knob Not Working: Check the connection cable between the CXARC and the ampחיים יותר. להבטיח את ampהמרגן מופעל.
If problems persist after checking these points, contact KICKER customer support.
מפרטים
| תכונה | מִפרָט |
|---|---|
| יציאת חשמל (RMS) | 150x1 watts/ch at 4 Ohms, 300x1 watts/ch at 2 Ohms, 400x1 watts/ch at 1 Ohm |
| תגובת תדר | 25-200 הרץ |
| רגישות קלט | 250mV-10V (רמה נמוכה), 1V-40V (רמה גבוהה) |
| יחס אות לרעש | >95dB |
| קרוסאובר פעיל | Lo-pass משתנה 50Hz–200Hz, 12dB/אוקטבה |
| מסנן תת קול | 25 הרץ @24dB/אוקטבה |
| KickEQ Boost | משתנה 0-6dB @40Hz |
| מידות | 8-1/8" x 5.9" x 17" (20.6cm x 15cm x 43cm) |
| משקל פריט | 5.3 פאונד |
| מספר דגם | KickerBDL240611-01 (Bundle) |
אַחֲרָיוּת
The KICKER CXA400.1 Amplifier and CXARC Bass Knob are covered by a 1 שנות אחריות יצרן. This warranty covers defects in materials and workmanship under normal use. Please retain your proof of purchase for warranty claims. For specific warranty terms and conditions, refer to the documentation included with your product or visit the official KICKER webאֲתַר.
תְמִיכָה
For technical assistance, troubleshooting, or warranty inquiries, please contact KICKER customer support. You can find contact information and additional resources on the official KICKER website. When contacting support, please have your product model number (CXA400.1, CXARC) and proof of purchase readily available.
בקר ב חנות KICKER באמזון למוצרים ומידע נוסף.