
1. הקדמה
תודה על הרכישהasing the Zenwire D300S Mini Projector. This manual provides essential information for the safe and efficient operation of your device. Please read it thoroughly before use and retain it for future reference.
אמצעי בטיחות
- אל תסתכל ישירות לתוך עדשת המקרן כאשר ה-lamp פועל.
- הקפידו על אוורור נאות כדי למנוע התחממות יתר. אין לחסום פתחי אוורור.
- השתמש רק במתאם החשמל המצורף.
- הרחק את המקרן ממים או נוזלים אחרים.
- הימנע מהצבת המקרן על משטחים לא יציבים.
- אל תנסה לפרק או לתקן את המקרן בעצמך. צור קשר עם אנשי שירות מוסמכים.
2. תכולת החבילה
אנא ודאו שכל הפריטים נמצאים בחבילה שלכם:
- Zenwire D300S Mini Projector
- שְׁלַט רָחוֹק
- מתאם מתח
- כבל AV
- מדריך למשתמש (מסמך זה)
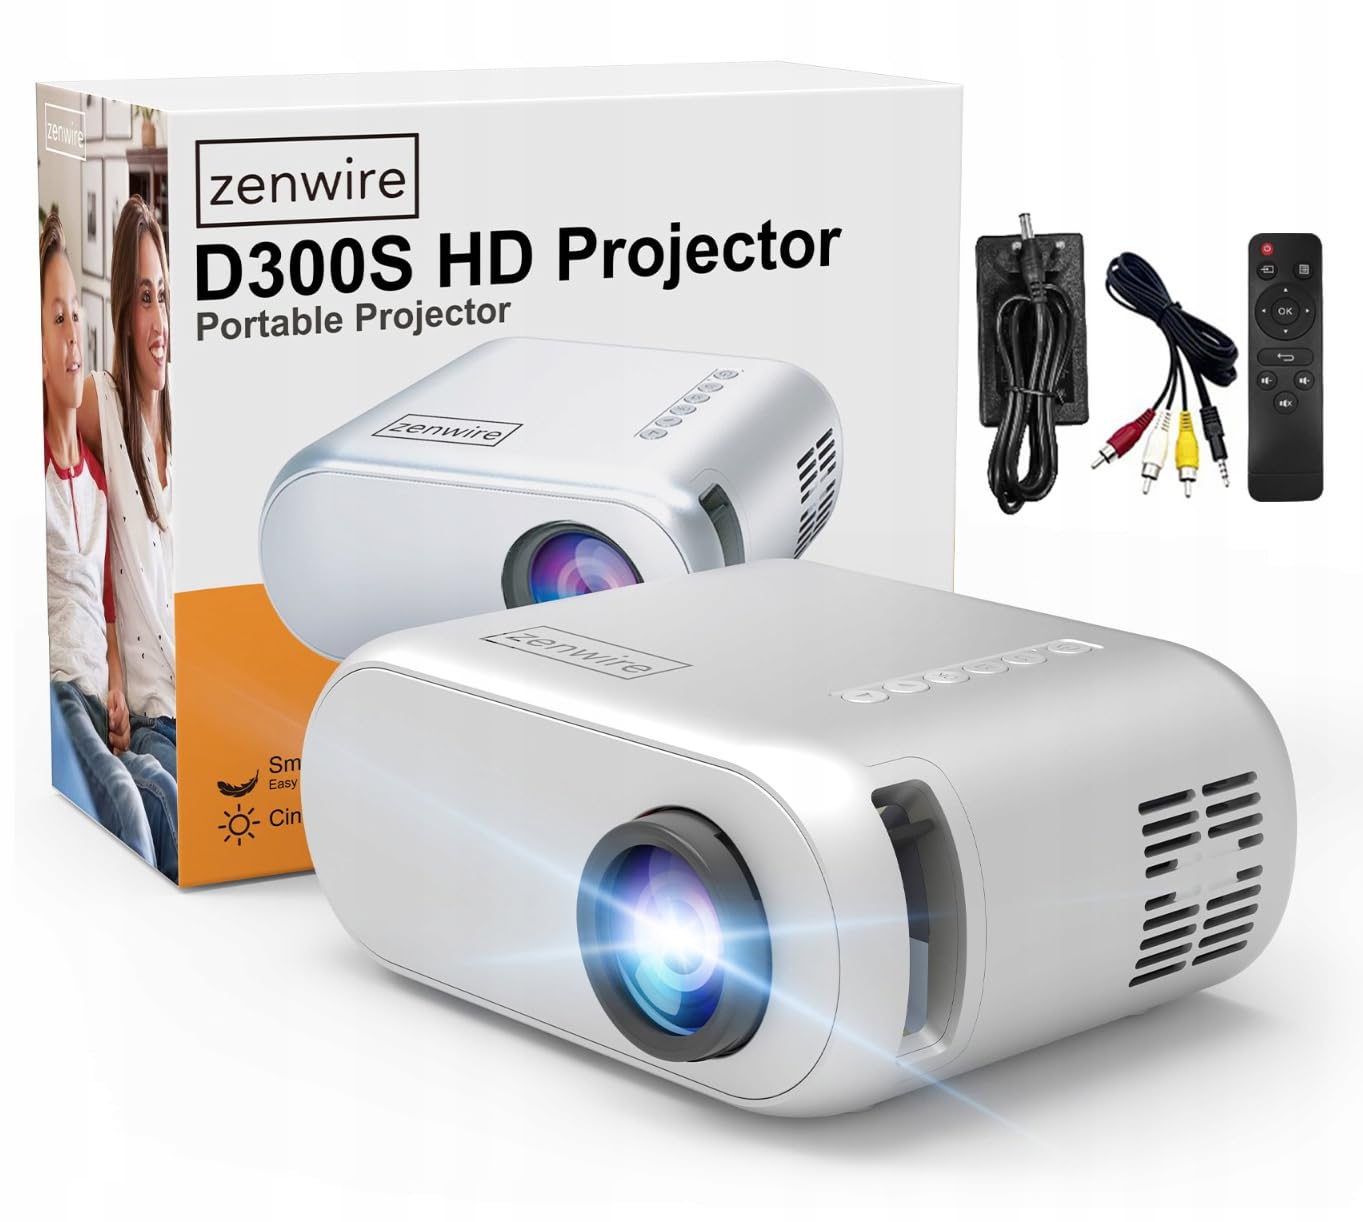
Image 2.1: Zenwire D300S Mini Projector and included accessories.
3. המוצר נגמרview
חזית המקרן והחלק העליון View
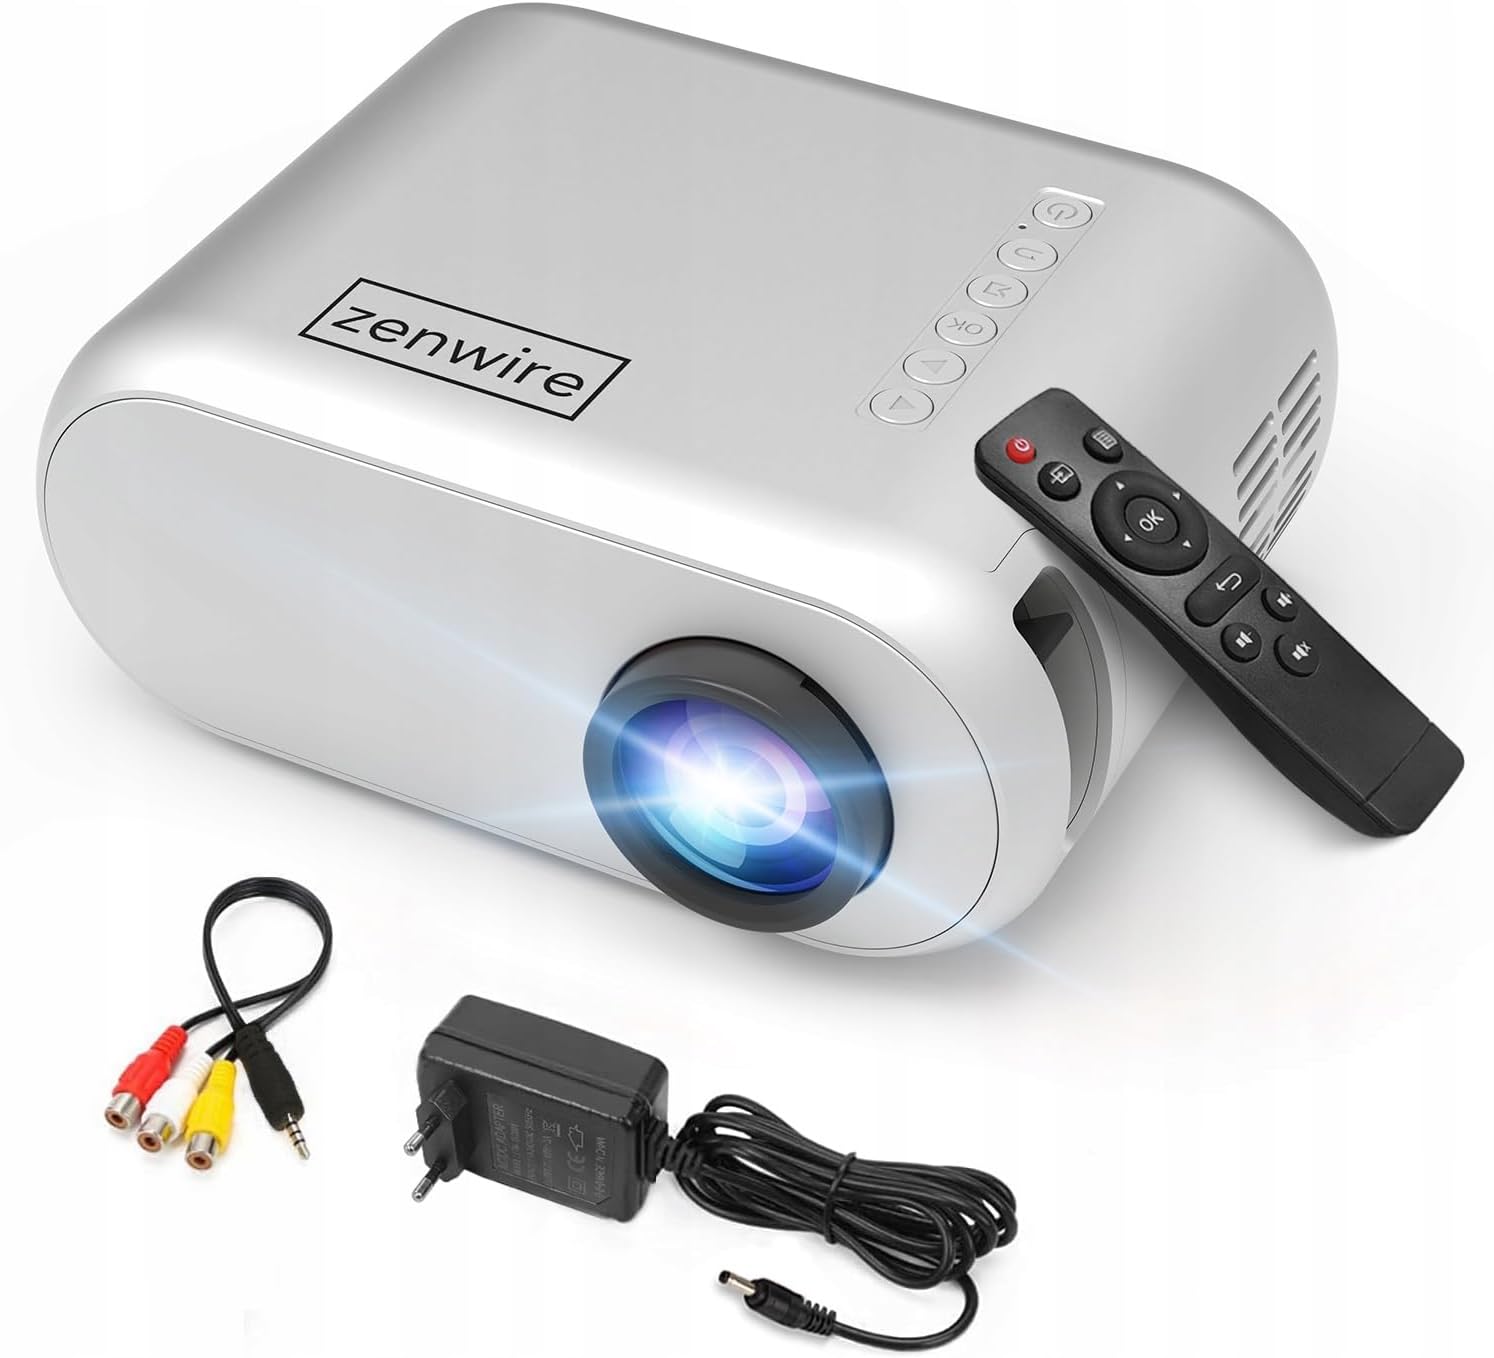
תמונה 3.1: חזית וחלק עליון view of the projector, showing the lens and top control panel.
פאנל אחורי וקישוריות
The rear panel of the projector features various ports for connecting external devices:

תמונה 3.2: אחורי view of the projector, highlighting the input/output ports.
- קלט AV: לחיבור מכשירים באמצעות כבל AV המצורף.
- כניסת HDMI: For connecting devices such as laptops, gaming consoles, or streaming sticks.
- יציאת USB: לחיבור כונני הבזק מסוג USB להפעלת מדיה files ישירות.
- פלט AUX: לחיבור רמקולים חיצוניים או אוזניות.
- כניסת מתח DC: לחיבור מתאם החשמל.
לוח הבקרה העליון
The top of the projector features a control panel for basic operations:
- לחצן הפעלה: מפעיל או מכבה את המקרן.
- כפתורי ניווט (למעלה/למטה/שמאלה/ימינה): משמש לנווט בתפריטים.
- לחצן אישור: מאשר בחירות.
- כפתור חזרה: חוזר לתפריט או למסך הקודם.
- לחצן המקור: Selects input source (HDMI, AV, USB).
4. התקנה
4.1 מיקום
Place the projector on a stable, flat surface. Ensure there is adequate space around the projector for ventilation. The projection distance affects the screen size. Refer to the image below for recommended distances and corresponding screen sizes.

Image 4.1: Recommended projection distances and screen sizes.
- For a 30-inch screen, place the projector approximately 0.9 meters away.
- For a 50-inch screen, place the projector approximately 1.5 meters away.
- For an 80-inch screen, place the projector approximately 2.4 meters away.
- For a 100-inch screen, place the projector approximately 3.0 meters away.
4.2 חיבור מתח
Connect the power adapter to the DC Power Input port on the projector, then plug the adapter into a power outlet.
4.3 חיבור התקנים
The Zenwire D300S supports various input sources:
תמונה 4.2: דוגמהamples of devices that can be connected to the projector.
- HDMI: Connect your laptop, gaming console, or streaming device using an HDMI cable.
- USB: הכנס כונן הבזק מסוג USB ליציאת ה-USB כדי להפעיל מדיה files ישירות.
- AV: Use the included AV cable to connect older devices like DVD players.
- Audio Out (AUX): Connect external speakers or headphones to the AUX port for enhanced audio.
4.4 התאמת פוקוס
Turn on the projector. Adjust the focus ring located near the lens until the projected image is clear and sharp.
5. הוראות הפעלה
5.1 הפעלה/כיבוי
לחץ על לחצן ההפעלה במקרן או בשלט רחוק כדי להפעיל או לכבות את המכשיר.
5.2 בחירת מקור
After powering on, use the 'Source' button on the projector or remote control to select the desired input source (HDMI, AV, USB).
5.3 ניווט בתפריט
Use the navigation buttons (Up/Down/Left/Right) on the projector or remote to browse through menus. Press 'OK' to confirm a selection and 'Back' to return.
5.4 בקרת עוצמת הקול
כוונן את עוצמת הקול באמצעות לחצני עוצמת הקול בשלט הרחוק.
5.5 Connecting to a Phone/Laptop
To project content from a phone or laptop:
- למחשבים ניידים: Connect via HDMI cable. Select HDMI as the input source on the projector.
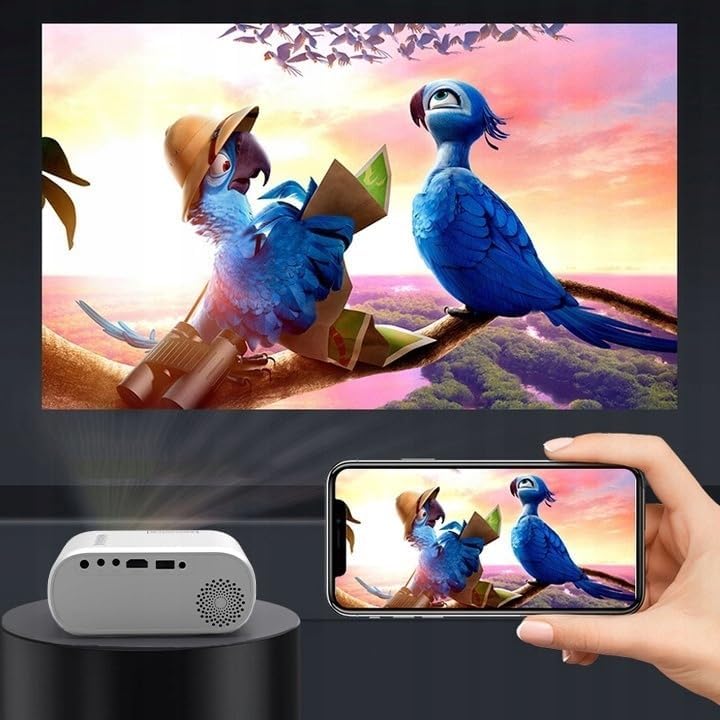
- עבור טלפונים: Depending on your phone model, you may need an adapter (e.g., USB-C to HDMI, Lightning to HDMI) to connect via HDMI. Alternatively, some phones support wireless display technologies that can be used with a compatible streaming stick connected to the projector's HDMI port.

Image 5.1: Projecting content from a smartphone to the Zenwire D300S Mini Projector.
6. תחזוקה
6.1 ניקוי העדשה
השתמשו במטלית רכה ונטולת סיבים המיועדת במיוחד לעדשות אופטיות כדי לנגב בעדינות את עדשת המקרן. אין להשתמש בחומרי ניקוי שוחקים או בכוח מופרז.
6.2 ניקוי גוף המקרן
נגבו את החלק החיצוני של המקרן בעזרת מטלית רכה ויבשה. במקרה של סימנים עקשניים, נקו מעטamp ניתן להשתמש במטלית, ולאחר מכן במטלית יבשה.
6.3 אוורור
Regularly check that the ventilation openings are free from dust and obstructions to ensure proper airflow and prevent overheating.
7. פתרון תקלות
אם נתקלתם בבעיות עם המקרן שלכם, אנא עיינו בבעיות הנפוצות ובפתרונות הבאים:
| בְּעָיָה | סיבה אפשרית | פִּתָרוֹן |
|---|---|---|
| אין תמונה מוקרנת | Power not connected, incorrect input source, device not sending signal. | Check power connection, select correct input source, ensure connected device is on and outputting video. |
| התמונה מטושטשת | Focus not adjusted, projector too close/far. | Adjust the focus ring, reposition the projector according to recommended distances. |
| אין קול | Volume too low, external speakers not connected, audio format not supported. | Increase volume, connect external speakers via AUX, check audio settings on source device. |
| השלט רחוק לא עובד | Batteries dead, obstruction between remote and projector. | Replace batteries, ensure clear line of sight to the projector's IR receiver. |
8. מפרטים
- דֶגֶם: Zenwire D300S
- רזולוציה מקורית: 1280 x 720p HD
- בְּהִירוּת: 3000 לומן (100 לומן ANSI)
- קישוריות: HDMI, USB, AUX, AV
- יחס גובה-רוחב: 16:9 / 4:3
- מרחק הקרנה: 0.9m - 3.0m (approx. 30-100 inches)
9. אחריות ותמיכה
The Zenwire D300S Mini Projector comes with a standard manufacturer's warranty. Please refer to the warranty card included in your package for specific terms and conditions. For technical support or service inquiries, please contact your retailer or the Zenwire customer service department.