Duex DX H110Z M2
מדריך למשתמש של לוח האם Duex DX H110Z M2
Model: DX H110Z M2
1. המוצר נגמרview
The Duex DX H110Z M2 Motherboard is an entry-level micro-ATX motherboard designed to support 6th and 7th generation Intel processors. It is built on the Intel H110 chipset and provides support for DDR4 memory, SATA storage, and PCIe expansion. This manual provides essential information for setting up, operating, and maintaining your motherboard.
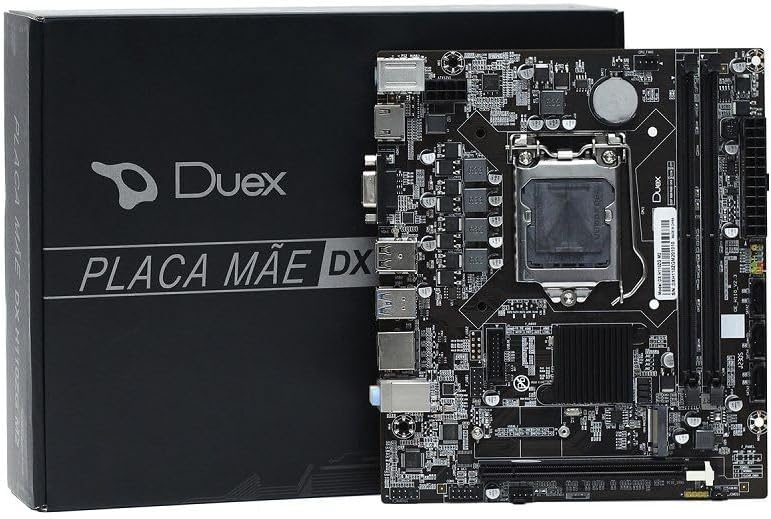
איור 1: The Duex DX H110Z M2 Motherboard shown alongside its product packaging. The motherboard features an LGA 1151 CPU socket, two DDR4 DIMM slots, and various I/O ports.
2. מפרטים
| תכונה | פְּרָט |
|---|---|
| דֶגֶם | DX H110Z M2 |
| תמיכה במעבד | Intel Socket 1151 for 6th/7th Generation Core i7/i5/i3/Pentium/Celeron CPUs (supports Intel 14 nm CPU) |
| ערכת שבבים | אינטל H110 |
| זֵכֶר | 2x 288-pin DDR4 Slots, up to 32GB, supports Dual-Channel DDR4 2133/2400/2666 MHz memory |
| BIOS | ביוס EFI |
| ממשק I/O | 1x PS/2, 1x VGA, 1x DP, 1x HDMI, 2x USB 2.0, 2x USB 3.0, 1x RJ45, 1x Audio |
| ממשק מובנה | 1x 24-pin ATX, 1x 8-pin ATX 12V, 3x USB connectors (supporting 5x USB 2.0), 1x F_AUDIO, 1x F_PANEL, 1x Speaker, 2x Fan, 3x Serial ATA, 1x COM |
| Integrated Sound | 6-channel HD Audio Codec, front audio interface, front stereo mic interface |
| LAN משולב | 10/100/1000 Mbps LAN onboard |
| חריצי הרחבה | 1x PCI Express x16, 1x M.2, 1x PCIE x1, 1x WIFI slot |
| מידות המוצר | 20 x 30 x 20 ס"מ |
| משקל המוצר | 200 גרם |
3. מדריך התקנה
Follow these steps to properly install your Duex DX H110Z M2 Motherboard into your computer system.
- הכן את סביבת העבודה שלך: Ensure your workspace is clean, well-lit, and free of static electricity. Use an anti-static wrist strap or frequently touch a grounded metal object.
- התקן את המעבד:
- Carefully open the CPU socket lever on the motherboard.
- Align the CPU with the socket, matching the golden triangle on the CPU with the triangle on the socket.
- הכנס בעדינות את המעבד לתוך השקע. אל תלחץ עליו בכוח.
- סגור את ידית שקע המעבד כדי לאבטח את המעבד למקומו.
- התקנת מקרר המעבד: מרחו משחה תרמית (אם לא מרוח מראש) והתקינו את מקרר המעבד בהתאם להוראות היצרן. חברו את כבל מאוורר המעבד לראש ה-CPU_FAN בלוח האם.
- התקנת מודולי RAM:
- פתחו את הקליפסים בשני קצוות חריצי זיכרון DDR4.
- יישר את החריץ במודול ה-RAM עם המפתח בחריץ ה-DIMM.
- לחץ בחוזקה על שני קצוות מודול ה-RAM עד שהקליפסים יתייצבו במקומם.
- התקנת לוח האם: Install the necessary standoffs in your PC case. Carefully place the motherboard onto the standoffs, aligning the screw holes. Secure the motherboard with screws.
- חיבור כבלי חשמל:
- Connect the 24-pin ATX power cable from your power supply to the main power connector on the motherboard.
- Connect the 8-pin ATX 12V power cable (or 4-pin, depending on your PSU) to the CPU power connector.
- חיבור התקני אחסון: Connect your SATA SSDs/HDDs to the SATA ports on the motherboard using SATA data cables. Connect the power cables from your PSU to these devices. If using an M.2 SSD, install it into the M.2 slot and secure it with the provided screw.
- חיבור כבלי הפאנל הקדמי: Connect the power switch, reset switch, HDD LED, power LED, and USB/audio headers from your PC case to the corresponding pins on the motherboard's front panel header (F_PANEL). Refer to the motherboard's silkscreen labels for correct pin alignment.
- התקנת כרטיסי הרחבה: Insert any necessary PCI Express cards (e.g., graphics card, Wi-Fi card) into the appropriate slots and secure them.
- חבר ציוד היקפי: חבר את הצג, המקלדת, העכבר וציוד היקפי אחר ליציאות הקלט/פלט האחוריות.
4. הוראות הפעלה
Once your system is assembled, follow these general operating guidelines.
- אתחול ראשון: After assembly, ensure all connections are secure. Power on your system. The system should display the BIOS/UEFI screen.
- תצורת BIOS/UEFI:
- לחץ על המקש המיועד (בדרך כלל DEL or F2) במהלך האתחול כדי להיכנס להגדרות ה-BIOS/UEFI.
- הגדר את סדר האתחול, זמן המערכת והגדרות חיוניות אחרות לפי הצורך.
- שמור את השינויים וצא מה-BIOS/UEFI.
- התקנת מערכת הפעלה: הכנס את מדיית ההתקנה של מערכת ההפעלה (כונן USB או DVD) ופעל לפי ההנחיות שעל המסך כדי להתקין את מערכת ההפעלה המועדפת עליך.
- התקנת דרייבר: After OS installation, install the necessary drivers for your motherboard (chipset, LAN, audio, graphics, etc.). These are typically found on the manufacturer's website or an included driver CD/USB.
- יציבות מערכת: Monitor your system's temperature and performance. Ensure proper airflow within your PC case to prevent overheating.
5. תחזוקה
תחזוקה שוטפת מסייעת להבטיח את אורך החיים והביצועים האופטימליים של לוח האם שלך.
- הסרת אבק: Periodically clean dust from inside your PC case, especially from the motherboard, CPU cooler, and fan vents. Use compressed air or a soft brush. Ensure the system is powered off and unplugged before cleaning.
- עדכוני BIOS/UEFI: Check the Duex webאתר האינטרנט לקבלת עדכוני ה-BIOS/UEFI האחרונים. עדכונים יכולים לשפר את התאימות, היציבות והביצועים. יש לפעול בקפידה אחר הוראות העדכון כדי למנוע נזק ללוח האם.
- עדכוני דרייבר: Keep your system drivers (chipset, LAN, audio, etc.) updated to ensure compatibility and optimal performance with your operating system and hardware.
- ניהול כבלים: Ensure cables inside your PC case are neatly organized to improve airflow and prevent obstruction of components.
- תנאים סביבתיים: Operate the motherboard in a cool, dry environment. Avoid extreme temperatures, humidity, and direct sunlight.
6. פתרון תקלות
סעיף זה מספק פתרונות לבעיות נפוצות שאתה עשוי להיתקל בהן בלוח האם שלך.
- אין חשמל/אין אתחול:
- Check all power connections (24-pin ATX, 8-pin ATX 12V) from the power supply to the motherboard.
- Ensure the power supply is switched on and plugged into a working outlet.
- Verify that the front panel power switch cable is correctly connected to the motherboard.
- נסה להכניס מחדש מודולי RAM וכרטיסי הרחבה.
- אין תצוגה:
- Ensure your monitor is connected to the correct video output (motherboard integrated graphics or discrete graphics card).
- Check the monitor's power and input source.
- Reseat your graphics card (if applicable) and ensure its power cables are connected.
- נסה לאתחל עם דיסק און קי אחד בלבד.
- חוסר יציבות/קריסות מערכת:
- בדוק את טמפרטורות המעבד והמערכת. התחממות יתר עלולה לגרום לחוסר יציבות.
- הפעל כלי אבחון זיכרון כדי לבדוק אם יש זיכרון RAM פגום.
- ודא שכל הדרייברים מעודכנים.
- Check for loose connections or components.
- לא זוהה ציוד היקפי:
- נסה לחבר את ההתקן ההיקפי ליציאת USB אחרת.
- ודא שמנהלי ההתקן של הציוד ההיקפי מותקנים.
- בדוק את הגדרות ה-BIOS/UEFI כדי לוודא שיציאות ה-USB מופעלות.
- איפוס BIOS: If you encounter issues after changing BIOS settings, you can reset the BIOS to default settings. This can usually be done by:
- Entering the BIOS setup and selecting "Load Optimized Defaults" or similar option.
- Clearing the CMOS by removing the CMOS battery for a few minutes (with the system unplugged) or using the CLR_CMOS jumper on the motherboard (refer to motherboard diagram).
7. אחריות ותמיכה
למידע על אחריות ותמיכה טכנית, אנא עיינו באתר הרשמי של Duex webאתר או צור קשר עם הספק המקומי שלך. שמור את הוכחת הרכישה שלך לצורך תביעות אחריות.
משאבים מקוונים:
- Visit the official Duex website for driver downloads, BIOS updates, and FAQs.
- Consult online forums and communities for peer support and additional troubleshooting tips.