
1. הקדמה
This manual provides detailed instructions for the installation, operation, and maintenance of your OLONETO 100A Solar Charge Controller. This device is designed to manage power flow from your solar panel to your battery bank and DC loads, ensuring efficient charging and protection for your battery system. It supports 12V, 24V, 36V, and 48V battery systems with automatic voltagזיהוי אלקטרוני.
Note: This controller utilizes a combination of MPPT and PWM charging technologies. It is not a 100% true MPPT controller.
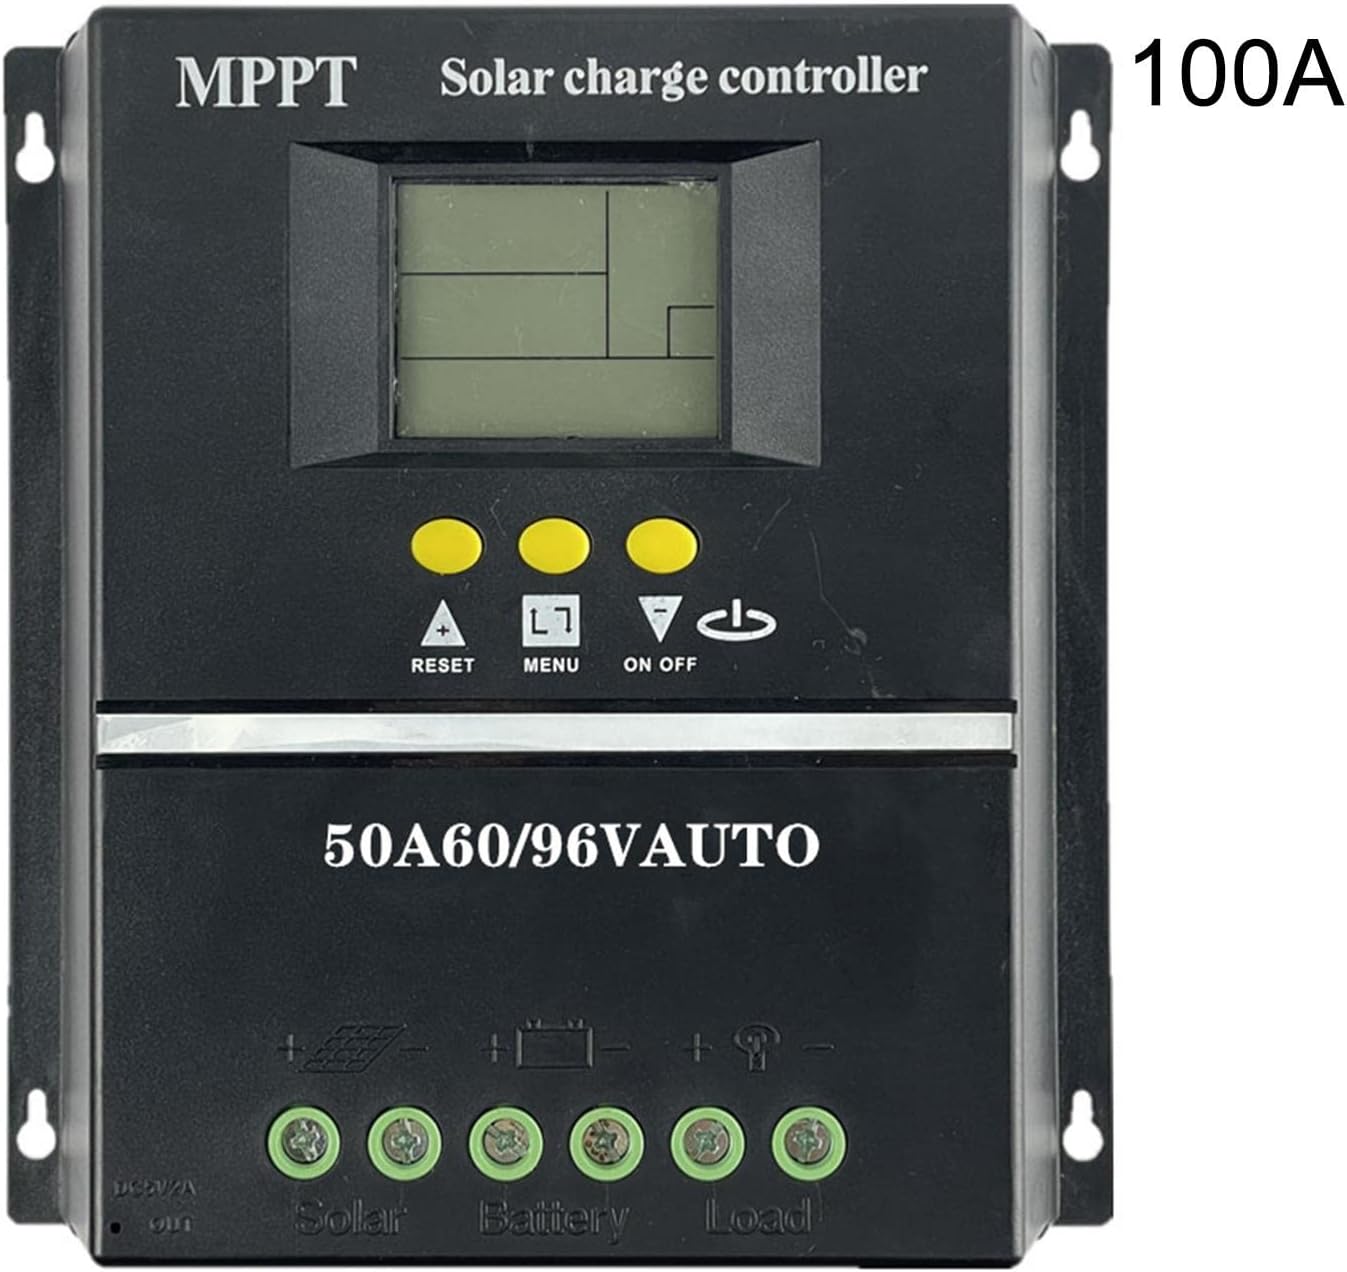
איור 1: חזית view of the OLONETO 100A Solar Charge Controller, showing the LCD display, control buttons, and connection terminals. The "100A" rating is visible on the top right.
2. הוראות בטיחות
- Ensure all connections are tight and correct to prevent damage to the controller or other components.
- Always connect the battery to the controller רֵאשִׁית, and then connect the solar panel. Disconnect in the reverse order: solar panel first, then battery. Failure to follow this sequence may damage the controller.
- ודא את נפח הסוללהtage is sufficient for the controller to recognize the system voltage (e.g., >10V for 12V battery, >20V for 24V battery, >30V for 36V battery, >40V for 48V battery).
- התקן את הבקר באזור מאוורר היטב, הרחק מאור שמש ישיר, טמפרטורות גבוהות ולחות.
- Do not attempt to repair or modify the controller yourself. Contact qualified personnel for service.
3. תכונות מוצר
The OLONETO Solar Charge Controller offers several key features for efficient solar power management:
- כרך אוטומטיtagזיהוי אלקטרוני: Automatically detects 12V, 24V, 36V, or 48V battery systems.
- תצוגת LCD: Provides real-time information on battery status, charging parameters, and load status.
- יציאת USB כפולה: Convenient 5V output for charging mobile phones and other USB devices.
- פרמטרים מתכווננים: Allows users to customize charging and discharge settings.
- Smart Charge Management: Optimizes battery charging to prolong battery life.
- הגנת הסביבה: Designed with green environmental protection principles.
- Automatic Focusing MPPT Tracking: High charging efficiency with non-stop detection during charging and bidirectional focusing tracking.

Figure 2: Diagram illustrating key features of the solar charge controller, including LCD display for battery power supply voltage, smart charge capabilities, 5V USB output, adjustable parameters, and green environmental protection.

Figure 3: Image highlighting the automatic focusing MPPT tracking feature, which ensures high charging efficiency and continuous detection during the charging process.
4. התקנה והתקנה
4.1 רצף חיווט
- חבר את הסוללה: חברו את הסוללה להדקים של הבקר. ודאו כי הקוטביות נכונה (+ ל-+ ו-- ל--). הבקר יזהה אוטומטית את עוצמת הסוללה.tage.
- חבר את הפנל הסולארי: Connect the solar panel to the controller's solar panel terminals. Ensure correct polarity.
- חבר את עומס הזרם הישר (אופציונלי): Connect your DC loads to the controller's load terminals. Ensure correct polarity.
Important: Always follow this connection order: Battery → Solar Panel → Load. To disconnect, follow the reverse order: Load → Solar Panel → Battery.
4.2 Recommended Solar Panel Voltage
- עֲבוּר 12V battery systems: Use a solar panel with approximately 18V תְפוּקָה.
- עֲבוּר 24V battery systems: Use a solar panel with approximately 30-37V תְפוּקָה.
- עֲבוּר 36V battery systems: Use a solar panel with approximately 45-55V תְפוּקָה.
- עֲבוּר 48V battery systems: Use a solar panel with approximately 60-72V תְפוּקָה.
4.3 דיאגרמות חיווט

Figure 4: Basic wiring diagram showing connections for the solar panel, battery, and DC loads to the controller. Ensure positive (+) and negative (-) terminals are correctly matched.

Figure 5: Detailed wiring diagram illustrating connections for the solar panel, battery, DC load, and the integrated USB output for charging external devices.
5. הוראות הפעלה
5.1 הפעלה ראשונית ותצוגה
Once the battery is connected, the controller's LCD display will power on, showing current system parameters. The controller automatically identifies the battery voltage (12V, 24V, 36V או 48V).
5.2 פונקציות כפתורים
- ▲ (Up/Reset): Used to increase values during setting, or as a reset function.
- תפריט: Used to navigate through display screens and enter/exit setting modes.
- ▼ (Down/On/Off): Used to decrease values during setting, or to toggle the DC load on/off.
5.3 טעינה כרךtage הגדרות
To adjust charging parameters:
- After connecting the battery, ensure the clock is set and saved (see 5.4 Clock Setting).
- לחץ והחזק את ה"▲" button for 3-5 seconds. The screen will display "L**V" (floating charging voltagה).
- השתמש ב-"▼" button to adjust the floating charging voltage.
- Briefly press "▲" again. The screen will display "H**V" (boost charging voltagה).
- השתמש ב-"▼" button to adjust the boost charging voltage.
- Briefly press "▲" again. The screen will display "F**V" (low-voltage cut-off כרךtage for DC load).
- השתמש ב-"▼" button to adjust the low-voltage cut-off כרךtage.
- After making all desired adjustments, press and hold the "▲" button for 3-5 seconds to save the settings and exit.
5.4 הגדרת שעון
To set the internal clock:
- ודא שהסוללה מחוברת.
- לחץ על ה"▲" או "▼" buttons to navigate to the clock setting interface.
- השתמש ב-"▲"ו"▼" buttons to adjust the time.
- Briefly press the "MENU" button (represented as "□" in some descriptions) to save the clock setting.
5.5 Load Protection Voltage הפניה
The following are typical battery charging voltages for different system voltages:
- כאשר משתמשים ב- a 12V battery, the battery charging voltage is typically 13.7V.
- כאשר משתמשים ב- a 24V battery, the battery charging voltage is typically 27.4V.
- כאשר משתמשים ב- a 36V battery, the battery charging voltage is typically 41.1V.
- כאשר משתמשים ב- a 48V battery, the battery charging voltage is typically 54.8V.
6. תחזוקה
- בדיקה רגילה: בדקו מעת לעת את כל חיבורי החיווט לאיתור הידוק וקורוזיה.
- נִקָיוֹן: שמרו על ניקיון הבקר, ללא אבק ולכלוך. השתמשו במטלית יבשה לניקוי.
- אוורור: Ensure the installation area remains well-ventilated to prevent overheating.
- בריאות הסוללה: ניטור בריאות ועוצמת הסוללהtage regularly to ensure optimal system performance.
7. פתרון תקלות
| בְּעָיָה | סיבה אפשרית | פִּתָרוֹן |
|---|---|---|
| תצוגת הבקר כבויה. | אין סוללה מחוברת או עוצמת סוללהtagה נמוך מדי. | Connect battery or ensure battery voltage is above minimum threshold (e.g., >10V for 12V system). |
| אין טעינה מפאנל סולארי. | Solar panel not connected, incorrect polarity, or insufficient sunlight. | Check solar panel connections and polarity. Ensure adequate sunlight. |
| כרך ידtage identification error. | סוללה כרךtage was too low when connected initially. | ודא נפח הסוללהtage is above the minimum threshold before connecting to the controller. Disconnect and reconnect the battery. |
| DC load not working. | Load is off, incorrect wiring, or battery voltage is below low-voltagחיתוך e. | Check load connection and polarity. Press the "▼" button to toggle load. Check battery voltage and adjust low-voltage cut-off if necessary. |
8. מפרטים
| פָּרָמֶטֶר | עֵרֶך |
|---|---|
| דֶגֶם | 100A |
| מותג | OLONETO |
| מערכת כרךtage | 12V/24V/36V/48V אוטומטי |
| טכנולוגיית טעינה | MPPT/PWM Hybrid |
| יציאת USB | Dual USB, 5V |
| משקל פריט | 200 גרם |
| מידות (בערך) | 190 מ"מ (7.48 אינץ') x 180 מ"מ (7.08 אינץ') |

Figure 6: Physical dimensions of the solar charge controller, showing approximate measurements of 190mm (7.48 inches) in width and 180mm (7.08 inches) in height.
9. אחריות ותמיכה
למידע על אחריות ותמיכה טכנית, אנא עיין בתיעוד המצורף לרכישה שלך או פנה לספק שלך. שמור את הוכחת הרכישה שלך עבור כל תביעת אחריות.