
1. הקדמה
Thank you for choosing the SILENTWARE Air 1000 Black ATX Midi Tower PC Case. This manual provides essential information for the proper installation, operation, and maintenance of your new PC case. Please read this manual thoroughly before beginning the assembly process to ensure a smooth and successful build.
2. מידע בטיחות
- Always disconnect the power supply from the wall outlet before installing or removing any components inside the PC case.
- טפלו ברכיבים בזהירות כדי למנוע נזק מפריקה אלקטרוסטטית (ESD). שקלו להשתמש ברצועת יד אנטי-סטטית.
- Be cautious of sharp edges inside the case.
- Do not attempt to modify the case or its components, as this may void your warranty and pose safety risks.
- Keep the case away from water, moisture, and extreme temperatures.
3. תכולת החבילה
אנא ודא שכל הפריטים נמצאים בחבילה שלך:
- SILENTWARE Air 1000 Black ATX Midi Tower PC Case
- Pre-installed 4x 120mm ARGB Fans
- Accessory box (screws, cable ties, standoffs, etc.)
- מדריך למשתמש (מסמך זה)
4. המוצר נגמרview
The SILENTWARE Air 1000 is an ATX Midi Tower PC case designed for optimal airflow and component compatibility. It features a mesh front panel for maximum ventilation and a tempered glass side panel to showcase your build.


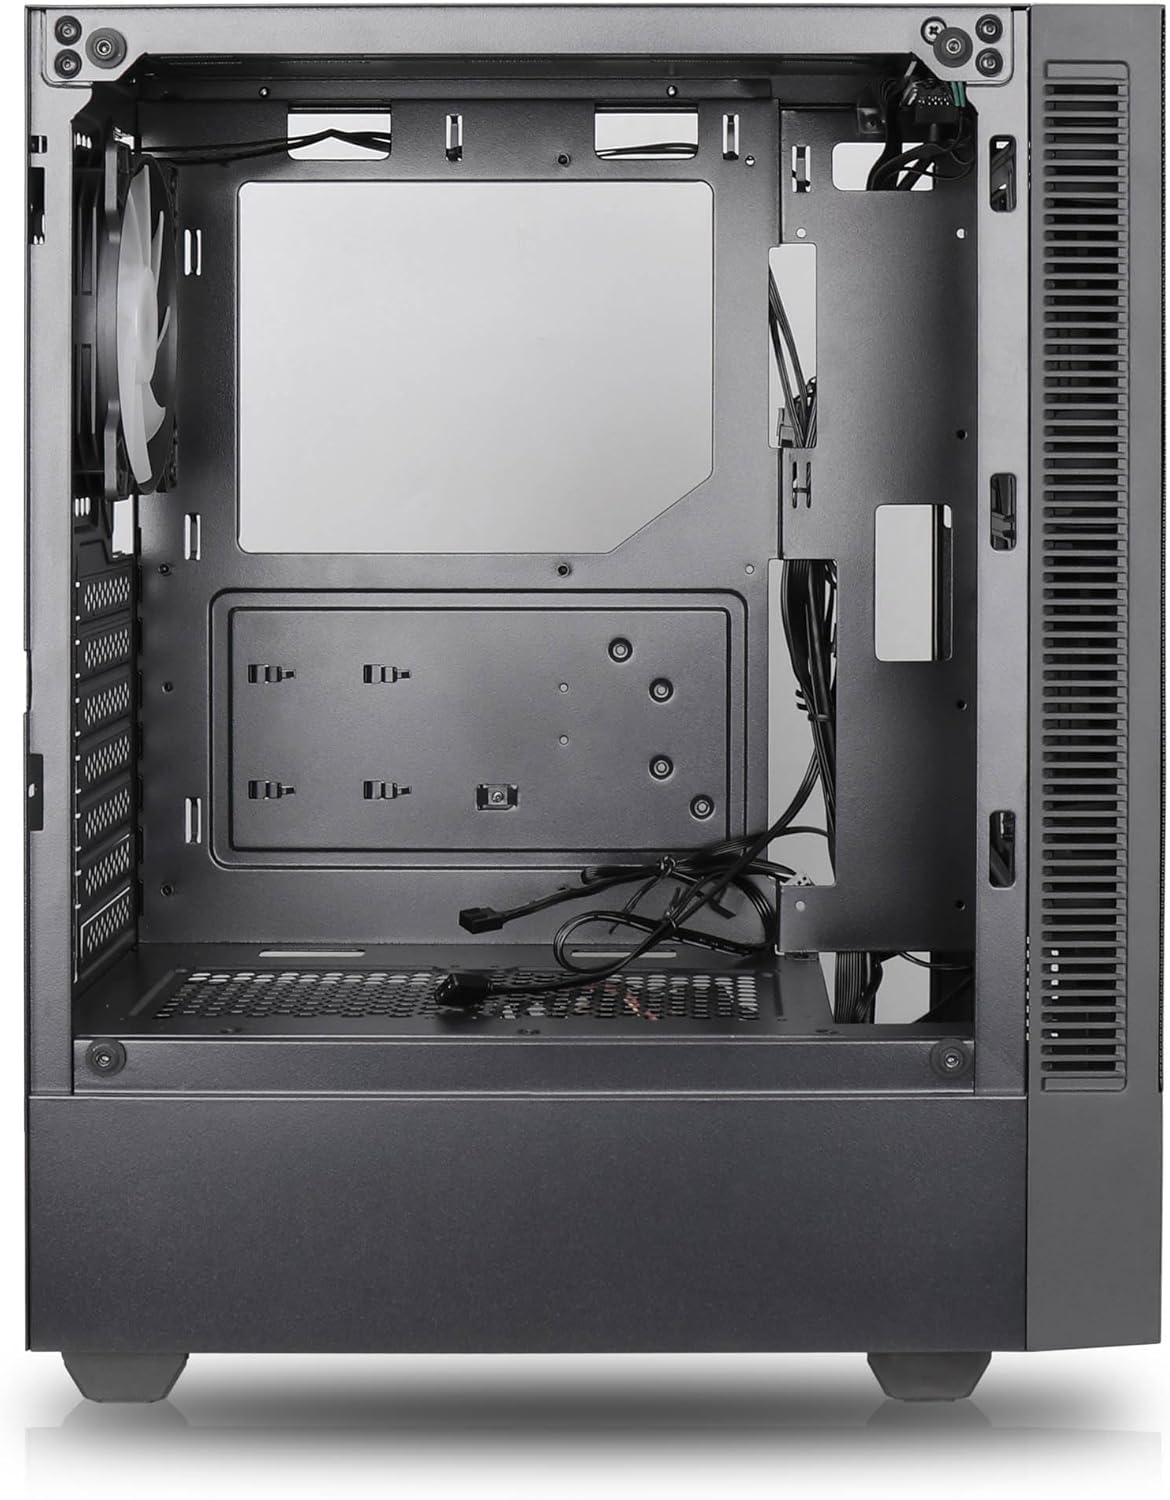

תכונות עיקריות:
- זרימת אוויר מרבית: Large mesh front panel and four pre-installed 140mm A-RGB fans with hydraulic bearings ensure excellent ventilation.
- Easy PC Building: Thoughtful design with daisy-chain connections simplifies installation, eliminating the need for additional adapters or controllers.
- עיצוב באיכות גבוהה: Genuine tempered glass side panel showcases installed components and provides a minimalist, premium aesthetic.
- Flexible Lighting and Control: 3-pin A-RGB fans and 4-pin fan control allow for impressive lighting effects and easy adjustment of fan speed and curves directly from the motherboard.
- Powerful Component Compatibility: Supports GPUs up to 400mm long, radiators up to 360mm (front and top) and 140mm (rear), and space for up to 4 fans.
- Compact Case with Ample Space: Midi tower format accommodates E-ATX, ATX, mATX, and ITX motherboards, up to two 2.5" SSDs, two 3.5" HDDs, and ATX power supplies.
5. מדריך התקנה
Follow these steps for component installation. Refer to your individual component manuals for specific instructions.
5.1. הכנת התיק
- הנח את המארז על משטח ישר ויציב.
- Carefully remove the tempered glass side panel by unscrewing the thumb screws and gently pulling it away. Set it aside on a soft, non-abrasive surface.
- Remove the solid right side panel by unscrewing the thumb screws and sliding it backward.
5.2. התקנת לוח אם
- התקן את מגן ה-I/O בפתח האחורי של המארז.
- Ensure the correct standoffs are installed for your motherboard form factor (E-ATX, ATX, mATX, ITX). Adjust or add standoffs as needed.
- הנח בזהירות את לוח האם שלך על המעמדים, תוך יישור חורי הברגים.
- אבטחו את לוח האם בעזרת הברגים המצורפים. אין להדק יתר על המידה.
5.3. התקנת יחידת ספק כוח (PSU)
- מקם את ספק הכוח בתא הייעודי בחלק האחורי התחתון של המארז.
- Ensure the PSU fan faces downwards (if the case has a bottom vent) or upwards, depending on your cooling preference.
- Secure the PSU to the case with the provided screws from the rear.
5.4. התקנת כונן אחסון
כונני SSD בגודל 2.5 אינץ':
- Locate the 2.5" drive mounts (typically behind the motherboard tray).
- Secure the SSDs using the provided screws.
כוננים קשיחים בגודל 3.5 אינץ':
- Locate the 3.5" drive cages (usually near the PSU shroud).
- Slide the HDDs into the drive trays and secure them with screws or tool-less mechanisms if available.
5.5. התקנת כרטיס מסך (GPU)
- הסר את כיסויי חריצי ה-PCIe הדרושים מחלקו האחורי של המארז.
- Align your GPU with the PCIe slot on the motherboard and press firmly until it clicks into place.
- Secure the GPU to the case with screws.
5.6. ניהול כבלים
נצלו את פתחי ניתוב הכבלים ואת נקודות הקשירה שמאחורי מגש לוח האם כדי לנהל את הכבלים. זה משפר את זרימת האוויר ואת האסתטיקה.
6. תפעול
6.1. הפעלה
After all components are installed and cables are connected, reattach the side panels. Connect the power cable to the PSU and a wall outlet, then press the power button on the top I/O panel of the case.
6.2. בקרת מאוורר ARGB
The pre-installed ARGB fans feature 3-pin ARGB connectors for lighting control and 4-pin connectors for fan speed control. These can be connected directly to compatible headers on your motherboard. Use your motherboard's software or BIOS settings to customize lighting effects and fan curves.
7. תחזוקה
7.1. ניקיון
- יש לנקות באופן קבוע את מסנני האבק (אם קיימים) כדי לשמור על זרימת אוויר אופטימלית.
- Use a can of compressed air to remove dust from inside the case and components.
- נגב משטחים חיצוניים עם רך, דamp בַּד. הימנע מכימיקלים קשים.
- For the tempered glass panel, use a glass cleaner and a microfiber cloth.
8. פתרון תקלות
- המחשב לא נדלק: Check all power connections, including the 24-pin motherboard power, 8-pin CPU power, and GPU power cables. Ensure the PSU switch is in the 'ON' position.
- Fans not spinning/RGB not working: Verify that fan and ARGB headers are correctly connected to the motherboard. Check motherboard software for fan speed and lighting control settings.
- התחממות יתר: Ensure proper airflow by checking fan orientation and cleaning dust filters. Verify CPU cooler and GPU cooler are properly seated.
- אין תצוגה: Confirm the monitor cable is connected to the graphics card (not the motherboard integrated graphics, unless you are using integrated graphics). Reseat the graphics card and RAM modules.
9. מפרטים
| תכונה | מִפרָט |
|---|---|
| מותג | SILENTWARE |
| שם הדגם | Silentware Flow 100 ARGB |
| מספר דגם של פריט | FLOW100 |
| ASIN | B0CB8CZ5GF |
| צֶבַע | שָׁחוֹר |
| סוג מקרה | מגדל אמצע |
| חוֹמֶר | זכוכית מחוסמת |
| תאימות לוח אם | ATX, מיקרו ATX, מיני ITX |
| מכשירים תואמים | ATX, mATX, ITX motherboards, GPUs up to 325mm, radiators up to 360mm, 2.5" and 3.5" storage drives |
| שימושים מומלצים | משחקים |
| שיטת קירור | אֲוִיר |
| מאווררים מותקנים מראש | 4 מאווררי ARGB בגודל 120 מ"מ |
| גודל מאוורר | 140 Millimeters (Note: Product description mentions 140mm fans, while pre-installed are 120mm. Please verify with product packaging.) |
| סוג הרכבה של ספק כוח | הר תחתון |
| אורך GPU מקסימלי | 400 מ"מ |
| Radiator Support (Front/Top) | עד 360 מ"מ |
| תמיכה לרדיאטור (אחורי) | עד 140 מ"מ |
| מפרצי כוננים 2.5 אינץ' | עד 2 |
| מפרצי כוננים 3.5 אינץ' | עד 2 |
10. אחריות ותמיכה
For warranty information and technical support, please refer to the official SILENTWARE website or contact your retailer. Specific details regarding spare parts availability and software updates are not available in the provided product information.