
1. הקדמה
This manual provides detailed instructions for the Shutao HX1838 Infrared Remote Control Module and Receiver Kit. This kit is designed for various electronic projects, including microcontroller learning, development board experiments, and toy car starter kits. It enables wireless infrared communication for control applications.
2. המוצר נגמרview ורכיבים
The Shutao HX1838 kit includes multiple sets of infrared remote controls, HX1838 receiver modules, and connecting cables. Each set allows for independent infrared control functionality.

איור 2.1: A single set of the Shutao HX1838 Infrared Remote Control Kit, showing the remote control, HX1838 receiver module, infrared receiver head, and connecting cables.
2.1. Kit Contents (Per Set)
- Infrared Wireless Remote Control: A compact remote with various buttons for sending commands.
- HX1838 Infrared Receiving Head: The sensor component that detects infrared signals.
- HX1838 Infrared Receiver Module: A small circuit board that processes signals from the receiving head and outputs a digital signal.
- כבל חיבור: Wires for connecting the module to a microcontroller or power source.
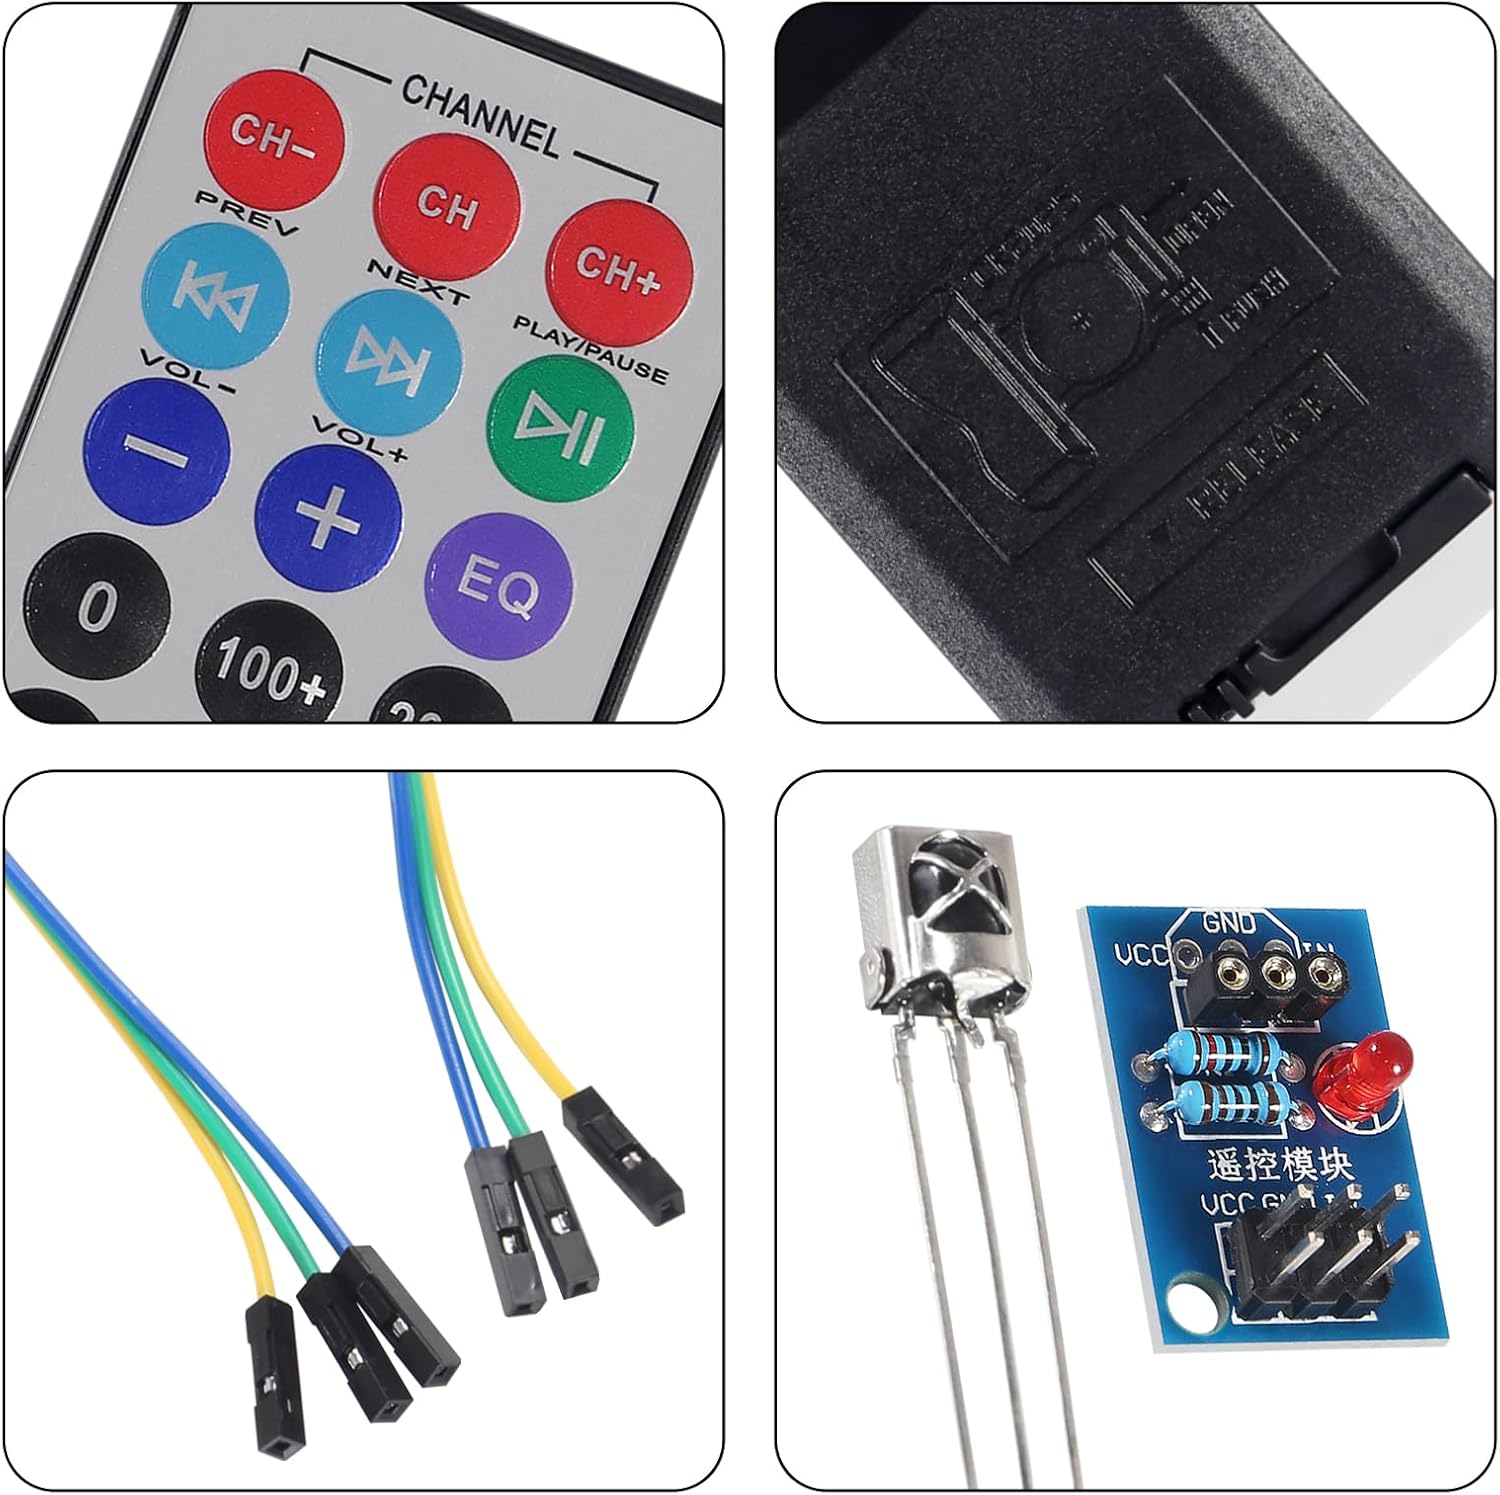
איור 2.2: מְפוֹרָט view of the remote control buttons, the battery compartment on the back of the remote, the HX1838 receiver module with its components, and the infrared receiver head.
3. מפרטים
3.1. Infrared Wireless Remote Control
- כרך הפעלהtage: 3V (powered by button lithium manganese battery)
- Infrared Carrier Frequency: 38KHz
- Effective Life: יותר מ-20,000 פעמים
- טווח שלט רחוק: 8-10 meters (actual range may vary due to obstacles and receiver quality). Theoretical test distance of the kit is approximately 5-8 meters.
3.2. HX1838 Infrared Receiver Module
- חיישן: HX1838, high sensitivity
- כרך עבודהtage: 5V
- Output Form: פלט דיגיטלי
- תכונות: Power working indicator, receives 38KHz frequency data of any NEC remote control code.
3.3. מימדים פיזיים
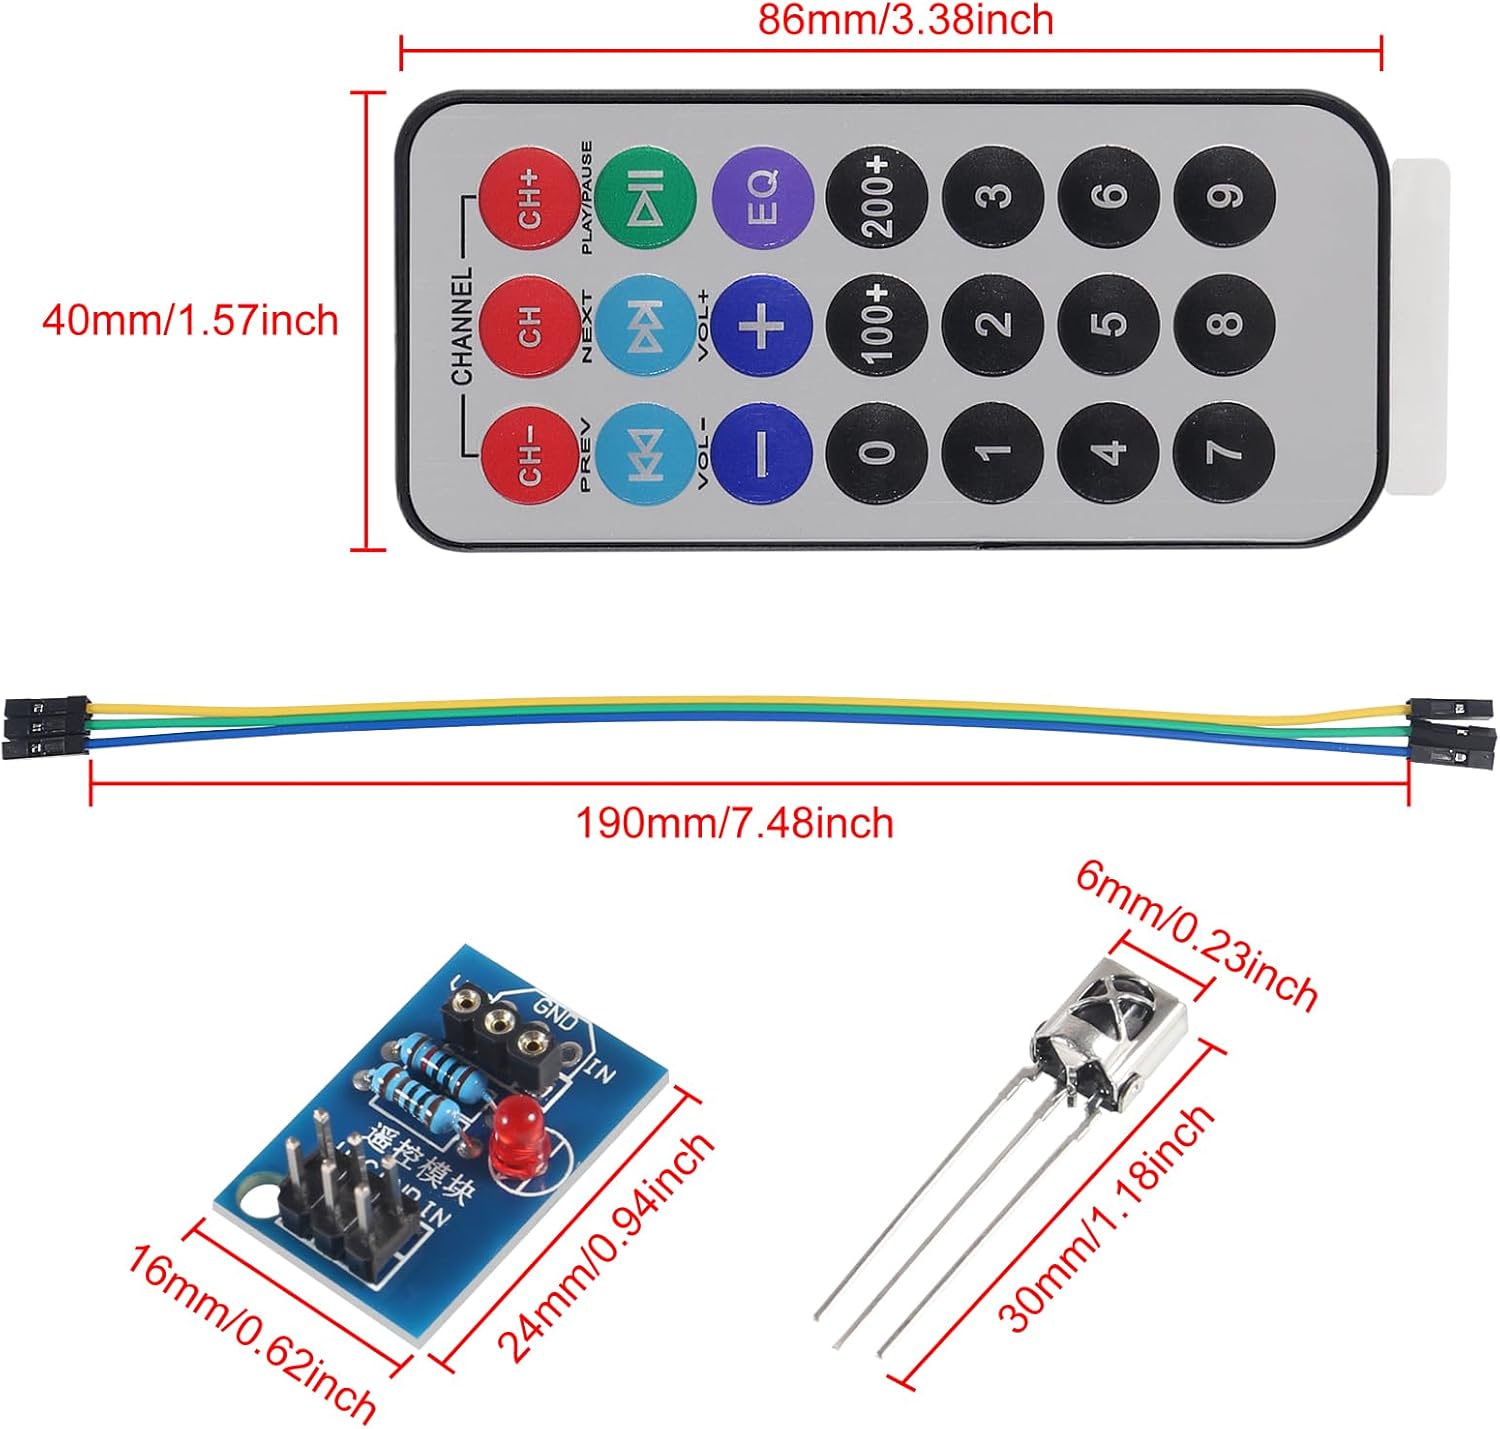
איור 3.1: Dimensions of the remote control (86mm x 40mm), connecting cable (190mm), HX1838 receiver module (24mm x 16mm), and infrared receiver head (30mm x 6mm).
4. הגדרה וחיבור
Proper connection of the HX1838 receiver module to your microcontroller is crucial for its operation. The module has three main interface pins:
- VCC: Connect to an external 3.3V-5V power supply. This can be directly connected to a 5V or 3.3V microcontroller's power output.
- GND: Connect to the external Ground (GND) of your circuit.
- IN: Connect to a digital input/output (I/O) pin of your microcontroller. This pin has a 10K pull-up resistor already designed into the module.
שלבי חיבור:
- Solder the IR Receiver Head: If not pre-soldered, carefully solder the HX1838 infrared receiving head onto the designated pins on the receiver module board. Ensure correct orientation as indicated on the PCB.
- חבר חשמל: Connect the VCC pin of the module to the 3.3V or 5V power supply of your microcontroller.
- חיבור קרקע: Connect the GND pin of the module to the Ground (GND) pin of your microcontroller.
- Connect Data Output: Connect the IN pin of the module to a digital input pin on your microcontroller (e.g., Pin 12 on an Arduino).
- הכנס סוללה: Ensure the 3V button lithium manganese battery is correctly inserted into the remote control.
Once connected, the power indicator LED on the HX1838 receiver module should illuminate, indicating it is ready to receive signals.
5. הוראות הפעלה
The HX1838 Infrared Remote Control Module operates by receiving infrared signals transmitted by the accompanying remote control. These signals are typically NEC coded at a 38KHz carrier frequency.
5.1. שליחת פקודות
- Point the infrared remote control towards the HX1838 infrared receiving head.
- Press any button on the remote control. Each button press sends a unique infrared code.
5.2. Receiving Commands (Microcontroller Integration)
To interpret the signals, your microcontroller needs to be programmed to decode the incoming infrared data from the 'IN' pin of the HX1838 module. Libraries such as the 'IRremote' library for Arduino are commonly used for this purpose.
- Program Microcontroller: Upload code to your microcontroller that initializes an IR receiver on the connected digital pin.
- Decode Signals: The program should continuously listen for incoming IR signals and decode them into their corresponding hexadecimal or decimal values.
- Implement Actions: Based on the decoded button values, your microcontroller can then trigger specific actions (e.g., turn on an LED, control a motor, display information).
Refer to your microcontroller's documentation and relevant IR decoding libraries for specific programming examples.
6. תחזוקה
- ניקוי: Keep the infrared receiving head and the remote control's IR emitter clean and free from dust or obstructions. Use a soft, dry cloth for cleaning.
- החלפת סוללה: If the remote control's range decreases or it stops responding, replace the 3V button lithium manganese battery. Ensure correct polarity.
- אִחסוּן: Store the modules and remote controls in a dry, cool environment, away from direct sunlight and extreme temperatures.
- טיפול: Avoid dropping or subjecting the components to excessive physical shock, as this can damage internal circuitry.
7. פתרון תקלות
| בְּעָיָה | סיבה אפשרית | פִּתָרוֹן |
|---|---|---|
| Remote control not responding / No signal received. |
|
|
| טווח שלט רחוק קצר. |
|
|
| Module power indicator not lighting up. |
|
|
8. מידע על אחריות
Specific warranty details for the Shutao HX1838 Infrared Remote Control Module and Receiver Kit are not provided in the product information. Please refer to the retailer or point of purchase for any applicable warranty policies.
9. תמיכה
For technical assistance or further inquiries regarding the Shutao HX1838 Infrared Remote Control Module and Receiver Kit, please contact the seller or refer to online communities and forums dedicated to microcontroller development and infrared communication. Many resources are available for programming and project ideas involving these modules.