
1. הקדמה
Thank you for choosing the COUGAR MX360 RGB Mid Tower Case. This manual provides essential information for the proper installation, operation, and maintenance of your new PC case. The MX360 RGB combines a sleek design with ARGB LED strips on the front panel, offering excellent cooling performance and support for a wide range of components, including up to a 360mm radiator, 315mm graphics cards, and 170mm CPU coolers. Its compact layout and full-length PSU shroud contribute to a clean and organized build.
2. מידע בטיחות
- יש לנתק תמיד את ספק הכוח משקע הקיר לפני התקנה או הסרה של רכיבים כלשהם.
- טפלו ברכיבים בזהירות כדי למנוע נזק מחשמל סטטי. שקלו להשתמש ברצועת יד אנטי-סטטית.
- הרחיקו חלקים קטנים וברגים מהישג ידם של ילדים.
- ודא אוורור נאות סביב המארז כדי למנוע התחממות יתר.
- Do not attempt to modify the case or its components, as this may void your warranty and pose safety risks.
3. תכולת החבילה
אנא ודא שכל הפריטים הבאים כלולים בחבילה שלך:
- מארז COUGAR MX360 RGB Mid Tower
- קופסת אביזרים (המכילה ברגים, מעמדים, אזיקוני כבלים וכו')
- מדריך למשתמש (מסמך זה)
4. המוצר נגמרview
The COUGAR MX360 RGB case features a minimalist design with integrated ARGB lighting and a tempered glass side panel for showcasing your build.

איור 4.1: צד קדמי view of the COUGAR MX360 RGB case, showing the interior and active RGB lighting.
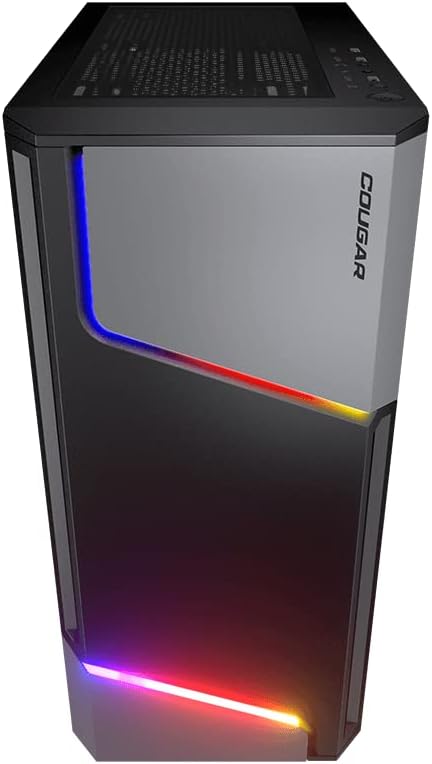
איור 4.2: חזית view of the COUGAR MX360 RGB case, highlighting the integrated ARGB LED strips.
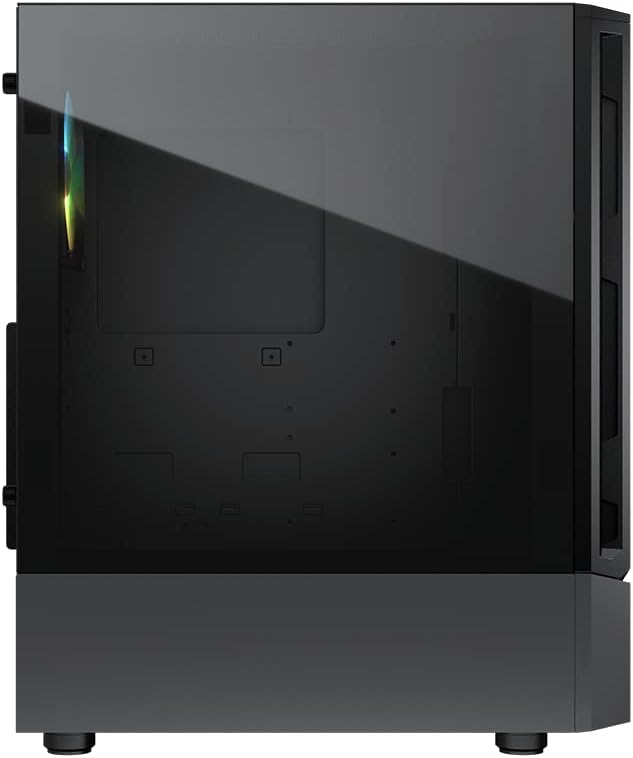
איור 4.3: צד view of the COUGAR MX360 RGB case, featuring the tempered glass panel.

איור 4.4: חזית בזווית view of the COUGAR MX360 RGB case, showcasing its design and ARGB elements.
5. התקנה והתקנה
Follow these steps to install your components into the COUGAR MX360 RGB case.
5.1 הכנת התיק
- הנח את המארז על משטח ישר ויציב.
- Remove the tempered glass side panel by unscrewing the thumb screws at the rear of the case and carefully sliding the panel off.
- Remove the opposite metal side panel by unscrewing the thumb screws and sliding it off.
5.2 התקנת לוח אם
- התקן את מגן ה-I/O (אם אינו מותקן מראש על לוח האם שלך) בפתח האחורי של המארז.
- Ensure the correct standoffs are installed for your motherboard form factor (ATX, Micro-ATX, Mini-ITX). Adjust or add standoffs as needed.
- הנח בזהירות את לוח האם שלך על המעמדים, תוך יישור חורי הברגים.
- אבטחו את לוח האם באמצעות הברגים המצורפים.
5.3 התקנת יחידת ספק כוח (PSU)
- Locate the PSU shroud at the bottom of the case.
- החלק את ספק הכוח שלך לתא המיועד לכך בחלק האחורי של המארז.
- אבטחו את ספק הכוח באמצעות ברגים מחלקו האחורי של המארז.
- Route necessary cables through the cutouts in the PSU shroud for cable management.
5.4 התקנת כונן אחסון
The MX360 RGB supports various storage configurations.
- כוננים קשיחים בגודל 3.5 אינץ': התקן את הכונן בכלוב הכונן הממוקם מתחת למעטה ספק הכוח.
- 2.5" SSDs/HDDs: Mount onto the dedicated trays or mounting points behind the motherboard tray.
5.5 התקנת כרטיס מסך (GPU)
- הסר את כיסויי חריצי ה-PCIe הדרושים מחלקו האחורי של המארז.
- הכנס את כרטיס המסך שלך לחריץ PCIe המתאים בלוח האם.
- Secure the graphics card with screws. The case supports graphics cards up to 315mm in length.
5.6 Cooling System Installation (Fans/Radiators)
The case supports up to six fans and a 360mm water cooling radiator.
- חֲזִית: Supports up to 3 x 120mm or 2 x 140mm fans, or a 240/280/360mm radiator.
- רֹאשׁ: Supports up to 2 x 120mm or 2 x 140mm fans, or a 240/280mm radiator.
- אֲחוֹרִי: Supports 1 x 120mm fan.
Install fans or radiators using the provided screws, ensuring proper airflow direction.
5.7 חיבורי לוח קדמי
Connect the front panel cables (USB, Audio, Power, Reset, LED) to their corresponding headers on your motherboard. Refer to your motherboard manual for exact header locations.
5.8 ARGB Lighting Connection
The integrated ARGB LED strips on the front panel connect via a 5V/3Pin ARGB connector. Connect this cable to a compatible 5V/3Pin ARGB header on your motherboard to synchronize lighting effects with your system.
6. הפעלת המארז
Once all components are installed and connected, replace the side panels. Power on your system using the power button on the top I/O panel. The ARGB lighting will illuminate, controlled by your motherboard's software or a dedicated ARGB controller if you have one installed.
7. תחזוקה
תחזוקה שוטפת מסייעת להבטיח ביצועים אופטימליים ואורך חיים של רכיבי המחשב שלך.
- מסנני אבק: The MX360 RGB includes removable dust filters (e.g., top, bottom). Periodically remove and clean these filters with compressed air or water (ensure they are completely dry before reinstallation).
- ניקוי פנים: Use compressed air to remove dust from internal components like fans, heatsinks, and the motherboard.
- ניקוי חיצוני: נגב את המשטחים החיצוניים עם רך, דamp בַּד. הימנע מחומרי ניקוי שוחקים.
8. פתרון תקלות
אם נתקלת בבעיות, עיין בשלבים הנפוצים הבאים לפתרון בעיות:
- אין כוח: Ensure all power cables (24-pin ATX, 8-pin CPU, GPU power) are securely connected. Check the PSU switch is in the 'ON' position. Verify front panel power button connection to the motherboard.
- תאורת ARGB לא עובדת: Confirm the 5V/3Pin ARGB connector is correctly plugged into a compatible motherboard header. Check your motherboard's RGB software for control settings.
- התחממות יתר: Ensure all case fans are spinning and oriented correctly for optimal airflow. Check for dust buildup on filters and components. Verify CPU cooler and GPU cooler are properly installed.
- חיבורים רופפים: Re-seat all components (RAM, GPU, storage drives) and check all power and data cables.
9. מפרטים
| תכונה | מִפרָט |
|---|---|
| מותג | פומה |
| שם הדגם | MX360 RGB |
| מספר דגם של פריט | CGR-5CC6G-RGB |
| סוג מקרה | מגדל אמצע |
| מידות (LxWxH) | 14.88 x 8.27 x 18.11 אינץ' (378 x 210 x 460 מ"מ) |
| משקל פריט | 10.56 פאונד (4.8 קילוגרם) |
| חוֹמֶר | Tempered Glass, Fine Metal |
| צֶבַע | שָׁחוֹר |
| תמיכה בלוח אם | מיני ITX / מיקרו ATX / ATX |
| מקסימום אורך כרטיס מסך | 315 מ"מ |
| מקסימום גובה מצנן מעבד | 170 מ"מ |
| תמיכת PSU | ATX PS2 רגיל |
| שיטת קירור | אוויר / מים |
| תמיכת רדיאטור | Front: 360mm / 280mm / 240mm / 140mm / 120mm Top: 280mm / 240mm / 140mm / 120mm אחורי: 120 מ"מ |
| תמיכת מעריצים | קדמי: 3 x 120 מ"מ / 2 x 140 מ"מ עליון: 2 x 120 מ"מ / 2 x 140 מ"מ אחורי: 1 x 120 מ"מ |
| דרייב בייס | 3.5" HDD: 2 2.5" SSD: 2+2 (converted from 3.5" drive bays) |
| פאנל קלט/פלט | USB 3.0 x 2, USB 2.0 x 1, Mic x 1, Audio x 1, RGB Button |
| תכונה מיוחדת | ARGB LED Strips, Full-length PSU Cover for Cable Hiding and Improved Airflow |
10. אחריות ותמיכה
COUGAR products are designed and manufactured to the highest quality standards. For warranty information, please refer to the warranty card included with your product or visit the official COUGAR webאתר. שמור את הוכחת הרכישה שלך לצורך תביעות אחריות.
For technical support or further assistance, please visit the official COUGAR webאתר או צרו קשר עם מחלקת שירות הלקוחות שלהם. תוכלו למצוא מידע ומשאבים נוספים באתר חנות COUGAR באמזון.