
Alarm.com V724X
מדריך למשתמש של מצלמת Wi-Fi חיצונית Alarm.com ADC-V724X
Model: V724X
מָבוֹא
The Alarm.com ADC-V724X is an advanced outdoor Wi-Fi camera designed to enhance the security of your property. It features High Dynamic Range (HDR) for clear imaging, two-way audio for communication, 1080p resolution, and a wide 117-degree field of view. Equipped with Video Analytics and IR Night Vision, it provides intelligent detection and monitoring capabilities. The camera also includes a MicroSD card slot for local storage and boasts an IP66 ingress protection rating, ensuring durability in various outdoor conditions.
מידע בטיחות
- Ensure the camera is installed by a qualified professional or with proper safety precautions.
- Use only the specified 12VDC power supply.
- אין לחשוף את המצלמה לטמפרטורות קיצוניות מחוץ לטווח הפעולה שלה.
- הימנעו מחשיפה ישירה של העדשה למקורות אור חזקים למשך תקופות ממושכות.
- נתק את החשמל לפני ביצוע כל תחזוקה או ניקוי.
- הרחק מהישג ידם של ילדים.
תוכן החבילה
ודא שכל הפריטים נמצאים בחבילה:
- Alarm.com ADC-V724X Outdoor Wi-Fi Camera
- חומרת הרכבה (ברגים, עוגנים)
- מדריך התקנה
- Power Adapter (12VDC)
הגדרה
1. התקנה פיזית
The ADC-V724X camera is designed for outdoor wall mounting. Choose a location that provides the desired field of view ונמצא בטווח קליטה של רשת ה-Wi-Fi שלך.
- הכן את משטח ההרכבה: Use the included mounting template (if provided) or the camera base to mark drill holes.
- חורים לקדוח: Drill pilot holes for the mounting screws. Insert wall anchors if mounting into drywall or masonry.
- אבטח את התושבת: Attach the camera's mounting base securely to the surface using the provided screws.
- צרף את המצלמה: Connect the camera body to the mounted base. Adjust the camera angle for optimal coverage.

איור 1: חזית view of the ADC-V724X camera, highlighting its compact design and lens.
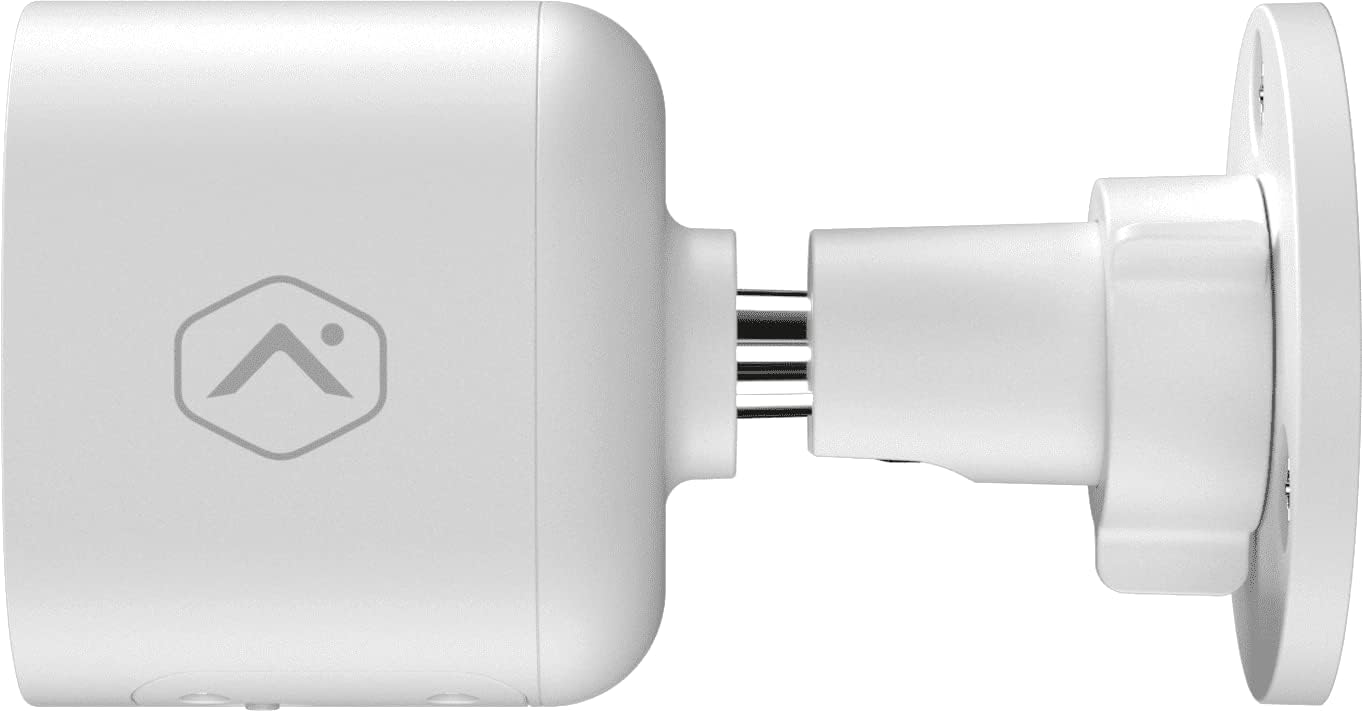
איור 2: צד פרוfile of the camera, illustrating how it connects to the wall mount.

איור 3: זוויתי view of the camera, demonstrating its adjustable mounting capabilities.
2. חיבור חשמל
Connect the provided 12VDC power adapter to the camera's power input. Ensure the connection is secure and protected from weather elements if applicable.
3. חיבור רשת (Wi-Fi)
The ADC-V724X connects to your network via Wi-Fi (2.4 or 5 GHz). Integration with your Alarm.com system typically requires activation through your Alarm.com service provider.
- הפעלה: Plug in the camera. The LED indicator will show its status (refer to LED status guide in your Alarm.com app or provider's documentation).
- Add to System: Contact your Alarm.com service provider to add the camera to your existing security system. They will guide you through the process, which often involves scanning a QR code on the camera or entering its MAC address.
- הגדרת Wi-Fi: Your service provider will assist in connecting the camera to your home Wi-Fi network through the Alarm.com app or webאֲתַר.

איור 4: אחורה view of the camera, displaying the QR code and product information essential for system integration.
הפעלת המצלמה
Once installed and connected, the ADC-V724X camera operates primarily through the Alarm.com Customer Webאתר ואפליקציה לנייד.
לִחיוֹת View והקלטה
- גישה לשידור חי: Open the Alarm.com app or website, navigate to the camera section, and select the ADC-V724X to view השידור החי שלו.
- Onboard Recording (Smart View): The camera supports local recording to a MicroSD card (sold separately, up to 512 GB). This allows for continuous, encrypted recordings that can be viewed from anywhere via the Alarm.com platform.
- הקלטת ענן: Depending on your Alarm.com service plan, video clips triggered by events (e.g., motion) will be uploaded to the cloud for secure storage and access.
אודיו דו-כיווני
The camera features a built-in microphone and speaker, enabling two-way communication.
- ייזום תקשורת: מהחיים view in the Alarm.com app, tap the microphone icon to speak through the camera's speaker. Release the icon to listen.
- Audio in Recorded Clips: Audio is included in recorded video clips, providing additional context for events.
Video Analytics and Alerts
Configure Video Analytics rules through your Alarm.com account to receive smarter, more relevant alerts.
- אזורי זיהוי: הגדירו אזורים ספציפיים בתוך שדה הראייה של המצלמה view לזיהוי תנועה.
- Object Classification: The camera can differentiate between people, animals, and vehicles, reducing false alerts.
- הגדרות התראה: Customize notifications (e.g., push notifications, email) for specific events detected by Video Analytics.
ראיית לילה (IR)
The camera automatically switches to infrared (IR) night vision in low-light conditions, providing clear black-and-white video.
- הפעלה אוטומטית: The camera's built-in light sensor detects ambient light levels and activates IR LEDs as needed.
- ביצועים אופטימליים: Ensure no obstructions are blocking the IR illuminators on the camera's front.
תַחזוּקָה
ניקוי המצלמה
- עֲדָשָׁה: Gently wipe the camera lens with a soft, clean, lint-free cloth. If necessary, use a small amount of lens cleaning solution. Avoid abrasive cleaners.
- גוּף: נגב את גוף המצלמה עם מודעהamp בַּד. אין להשתמש בכימיקלים קשים או בממיסים.
- תֶדֶר: Clean the camera periodically, especially if installed in dusty or high-traffic areas, to ensure optimal image quality.
ניהול כרטיסי MicroSD
The camera supports a MicroSD card for local storage. The slot is located on the bottom of the camera, protected by a cover.
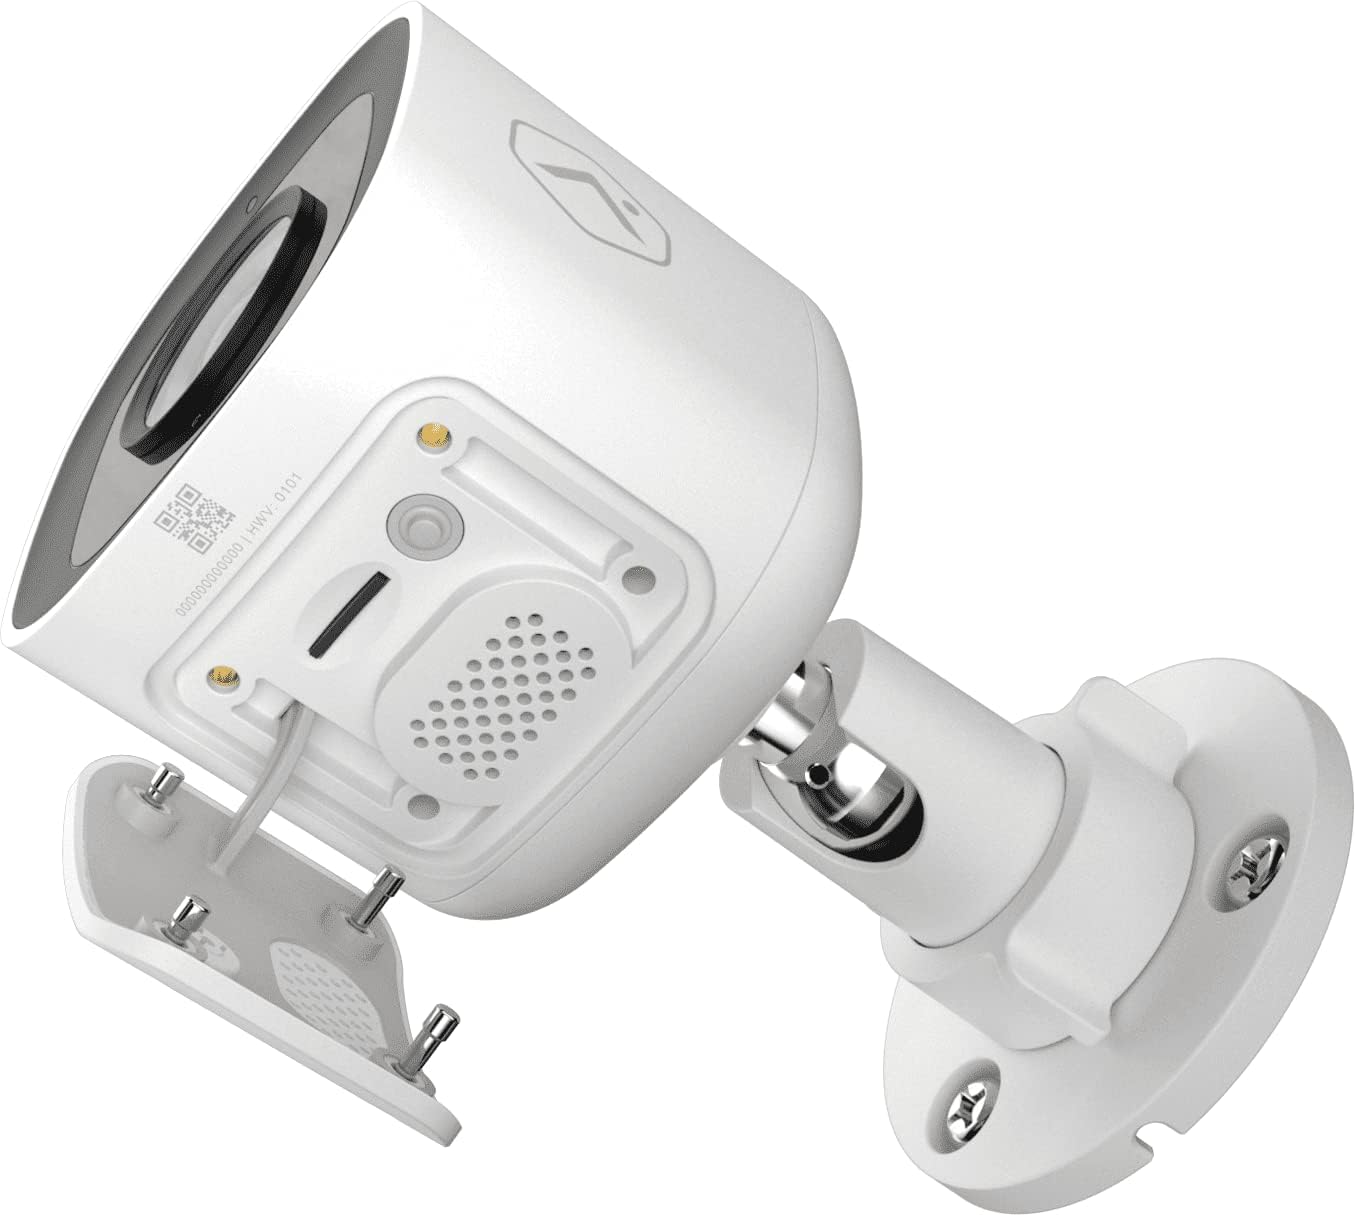
איור 5: תחתון view of the camera showing the access panel for the MicroSD card slot.
- הַתקָנָה: Carefully insert a compatible MicroSD card (up to 512 GB) into the slot until it clicks into place. Ensure the camera is powered off before insertion or removal.
- עיצוב: The Alarm.com system may prompt you to format the card upon first use.
- תַחֲלִיף: If the card becomes full or corrupted, replace it with a new one. Data on the card can be managed through the Alarm.com platform.
פתרון בעיות
| בְּעָיָה | סיבה אפשרית | פִּתָרוֹן |
|---|---|---|
| המצלמה לא נדלקת | אין חשמל, מתאם פגום, חיבור רופף. | Check power outlet, ensure adapter is securely connected to camera and power source. |
| לא ניתן להתחבר ל-Wi-Fi | Incorrect Wi-Fi password, camera too far from router, network interference. | Verify Wi-Fi password. Move camera closer to router or use a Wi-Fi extender. Reduce interference from other devices. Contact your Alarm.com provider for assistance with network setup. |
| איכות תמונה ירודה | עדשה מלוכלכת, תאורה חלשה, בעיות רוחב פס של הרשת. | Clean the camera lens. Ensure adequate lighting or check night vision settings. Verify stable internet connection. |
| אודיו דו-כיווני לא עובד | Microphone/speaker blocked, volume too low, app settings. | Ensure nothing is obstructing the microphone or speaker. Check volume settings in the Alarm.com app. |
| No local recording | No MicroSD card, incompatible card, card full/corrupted. | Insert a compatible MicroSD card. Format the card via the Alarm.com app. Replace the card if corrupted. |
For further assistance, please contact your Alarm.com service provider.
מפרטים
| תכונה | פְּרָט |
|---|---|
| מספר דגם | V724X |
| רזולוציית מצלמה אפקטיבית | 2MP |
| רזולוציית וידאו מקסימלית | 1920 x 1080 (1080p Full HD) |
| שדה של View (FOV) | 117 מעלות |
| שֶׁמַע | 2-Way Audio (Microphone and Speaker) |
| סוג ראיית לילה | IR (אינפרא אדום) |
| קישוריות | Wi-Fi (2.4 or 5 GHz) |
| אחסון מקומי | MicroSD Card Slot (up to 512 GB, sold separately) |
| דירוג הגנה מפני כניסה | IP66 |
| ספק כוח | 12VDC |
| מידות (L x W x H) | 2.5 x 2.5 x 4.5 אינץ' |
| מִשׁקָל | 1.46 פאונד (0.66 קילוגרם) |
| תכונות מיוחדות | HDR, Video Analytics, Motion Sensor |
אחריות ותמיכה
For warranty information and technical support, please refer to the documentation provided by your Alarm.com service provider or visit the official Alarm.com website. Support for the ADC-V724X camera is typically handled through your authorized Alarm.com dealer or installer.
משאבים מקוונים:
Ask a question about this manual
Ask about setup, troubleshooting, compatibility, parts, safety, or missing instructions. Manuals+ will review the question and use this page’s manual context to help answer it.