1. הקדמה
תודה על הרכישהasing the Lanix LX240 V7 23.8-inch Full HD Monitor. This manual provides essential information for the safe and efficient use of your new monitor. Please read it thoroughly before installation and keep it for future reference.
2. מידע בטיחות
יש להקפיד על אמצעי הזהירות הבאים כדי למנוע נזק לצג ולהבטיח את בטיחות המשתמש:
- אין לחשוף את הצג לגשם או לחות כדי למנוע שריפה או התחשמלות.
- אל תפתח את הצג גasinז. אין חלקים בפנים הניתנים לתיקון על ידי המשתמש. יש לפנות לכל טיפול וטיפול באנשי מקצוע מוסמכים.
- הנח את הצג על משטח יציב ושטוח כדי למנוע ממנו ליפול.
- ודא אוורור נאות סביב הצג. אין לחסום פתחי אוורור.
- השתמשו רק במתאם החשמל המצורף לצג.
- נתק את תקע החשמל מהשקע אם לא תשתמש בצג למשך תקופה ממושכת.
3. תכולת החבילה
ודא שכל הפריטים נמצאים ובמצב תקין בעת הוצאת האריזה:
- Lanix LX240 V7 Monitor
- מתאם מתח
- כבל HDMI
- מדריך למשתמש (מסמך זה)

Image: Lanix LX240 V7 Monitor packaging box, showing the monitor model and key features.
4. התקנה
4.1 הרכבת המעמד
בצע את השלבים הבאים כדי לחבר את המעמד לצג שלך:
- הוציאו בזהירות את הצג מאריזתו, תוך שמירה על הגנה עליו.
- Attach the stand base to the stand neck. Secure with screws if provided.
- יישר את המעמד המורכב עם חריץ ההרכבה בגב הצג.
- Gently push the stand into the slot until it clicks into place or secure with screws.

תמונה: אחורי view of the Lanix LX240 V7 monitor, showing the stand attachment point and port area.
4.2 חיבור הצג
Connect the monitor to your computer using the appropriate cables:
- חיבור חשמל: חבר את מתאם החשמל לכניסת החשמל של הצג, לאחר מכן חבר את המתאם לשקע חשמל.
- חיבור וידאו:
- HDMI: חבר קצה אחד של כבל ה-HDMI ליציאת ה-HDMI בצג שלך ואת הקצה השני ליציאת ה-HDMI במחשב שלך.
- VGA: חבר קצה אחד של כבל ה-VGA ליציאת ה-VGA בצג שלך ואת הקצה השני ליציאת ה-VGA במחשב שלך.
- חיבור שמע (אם רלוונטי): The monitor has integrated speakers. If using HDMI, audio will transmit automatically. For VGA, ensure your computer's audio output is configured correctly.
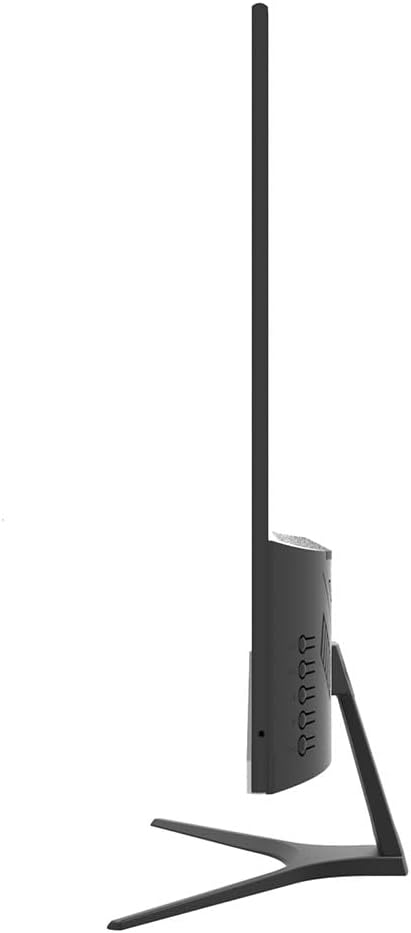
תמונה: צד view of the Lanix LX240 V7 monitor, illustrating the location of input ports and control buttons.
5. הוראות הפעלה
5.1 הפעלה/כיבוי
לחץ על לחצן ההפעלה הממוקם על הצג כדי להפעיל או לכבות אותו. נורית חיווי ההפעלה תידלק כאשר הצג דולק.
5.2 בחירת מקור קלט
If you have multiple devices connected, you may need to manually select the input source:
- Press the "Input" or "Source" button on the monitor (refer to the side view image for button locations).
- Use the navigation buttons to select between HDMI and VGA inputs.
- Press the "Menu" or "OK" button to confirm your selection.
5.3 תפריט תצוגה על המסך (OSD).
תפריט המסך מאפשר לך להתאים הגדרות שונות של הצג:
- לחץ על כפתור "תפריט" כדי לפתוח את תפריט המסך.
- Use the navigation buttons (usually up/down or left/right arrows) to browse through menu options such as Brightness, Contrast, Color Settings, Aspect Ratio, etc.
- Press "Menu" or "OK" again to enter a sub-menu or confirm a setting.
- Press the "Exit" or "Menu" button repeatedly to close the OSD.

תמונה: חזית view of the Lanix LX240 V7 monitor, showcasing its display area and slim bezels.
6. תחזוקה
תחזוקה נכונה מבטיחה את אורך חייו של הצג שלך:
- ניקוי המסך: נגבו בעדינות את המסך בעזרת מטלית רכה ונטולת סיבים. במקרה של סימנים עקשניים,ampen the cloth slightly with water or a specialized screen cleaner. Never spray liquid directly onto the screen.
- ניקוי ה-Casing: השתמשו במטלית רכה ויבשה כדי לנגב את הצג.asinז. הימנעו מחומרי ניקוי שוחקים או ממסים.
- אִחסוּן: אם מאחסנים את הצג לתקופה ממושכת, נתק את כל הכבלים ואחסן אותו במקום קריר ויבש, רצוי באריזתו המקורית.
7. פתרון תקלות
עיינו בטבלה הבאה לקבלת בעיות נפוצות ופתרונותיהן:
| בְּעָיָה | סיבה אפשרית | פִּתָרוֹן |
|---|---|---|
| אין תמונה על המסך | הצג אינו דולק; מקור קלט שגוי; כבל וידאו רופף. | Ensure power cable is connected and monitor is turned on. Select correct input source (HDMI/VGA). Check video cable connections. |
| תמונה כהה/בהירה מדי | הגדרות בהירות/ניגודיות שגויות. | כוונן את הגדרות הבהירות והניגודיות דרך תפריט המסך. |
| אין שמע מהרמקולים | Audio settings incorrect; Volume too low. | Check monitor's volume settings in OSD. Ensure computer's audio output is set to the monitor (for HDMI) or external speakers (for VGA). |
| תמונה מהבהבת או לא יציבה | Loose video cable; Incorrect refresh rate. | Ensure video cable is securely connected. Check your computer's display settings for the correct refresh rate (60Hz). |
8. מפרטים
| שם הדגם | LX240 V7 |
| גודל מסך | 23.8 inches (23.6 inches actual) |
| סוג פאנל | LED |
| הַחְלָטָה | 1920 x 1080 (Full HD) |
| יחס גובה-רוחב | 1.78:1 (16:9) |
| קצב רענון | 60 הרץ |
| זמן תגובה | 5 אלפיות שניות |
| בְּהִירוּת | 250 תקליטורים/מ"ר |
| יחס ניגודיות | 3000:1 |
| Viewזווית | 178 מעלות |
| קישוריות | 1x HDMI, 1x VGA |
| רמקולים מובנים | כֵּן |
| צריכת חשמל | 22 וואט |
| מידות (H x W x D) | Approx. 21cm x 25cm x 5cm (screen only, based on image) |
| מִשׁקָל | 2.71 קילוגרם |
תמונה: חזית view of the Lanix LX240 V7 monitor with height, width, and depth measurements indicated.
9. אחריות ותמיכה
מידע על אחריות: The Lanix LX240 V7 monitor comes with a 1-year manufacturer's warranty. This warranty covers defects in materials and workmanship under normal use. It does not cover damage caused by misuse, accidents, unauthorized modifications, or external causes.
תמיכת לקוחות: For technical assistance, warranty claims, or service inquiries, please contact Lanix customer support. Refer to the official Lanix webבאתר או במסמכי הרכישה שלך לקבלת פרטי יצירת קשר.