
1. הקדמה
Welcome to the HyperX Armada 25 Gaming Monitor user manual. This document provides essential information for setting up, operating, maintaining, and troubleshooting your new monitor. The HyperX Armada 25 is designed for competitive gaming, featuring a 24.5-inch Full HD (1920x1080) IPS panel, a 240Hz refresh rate, and a 1ms response time, ensuring smooth and responsive visuals. It also includes NVIDIA G-SYNC compatibility to eliminate screen tearing and minimize input latency. A desk mount is included for convenient setup and to maximize desk space.
תכונות עיקריות:
- חבילת הכל באחד: Includes an ergonomic arm and desk mount for easy setup and space-saving.
- קצב רענון וזמן תגובה גבוהים: 240Hz refresh rate and 1ms response time for ultra-smooth gaming.
- Vibrant IPS Panel: 24.5-inch Full HD (1920x1080) IPS panel delivers stunning visuals with accurate colors and wide viewזוויות.
- NVIDIA G-SYNC Compatible: Eliminates screen tearing and reduces stuttering for a fluid gaming experience.

סרטון מוצר רשמי:
2. התקנה
This section guides you through the initial setup of your HyperX Armada 25 Gaming Monitor, including assembly and connection to your computer.
2.1. Assembling the Desk Mount
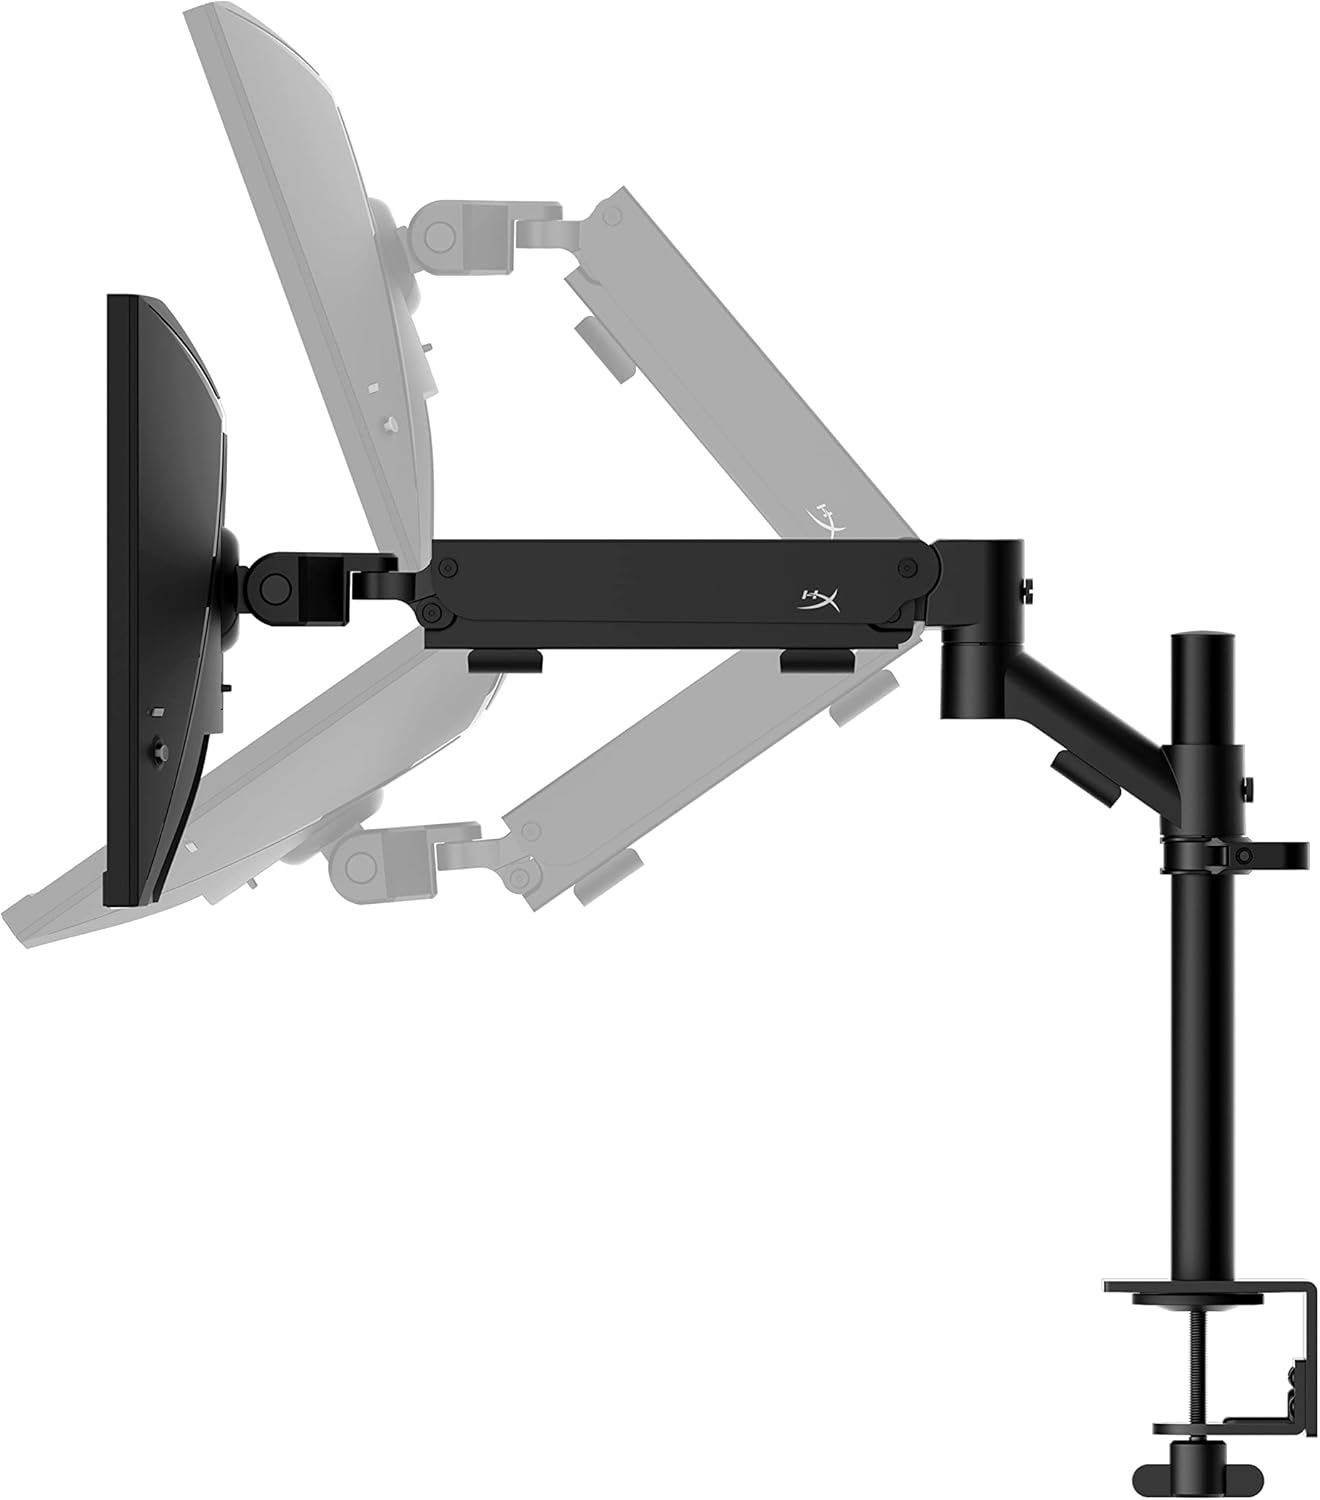
The HyperX Armada 25 comes with an integrated ergonomic desk mount. Follow the instructions provided in the separate quick start guide for detailed assembly steps. The monitor head easily snaps into the arm, allowing for quick and secure installation.

2.2. חיבור הצג
Connect the monitor to your computer using the appropriate cables. The HyperX Armada 25 supports both HDMI and DisplayPort connections.
- חבר קצה אחד של כבל ה-HDMI או ה-DisplayPort ליציאה המתאימה בכרטיס המסך של המחשב.
- Connect the other end of the cable to an available HDMI 2.0 or DisplayPort 1.4 port on the back of your monitor.
- Connect the power cord to the monitor and then to a power outlet.
- לחץ על לחצן ההפעלה בצג כדי להפעיל אותו.

3. הפעלת המוניטור
This section covers basic operation and navigation of the monitor's On-Screen Display (OSD) menu.
3.1. ניווט בתצוגה על המסך (OSD).
The OSD menu is controlled using a joystick located on the back of the monitor. This joystick allows you to power on/off the monitor and navigate through various settings.
- לחץ על הג'ויסטיק: כדי לפתוח את תפריט המסך או לאשר בחירה.
- הזז את הג'ויסטיק למעלה/למטה/שמאלה/ימינה: To navigate through menu options and adjust settings.
- Hold the joystick: To power off the monitor.

3.2. כוונון מיקום הצג
The ergonomic desk mount allows for flexible positioning of your monitor. You can adjust the height, tilt, swivel, and pivot to find your optimal viewזווית ing.

4. תחזוקה
Proper maintenance ensures the longevity and optimal performance of your HyperX Armada 25 Gaming Monitor.
- ניקוי המסך: השתמש קלות במטלית רכה נטולת מוך דampened with water or a specialized screen cleaner. Avoid using harsh chemicals, abrasive materials, or direct spraying onto the screen.
- ניקוי ה-Casing: נגב את הצג גasinנגבו בעזרת מטלית רכה ויבשה.
- אוורור: ודא שפתחי האוורור של הצג אינם חסומים כדי למנוע התחממות יתר.
- כיבוי כאשר אינו בשימוש: כבה את הצג כאשר אינו בשימוש למשך תקופות ממושכות כדי לחסוך באנרגיה ולהאריך את תוחלת החיים שלו.
5. פתרון תקלות
אם אתם נתקלים בבעיות עם הצג שלכם, עיינו בשלבי פתרון הבעיות הנפוצים הבאים.
- אין כוח:
- בדוק אם כבל החשמל מחובר היטב הן לצג והן לשקע החשמל.
- ודא ששקע החשמל פועל כראוי.
- לחץ על לחצן ההפעלה במסך.
- אין קליטה:
- Verify that the HDMI or DisplayPort cable is securely connected to both the monitor and your computer.
- ודא שהמחשב שלך דלוק ואינו במצב שינה.
- בחר את מקור הקלט הנכון באמצעות תפריט המסך.
- Flickering Screen or Image Issues:
- Check the display cable for damage or loose connections.
- ודא שמנהלי ההתקן של כרטיס המסך שלך מעודכנים.
- התאם את קצב הרענון בהגדרות התצוגה של המחשב שלך.
- If G-SYNC is enabled, try disabling it temporarily to see if the issue persists.
- Buttons Not Responding (OSD Joystick):
- ודא שהצג מופעל.
- Try restarting the monitor by unplugging and replugging the power cable.
- Clean around the joystick to ensure no debris is obstructing its movement.
6. מפרטים
Detailed technical specifications for the HyperX Armada 25 Gaming Monitor.
| תכונה | פְּרָט |
|---|---|
| מידות המוצר | 21.94 x 25.79 x 31.12 אינץ'; 16.98 פאונד |
| מספר דגם של פריט | HyperX Armada 25 |
| תאריך ראשון זמין | 24 באוגוסט 2022 |
| יַצרָן | HP Inc. |
| ASIN | B0B2C1G356 |
| גודל תצוגה | אלכסון 24.5 אינץ' |
| הַחְלָטָה | רזולוציה מלאה (1920x1080) |
| קצב רענון | 240 הרץ |
| סוג פאנל | פנל IPS |
| זמן תגובה | 1ms |
| טכנולוגיית סינכרון | תואם NVIDIA® G-SYNC® |
| Included Mount | Desk Mount Included |
| קישוריות | HDMI and Display Port |
7. אחריות ותמיכה
For warranty information, technical support, or to access additional resources, please visit the official HyperX webלאתר או לפנות לשירות הלקוחות שלהם.
- רשמי של HyperX Webאֲתַר: www.hyperx.com
- דף תמיכת מוצר: Refer to the support section on the HyperX webאתר עבור הדגם הספציפי שלך.