
1. הקדמה
תודה על הרכישהasing the IRRADIO VDP-4600HDW LCD/LED Projector. This manual provides essential information for the safe and efficient operation of your device. Please read it thoroughly before use and retain it for future reference.
2. הוראות בטיחות
- אין לחסום את פתחי האוורור. יש לוודא זרימת אוויר מספקת סביב המקרן כדי למנוע התחממות יתר.
- אל תסתכל ישירות לתוך עדשת המקרן כאשר ה-lamp דולק, מכיוון שהאור הבהיר עלול לגרום נזק לעיניים.
- הרחק את המקרן ממים או נוזלים אחרים. אין להפעיל אותו בתנאים שלamp או תנאים רטובים.
- השתמשו רק במתאם החשמל המצורף למקרן.
- אל תנסה לתקן את המקרן בעצמך. פנה לכל טיפול וטיפול באנשי מקצוע מוסמכים.
- הנח את המקרן על משטח יציב ומאוזן כדי למנוע ממנו ליפול.
3. תכולת החבילה
אנא ודאו שכל הפריטים נמצאים בחבילה שלכם:
- IRRADIO VDP-4600HDW Projector
- שְׁלַט רָחוֹק
- כבל חשמל
- כבל HDMI
- כבל AV
- מדריך למשתמש
4. המוצר נגמרview
4.1. רכיבי המקרן

איור 4.1: בסך הכל view of the IRRADIO VDP-4600HDW Projector. This image displays the projector from an angled perspective, highlighting its compact design and the lens on the front left side, with ventilation grilles and control buttons visible on the top and sides.

איור 4.2: חֲזִית view of the projector. This image focuses on the large projection lens on the left, with the IRRADIO logo and ventilation grilles on the right side of the front panel.

איור 4.3: אֲחוֹרִי view of the projector. This image shows the VGA port, focus adjustment knob, and keystone correction knob on the rear panel, along with additional ventilation.
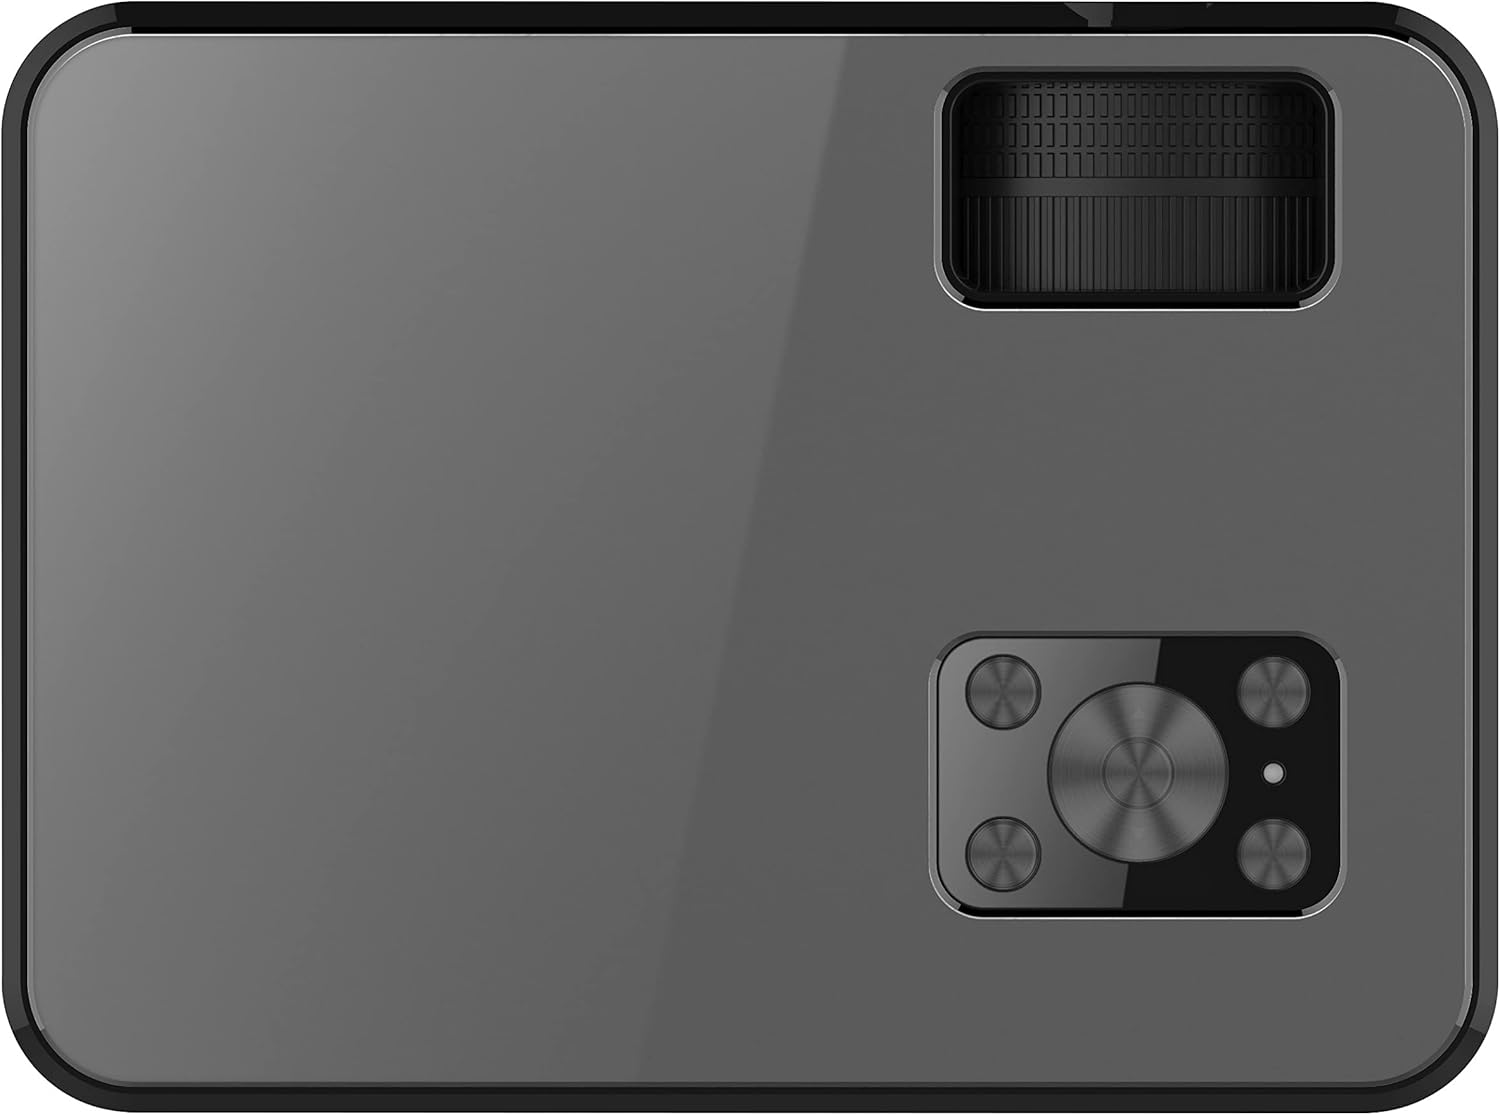
איור 4.4: רֹאשׁ view of the projector. This image displays the control panel with navigation buttons (up, down, left, right, OK), source, menu, and exit buttons, along with the power button and volume controls.

איור 4.5: צַד view of the projector showing input/output ports. This image highlights two HDMI ports, AV input, two USB ports, and a 3.5mm headphone jack (audio out).

איור 4.6: צד הפוך view of the projector. This image shows the power input port and additional ventilation grilles.

איור 4.7: תַחתִית view of the projector. This image displays the mounting points for ceiling installation and rubber feet for stable placement on a flat surface.
4.2. שלט רחוק
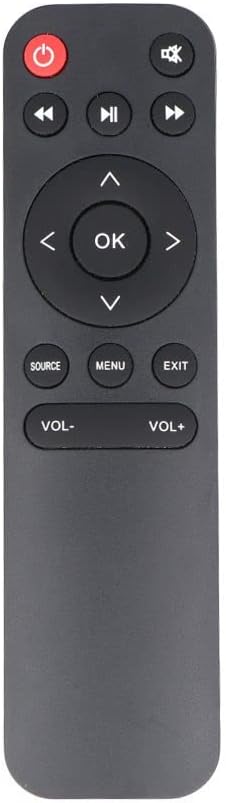
איור 4.8: The remote control for the IRRADIO VDP-4600HDW Projector. It features buttons for power, mute, navigation (up, down, left, right, OK), source selection, menu, exit, and volume control.
4.3. Ports and Controls Overview
- לחצן הפעלה: מפעיל/כיבוי את המקרן.
- עֲדָשָׁה: מקרין את התמונה.
- טבעת מיקוד: מכוונן את בהירות התמונה.
- תיקון אבן מפתח: מכוונן את עיוות התמונה.
- יציאות HDMI (x2): Connect to HDMI-enabled devices (laptops, gaming consoles, Blu-ray players).
- יציאות USB (x2): חבר כונני USB להפעלת מדיה.
- יציאת VGA: Connect to computers with VGA output.
- יציאת AV: Connect to older devices using composite video.
- יציאת שמע 3.5 מ"מ: חבר רמקולים חיצוניים או אוזניות.
- מקלט IR: עבור אותות שלט רחוק.
5. התקנה
5.1. מיקום
Place the projector on a stable, flat surface or mount it to the ceiling. Ensure the projector is positioned directly in front of the projection screen or wall. The optimal projection distance ranges from 1.52 meters to 3.48 meters, yielding a screen size between 50 and 120 inches.
- הקרנה קדמית: Place the projector in front of the screen.
- הקרנה אחורית: מקם את המקרן מאחורי מסך שקוף.
- תקרת הר: The projector can be inverted and mounted to the ceiling. Adjust settings in the OSD menu for inverted projection.
5.2. חיבור חשמל
- חבר את כבל החשמל לשקע החשמל של המקרן.
- Plug the other end of the power cable into a standard electrical outlet (220V AC, 50Hz).
- לחץ על לחצן ההפעלה במקרן או בשלט רחוק כדי להפעיל אותו.
5.3. כוונון מיקוד ועקיבה
- הפעל את המקרן והצג תמונה.
- סובב את ה טבעת פוקוס (located near the lens) until the image appears sharp and clear.
- התאם את תיקון קיסטון knob (located on the rear panel) to correct any trapezoidal distortion, making the image rectangular.
6. הפעלה
6.1. הפעלה/כיבוי
לחץ על לחצן ההפעלה במקרן או בשלט רחוק כדי להפעיל או לכבות את היחידה.
6.2. בחירת מקור קלט
לאחר ההפעלה, לחצו על הלחצן מָקוֹר button on the remote control or the projector's control panel to cycle through available input sources (HDMI1, HDMI2, USB1, USB2, VGA, AV).
6.3. חיבור התקנים חיצוניים
- HDMI: Connect an HDMI cable from your device (e.g., laptop, game console) to one of the projector's HDMI ports. Select the corresponding HDMI input.
- VGA: Connect a VGA cable from your computer to the projector's VGA port. Select the VGA input.
- AV: Use the provided AV cable to connect to devices with composite video output. Select the AV input.
- USB: Insert a USB flash drive into a USB port. The projector's media player interface will appear automatically or can be accessed via the source menu.
6.4. הפעלת מדיה (USB)
The integrated media player supports various formats:
- פורמטים של תמונה: JPEG, BMP, PNG, MPO
- פורמטים של וידאו: MPEG1, MPEG2, H.263, H.264, AVS, MJPEG, RV30, RV40, HEVC
- פורמטי שמע: MPEG1, MPEG2, LPCM, MP3
נווט דרך files using the remote control's arrow keys and press OK כדי לבחור.
6.5. Wireless Audio Connection
The projector features an integrated wireless audio function for connecting to external audio devices. Refer to the on-screen display (OSD) menu for specific pairing instructions. Typically, you will need to enable the wireless audio feature in the projector's settings and then pair it with your desired external speaker or headphone.
7. תחזוקה
7.1. ניקוי עדשות
Use a soft, lint-free cloth and a specialized lens cleaning solution to gently wipe the lens. Avoid abrasive materials or excessive pressure.
7.2. ניקוי מסנן האבק
Regularly check and clean the dust filters to ensure optimal airflow and prevent overheating. Use a soft brush or a vacuum cleaner with a brush attachment to remove dust from the ventilation grilles.
7.3. אחסון
When not in use for extended periods, store the projector in a cool, dry place, protected from dust and direct sunlight. Use the original packaging or a protective case.
8. פתרון תקלות
- אין כוח: ודא שכבל החשמל מחובר היטב ושהשקע פועל כראוי.
- אין תמונה: Check the input source selection. Ensure the connected device is powered on and sending a signal. Verify cable connections.
- תמונה מטושטשת: Adjust the focus ring. Ensure the projection distance is within the optimal range.
- Image Distorted: התאם את תיקון אבן המפתח.
- אין צליל: Check the volume settings on both the projector and the connected device. If using external speakers, ensure they are properly connected or paired via wireless audio.
- השלט הרחוק לא עובד: Replace the batteries. Ensure there are no obstructions between the remote and the projector's IR receiver.
9. מפרטים
| תכונה | מִפרָט |
|---|---|
| מערכת הקרנה | LCD panel with LED light source |
| רזולוציה מקורית | 1920x1080 (רזולוציה מלאה באיכות HD 1080p) |
| יחס ניגודיות דינמי | 2000:1 |
| בהירות מקור האור | 3000 לומן |
| נורת LEDamp חַיִים | 50,000 שעות |
| עֲדָשָׁה | פוקוס ידני |
| פונקציית שמע אלחוטית | מְשׁוּלָב |
| קישוריות | 2x HDMI, 2x USB, VGA, AV Composite, 3.5mm Headphone Jack (output) |
| יחס גובה-רוחב | 16:9 Native / 4:3 Compatible |
| גודל הקרנה אופטימלי | 50 אינץ' - 120 אינץ' |
| מרחק הקרנה אופטימלי | 1.52 מ' עד 3.48 מ' |
| מצבי הקרנה | Front, Rear, Ceiling (Front/Rear) |
| שֶׁמַע | 1x 3W Hi-Fi Speaker |
| מערכת קירור | מערכת קירור כפולה |
| שפת OSD | 23 שפות |
| ספק כוח | 220V AC 50Hz (single phase) |
| מִשׁקָל | 1.4 ק"ג |
| מידות (B x H x D) | 222 x 91 x 173 מ"מ |
10. אחריות ותמיכה
Information regarding specific warranty terms and support contacts is not available in the provided product data. Please refer to the product packaging or the retailer's webאתר לפרטי אחריות ומידע על תמיכת לקוחות.