
1. הקדמה
Thank you for choosing the Xigmatek Lux M Micro-ATX Mini Tower PC Case. This manual provides detailed instructions for the installation, operation, and maintenance of your new PC chassis. Please read this manual carefully before beginning the assembly process to ensure proper installation and to maximize the performance and longevity of your system.
The Lux M case is designed to offer a robust and aesthetically pleasing housing for your computer components, featuring a tempered glass side panel, a metallic front panel with a unique cut-out pattern, and pre-installed fixed RGB fans for optimal cooling and visual appeal. It supports Micro-ATX and Mini-ITX motherboards and is compatible with various cooling solutions, including water cooling.
2. מידע בטיחות
אנא הקפידו על אמצעי הזהירות הבאים במהלך ההתקנה והתפעול:
- יש לנתק תמיד את ספק הכוח משקע הקיר לפני התקנה או הסרה של רכיבים כלשהם כדי למנוע התחשמלות.
- Handle all components with care. Avoid touching circuit boards directly; hold them by their edges.
- Wear an anti-static wrist strap when handling sensitive electronic components to prevent electrostatic discharge (ESD) damage.
- Keep the case and components away from liquids, excessive heat, and direct sunlight.
- ודא אוורור נאות סביב מארז המחשב כדי למנוע התחממות יתר.
- Keep small parts and screws out of reach of children.
3. תכולת החבילה
ודא שכל הפריטים נמצאים בחבילה שלך. אם פריטים חסרים או פגומים, אנא פנה לקמעונאי שלך.
- Xigmatek Lux M Micro-ATX Mini Tower PC Case
- קופסת אביזרים (המכילה ברגים, מעמדים, אזיקוני כבלים וכו')
- מדריך למשתמש (מסמך זה)
4. המוצר נגמרview
Familiarize yourself with the various parts of your Xigmatek Lux M PC case.
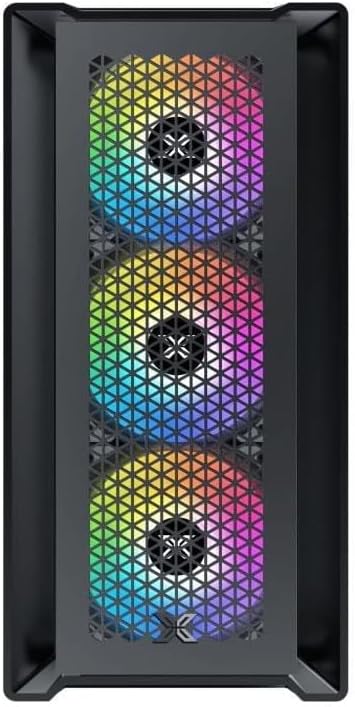
איור 4.1: חזית View. This image displays the front of the Xigmatek Lux M case, highlighting the metallic mesh panel with a triangular design and the three pre-installed 120mm fixed RGB fans.

Figure 4.2: Angled Top-Front View. This perspective shows the tempered glass side panel, offering a clear view of the interior, and the top panel with its I/O ports (USB, audio) and power button.
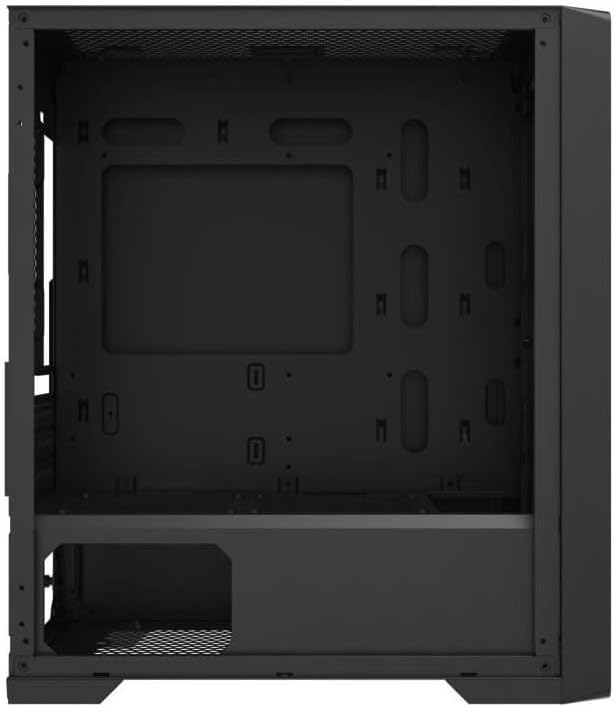
איור 4.3: סידור פנים. The internal structure of the case, featuring the motherboard mounting tray, cutouts for cable management, and the power supply shroud at the bottom.
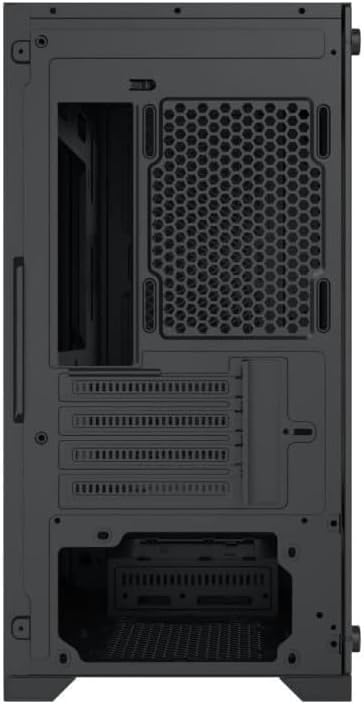
איור 4.4: אחורי View. This image illustrates the rear of the case, including the expansion slots for graphics cards and other add-in cards, the rear fan mounting area, and the power supply mounting bracket.
5. התקנה והתקנה
Follow these steps to install your computer components into the Xigmatek Lux M case.
5.1. הכנת התיק
- הנח את המארז על משטח ישר ויציב.
- Remove the tempered glass side panel by unscrewing the thumb screws and carefully lifting it off. Set it aside on a soft, non-abrasive surface.
- Remove the opposite steel side panel by unscrewing the thumb screws and sliding it backward.
5.2. התקנת לוח אם
The Lux M supports Micro-ATX and Mini-ITX motherboards.
- התקן את מגן ה-I/O (אם אינו מותקן מראש על לוח האם שלך) בפתח האחורי של המארז.
- יישר את לוח האם עם המעמדים המותקנים מראש. ודא שכל חורי הברגים בלוח האם תואמים למעמדים.
- Secure the motherboard using the provided motherboard screws. Do not overtighten.
5.3. התקנת יחידת ספק כוח (PSU)
The PSU mounts at the rear bottom of the case.
- Slide the PSU into its designated compartment from the rear of the case.
- Align the PSU's screw holes with the holes on the case's rear panel.
- Secure the PSU with the provided screws.
5.4. Storage Drive Installation (2.5"/3.5" Drives)
The case supports 2x 2.5"/3.5" storage drives.
- Locate the drive cage beneath the PSU shroud or dedicated 2.5" mounting points behind the motherboard tray.
- For 3.5" HDDs, slide the drive into a drive tray (if applicable) and secure it with screws.
- For 2.5" SSDs, secure them directly to the mounting points using the provided screws.
5.5. Graphics Card (VGA) and Expansion Card Installation
המארז תומך בכרטיסי מסך באורך של עד 320 מ"מ.
- הסר את כיסויי חריצי ההרחבה הדרושים מחלקו האחורי של המארז.
- Insert your graphics card or other expansion card into the appropriate PCIe slot on your motherboard.
- Secure the card to the case using the expansion slot screws.
5.6. Cooling System Installation (Optional)
The Lux M comes with 4x 120mm X24F fixed RGB fans. It supports additional cooling options.
- מצנן מעבד: Max height of 160mm. Install your CPU cooler according to its manufacturer's instructions.
- תמיכה ברדיאטור: The case supports radiators of 360mm, 240mm, or 120mm. Refer to your radiator's manual for installation. Common mounting locations include the front and top panels.
5.7. ניהול כבלים
נצלו את פתחי ניתוב הכבלים ואת נקודות הקשירה שמאחורי מגש לוח האם כדי לארגן את הכבלים. זה משפר את זרימת האוויר ואת האסתטיקה.
5.8. הרכבה סופית
- Once all components are installed and cables are managed, reattach the steel side panel and secure it with thumb screws.
- Carefully reattach the tempered glass side panel and secure it with thumb screws.
6. הוראות הפעלה
After completing the installation, connect your peripherals (monitor, keyboard, mouse) and power cable to the PC. Press the power button located on the top panel of the case to start your system.
The pre-installed X24F RGB fans feature fixed RGB lighting, which will illuminate automatically upon system power-on. No additional software or controller is required for their basic operation.
Ensure that the case's ventilation is not obstructed to maintain optimal airflow and cooling performance.
7. תחזוקה
תחזוקה שוטפת מסייעת להבטיח את אורך החיים והביצועים האופטימליים של רכיבי המחשב שלך.
- ניקוי אבק: יש לנקות מעת לעת את מסנני האבק (אם קיימים) ואת פנים המארז באמצעות אוויר דחוס או מברשת רכה. הצטברות אבק עלולה להפריע לזרימת האוויר ולהוביל להתחממות יתר.
- ניקוי חיצוני: נגב את המשטחים החיצוניים עם רך, דamp cloth. Avoid harsh chemicals that may damage the finish or tempered glass.
- זכוכית מחוסמת: Clean the tempered glass panel with a glass cleaner and a microfiber cloth to avoid scratches and streaks.
8. פתרון תקלות
אם נתקלת בבעיות במהלך ההתקנה או לאחריה, שקול את השלבים הנפוצים הבאים לפתרון בעיות:
- אין כוח:
- ודא שכבל החשמל מחובר היטב גם לספק הכוח וגם לשקע בקיר.
- Check that the PSU switch is in the 'ON' position.
- Verify that the front panel power switch cable is correctly connected to the motherboard's front panel header.
- Fans Not Spinning / RGB Not Lighting:
- Ensure all fan power cables are securely connected to the motherboard or a fan controller.
- For RGB, confirm that any necessary RGB headers are connected to the motherboard (though the included fans are fixed RGB and should light up with power).
- אין פלט תצוגה:
- Verify that your monitor cable is connected to the graphics card (if installed) and not the motherboard's integrated graphics port.
- הכנס מחדש את כרטיס המסך לחריץ ה-PCIe שלו.
- התחממות יתר:
- ודא שכל מאווררי המארז מסתובבים וכיוונם נכון לקבלת זרימת אוויר אופטימלית (יניקה/פליטה).
- נקו את כל מסנני האבק והרכיבים הפנימיים.
- Verify that the CPU cooler is properly seated and making good contact with the CPU.
For more complex issues, consult your component manuals or seek assistance from Xigmatek support or a qualified technician.
9. מפרטים
| תכונה | מִפרָט |
|---|---|
| מותג | Xigmatek |
| שם הדגם | Lux M |
| מספר דגם | EN48540 |
| סוג מקרה | מגדל מיני |
| תאימות לוח אם | מיקרו ATX, מיני ITX |
| חוֹמֶר | Tempered Glass (side panel), Metal (front panel) |
| צֶבַע | שָׁחוֹר |
| מאווררים מותקנים מראש | 4 x 120mm X24F Fixed RGB Fans |
| תמיכת רדיאטור | 360 מ"מ, 240 מ"מ, 120 מ"מ |
| מקסימום גובה מצנן מעבד | 160 מ"מ |
| אורך VGA מקסימלי | 320 מ"מ |
| אורך PSU מקסימלי | 165 מ"מ |
| מפרצי אחסון | 2x 2.5"/3.5" |
| תכונות מיוחדות | RGB Lighting, Triangular Mesh Front Design |
10. אחריות ותמיכה
Xigmatek products are manufactured to the highest quality standards. For warranty information and technical support, please refer to the warranty card included with your product or visit the official Xigmatek webאתר. אנא שמור את הוכחת הרכישה שלך לצורך תביעות אחריות.
For further assistance, you may contact Xigmatek customer support through their official channels.