
HATOKU XD010
HATOKU External CD DVD Drive User Manual
דגם: XD010
המוצר נגמרview
The HATOKU External CD DVD Drive (Model XD010) is a versatile and portable optical drive designed for modern computers lacking an internal CD/DVD reader/burner. It features high-speed USB 3.0 connectivity, a Type-C port, an integrated SD/TF card reader, and two additional USB 3.0 ports, making it a comprehensive solution for data transfer, multimedia playback, and system installations.

Figure 1: HATOKU External CD DVD Drive, showcasing its compact design and multiple connectivity options including USB 3.0, Type-C, SD, and TF card slots.
תכונות מפתח
- High-Speed USB 3.0: Offers data transfer speeds up to 5 Gbps, backward compatible with USB 2.0/1.0.
- רב תפקודי: Supports reading and writing for CD, CD-R, CD-RW, DVD-RW, DVD±R, DVD±R DL, DVD±RW, DVD-RAM, and DVD formats.
- קורא כרטיסים משולב: Features SD and TF card slots for convenient data access. Note: SD and TF slots cannot be used simultaneously.
- יציאות USB נוספות: Includes two USB 3.0 ports for connecting other peripherals.
- תאימות רחבה: Compatible with Windows 2000/XP/2003/Vista/7/8/10/11, Linux, and Mac operating systems.
- הכנס והפעל: No additional drivers or external power supply typically required (see Troubleshooting for exceptions).
- עיצוב נייד: Compact and lightweight with an integrated cable for easy transport.

Figure 2: Illustration of the high-speed data transmission capabilities (USB 3.0 up to 5Gbps) and supported disc types (DVD, CD, VCD ROM).
הוראות התקנה
- התחבר למחשב:
Locate an available USB port (USB 3.0 or USB 2.0) on your desktop PC, laptop, or MacBook. Plug the integrated USB cable from the HATOKU External CD DVD Drive into this port. For optimal performance, use a USB 3.0 port.

Figure 3: The external drive connected to a laptop via its integrated USB cable, demonstrating its plug-and-play setup.
- System Recognition and Compatibility:
The operating system (Windows, Linux, or Mac) should automatically detect and install the necessary drivers. This is a plug-and-play device, so no manual driver installation is typically required.

Figure 4: The drive's wide compatibility with Windows (11, 10, 8.1, 7, Vista, XP), Mac OS, and Linux, and various computer types (desktops, laptops, iMac, MacBook).
- Power Supply (If Needed):
For some low-power USB ports on certain laptops (e.g., Microsoft Surface Pro, Lenovo Yoga) or front USB ports on desktop PCs (which may not be directly connected to the motherboard), an additional power supply might be necessary. If the drive is not recognized or functions intermittently, connect the included power supply cable to the drive's power port and a USB power source (e.g., a wall adapter or another USB port with sufficient power).

Figure 5: The external drive showing the optional power supply cable connection for situations where additional power is required.
הוראות הפעלה
Using the CD/DVD Drive
- הכנסת דיסק:
Press the eject button on the front of the drive to open the disc tray. Carefully place a CD or DVD onto the tray, ensuring it is centered on the spindle. Gently push the tray back into the drive until it clicks shut.
- Reading a Disc:
Once the disc is inserted, your computer's operating system should automatically detect it. You can then access the disc's contents through "My Computer" (Windows) or "Finder" (Mac). For multimedia discs, playback software may launch automatically or can be opened manually.
- Burning a Disc:
To burn files to a blank CD-R/RW or DVD±R/RW, you will need disc burning software (e.g., Windows Media Player, Nero, Roxio). Open your preferred burning software, select the files you wish to burn, and follow the software's instructions to initiate the burning process.

Figure 6: Visual representation of the disc burning process: dragging files to software, burning, and completion.
- הוצאת דיסק:
To eject a disc, either press the eject button on the drive or use the software eject function from your computer's operating system (right-click the drive icon and select "Eject").
Using the Card Reader and USB Ports
- קורא כרטיסי SD/TF:
Insert your SD or TF (Micro SD) card into the corresponding slot on the side of the drive. The card will appear as a removable drive on your computer, allowing you to transfer files. Remember: SD and TF slots cannot be used simultaneously.
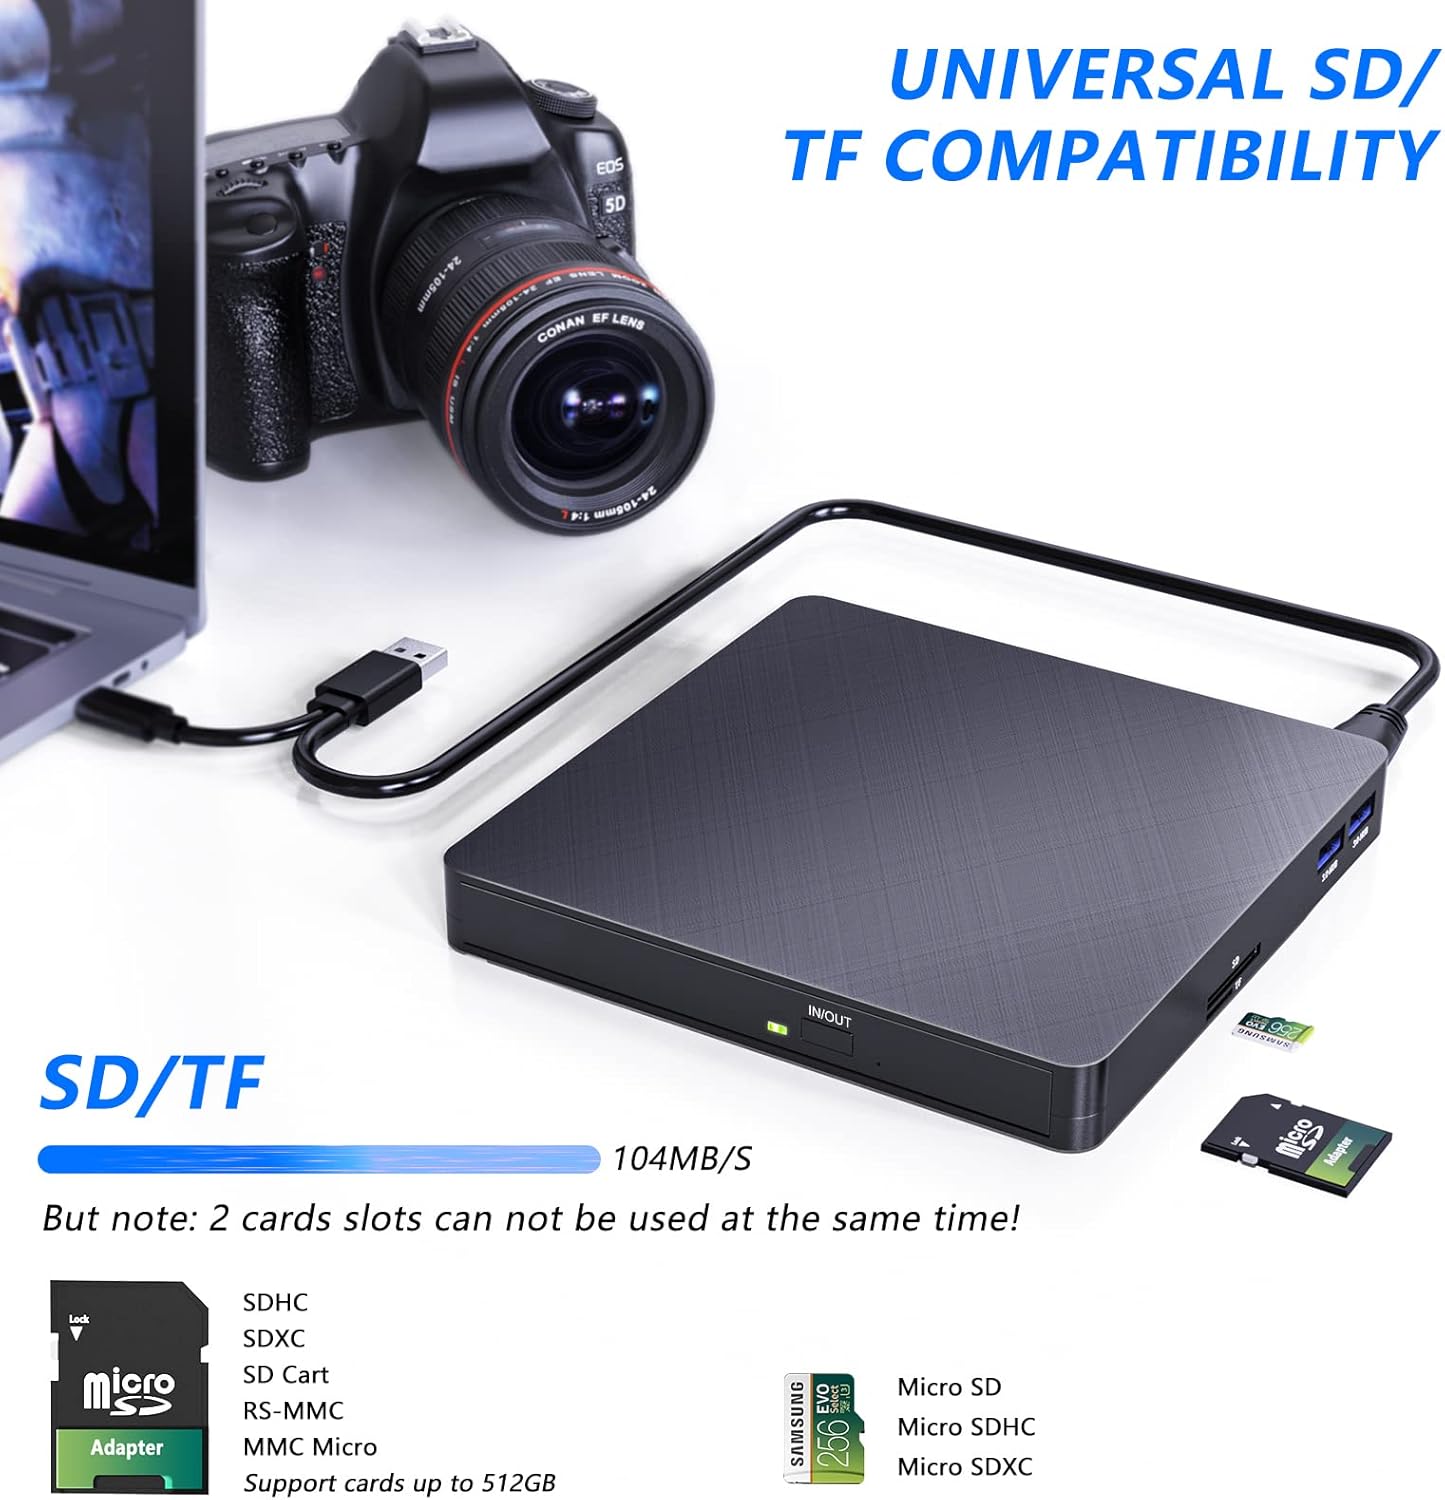
Figure 7: The external drive highlighting its universal SD/TF card compatibility, showing cards inserted into the respective slots.
- יציאות USB 3.0:
The two USB 3.0 ports on the side of the drive can be used to connect other USB devices such as flash drives, external hard drives, or charging cables for mobile devices. These ports offer high-speed data transfer for connected devices.
- Typical Usage Scenarios:

איור 8: דוגמהamples of how the drive can be used, including copying music, watching movies, transferring data, and installing systems.
תַחזוּקָה
- ניקוי: השתמשו במטלית רכה ויבשה כדי לנגב את החלק החיצוני של הכונן. אין להשתמש בחומרי ניקוי נוזליים או בחומרים שוחקים.
- טיפול בדיסק: טפלו בתקליטורים בקצוותיהם כדי למנוע טביעות אצבעות ושריטות. אחסנו את התקליטורים בקופסאות שלהם כאשר אינם בשימוש.
- אִחסוּן: אחסן את הכונן במקום קריר ויבש, הרחק מאור שמש ישיר וטמפרטורות קיצוניות.
- הימנע מהשפעה: While the drive is shock-resistant, avoid dropping or subjecting it to strong impacts to prevent internal damage.
פתרון בעיות
| בְּעָיָה | סיבה אפשרית | פִּתָרוֹן |
|---|---|---|
| הכונן לא מזוהה על ידי המחשב. | Insufficient power from USB port; loose connection; driver issue. |
|
| Disc not reading or burning correctly. | Dirty or scratched disc; incompatible disc format; software issue. |
|
| כרטיס SD/TF לא זוהה. | Card not fully inserted; SD and TF slots used simultaneously. |
|
מפרטים
| תכונה | פְּרָט |
|---|---|
| מותג | HATOKU |
| מספר דגם | XD010 |
| צֶבַע | שָׁחוֹר |
| מִמְשָׁק | USB 3.0, Type-C |
| יציאות USB | 2 x USB 3.0 |
| קורא כרטיסים | SD, TF (מיקרו SD) |
| מהירות כתיבה | פי 8 (DVD), פי 24 (CD) |
| קרא מהירות | פי 8 (DVD), פי 24 (CD) |
| תְאִימוּת | Windows 2000/XP/2003/Vista/7/8/10/11, Linux, Mac OS |
| מידות (L x W x H) | 14.3 x 14.3 x 2 ס"מ (5.6 x 5.6 x 0.8 אינץ ') |
| מִשׁקָל | 370 גרם |
| תכונות מיוחדות | עמיד בפני זעזועים |

Figure 9: Detailed product view showing dimensions, port types (USB 3.0, Type-C), and card slots (SD, TF).
אחריות ותמיכה
HATOKU provides a lifetime warranty for this external CD DVD drive from the date of purchase. We are committed to ensuring customer satisfaction.
For any questions or issues regarding your HATOKU External CD DVD Drive, please contact our customer support team. We offer 24/7 online support to assist you. If necessary, we will ensure a refund or replacement.
לתמיכה, אנא בקרו באתר הרשמי שלנו webאתר או עיינו בפרטי הקשר המצורפים לאריזת המוצר.
Ask a question about this manual
Ask about setup, troubleshooting, compatibility, parts, safety, or missing instructions. Manuals+ will review the question and use this page’s manual context to help answer it.