
מָבוֹא
This manual provides essential information for the safe and effective use of your Sun Joe 24V-X2-16LM 48-Volt IONMAX Cordless Brushless Lawn Mower Kit. Please read these instructions thoroughly before assembly, operation, or maintenance. Keep this manual for future reference.
מידע בטיחות
יש לתת עדיפות לבטיחות בעת הפעלת כלי עבודה חשמליים. אי ציות להוראות הבטיחות עלול לגרום לפציעה חמורה או נזק לרכוש.
כללי בטיחות כלליים
- Read and understand all instructions before operating the appliance.
- הרחק ילדים ועוברי אורח מאזור ההפעלה.
- יש ללבוש ציוד מגן אישי (PPE) מתאים, כולל הגנה על העיניים, הגנה על השמיעה ונעליים יציבות.
- Inspect the work area for objects that could be thrown by the blade. Remove all debris.
- אין להפעיל את מכסחת הדשא על דשא רטוב או בגשם.
- ודא שהסוללה טעונה במלואה לפני השימוש והסר אותה כאשר אינה בשימוש או במהלך תחזוקה.
- Never attempt to bypass safety features.
תוכן החבילה
ודא שכל הפריטים נמצאים בעת הוצאת האריזה:
- Sun Joe 24V-X2-16LM Lawn Mower Unit
- 2 x 4.0-Ah IONMAX Lithium-Ion Batteries
- Dual-Port Charger
- 12-Gallon Grass Collection Bag
- Upper and Lower Handle Frames
- Assembly Hardware (latches, washers, nuts)
- מדריך הוראות

תמונה: מעלview of the Sun Joe 24V-X2-16LM Lawn Mower Kit, showing the mower, batteries, charger, and grass collection bag.
הגדרה
1. הרכבת ידית
- Lift the lower handle to the desired height.
- Turn the latch clockwise and flip it up to lock the lower handle frame in position.
- Connect the upper frame and lower frame handles.
- Insert latches into aligned holes. Attach with provided washers and nuts. Flip latches to secure.
2. חיבור לשקית איסוף דשא
- To use with the grass collection bag, first remove the mulching plug (if installed).
- With the ejector flap lifted, hook the grass collection bag into place.
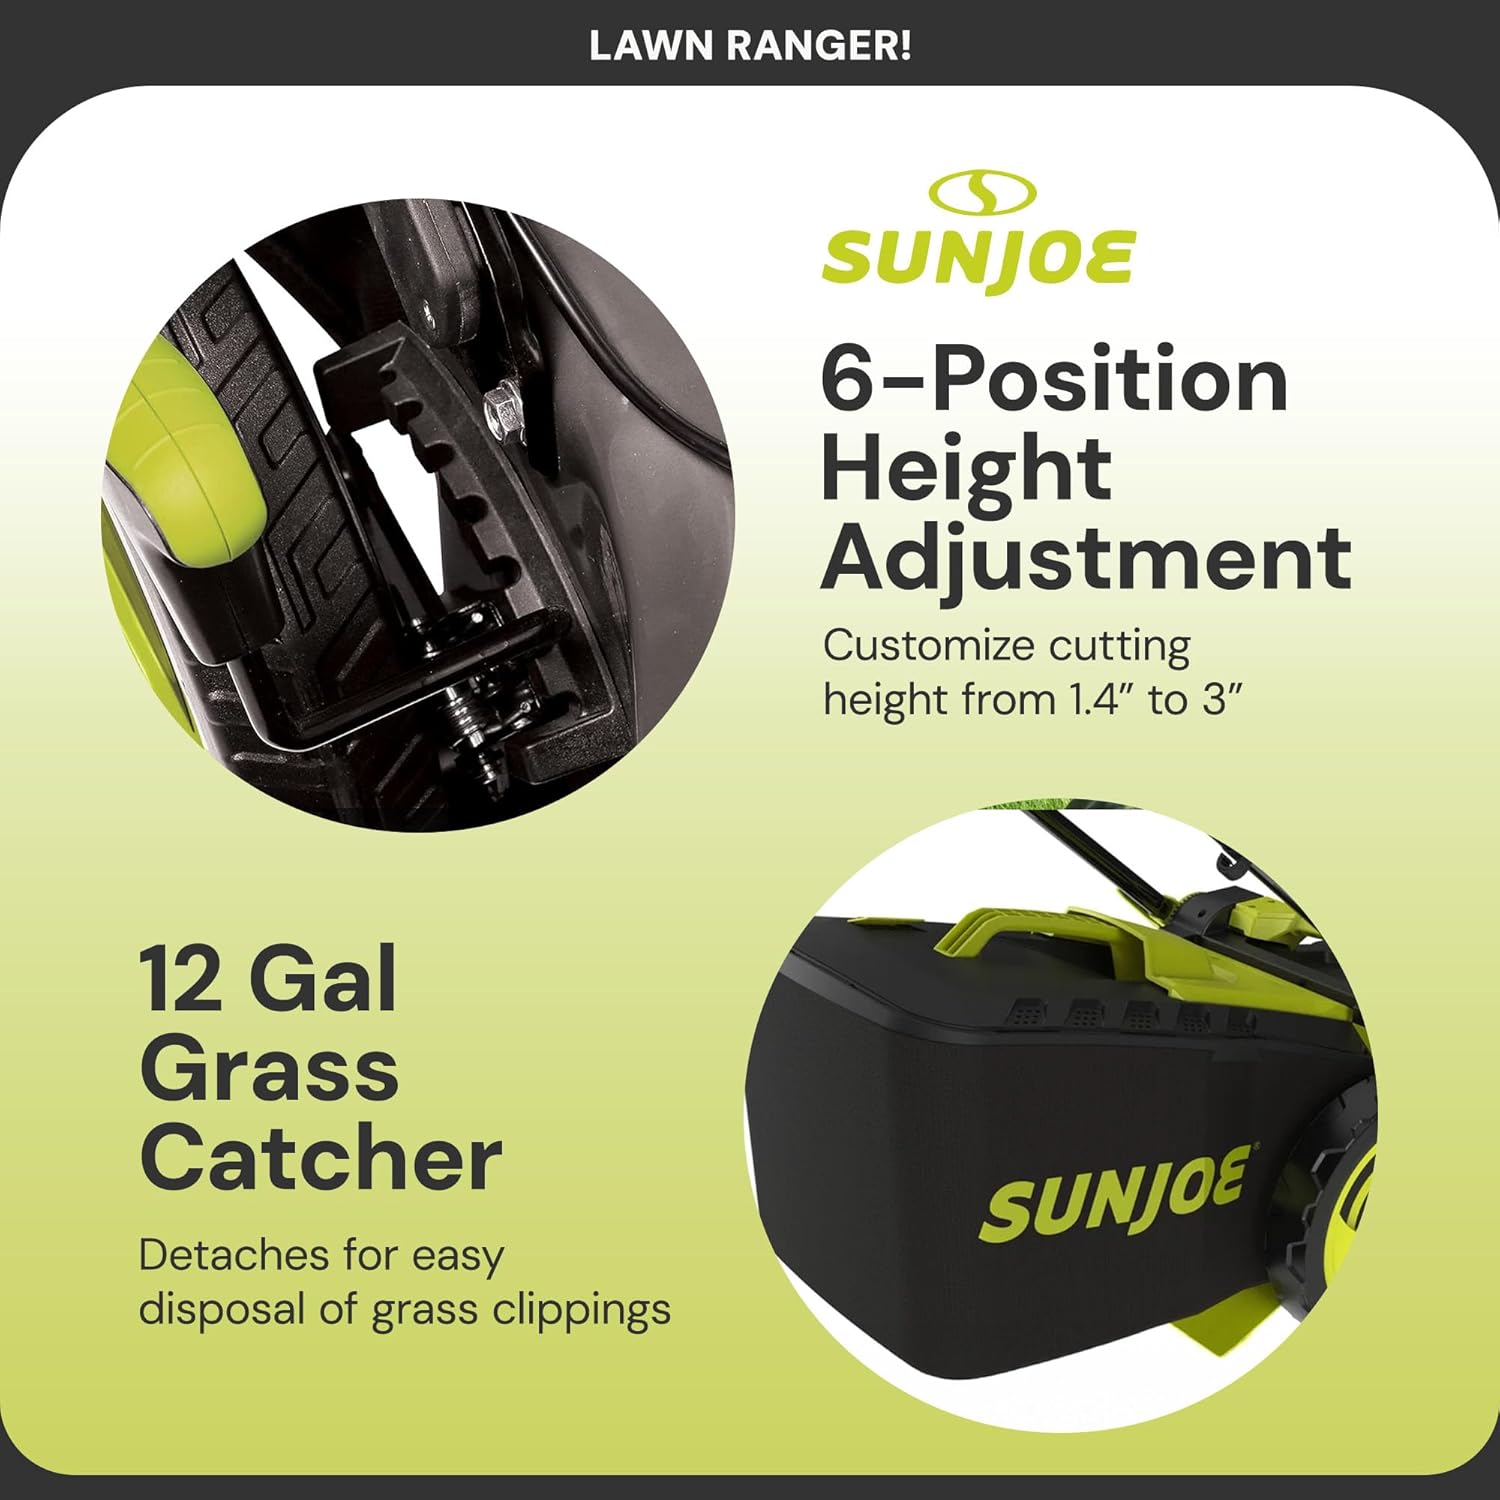
תמונה: תקריב view of the mower's height adjustment lever and the grass catcher attachment point.
3. טעינת והתקנת סוללה
- Insert the 4.0-Ah lithium-ion batteries into the dual-port charger.
- Allow approximately 1 hour and 50 minutes for a full charge of both batteries.
- Once charged, insert the batteries into the designated battery compartments on the mower. Ensure they click securely into place.

Image: The Sun Joe lawn mower with its two 48V 4.0 Ah batteries inserted into the battery compartment.
וידאו האסיפה
Video: Quick assembly guide for the Sun Joe 24V-X2-16LM Cordless Walk-Behind Brushless Mower, demonstrating handle setup and grass bag attachment.
מִבצָע
1. הפעלת המכסחת
- Ensure batteries are fully charged and correctly installed.
- Press and hold the safety button, then pull the bail switch towards the handle. The mower will start.
- שחררו את כפתור הבטיחות לאחר שהמכסחת פועלת.
2. כוונון גובה החיתוך
- The mower features a 6-position manual height-adjustment lever.
- Adjust the lever to select a cutting height between 1.4 inches and 3 inches.
- לקבלת התוצאות הטובות ביותר, הימנעו מכיסוח של יותר משליש מאורך עלה הדשא בכל פעם.
3. טכניקות כיסוח
- Mow in overlapping rows to ensure even coverage.
- עבור דשא עבה או גבוה, שקול לבצע שני מעברים, תוך העלאת גובה הכיסוח במעבר הראשון.
- Always push the mower forward; do not pull it towards you.

Image: The Sun Joe lawn mower cutting grass in a residential lawn, demonstrating its 16-inch cutting width.
תַחזוּקָה
תחזוקה שוטפת מבטיחה ביצועים אופטימליים ומאריכה את חיי מכסחת הדשא שלכם.
1. ניקיון
- יש להוציא תמיד סוללות לפני הניקוי.
- נקו את משטח הכיסוח ואת אזור הלהב לאחר כל שימוש כדי למנוע הצטברות דשא. השתמשו במברשת או במטלית; אין להשתמש במים ישירות על רכיבים חשמליים.
- נגב את החלק החיצוני עם המודעהamp בַּד.
2. טיפול להב
- בדקו את הלהב באופן קבוע לאיתור חדות ונזקים. להב קהה עלול לקרוע את הדשא, ולהוביל למדשאה לא בריאה.
- If the blade is damaged or excessively dull, it should be sharpened or replaced by a qualified service technician.
3. אחסון סוללה
- אחסן סוללות במקום קריר ויבש הרחק מאור שמש ישיר וטמפרטורות קיצוניות.
- לאחסון לטווח ארוך, יש לטעון את הסוללות עד לכ-50% קיבולת.
פתרון בעיות
| בְּעָיָה | סיבה אפשרית | פִּתָרוֹן |
|---|---|---|
| מכסחת לא מתחילה | Batteries not charged or improperly installed; Safety key not inserted; Bail switch not engaged. | Charge and properly install batteries; Insert safety key; Engage bail switch. |
| מכסחת הדשא עוצרת במהלך הפעולה | Batteries depleted; Overload protection activated (e.g., very thick grass). | Recharge batteries; Reduce load by raising cutting height or taking smaller passes. |
| חתך לא אחיד | Dull or damaged blade; Uneven terrain; Incorrect cutting height. | Sharpen or replace blade; Mow on level ground; Adjust cutting height. |
| רטט מוגזם | להב עקום או לא מאוזן; רכיבים רופפים. | Inspect and replace blade if bent; Tighten all fasteners. |
מפרטים
| תכונה | פְּרָט |
|---|---|
| מותג | סאן ג'ו |
| מספר דגם | 24V-X2-16LM |
| מקור כוח | Battery Powered (2x 4.0 Ah Lithium-Ion) |
| כרך ידtage | 48-Volt (2x 24V) |
| סוג מנוע | Brushless (800-watt) |
| רוחב חיתוך | 16 אינץ' |
| התאמת גובה | 6-position manual (1.4 inches to 3 inches) |
| קיבולת שקית איסוף דשא | 12 ליטר |
| משקל פריט | 18.9 Pounds (without batteries) |
| מידות המוצר | 32.7" D x 18.9" W x 13.8" H |
| חוֹמֶר | סגסוגת פלדה |
| צֶבַע | יָרוֹק |

Image: The Sun Joe lawn mower with key dimensions (length, width, height, weight) highlighted.
אחריות ותמיכה
מידע על אחריות
This product includes a 2-year manufacturer's warranty. Please refer to the warranty card included in your package for full terms and conditions.
תמיכת לקוחות
For technical assistance, replacement parts, or warranty claims, please contact Sun Joe customer service. Contact details can typically be found on the manufacturer's webבאתר או על אריזת המוצר.