
1. הקדמה
This manual provides detailed instructions for the installation, operation, and maintenance of your GALAX Revolution-01 Gaming PC Case. Please read this manual thoroughly before beginning installation to ensure proper setup and optimal performance.
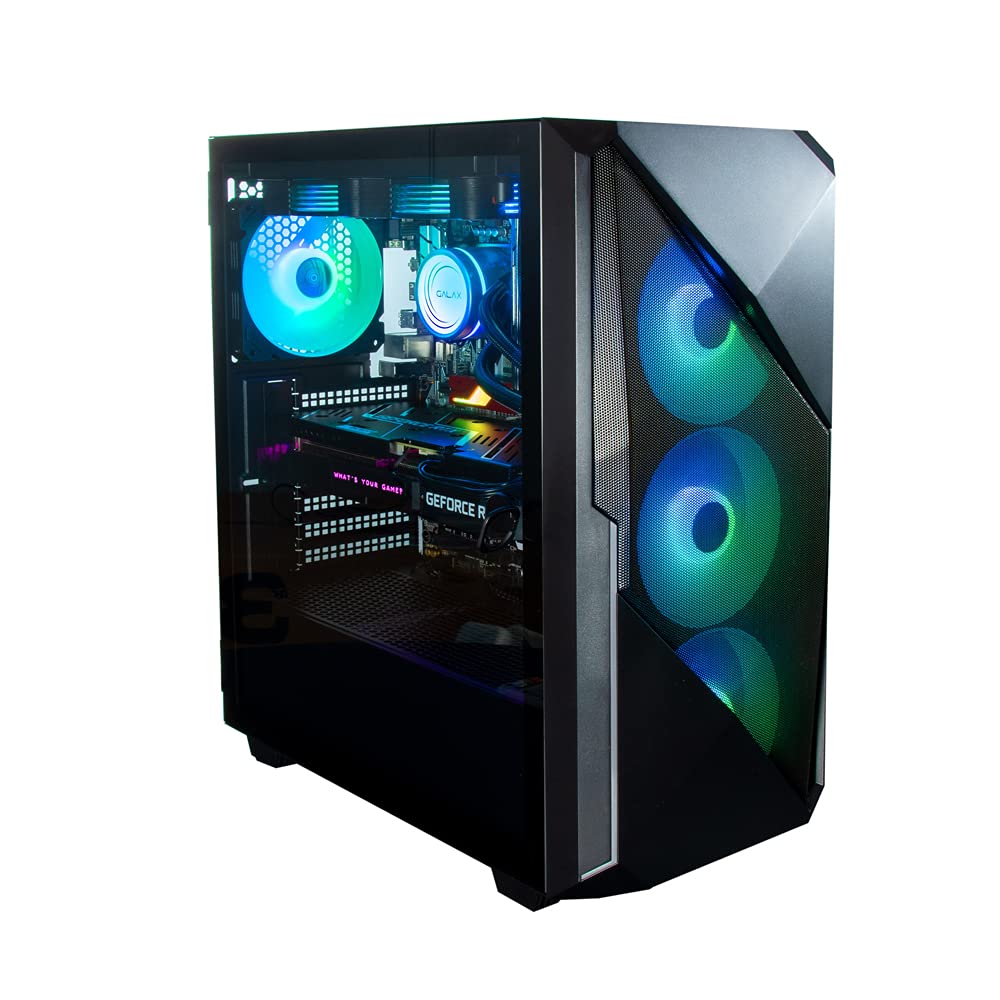
איור 1: קדמי-שמאלי view of the GALAX Revolution-01 Gaming PC Case.
2. תכונות מוצר
- Mid Tower Design: Accommodates ATX, M-ATX, and M-ITX motherboards, offering versatile compatibility for various PC builds.
- Integrated ARGB Controller: Manages customizable lighting effects for the four pre-installed ARGB cooling fans and other compatible RGB components.
- Premium Tempered Glass Panel: A durable side panel provides a clear view of internal components while ensuring structural integrity.
- Optimized Airflow Design: Engineered for efficient cooling, promoting stable performance during intensive gaming sessions.
- פנים מרווח: Facilitates easy installation of large components such as graphics cards, CPU coolers, and multiple storage drives.
- Magnetic Dust Filter: Located on the top panel, this filter helps prevent dust accumulation, maintaining cleaner internals and extending component lifespan.
3. התקנה והתקנה
3.1 Unpacking the Case
הוצא בזהירות את מארז המחשב מאריזתו. בדוק אם נגרם נזק במהלך ההובלה. שמור את כל חומרי האריזה לצורך הובלה עתידית או תביעות אחריות.
3.2 גישה לפנים
The GALAX Revolution-01 features a hinged tempered glass side panel for easy access. Gently open the panel to expose the interior for component installation.

Figure 2: Tempered glass side panel in open position.
3.3 התקנת לוח אם
The case supports ATX, Micro-ATX, and Mini-ITX motherboards. Install the necessary standoffs for your motherboard form factor. Carefully place your motherboard onto the standoffs and secure it with screws.

Figure 3: Component placement diagram for motherboard, storage, and fans.
3.4 התקנת יחידת ספק כוח (PSU)
Install your power supply unit in the designated top-mount location. Secure it with screws from the rear of the case.
3.5 התקנת כונן אחסון
The case provides bays for 3.5-inch hard disk drives (HDDs) and 2.5-inch solid-state drives (SSDs). Refer to the case's internal structure for specific mounting points and secure your drives.
3.6 התקנת כרטיס מסך וכרטיס הרחבה
Install your graphics card and other expansion cards into the appropriate PCIe slots on your motherboard. Secure them with the provided screws or retention clips.
3.7 ניהול כבלים
Utilize the cable routing cutouts and tie-down points behind the motherboard tray to manage cables. This improves airflow and maintains a clean interior aesthetic.

איור 4: פנים view highlighting cable management areas.
4. Operating the ARGB Lighting
The GALAX Revolution-01 comes with four pre-installed ARGB fans and an integrated ARGB controller. Connect the ARGB cables from the fans to the controller, and the controller to your motherboard's ARGB header (if available) or a SATA power connector for standalone operation.
4.1 ARGB Control
Lighting effects can be controlled via:
- תוכנת לוח אם: If connected to a compatible motherboard ARGB header, use the motherboard's RGB software (e.g., ASUS Aura Sync, MSI Mystic Light, Gigabyte RGB Fusion) to synchronize and customize lighting.
- Case Control Button: If no motherboard ARGB header is used, a dedicated button on the case's front I/O panel may cycle through pre-set lighting modes.

איור 5: פנים view with active ARGB lighting.
5. תחזוקה
5.1 ניקוי מסנן האבק
The top panel features a magnetic dust filter. Regularly remove and clean this filter to maintain optimal airflow and prevent dust buildup inside the case. Wash with water and mild soap, then dry completely before reattaching.
5.2 General Case Cleaning
השתמש רך, דamp cloth to wipe down the exterior surfaces of the case. For the tempered glass panel, use a glass cleaner and a microfiber cloth to avoid streaks. Avoid abrasive cleaners or solvents.
5.3 Fan Cleaning
Periodically clean the fan blades with compressed air or a soft brush to remove dust. Ensure the system is powered off before cleaning fans.
6. פתרון תקלות
6.1 Fans Not Spinning or Lighting Up
- בדוק את חיבורי החשמל: Ensure all fan power cables and the ARGB controller's power cable (SATA) are securely connected to the power supply.
- בדוק חיבורי ARGB: Verify that ARGB cables are correctly connected to the controller or motherboard header.
- תוכנת לוח אם: If using motherboard software, ensure it is updated and configured correctly for ARGB control.
6.2 זרימת אוויר לקויה או התחממות יתר
- Clean Dust Filters: Ensure the top magnetic dust filter and any other intake filters are clean.
- Check Fan Orientation: Verify that fans are installed with the correct intake/exhaust orientation for optimal airflow.
- ניהול כבלים: Improve cable routing to reduce obstructions to airflow.

Figure 6: Airflow diagram illustrating cooling potential.
7. מפרטים
| תכונה | פְּרָט |
|---|---|
| מותג | Galax |
| שם הדגם | Revolution-01 Black |
| מספר דגם | CG01AGBA4A0 |
| סוג מקרה | מגדל אמצע |
| תאימות לוח אם | ATX, מיקרו ATX, מיני ITX |
| חומר המארז | מתכת, זכוכית מחוסמת |
| מספר המעריצים | 4 (ARGB) |
| גודל מאוורר | 120 מילימטרים |
| שיטת קירור | אֲוִיר |
| סוג הרכבה של ספק כוח | הר עליון |
| Internal Bays Quantity | 4 (for 3.5 Inches Hard Disk Form Factor) |
| תכונות מיוחדות | Built-In Fan, Dust Filter, RGB Lighting |
| משקל פריט | 3 קילוגרם |
| מידות פריט (D x W x H) | 42.4D x 21.5W x 46H סנטימטרים |
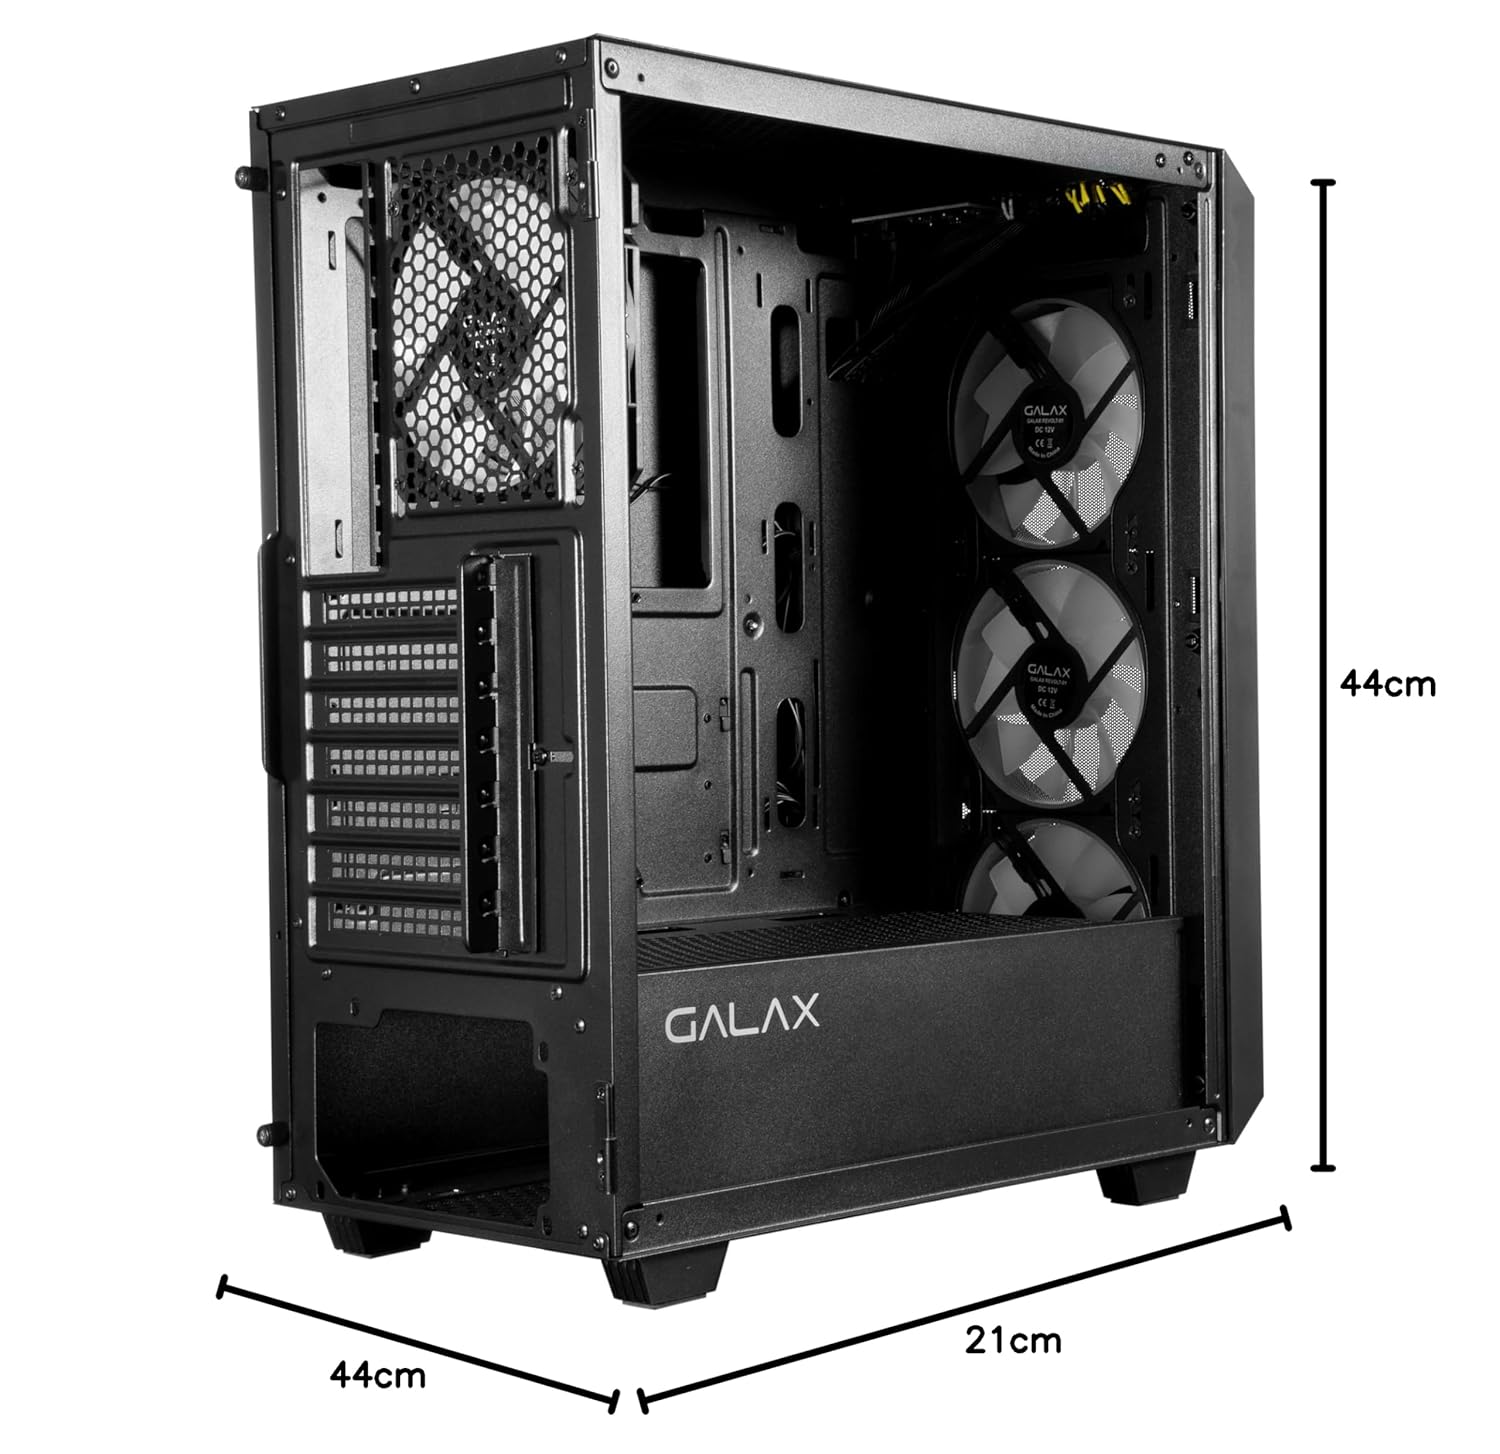
Figure 7: Case dimensions.
8. אחריות ותמיכה
8.1 מידע אחריות
מוצר זה מכוסה על ידי א אחריות יצרן לשנה from the date of purchase. Please retain your proof of purchase for warranty claims. The warranty covers manufacturing defects but does not cover damage caused by improper installation, misuse, or accidental damage.
8.2 Importer Contact Information
For support or warranty inquiries, please contact the importer:
Technology And GadgetsGala no.142/143, 1st Floor, Building no.6,
Mittal Industrial Estate, Marol, Andheri (East),
Mumbai - 400059., Mumbai, India, Maharashtra