1. הקדמה
תודה על הרכישהasing the KEPLUG Sunrise Alarm Clock. This device is designed to enhance your waking and sleeping experience with its unique features, including sunrise and sunset simulations, dual alarms, FM radio, and various natural sounds. Please read this manual carefully to ensure proper use and optimal performance.
תכולת החבילה:
- 1 x KEPLUG Sunrise Alarm Clock
- 1 x כבל מיקרו USB
- 1 x מתאם קיר
- 1 x מדריך למשתמש
2. המוצר נגמרview
Familiarize yourself with the main components and controls of your KEPLUG Sunrise Alarm Clock.

תמונה 2.1: חֲזִית view of the KEPLUG Sunrise Alarm Clock, showing the digital time display and the illuminated light panel. The clock face is round with a white base.
כפתורי בקרה ויציאות:
Refer to the diagram below for button identification (exact button layout may vary slightly by model, but functions are consistent).
- לחצן הגדרת זמן: משמש לכניסה למצב הגדרת זמן.
- לחצן אזעקה 1: Used to set and activate Alarm 1.
- לחצן אזעקה 2: Used to set and activate Alarm 2.
- כפתור רדיו FM: Activates and controls FM radio functions.
- כפתור אור: Controls the light brightness and color modes.
- כפתורי עוצמת קול +/-: מכוונן את עוצמת הקול.
- לחצנים למעלה/למטה: ניווט בתפריטים והתאמת ערכים.
- Snooze/Sleep Aid Button: Activates snooze during an alarm or sleep aid function.
- יציאת טעינה מסוג USB: לטעינת התקנים חיצוניים.
- כניסת חשמל מיקרו USB: מתחבר למתאם החשמל.
3. התקנה
3.1 חיבור מתח
- Connect the micro USB cable to the power input port on the back of the alarm clock.
- חברו את מתאם הקיר לשקע חשמלי רגיל.
- התצוגה תידלק, ותציין שהמכשיר מופעל.
The clock includes a built-in backup battery to retain settings during power outages or disconnections.
3.2 קביעת השעה
- הקש על לחצן הגדרת זמן (often represented by a clock icon). The hour display will start flashing.
- השתמש ב- כפתורי למעלה / למטה כדי להתאים את השעה.
- הקש על לחצן הגדרת זמן again to confirm the hour and move to minute setting. The minute display will flash.
- השתמש ב- כפתורי למעלה / למטה כדי להתאים את הדקות.
- הקש על לחצן הגדרת זמן a third time to confirm the minutes.
- כדי לעבור בין פורמט של 12 שעות לפורמט של 24 שעות, לחצו על הלחצן כפתורי למעלה / למטה while the time is flashing during setup, or refer to the specific instructions in your manual for a dedicated time format button.
3.3 Time Display Brightness
The time display offers three brightness settings: High, Low, and Off. This can typically be adjusted by repeatedly pressing a dedicated display brightness button or by holding the Time Setting button. Refer to your specific model's instructions for exact control.
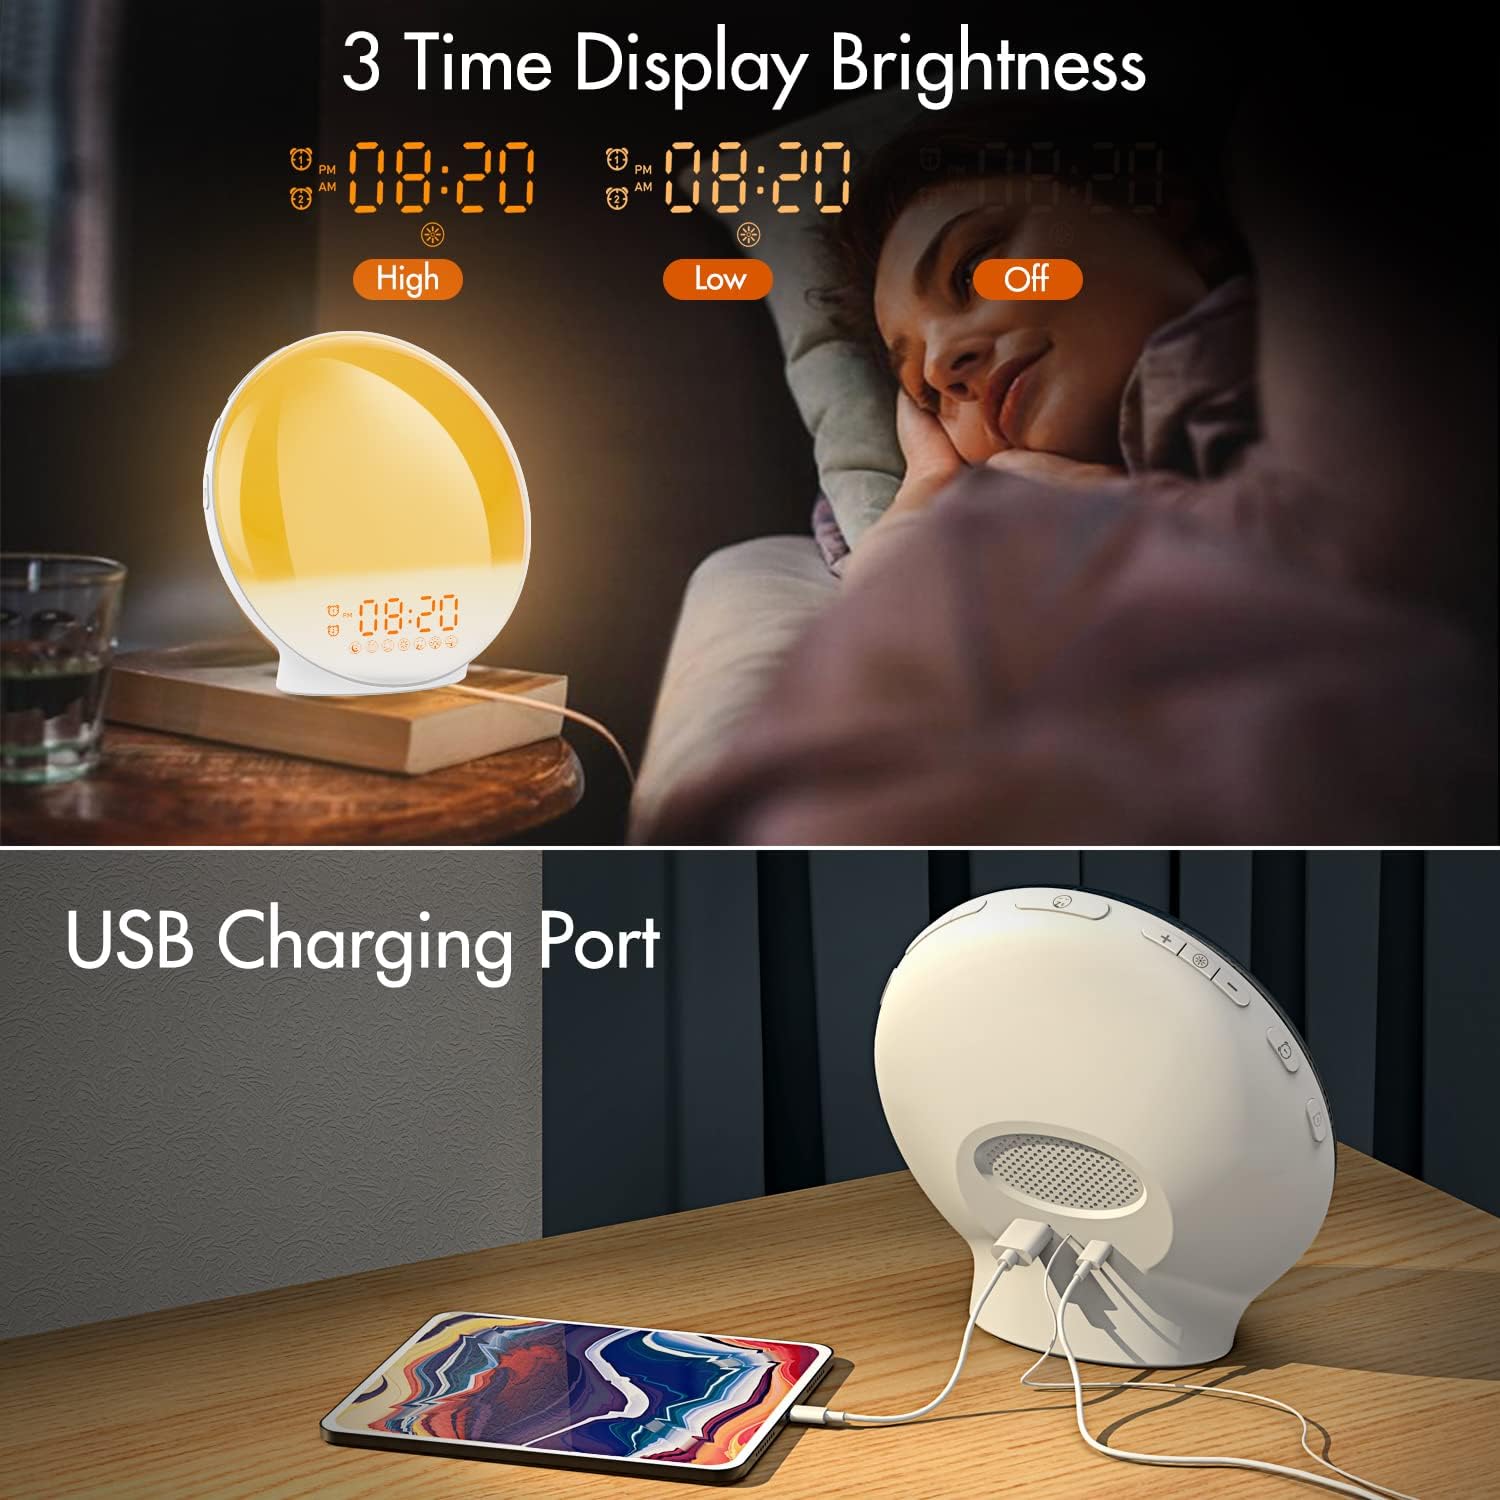
תמונה 3.1: Illustration of the three time display brightness options: High, Low, and Off, allowing users to customize visibility for different times of day or night.
4. הוראות הפעלה
4.1 הגדרת אזעקות (אזעקה 1 ואזעקה 2)
The clock features two independent alarms, allowing for separate wake-up times (e.g., weekday and weekend).

תמונה 4.1: Depiction of the dual alarm functionality, allowing users to set different alarms for weekdays and weekends, along with the snooze feature.
- הקש על לחצן אזעקה 1 (אוֹ לחצן אזעקה 2) to activate and enter alarm setting mode. The alarm time will flash.
- השתמש ב- כפתורי למעלה / למטה כדי להגדיר את שעת ההתראה הרצויה.
- הקש על כפתור אזעקה again to confirm the hour and set the minutes.
- השתמש ב- כפתורי למעלה / למטה to set the desired alarm minutes.
- הקש על כפתור אזעקה again to select the wake-up sound. Use כפתורי למעלה / למטה to cycle through 7 nature sounds or FM radio.
- הקש על כפתור אזעקה again to set the volume level (1-16) for the alarm sound. Use כפתורי למעלה / למטה להתאים.
- הקש על כפתור אזעקה one last time to confirm all settings and activate the alarm. An alarm icon will appear on the display.
4.2 פונקציית נודניק
When an alarm sounds, tap the כפתור נודניק (often the large button on top or front) to pause the alarm for 9 minutes. This can be repeated up to 5 times.
4.3 סימולציית זריחה
The sunrise simulation gradually brightens the light before your alarm time, mimicking a natural sunrise.

תמונה 4.2: Visual representation of the sunrise simulation feature, where the light intensifies gradually over a set period before the alarm, designed for a gentle wake-up.
- When setting an alarm, after selecting the sound and volume, you will typically be prompted to set the sunrise duration.
- השתמש ב- כפתורי למעלה / למטה to choose a duration between 10 to 60 minutes. The light will gradually increase from 0% to the set brightness level (0-20) during this period.
- The light color will transition from deep red to bright yellow, simulating a natural sunrise.
4.4 Sunset Simulation / Sleep Aid
The sunset simulation gradually dims the light and can play soothing sounds to help you fall asleep.

תמונה 4.3: Illustration of the sunset simulation, where the light gradually dims over a period of 10 to 120 minutes, accompanied by optional sleep sounds like rain, forest, river, or FM radio.
- הקש על Snooze/Sleep Aid Button (or a dedicated Sleep Aid button) to activate the sleep aid function.
- השתמש ב- כפתורי למעלה / למטה to select a duration for the dimming process (10-120 minutes).
- You can also select a natural sound (Rain, Forest, River) or FM radio to play during this period.
- The light will gradually dim from 100% to 0% over the selected duration, and the sound will fade out.
4.5 רדיו FM
The built-in FM radio allows you to listen to your favorite stations or use them as an alarm sound.

תמונה 4.4: מֵעַלview of the 7 available alarm sounds and the FM radio option, providing diverse choices for waking up.
- הקש על לחצן רדיו FM כדי להפעיל/לכבות את הרדיו.
- החזק את לחצן רדיו FM to automatically scan and save available stations.
- השתמש ב- כפתורי למעלה / למטה to manually tune to a specific frequency or cycle through saved stations.
- כוונן את עוצמת הקול באמצעות לחצני עוצמת הקול +/-.
4.6 Night Light / Color Light
The clock can function as a night light with various color options and adjustable brightness.

תמונה 4.5: Display of the 7 color atmosphere light options and 20 brightness levels, highlighting the clock's versatility as a mood light or reading lamp.
- הקש על כפתור אור להדליק את האור.
- הקש על כפתור אור repeatedly to cycle through 7 static colors (e.g., Red, Green, Blue, Yellow, Indigo, Purple, White) or an automatic color-changing mode.
- השתמש ב- כפתורי למעלה / למטה to adjust the brightness level (0-20) of the selected color or white light.
- החזק את כפתור אור לכבות את האור.
4.7 יציאת טעינה USB
A 5V/2.4A USB port is located on the back of the device, allowing you to charge your smartphone or other small electronic devices.
תמונה 4.6: אֲחוֹרִי view of the alarm clock showing the USB charging port in use, connected to a tablet for charging.
5. תחזוקה
- ניקוי: נגבו את המכשיר במטלית רכה ויבשה. אין להשתמש בחומרי ניקוי שוחקים או ממסים.
- אִחסוּן: יש לאחסן את המכשיר במקום קריר ויבש כאשר אינו בשימוש למשך תקופות ממושכות.
- כּוֹחַ: Always use the provided power adapter to prevent damage.
6. פתרון תקלות
| בְּעָיָה | סיבה אפשרית | פִּתָרוֹן |
|---|---|---|
| השעון לא נדלק. | מתאם החשמל לא מחובר או פגום. | ודא שמתאם החשמל מחובר היטב הן לשעון והן לשקע חשמל תקין. נסה שקע אחר. |
| האזעקה לא נשמעת. | האזעקה לא הופעלה או שעוצמת הקול נמוכה מדי. | Check if the alarm icon is displayed. Re-set the alarm and ensure the volume is set to an audible level. |
| סימולציית הזריחה לא עובדת. | Sunrise duration not set during alarm setup. | Ensure you have set a sunrise duration (10-60 minutes) when configuring the alarm. |
| קליטה סטטית או חלשה ברדיו FM. | אות או מיקום אנטנה חלשים. | Extend the antenna wire fully. Reposition the clock to improve reception. Perform an auto-scan for stations. |
| טעינת USB לא עובדת. | המכשיר אינו תואם או שהכבל פגום. | Ensure the device you are charging is compatible with 5V/2.4A USB charging. Try a different USB cable. |
7. מפרטים
- מותג: KEPLUG
- דֶגֶם: B09FRY71NH
- מידות המוצר: 16 x 16 x 6.1 ס"מ
- משקל פריט: 481 גרם
- כרך ידtage: 5 וולט
- מקור כוח: מופעל על ידי סוללה (עם מתאם AC)
- סוג תצוגה: דִיגִיטָלי
- מאפיינים מיוחדים: Charging Port, Dimmable Light, Sunrise/Sunset Simulation, Dual Alarm, FM Radio, Nature Sounds
- תאריך זמין ראשון: 12 בנובמבר 2021
8. אחריות ותמיכה
For warranty information or technical support, please refer to the contact details provided with your purchase documentation or visit the official KEPLUG webאתר. שמור את קבלת הרכישה כהוכחת קנייה.