
1. הקדמה
תודה על הרכישהasing the PMW Mini Wireless Controller. This manual provides essential information for setting up, operating, and maintaining your controller. Please read it carefully before use and keep it for future reference.
This controller is designed for use with Nintendo Switch, Switch Lite, Switch OLED, and PC, offering a comfortable and feature-rich gaming experience.
2. המוצר נגמרview
2.1 תכונות עיקריות
- Cat Ear Design: Delicate and compact, suitable for women and children.
- Continuous Fire Function: Allows rapid firing without holding the button.
- Wake-up from Sleep: Press the HOME button to wake up the Switch console.
- חיישן ג'ירוסקופי בעל 6 צירים: Provides precise control for motion-sensing games.
- פונקציית רטט: Four adjustable levels (None/Weak/Standard/Strong) for immersive feedback.
- שקע אוזניות 3.5 מ"מ: Supports wired headphones (wired mode only).
- סוללה בעלת קיבולת גדולה: Built-in 300mAh battery for 8-10 hours of continuous play.
- קישוריות כפולה: תומך גם בחיבורים אלחוטיים Bluetooth וגם בחיבורים קוויים USB.
2.2 תכולת החבילה
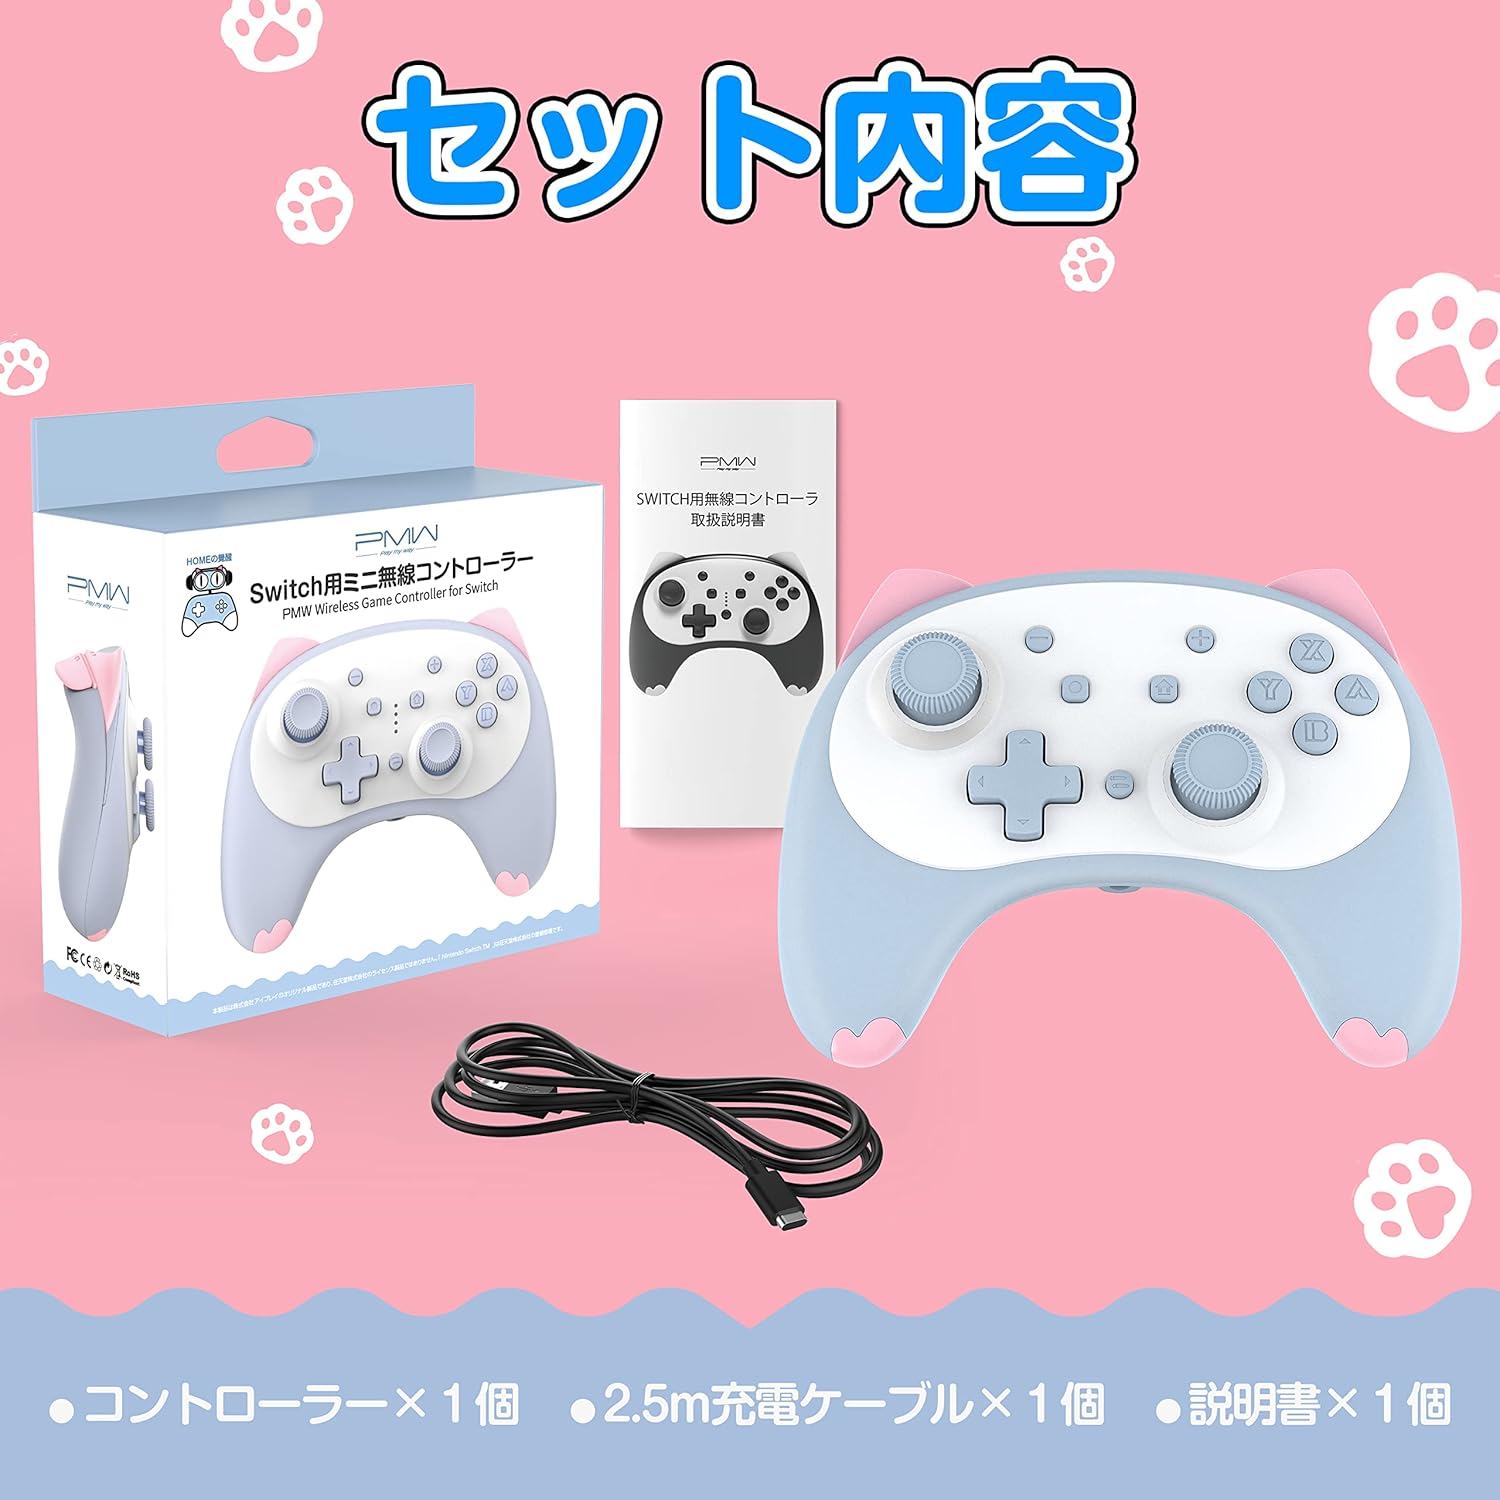
Image: Package contents showing the controller, a charging cable, and the instruction manual.
- PMW Mini Wireless Controller x 1
- 2.5m USB Type-C Charging Cable x 1
- מדריך הוראות x 1
2.3 פריסת בקר

Image: Detailed diagram illustrating the layout and names of all buttons and ports on the controller.
| לֹא. | שם חלק |
|---|---|
| 1 | מקל שמאלי |
| 2 | משטח כיוון (D-Pad) |
| 3 | שקע אוזניות 3.5 מ"מ |
| 4 | תפריט בחר כפתור |
| 5 | כפתור לכידה |
| 6 | כפתור טורבו |
| 7 | כפתור HOME |
| 8 | Menu Select + Button |
| 9 | מקל ימני |
| 10 | Action Buttons (A/B/X/Y) |
| R | לחצן R |
| L | כפתור L |
| ZR | לחצן ZR |
| ZL | לחצן ZL |
| סוג-C | נמל טעינה מסוג C |
| סנכרון | Wireless Connection Button |
3. התקנה
3.1 Wireless Connection (First Time Setup for Nintendo Switch)

Image: Visual instructions for the initial wireless pairing process with a Nintendo Switch.
- הפעל את קונסולת הנינטנדו סוויץ' שלך.
- מתפריט HOME בחר בקרים > שנה אחיזה/סדר to enter the controller connection screen.
- לחץ והחזק את Wireless Connection Button (Sync button) on the back of the controller for 2 seconds. Release the button when the four LED indicators start flashing.
- The Switch console and controller will begin pairing. Once connected, the LED indicator on the controller will light up steadily.
3.2 Wired Connection (for Nintendo Switch and PC)
- Connect the controller to your Nintendo Switch dock or PC using the provided USB Type-C charging cable.
- הבקר יזוהה באופן אוטומטי ויהיה מוכן לשימוש.
4. הוראות הפעלה
4.1 Wake-up from Sleep Mode

Image: The controller's HOME button can be used to conveniently wake up the Nintendo Switch console.
To wake up your Nintendo Switch console from sleep mode, simply press the כפתור HOME על הבקר.
4.2 Continuous Fire (Turbo) Function

Image: The controller's continuous fire function, which allows for repeated button presses without constant input.
The controller features a continuous fire hold function. Once activated, it will maintain rapid firing even after you release the button. This is particularly useful for games requiring fast, repeated button presses.
חיישן ג'ירוסקופי בעל 6 צירים 4.3

Image: The 6-axis gyro sensor enables precise motion control for characters and vehicles in compatible games.
The built-in 6-axis gyro sensor allows for precise control of in-game characters and vehicles by detecting rotations and changes in direction. This enhances the gaming experience for titles that support somatosensory actions, shooting, and aiming.
4.4 פונקציית רטט
The controller includes built-in vibration motors with four adjustable levels: None, Weak, Standard, and Strong. You can customize the vibration intensity to enjoy immersive feedback during gameplay.
4.5 שימוש בשקע אוזניות

Image: The controller's 3.5mm headphone jack in use, demonstrating that wired headphones are supported when the controller is in wired mode.
The controller is equipped with a 3.5mm headphone jack. Important Note: The headphone function is only available when the controller is connected via wired mode (USB cable).
5. טעינה

Image: Visual representation of the controller's battery, highlighting its 8-10 hour usage time and 2-hour charging time.
- The controller has a built-in 300mAh large capacity battery.
- טעינה מלאה אורכת כ-2 שעות.
- Once fully charged, the controller provides 8 to 10 hours of continuous use.
- To charge, connect the controller to a USB power source (e.g., Switch dock, PC, USB wall adapter) using the provided USB Type-C cable.
6. מפרטים
| תכונה | פְּרָט |
|---|---|
| דֶגֶם | Mini Wireless Controller |
| תְאִימוּת | Nintendo Switch, Switch Lite, Switch OLED, PC |
| קישוריות | Bluetooth (Wireless), USB Type-C (Wired) |
| סוג סוללה | סוללת ליתיום-יון אחת (כלולה) |
| קיבולת סוללה | 300mAh |
| זמן טעינה | כ. 2 שעות |
| זמן שימוש רצוף | 8-10 שעות |
| מידות | 127 x 95 x 52 מ"מ |
| מִשׁקָל | כ. 138 גרם |
| תכונות מיוחדות | 6-Axis Gyro, Vibration (4 levels), Continuous Fire, 3.5mm Headphone Jack (wired only) |
7. פתרון תקלות
- הבקר לא מתחבר באופן אלחוטי:
- Ensure the Switch console is on and you are on the 'Change Grip/Order' screen.
- Press and hold the Sync button on the back of the controller for 2 seconds until LEDs flash.
- ודא שהבקר טעון.
- If issues persist, try restarting both the Switch console and the controller.
- Headphone jack not working:
- The headphone jack only functions when the controller is connected via a wired USB cable. Ensure it is in wired mode.
- בדוק אם האוזניות מחוברות כראוי ופועלות כראוי.
- הבקר לא מגיב:
- בדוק את רמת הסוללה וטען במידת הצורך.
- Try resetting the controller by pressing the small reset button (if available, usually a pinhole) or by turning it off and on.
- Reconnect the controller to the console/PC.
- Vibration is too strong/weak or not working:
- Adjust the vibration intensity settings on the controller or within the game/console settings.
8. תחזוקה
- Keep the controller away from extreme temperatures, direct sunlight, and moisture.
- נקו את הבקר בעזרת מטלית רכה ויבשה. אין להשתמש בכימיקלים חזקים או בחומרים שוחקים.
- הימנעו מהפלת הבקר או מחשיפתו לפגיעות חזקות.
- When not in use for extended periods, store the controller in a cool, dry place.
9. אחריות ותמיכה
Specific warranty information for this product is not available in the provided data. Please refer to the product packaging or contact the retailer/manufacturer directly for warranty details and customer support.