
1. המוצר נגמרview
The RODOT 433M Wireless Remote Switch is a high-power relay control system designed for various electrical equipment. It operates on 110V-240V AC and features a 30A relay, supporting up to 3000 watts resistive load and 800 watts inductive load. The system includes a receiver and two remote controls, offering a long-range wireless control distance of up to 100 meters (328 feet) in open environments.

Image: The RODOT 433M Wireless Remote Switch, showing the receiver unit and two accompanying remote controls.
2. מידע בטיחות
Always ensure power is disconnected before installation or maintenance. This device operates with high voltage (110V-240V AC) and high current (up to 30A). Improper installation can lead to electric shock, fire, or equipment damage. If you are unsure about electrical wiring, consult a qualified electrician.
- Do not exceed the maximum load ratings (3000W resistive, 800W inductive).
- ודא שכל החיבורים מאובטחים ומבודדים.
- הרחק את המכשיר ממים ולחות מוגזמת.
- Do not place the receiver or remote in a metal case or near large metal objects, as this can affect signal range.
3. תכולת החבילה
- 1 x RODOT 433M Wireless Remote Switch Receiver
- 2 x Remote Controls (with 2 CR2032 batteries included)
4. התקנה והתקנה
4.1. Wiring the Receiver
The receiver unit has clearly labeled terminals for AC Input (L, N) and AC Output (L, N). Ensure correct polarity when connecting to your power source and load.

Image: Close-up of the receiver unit, highlighting the learning button and AC input/output terminals.
Standard Wiring (for loads within 30A / 3000W resistive / 800W inductive):
- Disconnect power to the circuit before wiring.
- Connect the AC Live (L) wire from your power source to the 'AC Input L' terminal on the receiver.
- Connect the AC Neutral (N) wire from your power source to the 'AC Input N' terminal on the receiver.
- Connect the Live (L) wire of your electrical load (e.g., light, pump) to the 'AC Output L' terminal on the receiver.
- Connect the Neutral (N) wire of your electrical load to the 'AC Output N' terminal on the receiver.
- ודא שכל החיבורים הדוקים ומאובטחים.

Image: Simplified wiring diagram showing the connection of the remote switch to a 110V-240V AC power source and a light bulb load.
4.2. Wiring for High-Power Inductive Loads (above 800W) using an AC Contactor
For frequent use with high-power inductive loads like water pumps or motors exceeding 800W, it is recommended to use an external AC contactor (not included) to protect the relay within the switch. The remote switch will then control the contactor, which in turn controls the high-power load.
- Connect the remote control switch's AC Input L and N to your 220V power source.
- Connect the remote control switch's AC Output L and N to the A1 and A2 terminals of your AC contactor.
- Connect the L2 and L3 terminals of the AC contactor to your 220V power source.
- Connect your high-power motor or pump to the output terminals of the AC contactor.

Image: Detailed wiring schematic illustrating how to connect the remote switch to an AC contactor for controlling high-power motors.
5. הוראות הפעלה
5.1. Learning Remote Controls (Pairing)
The receiver can learn up to 20 remote controls. Each button (ON/OFF) on a remote can be learned independently.
- Press the learning button on the receiver once. The indicator light will turn on.
- Press the desired button (ON or OFF) on the remote control. The indicator light on the receiver will flash three times, indicating successful pairing.
- Repeat for other buttons or additional remote controls.
5.2. Clearing Paired Remotes
To clear all paired remote controls from the receiver's memory:
- Press and hold the learning button on the receiver for approximately 8 seconds until the indicator light flashes 8 times. All previously paired remotes will be deleted.
5.3. Setting Working Modes
The receiver supports three working modes: Instantaneous (Inching), Self-locking, and Interlocking. The mode is set by pressing the learning button a specific number of times.
Mode 1: Instantaneous (Inching) Mode
- תֵאוּר: The relay is activated only while the remote button is pressed. Releasing the button deactivates the relay.
- סְבִיבָה: לחץ על כפתור הלמידה במקלט פַּעַם. The indicator light will turn on. Then, press the desired remote button (e.g., ON). The indicator light will flash three times.
Mode 2: Self-locking Mode
- תֵאוּר: Pressing the remote button activates the relay, and it remains active until the same button is pressed again to deactivate it.
- סְבִיבָה: לחץ על כפתור הלמידה במקלט פַּעֲמַיִם. The indicator light will turn on. Then, press the desired remote button (e.g., ON). The indicator light will flash three times.
Mode 3: Interlocking Mode
- תֵאוּר: This mode requires two buttons on the remote. Pressing one button activates the relay, and it remains active. Pressing the second button deactivates the first relay and activates a second (if applicable), or simply deactivates the first. (Typically used with ON/OFF pairs where ON activates and OFF deactivates).
- סְבִיבָה: לחץ על כפתור הלמידה במקלט שלוש פעמים. The indicator light will turn on. Then, press the 'ON' button on the remote, followed by the 'OFF' button on the same remote. The indicator light will flash three times after each button press.
5.4. הגדרת מצב הפעלה
By default, the receiver is in an OFF state when power is applied. To change this:
- לחץ על כפתור הלמידה במקלט שש פעמים.
- The indicator light will flash three times, confirming the setting is successful. The receiver will now power on in the ON state.
6. תחזוקה
6.1. החלפת סוללת השלט רחוק
The remote controls use CR2032 batteries. If the remote control distance decreases significantly or the remote stops responding, replace the battery.
- פתח בזהירות את השלט רחוק casing.
- הסר את סוללת CR2032 הישנה.
- הכנס סוללת CR2032 חדשה, תוך הקפדה על קוטביות נכונה.
- סגור את השלט רחוק גasing.

Image: Two remote controls, each with ON and OFF buttons, used to operate the wireless switch.
6.2. אופטימיזציה של אותות
The remote control distance can be affected by environmental factors. To optimize signal range:
- Ensure the receiver and remote control antennas are straightened.
- Avoid placing the receiver or remote inside metal enclosures or near large metal objects.
- Replace the remote control battery if the range is consistently poor.
7. פתרון תקלות
7.1. Issue: Device does not stay ON after pressing the remote button.
סיבה אפשרית: The receiver is set to Instantaneous (Inching) mode.
פִּתָרוֹן: Re-program the receiver to Self-locking mode (press learning button twice, then remote button) or Interlocking mode (press learning button three times, then ON/OFF buttons) as desired. Refer to the "Setting Working Modes" section.
7.2. Issue: Remote control does not pair with the receiver.
סיבות אפשריות:
- הליך צימוד שגוי.
- סוללת השלט רחוק חלשה או גמורה.
- Receiver memory is full (max 20 remotes).
פתרונות:
- Review the "Learning Remote Controls" section and repeat the steps carefully.
- החלף את סוללת השלט הרחוק.
- Clear all paired remotes from the receiver's memory (press learning button 8 times) and then attempt to pair again.
7.3. Issue: Remote control range is poor.
סיבות אפשריות:
- Low remote control battery.
- Obstructions (walls, metal objects) between the remote and receiver.
- Antennas are not optimally positioned.
פתרונות:
- החלף את סוללת השלט הרחוק.
- Ensure the receiver and remote antennas are straightened.
- Relocate the receiver or remote to an area with fewer obstructions.
8. מפרטים
| תכונה | מִפרָט |
|---|---|
| מותג | RODOT |
| דֶגֶם | 110V-240V Remote Switch |
| כרך הפעלהtage | 110V-240V AC |
| דירוג נוכחי | 30 Amps |
| עומס התנגדות מקסימלי | 3000 וואט |
| Max Inductive Load | 800 וואט |
| תדר אלחוטי | 433 מיליון |
| טווח שלט רחוק | עד 100 מטרים (328 רגל) בשטחים פתוחים |
| מצבי עבודה | Instantaneous (Inching), Self-locking, Interlocking |
| מידות מקלט | 3.54 x 2.76 x 1.18 אינץ' |
| משקל פריט | 5.3 אונקיות |
| סוללות מרחוק | 2 x CR2032 (כלול) |

Image: Visual representation of product features including high power support, PC material shell, signal antenna, compact size, and long remote control distance.
9. יישום Examples
This wireless remote switch is suitable for a wide range of applications, including:
- Controlling pumps (e.g., water pumps, irrigation systems)
- Lighting control (e.g., ceiling lights, chandeliers)
- Industrial control (e.g., production workshops, motors)
- Home appliances (e.g., fans, dust collectors)
- מערכות אבטחה
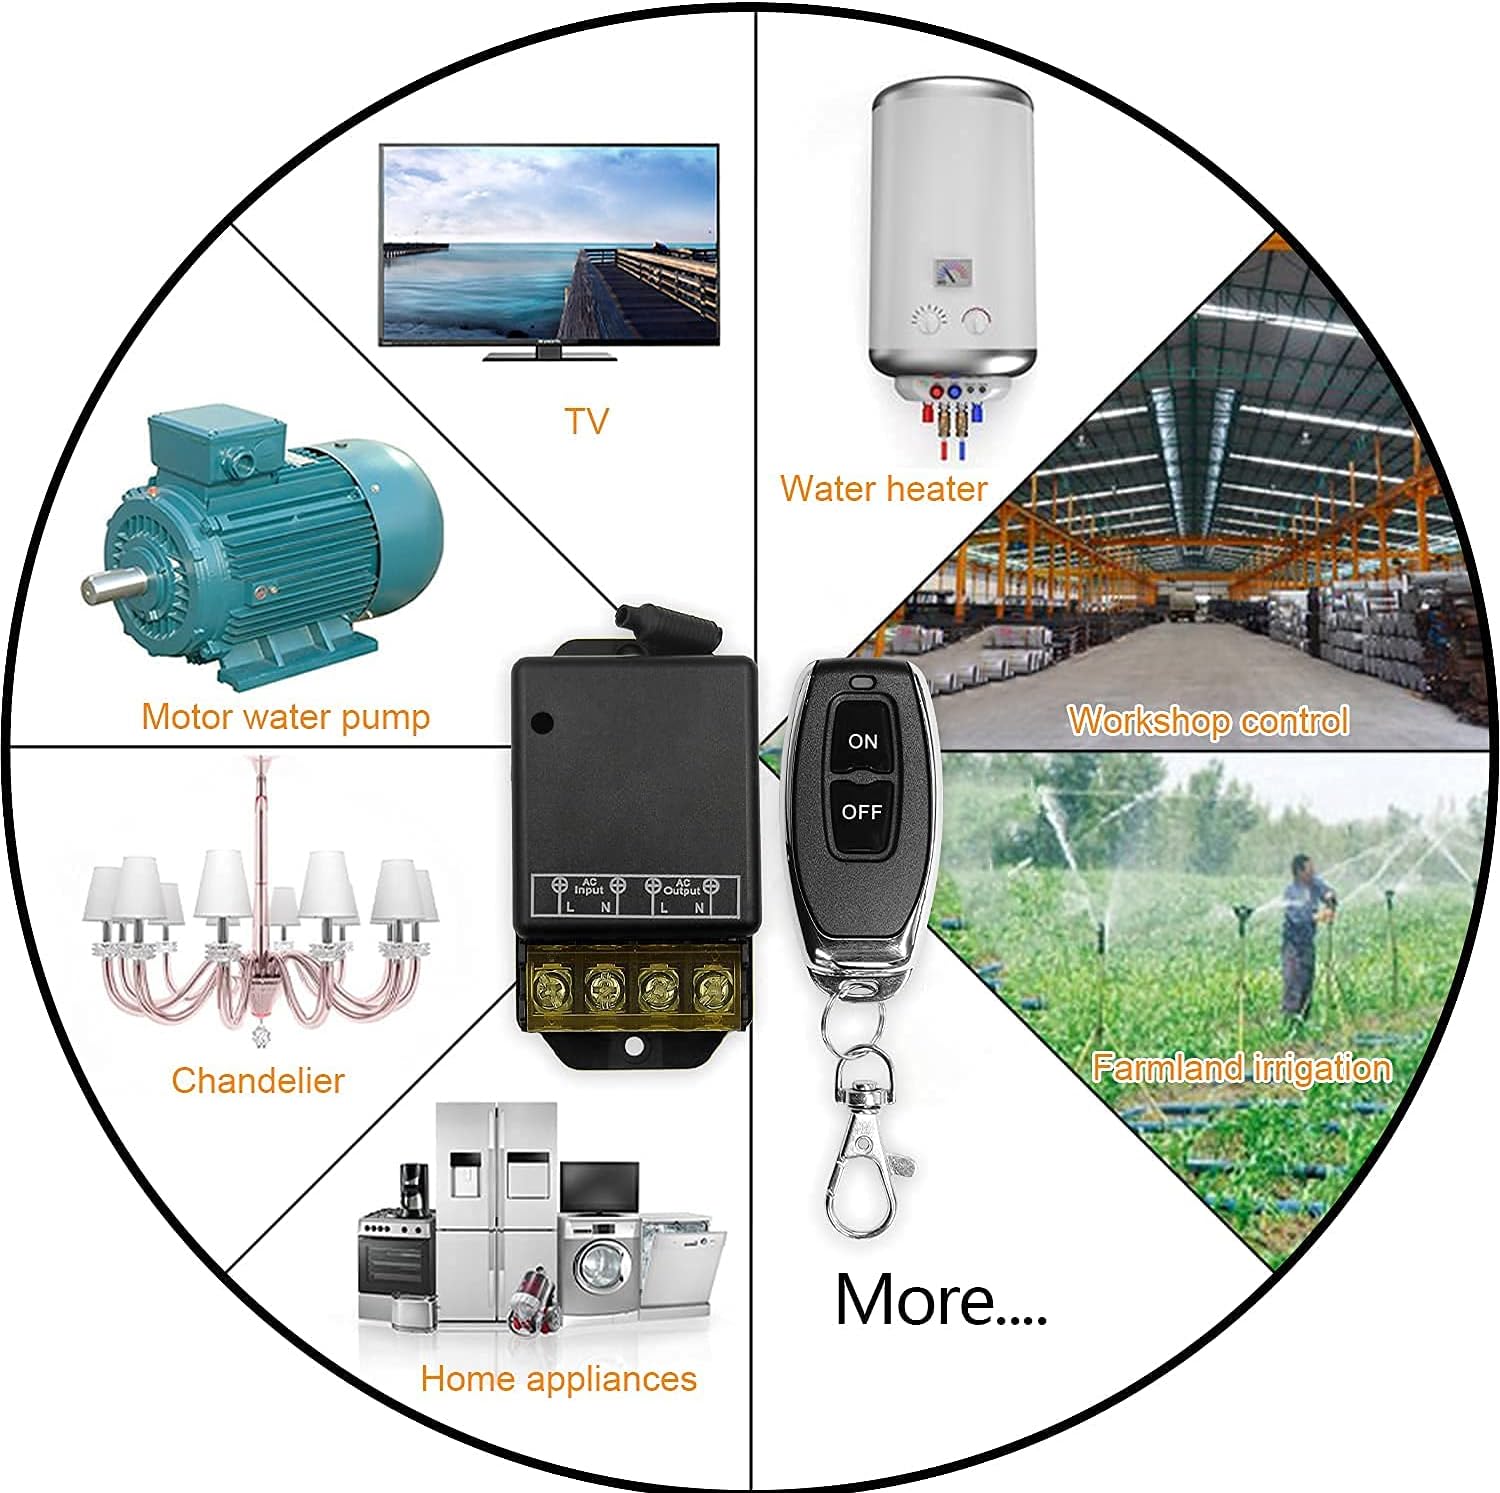
תמונה: דוגמהamples of common applications for the wireless remote switch, such as controlling motors, water heaters, and various lighting fixtures.
10. אחריות ותמיכה
Specific warranty details are not provided in this manual. For warranty information, technical support, or further assistance, please contact RODOT customer service through your purchase platform or the official RODOT webאֲתַר.