1. המוצר נגמרview
The Lexmark MX611DHE is a monochrome laser multifunction device designed for office environments, offering comprehensive capabilities including printing, copying, scanning, and faxing. This robust unit is engineered for high-volume output and efficient document handling.
- רב תכליתיות: Integrates print, copy, fax, and scan functions into a single device.
- ביצועים במהירות גבוהה: Capable of printing and copying at speeds up to 50 pages per minute (ppm).
- הדפסה דו - צדדית: Supports automatic two-sided printing to conserve paper.
- קיבולת קלט: Features a standard input capacity of 650 sheets, expandable for larger tasks.
- קישוריות: Equipped with USB and Ethernet interfaces for versatile network integration.
- שליטה אינטואיטיבית: Features a touchscreen display for easy navigation and operation.
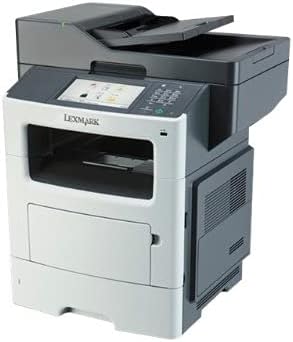
איור 1: חזית view of the Lexmark MX611DHE multifunction printer, showcasing its compact design and front-facing paper tray.
2. מדריך התקנה
Follow these steps to set up your Lexmark MX611DHE printer for initial use.
- פריקת אריזה: הוצא בזהירות את המדפסת מאריזתה. הסר את כל סרטי ההדבקה וחומרי האריזה מהחלק החיצוני והפנימי של ההתקן.
- מיקום: Place the printer on a stable, level surface with adequate ventilation. Ensure there is enough space around the printer for proper operation and maintenance.
- חיבור חשמל: Connect the power cord to the printer's power input and then to a grounded electrical outlet. Do not connect to a surge protector or extension cord initially.
- טעינת נייר: Open the paper tray and load the appropriate paper size (up to 8.5 x 14 inches). Adjust the paper guides to fit the paper stack snugly.
- חיבור רשת/USB:
- For Network (Ethernet): חבר כבל Ethernet מיציאת ה-Ethernet של המדפסת לנתב או למתג הרשת שלך.
- עבור USB: חבר כבל USB מיציאת ה-USB של המדפסת למחשב שלך.
- הפעלה ראשונית: Press the power button to turn on the printer. Follow the on-screen prompts on the touchscreen display to select language, region, and perform initial setup configurations.
- התקנת דרייבר: Install the necessary printer drivers on your computer. Drivers can typically be found on the Lexmark support website or on an included installation CD (if applicable).
3. הוראות הפעלה
This section provides basic instructions for using the Lexmark MX611DHE's primary functions.
3.1. הדפסה
- ודא שהמדפסת דולקת ומחוברת למחשב או לרשת שלך.
- פתחו את המסמך שברצונכם להדפיס במחשב שלכם.
- לִבחוֹר File > הדפס (או הפקודה המקבילה ביישום שלך).
- Choose "Lexmark MX611DHE" from the list of available printers.
- Adjust print settings such as number of copies, paper size, and duplex options as needed.
- נְקִישָׁה הֶדפֵּס.
3.2. העתקה
- Place the document face-down on the scanner glass or face-up in the automatic document feeder (ADF).
- במסך המגע של המדפסת, בחר את לְהַעְתִיק פוּנקצִיָה.
- Adjust settings such as number of copies, lightness/darkness, and paper size.
- הקש על הַתחָלָה לחצן כדי להתחיל בהעתקה.
3.3. סריקה

Figure 2: The Lexmark MX611DHE with its scanner lid open, revealing the flatbed scanner glass and the automatic document feeder mechanism.
- הנח את המסמך על זכוכית הסורק או במזין המסמכים האוטומטי (ADF).
- במסך המגע של המדפסת, בחר את לִסְרוֹק פוּנקצִיָה.
- Choose your desired scan destination (e.g., Scan to Computer, Scan to Email, Scan to Network Folder).
- קבע את הגדרות הסריקה כגון רזולוציה, מצב צבע ו file פוּרמָט.
- הקש על הַתחָלָה כפתור כדי להתחיל את הסריקה.
3.4. שליחת פקס
- ודא שהמדפסת מחוברת לקו טלפון.
- הנח את המסמך על זכוכית הסורק או במזין המסמכים האוטומטי (ADF).
- במסך המגע של המדפסת, בחר את פַקס פוּנקצִיָה.
- הזן את מספר הפקס של הנמען באמצעות לוח המקשים בלוח הבקרה.
- התאם את כל הגדרות הפקס הנדרשות.
- הקש על הַתחָלָה לחצן כדי לשלוח את הפקס.
4. תחזוקה
Regular maintenance ensures optimal performance and extends the lifespan of your Lexmark MX611DHE.
- ניקוי החלק החיצוני: השתמש רך, דamp, lint-free cloth to wipe the exterior surfaces of the printer. Avoid abrasive cleaners.
- ניקוי זכוכית הסורק: For clear scans, regularly clean the scanner glass with a soft, lint-free cloth and a mild glass cleaner.
- החלפת מחסנית טונר: When the toner low message appears, order a new Lexmark toner cartridge. Follow the instructions provided with the new cartridge for proper installation.
- ניקוי נתיב הנייר: If paper jams become frequent, consult the printer's internal guides or the Lexmark support website for instructions on cleaning the paper path rollers.
5. פתרון תקלות
This section addresses common issues you might encounter with your Lexmark MX611DHE.
| בְּעָיָה | סיבה אפשרית | פִּתָרוֹן |
|---|---|---|
| המדפסת לא מגיבה | Power cable disconnected, network issue, driver problem. | Check power connections. Verify network cable or USB connection. Reinstall printer drivers. |
| חסימת נייר | Incorrectly loaded paper, foreign object in paper path. | Open access covers and carefully remove jammed paper. Ensure paper is loaded correctly. |
| איכות הדפסה ירודה | Low toner, dirty print head/rollers, incorrect print settings. | Replace toner cartridge. Clean internal components as per maintenance guide. Adjust print quality settings in driver. |
| הסורק לא עובד | Scanner glass dirty, software issue, connectivity problem. | Clean scanner glass. Restart computer and printer. Check USB/network connection. |
6. מפרטים
Detailed technical specifications for the Lexmark MX611DHE.
| תכונה | פְּרָט |
|---|---|
| מותג | לקסמרק |
| שם הדגם | MX611DHE |
| סוג תצוגה | LCD (Touchscreen) |
| טכנולוגיית הדפסה | לייזר (מונוכרום) |
| מהירות הדפסה מרבית (מונוכרום) | 50 עמודים לדקה |
| מהירות צילום מקסימלית (שחור-לבן) | 50 עמודים לדקה |
| הַחְלָטָה | 1200 x 1200 dpi |
| קיבולת אחסון זיכרון | 1024 מגה-בייט |
| תמיכה בגודל גיליון | Up to 8.5 x 14 Inches |
| ממשק חומרה | USB, אתרנט |
| מידות המוצר | 22.6 x 23.5 x 26.5 אינץ' |
| צֶבַע | אפור/לבן |
| UPC | 656942073611 |
7. אחריות ותמיכה
Your Lexmark MX611DHE (Renewed) product is covered by a limited warranty and support resources.
- אַחֲרָיוּת: מוצר זה מגיע עם א 90 יום אחריות מוגבלת. Please refer to your purchase documentation for specific terms and conditions of the Amazon Renewed Guarantee.
- תמיכה טכנית: For technical assistance, driver downloads, or further troubleshooting, please visit the official Lexmark support webלאתר או לפנות לשירות הלקוחות שלהם.
- משאבים מקוונים: Additional user guides, FAQs, and firmware updates may be available on the Lexmark support portal.