
1. הקדמה
תודה על הרכישהasing the Technics SL-1200MK7 Direct Drive Turntable. This manual provides essential information for the proper setup, operation, and maintenance of your new turntable. Please read this manual thoroughly before using the product to ensure optimal performance and longevity.
The Technics SL-1200MK7 is engineered for precision and durability, offering a high-quality audio experience for both professional DJs and audiophiles. Its robust construction and advanced features make it a reliable choice for vinyl playback.
2. מידע בטיחות
כדי למנוע התחשמלות, שריפה או נזק ליחידה, אנא הקפידו על אמצעי הזהירות הבאים:
- אל תחשוף את היחידה לגשם או לחות.
- אין להסיר את המכסה. יש לפנות לאנשי מקצוע מוסמכים בלבד לצורך טיפול וטיפול.
- אל תניח חפצים מלאים בנוזלים, כגון אגרטלים, על היחידה.
- יש לוודא אוורור נאות. אין לחסום פתחי אוורור.
- השתמשו רק בספק הכוח שצוין עבור יחידה זו.
- נתק את תקע החשמל משקע הקיר אם המכשיר לא ישמש למשך תקופה ארוכה.
- הימנעו מהצבת היחידה באור שמש ישיר או בקרבת מקורות חום.
3. מדריך התקנה
3.1 פירוק האריזה והרכיבים הכלולים
הוציאו בזהירות את כל הרכיבים מהאריזה. ודאו שהפריטים הבאים נמצאים:
- Technics SL-1200MK7 Turntable Unit
- Lid (Dust Cover)
- כבל חשמל
- RCA Signal Cable
- מגש
- סליפמאט
- משקל נגד
- Headshell with Cartridge (may be sold separately)
- מתאם 45 סל"ד
3.2 מיקום
Place the turntable on a stable, level surface, away from direct sunlight, heat sources, and strong magnetic fields. Ensure there is adequate space around the unit for ventilation and cable connections. Avoid placing it near speakers to minimize vibrations that could affect playback quality.

איור 3.2.1: ראשי view of the Technics SL-1200MK7 Turntable, showcasing its sleek grey finish and classic design. This image provides an overview of the unit's primary components.
3.3 הרכבה
- התקנת מגש: Carefully place the platter onto the spindle. Ensure it sits flush and rotates freely.
- מיקום מחצלת החלקה: Lay the included slipmat on top of the platter.
- כיסוי אבק: Attach the dust cover to the hinges at the rear of the unit.
- Cartridge and Headshell: If not pre-installed, attach your preferred cartridge to the headshell. Ensure the stylus is protected during installation.
- Tonearm Balance: Mount the headshell onto the tonearm. Adjust the counterweight until the tonearm is balanced and floats horizontally.
- כוח מעקב: Set the tracking force according to your cartridge manufacturer's specifications using the tonearm's tracking force dial.
- אנטי סקייט: כוונן את חוגת נגד החלקה כך שתתאים להגדרת כוח המעקב.
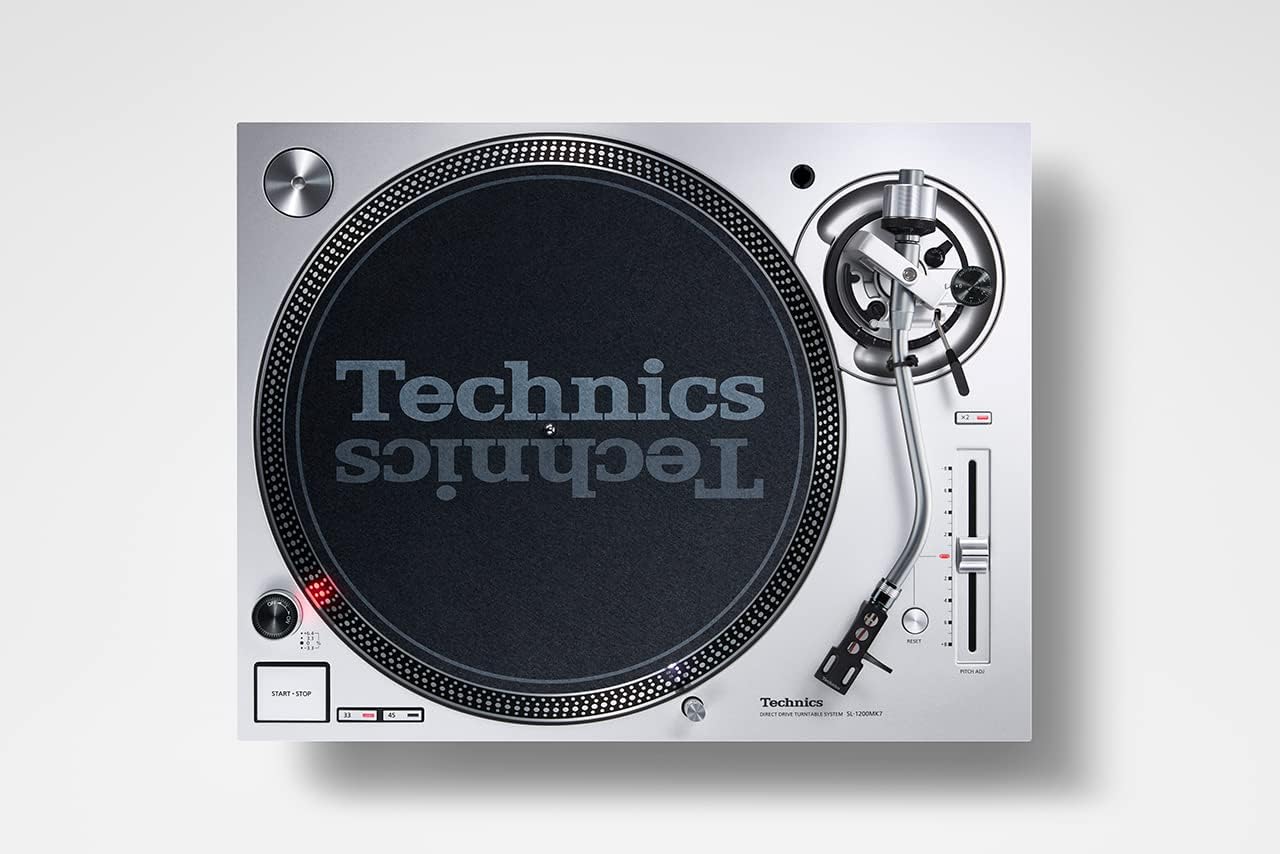
איור 3.3.1: מלמעלה למטה view of the Technics SL-1200MK7, highlighting the platter, tonearm, and control layout. This perspective is useful for understanding component placement during assembly.
3.4 חיבורים
- פלט RCA: Connect the supplied RCA signal cable from the turntable's RCA output jacks to the PHONO input of your ampליפר או פונו פרהamplifier. Ensure correct left (white) and right (red) channel connections.
- חוט הארקה: חבר את חוט ההארקה מהפטיפון למסוף ההארקה במכשיר שלך. ampליפר או פונו פרהampמפחית זמזום כדי למזער אותו.
- כּוֹחַ: Connect the power cable to the turntable and then to a suitable wall outlet.
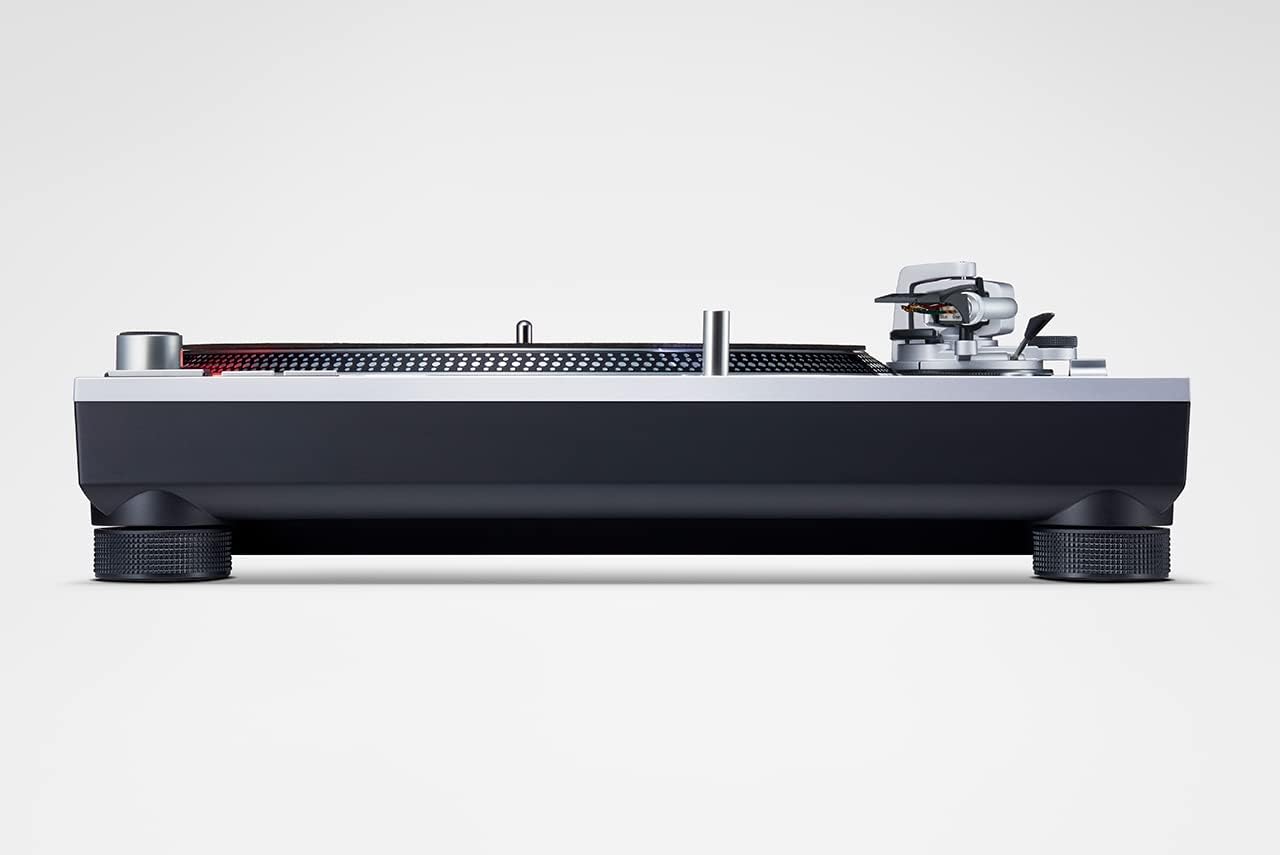
איור 3.4.1: צד view of the Technics SL-1200MK7, illustrating its sturdy base and adjustable feet. This view helps in understanding the unit's profile and stability features.
4. הוראות הפעלה
4.1 הפעלה/כיבוי
To power on the turntable, rotate the power switch/strobe illuminator knob clockwise. The strobe light will illuminate. To power off, rotate the knob counter-clockwise until it clicks off.
4.2 השמעת תקליט
- מניחים תקליט על המגש.
- Select the appropriate speed (33 ⅓, 45, or 78 RPM) using the speed selector buttons. For 78 RPM, refer to the advanced settings in the full manual.
- לחץ על כפתור START/STOP כדי להתחיל בסיבוב המגש.
- הרם בעדינות את זרוע הטונוס באמצעות ידית הרדיו.
- Position the tonearm over the desired groove of the record.
- הנמיכו באיטיות את ידית הרדיו כדי לאפשר לסטיילוס לרדת על התקליט.
- To stop playback, lift the tonearm using the cueing lever and return it to the tonearm rest. Press the START/STOP button to stop the platter.
4.3 בקרת גובה צליל
The SL-1200MK7 features a pitch control slider to adjust the playback speed. Move the slider up or down to increase or decrease the speed. The RESET button instantly returns the pitch to 0%.
5. תחזוקה
5.1 ניקוי
- כיסוי אבק: Wipe with a soft, dry cloth. For stubborn marks, use a slightly damp בד וחומר ניקוי עדין, ולאחר מכן יבש ביסודיות.
- מגש ושלדה: Use a soft, lint-free cloth. Avoid abrasive cleaners.
- חֶרֶט: Use a dedicated stylus brush or cleaner. Always brush from back to front.
5.2 החלפת עט סטיילוס
The stylus is a delicate component and wears over time. Replace it according to your cartridge manufacturer's recommendations (typically every 500-1000 hours of playback). Refer to your cartridge manual for specific replacement instructions.
6. פתרון תקלות
| בְּעָיָה | סיבה אפשרית | פִּתָרוֹן |
|---|---|---|
| אין קול או עוצמת קול נמוכה | Incorrect connections; Amplifier input not set to PHONO; Cartridge/stylus issue. | Check RCA and ground connections. Ensure amplifier is set to PHONO input. Verify cartridge is properly installed and stylus is not damaged. |
| צליל מעוות | Incorrect tracking force/anti-skate; Worn or dirty stylus; Damaged record. | Adjust tracking force and anti-skate. Clean or replace stylus. Inspect record for damage. |
| המגש לא מסתובב | Power not connected; START/STOP button not pressed. | Check power cable connection. Press the START/STOP button. |
| דילוג או קפיצה | Dust on stylus/record; Incorrect tracking force/anti-skate; Turntable not level; Vibrations. | Clean stylus and record. Re-adjust tracking force and anti-skate. Ensure turntable is level and on a stable surface. |
7. מפרטים
| תכונה | פְּרָט |
|---|---|
| שם הדגם | Sl 1200 |
| מספר דגם של פריט | SL-1200MK7EG |
| מותג | טֶכנִיקָה |
| צֶבַע | אָפוֹר |
| חוֹמֶר | אֲלוּמִינְיוּם |
| טכנולוגיית קישוריות | עזר |
| מהירות סיבוב מקסימלית | 78 RPM (supports 33 ⅓, 45, and 78 RPM) |
| משקל פריט | 22 פאונד (כ-10 ק"ג) |
| מידות חבילה | 21.34 x 17.17 x 9.53 אינץ' |
| רכיבים כלולים | Lid, power cable, RCA signal cable |
8. אחריות ותמיכה
For warranty information and technical support, please refer to the warranty card included with your product or visit the official Technics webאתר. שמור את הוכחת הרכישה שלך עבור כל תביעת אחריות.
For further assistance, you may contact Technics customer service through their official channels. Please have your model number (SL-1200MK7EG) and serial number ready when contacting support.