
1. הוראות בטיחות חשובות
Read and understand all safety instructions before operating the generator. Failure to follow these instructions can result in serious injury or death.
- סכנת פחמן חד חמצני: Generators produce carbon monoxide, an odorless, colorless, poisonous gas. Operate the generator outdoors in a well-ventilated area, far from windows, doors, and vents. Never operate indoors or in partially enclosed spaces.
- סכנת התחשמלות: Do not operate the generator in wet conditions. Ensure all electrical connections are dry and properly grounded. Use only approved extension cords that are rated for outdoor use and the generator's power output.
- סכנת שריפה: Gasoline is highly flammable. Refuel in a well-ventilated area with the engine off and cool. Do not smoke or allow open flames near the generator or fuel. Store gasoline in an approved container in a safe location.
- משטחים חמים: The generator engine and muffler become very hot during operation and remain hot for a period after shutdown. Avoid contact with hot surfaces to prevent burns.
- ילדים וחיות מחמד: הרחיקו ילדים וחיות מחמד מהגנרטור, במיוחד במהלך הפעולה.
2. רכיבים נגמרוview
Familiarize yourself with the main components of your Husky HKG3000 portable gasoline generator.
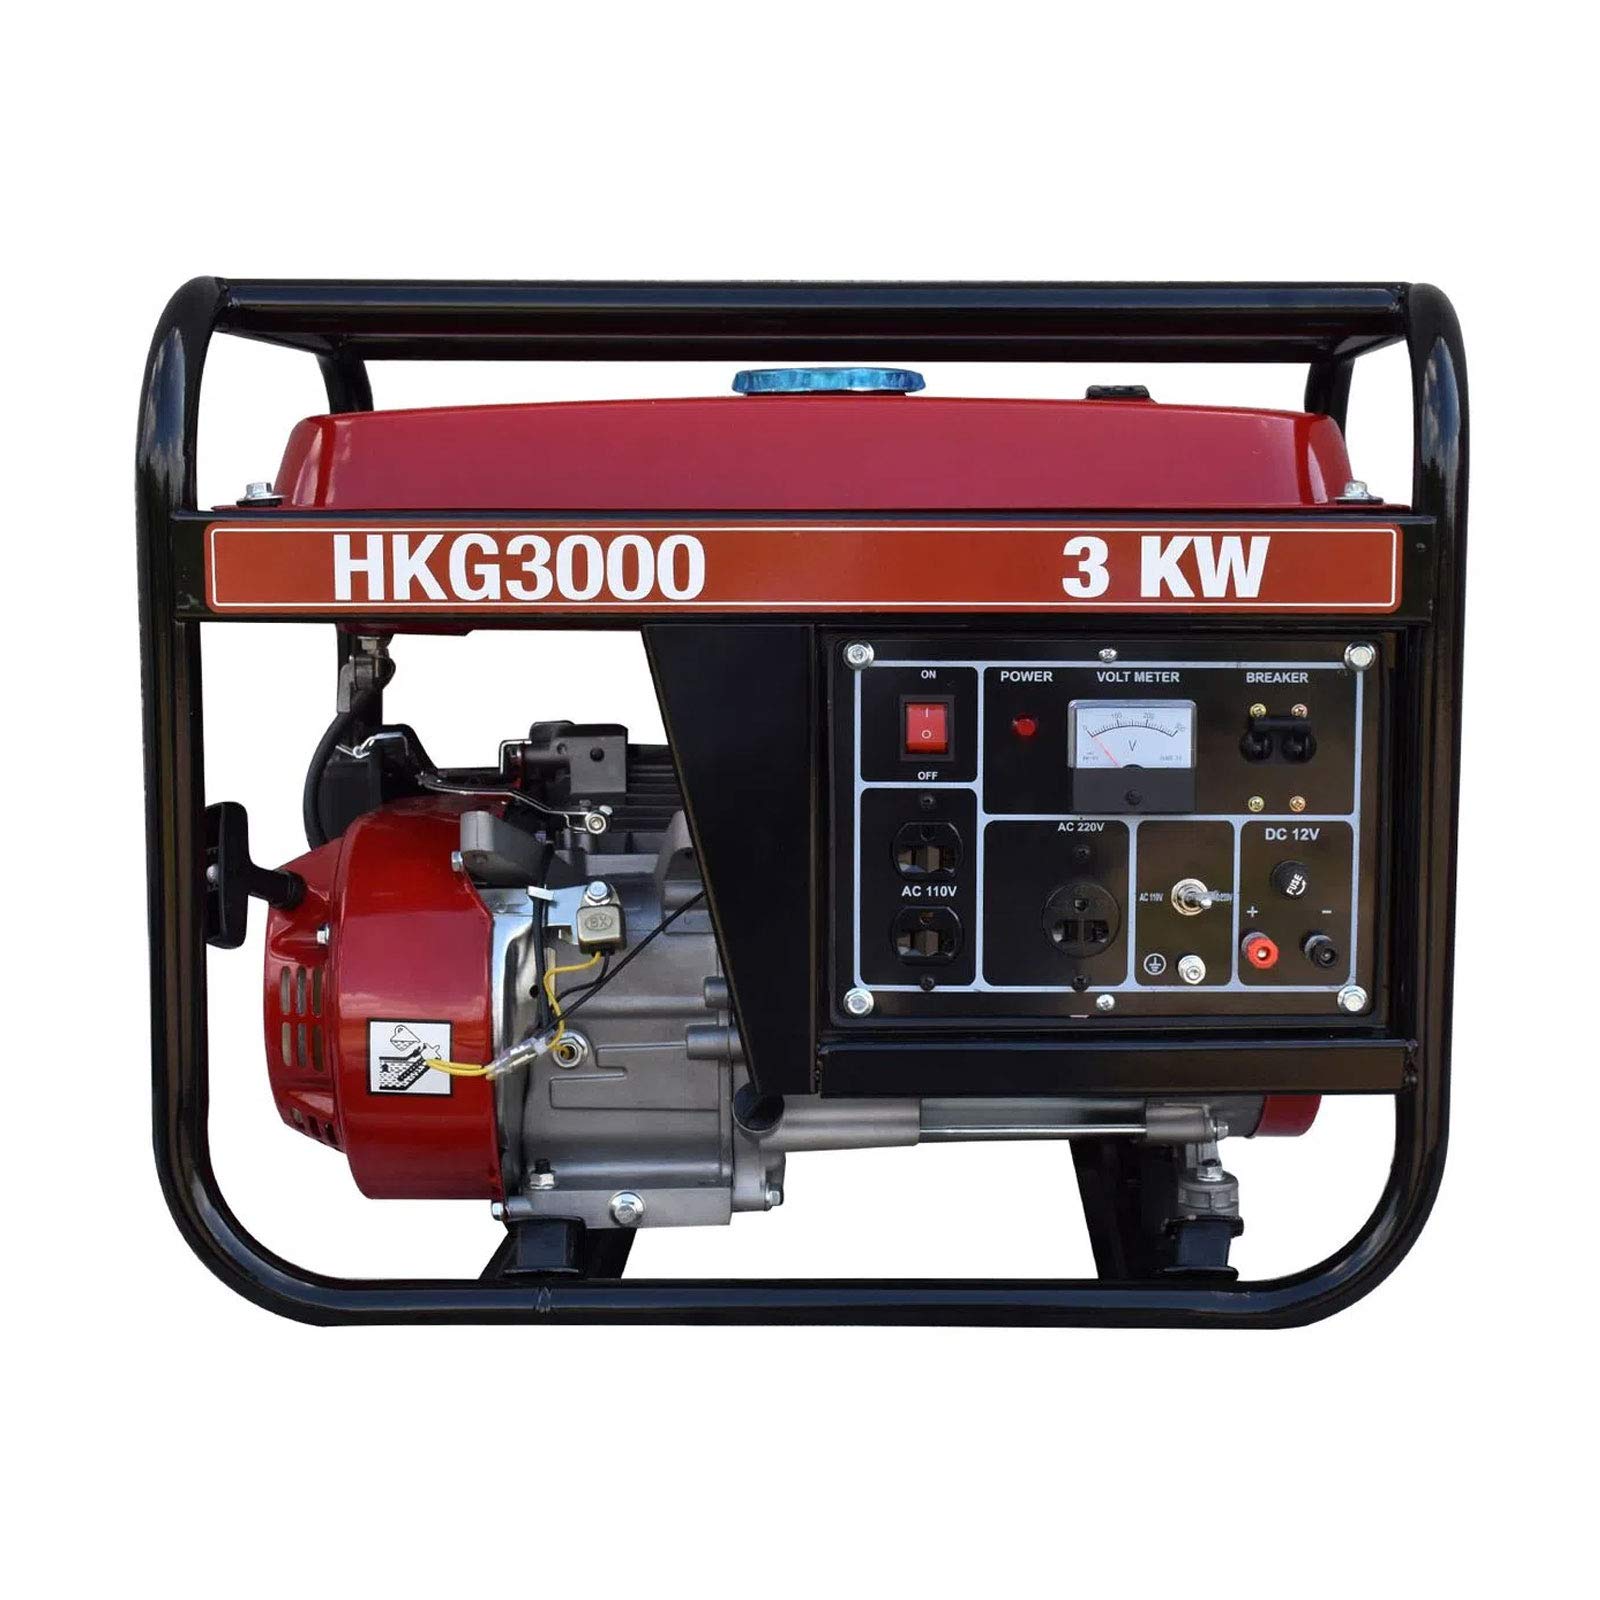
איור 2.1: בסך הכל view of the Husky HKG3000 Portable Gasoline Generator, showcasinהמסגרת החזקה ולוח הבקרה שלה.

איור 2.2: חזית view of the Husky HKG3000 Portable Gasoline Generator, highlighting the control panel with power outlets, voltmeter, and circuit breakers.

איור 2.3: צד view of the Husky HKG3000 Portable Gasoline Generator, showing the 4-stroke engine, air filter housing, and fuel valve.

Figure 2.4: Included accessories for the Husky HKG3000 Portable Gasoline Generator, featuring the user manual, power plugs, and a spark plug wrench.
מרכיבי מפתח:
- מיכל דלק: Stores gasoline.
- מכסת דלק: Seals the fuel tank.
- שסתום דלק: שולט על זרימת הדלק למנוע.
- ידית חנק: משמש להתנעת מנוע קר.
- מתנע רתיעה: Manual pull-cord for starting the engine.
- מתג מנוע: Turns the engine ignition ON/OFF.
- מסנן אוויר: מגן על המנוע מפני אבק ופסולת.
- מכסה/מדיד שמן: For adding and checking engine oil.
- AC Outlets (110V/220V): For connecting electrical devices.
- שקע DC 12V: לטעינת סוללות 12V.
- מד מתח: מציג את נפח הפלטtage.
- מפסקי פחת: Protect the generator and connected devices from overload.
- צָעִיף: מפחית רעש מנוע ומכוון גזי פליטה.
3. התקנה
לפני השימוש הראשון, בצע את שלבי ההתקנה הבאים:
3.1 פירוק
- הוציאו בזהירות את הגנרטור מאריזתו.
- Inspect for any shipping damage. Contact your dealer if damage is found.
- Ensure all included accessories (power plugs, spark plug wrench, manual) are present.
3.2 הוספת שמן מנוע
The generator is shipped without engine oil. Operating without oil will cause severe engine damage.
- מניחים את הגנרטור על משטח ישר.
- Unscrew the oil fill cap/dipstick.
- Slowly add the recommended engine oil (e.g., SAE 10W-30) to the crankcase until it reaches the upper mark on the dipstick. Do not overfill.
- סגור את מכסה/מדיד השמן היטב.
3.3 הוספת דלק
Use only fresh, unleaded gasoline with an octane rating of 87 or higher.
- Ensure the generator engine is off and cool.
- פתח את מכסה הדלק.
- Carefully pour gasoline into the fuel tank, avoiding spills. Do not fill above the red indicator or the bottom of the filler neck.
- Securely close the fuel cap. Wipe up any spilled fuel immediately.
3.4 הארקת הגנרטור
הארקה נכונה חיונית למניעת התחשמלות.
- Connect a heavy-gauge copper wire from the generator's grounding terminal to an approved ground source, such as a ground rod driven into the earth.
- Consult a qualified electrician for local grounding requirements.
4. הוראות הפעלה
4.1 בדיקות טרום התחלה
- בדוק את מפלס שמן המנוע.
- בדוק את מפלס הדלק.
- ודא שכל העומסים החשמליים מנותקים מהגנרטור.
- Verify the generator is on a level surface and in a well-ventilated outdoor area.
4.2 Starting the Engine (Manual Start)
- סובב את שסתום הדלק למצב ON מַצָב.
- הזז את ידית המשנק ל- סָגוּר (start) position if the engine is cold. If the engine is warm, set the choke to the לִפְתוֹחַ מַצָב.
- סובב את מתג המנוע ל ON מַצָב.
- Firmly grasp the recoil starter handle and pull it slowly until resistance is felt, then pull quickly and smoothly.
- Once the engine starts, slowly move the choke lever to the לִפְתוֹחַ (run) position.
- יש לאפשר למנוע להתחמם במשך מספר דקות לפני חיבור עומסים חשמליים.
4.3 חיבור עומסים חשמליים
- ודא שהגנרטור פועל בצורה חלקה.
- Plug in your electrical devices one at a time, starting with the highest wattagמכשיר אלקטרוני.
- אין לחרוג מהעוצמה המדורגת של הגנרטורtage (2.8 kW nominal, 3 kW maximum). Overloading will trip the circuit breakers.
4.4 עצירת המנוע
- נתק את כל העומסים החשמליים מהגנרטור.
- סובב את מתג המנוע ל כבוי מַצָב.
- סובב את שסתום הדלק למצב כבוי מַצָב.
5. תחזוקה
Regular maintenance ensures optimal performance and extends the life of your generator. Always perform maintenance with the engine off and cool.
5.1 החלפת שמן מנוע
- יש להחליף את שמן המנוע לאחר 20 שעות הפעולה הראשונות, ולאחר מכן כל 50-100 שעות או פעם בשנה.
- Drain old oil while the engine is warm. Refill with recommended oil type and quantity.
5.2 ניקוי מסנן אוויר
- Inspect the air filter every 50 hours or more frequently in dusty conditions.
- נקו את גוף הספוג במים חמימים וסבון, שטפו אותו ותנו לו להתייבש לחלוטין. שמנו קלות את גוף הספוג לפני ההתקנה מחדש.
5.3 בדיקת מצת
- בדוק את מצת כל 100 שעות או פעם בשנה.
- Clean carbon deposits and adjust the gap if necessary. Replace if electrodes are worn or insulation is cracked.
5.4 תחזוקת מערכת הדלק
- If storing the generator for more than 30 days, drain the fuel tank and carburetor, or use a fuel stabilizer.
- Regularly check fuel lines for cracks or leaks.
5.5 אחסון
- נקו את החלק החיצוני של הגנרטור.
- יש לאחסן במקום נקי, יבש ומאוורר היטב, הרחק מאור שמש ישיר וטמפרטורות קיצוניות.
- כסה את הגנרטור כדי להגן עליו מפני אבק.
6. פתרון תקלות
סעיף זה מספק פתרונות לבעיות תפעוליות נפוצות.
6.1 המנוע לא נדלק
- אין דלק: Check fuel level and add fresh gasoline if needed.
- Fuel Valve OFF: סובב את שסתום הדלק ל ON.
- כבוי מנוע: Turn engine switch to ON.
- Improper Choke Position: Adjust choke lever as per starting instructions (Section 4.2).
- Low Oil Level: Check oil level and add oil if necessary. The generator may have a low-oil shutdown feature.
- Fouled Spark Plug: בדוק ונקה או החלף את מצת.
6.2 אין תפוקת חשמל
- מפסק זרם הופסק: Reset the AC or DC circuit breaker on the control panel. Reduce load if it trips again.
- לְהַעֲמִיס יוֹתֵר מִדַי: Disconnect some electrical devices. Do not exceed the generator's rated capacity.
- Faulty Connection: Check all power cords and connections.
6.3 מנוע פועל בצורה גרועה
- דלק ישן: Drain old fuel and refill with fresh gasoline.
- פילטר אוויר סתום: נקה או החלף את מסנן האוויר.
- Fouled Spark Plug: בדוק ונקה או החלף את מצת.
7. מפרטים
| מִפרָט | עֵרֶך |
|---|---|
| מותג | צָרוּד |
| דֶגֶם | HKG3000 |
| סוג מנוע | 4 פעימות |
| כוח סוס מנוע | 7.5 כ"ס |
| סוג דלק | בֶּנזִין |
| הפעלת מערכת | Manual (Recoil) |
| תפוקת כוח מקסימלית | 3 קילוואט (3000 וואט) |
| תפוקת כוח מדורג | 2.8 קילוואט (2800 וואט) |
| תֶדֶר | 60 הרץ |
| כרך ידtage | 110V / 220V |
| שימוש מומלץ | מִסְחָרִי |
| משקל פריט | 70 קילוגרם |
| הִטַלטְלוּת | נייד |
8. אחריות ותמיכה
This Husky generator is covered by a manufacturer's warranty. Please refer to the warranty card included with your product for specific terms and conditions.
For technical assistance, parts, or warranty claims, please contact Husky customer support through their official webאתר או פרטי הקשר המופיעים בתיעוד המוצר שלך.
Always provide your model number (HKG3000) and serial number when contacting support to ensure efficient service.