מָבוֹא
This manual provides comprehensive instructions for the Lexmark MS431dw Monochrome Laser Printer. It covers setup, operation, maintenance, and troubleshooting to ensure optimal performance and longevity of your device. The Lexmark MS431dw is designed for efficient monochrome printing, offering speeds up to 40 pages per minute and automatic duplex printing.

תמונה: קדמי-ימין view of the Lexmark MS431dw Monochrome Laser Printer.
הגדרה
1. פירוק המדפסת
הוצא בזהירות את המדפסת מאריזתה. ודא שכל חומרי האריזה, הסרטים והיריעות המגן הוסרו מהחלק החיצוני והפנימי של המדפסת. שמור את האריזה להובלה עתידית במידת הצורך.
2. התקנת מחסנית הטונר
- פתח את המכסה הקדמי של המדפסת.
- הוצא את מחסנית הטונר החדשה מהאריזה שלה ונער אותה בעדינות כדי לפזר את הטונר.
- הכנס את מחסנית הטונר לחריץ המיועד לכך עד שתיכנס למקומה בנקישה.
- סגור את המכסה הקדמי.
3. טעינת נייר
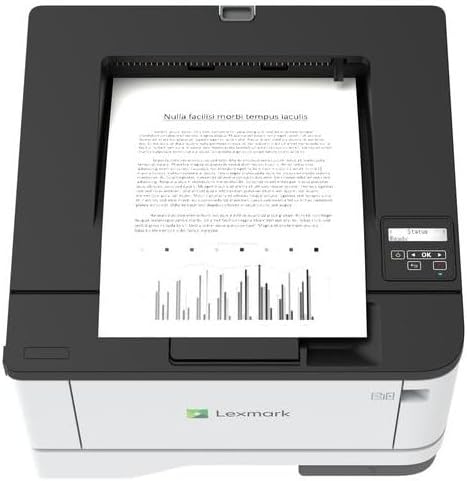
תמונה: למעלה view of the Lexmark MS431dw with paper loaded in the input tray.
Open the paper tray and adjust the paper guides to fit the size of your paper. Load the paper stack into the tray, ensuring it is flat and below the maximum fill line. Close the paper tray. The printer supports various media types, including card stock.
4. חיבור חשמל
חבר את כבל החשמל לשקע החשמל של המדפסת ולאחר מכן לשקע חשמלי מוארק.
5. Connecting to a Network/Computer
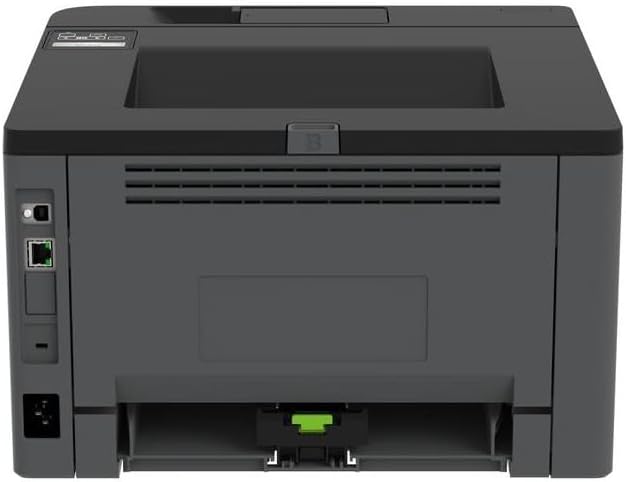
תמונה: אחורי view of the Lexmark MS431dw, highlighting the Ethernet and power connection ports.
The Lexmark MS431dw supports Ethernet connectivity. Connect an Ethernet cable from your network router or switch to the Ethernet port on the back of the printer. For direct connection to a computer, use a USB cable (not included) if available, or configure network printing.
6. התקנת דרייבר
Turn on the printer. Insert the driver CD (if provided) into your computer, or download the latest drivers from the official Lexmark support webאתר. פעל לפי ההוראות שעל המסך כדי להשלים את התקנת מנהל ההתקן.
הוראות הפעלה
1. לוח הבקרה נגמרview

תמונה: למעלה view of the Lexmark MS431dw, showing the printer's control panel with display and buttons.
The control panel features a display screen and navigation buttons (Up, Down, OK, Back) to access printer settings, status, and functions. Refer to the on-screen menus for specific options.
2. הדפסה בסיסית
- ודא שהמדפסת דולקת ומחוברת למחשב או לרשת שלך.
- פתחו את המסמך שברצונכם להדפיס במחשב שלכם.
- לִבחוֹר הֶדפֵּס מתפריט האפליקציה (למשל, File > הדפס).
- Choose the Lexmark MS431dw from the list of available printers.
- Adjust print settings as desired (e.g., number of copies, paper size).
- נְקִישָׁה הֶדפֵּס.
3. הדפסה דו-צדדית אוטומטית
The MS431dw supports automatic two-sided (duplex) printing. To enable this feature:
- In the print dialog box on your computer, navigate to the printer properties or preferences.
- Look for an option related to "Two-sided printing" or "Duplex printing."
- בחר את אפשרות ההדפסה הדו-צדדית הרצויה (לדוגמה, כריכה בקצה הארוך, כריכה בקצה הקצר).
- אשר את בחירתך והמשך בהדפסה.
תַחזוּקָה
1. החלפת מחסנית הטונר
When the toner level is low, the printer's display will indicate a warning. To replace the cartridge:
- ודא שהמדפסת מופעלת.
- פתח את המכסה הקדמי.
- Remove the old toner cartridge by pulling it out.
- Unpack a new Lexmark-compatible toner cartridge and gently shake it.
- הכנס את המחסנית החדשה עד שהיא תינעל במקומה.
- סגור את המכסה הקדמי.
2. ניקוי המדפסת
ניקוי קבוע מסייע בשמירה על איכות ההדפסה ומאריך את חיי המדפסת.
- חִיצוֹנִי: נגב את המשטחים החיצוניים עם רך, דamp, מטלית נטולת סיבים. אין להשתמש בחומרי ניקוי שוחקים או ממסים.
- פְּנִים: Periodically open the front cover and gently remove any dust or paper debris from accessible areas using a dry, lint-free cloth. Avoid touching the fuser unit.
פתרון בעיות
This section addresses common issues you might encounter. For more detailed troubleshooting, refer to the Lexmark support webאֲתַר.
1. חסימות נייר
- If a paper jam occurs, the printer display will show an error message indicating the location of the jam.
- Carefully open the indicated covers or trays.
- משוך בעדינות את הנייר התקוע לכיוון נתיב הנייר. הימנע מקריעת הנייר.
- Close all covers and trays. The printer should resume printing.
2. איכות הדפסה ירודה
- הדפסים דהויים: ייתכן שמחסנית הטונר עומדת להתרוקן. החלף אותה במידת הצורך.
- פסים או כתמים: Clean the printer's interior as described in the Maintenance section. Ensure the toner cartridge is properly seated.
- דפים ריקים: Verify the toner cartridge is installed correctly and has toner. Check printer drivers and print settings.
3. בעיות קישוריות
- מדפסת לא נמצאה: Ensure the Ethernet cable is securely connected to both the printer and the network. Verify network settings on the printer and computer.
- מצב לא מקוון: Check the printer's power and network connection. Restart both the printer and your computer.
מפרטים
| תכונה | פְּרָט |
|---|---|
| מספר דגם | 29S0110 |
| טכנולוגיית הדפסה | לייזר |
| פלט מדפסת | מונוכרום |
| מהירות הדפסה מרבית (מונוכרום) | עד 40 עמודים לדקה (ppm) |
| טכנולוגיית קישוריות | אתרנט |
| תכונה מיוחדת | Auto-Duplex (Automatic Two-sided Printing) |
| קיבולת גיליון קלט מקסימלית | 900 גיליונות |
| תמיכה במדיה מודפסת | Card stock, Plain paper |
| משקל פריט | 9300 גרם (כ-20.5 פאונד) |
| מהtage | 570 וואט |
| UPC | 734646695558 |
הערה: המפרטים עשויים להשתנות ללא הודעה מוקדמת.
אחריות ותמיכה
מידע על אחריות
Your Lexmark MS431dw printer is covered by a standard manufacturer's warranty. For specific terms, conditions, and duration of your warranty, please refer to the documentation included with your product or visit the official Lexmark webאתר. שמור את הוכחת הרכישה שלך לצורך תביעות אחריות.
תמיכת לקוחות
For technical assistance, driver downloads, or further support, please visit the official Lexmark support portal.
Visit the Lexmark Store for Support