
מָבוֹא
This manual provides detailed instructions for the installation and operation of your auomii Universal Ceiling Fan Remote Control Kit, Model KLK19008. This kit is designed to add wireless control to your existing ceiling fan and light fixture, offering convenience with fan speed adjustment, light control, and timing functions.
המוצר נגמרview
The auomii Universal Ceiling Fan Remote Control Kit provides convenient wireless control for your ceiling fan and light. It includes a compact receiver unit and a user-friendly remote control.
רכיבים
- משדר שלט רחוק
- יחידת מקלט
- Wall Mount Holder for Remote
- אומי חוט (לחיבורים חשמליים)
- הרכבה של ברגים ועוגנים

תכונות מפתח
- 3 מהירות מעריצים: נמוך, בינוני, גבוה.
- בקרת אור: On/Off functionality for the fan light (non-dimmable).
- פונקציית תזמון: Set the fan to turn off after 1 hour, 2 hours, 4 hours, or 8 hours.
- Beep On/Off Setting: Audible feedback for button presses can be enabled or disabled.
- מקלט קומפקטי: Designed to fit into small fan canopies.


תְאִימוּת
The auomii Universal Ceiling Fan Remote Control Kit is designed for broad compatibility with many popular ceiling fan brands and types of lighting. Please review פרטי התאימות הבאים:
- Fan Brands: Compatible with Hunter, Harbor Breeze, Westinghouse, Honeywell, and other well-known ceiling fan brands.
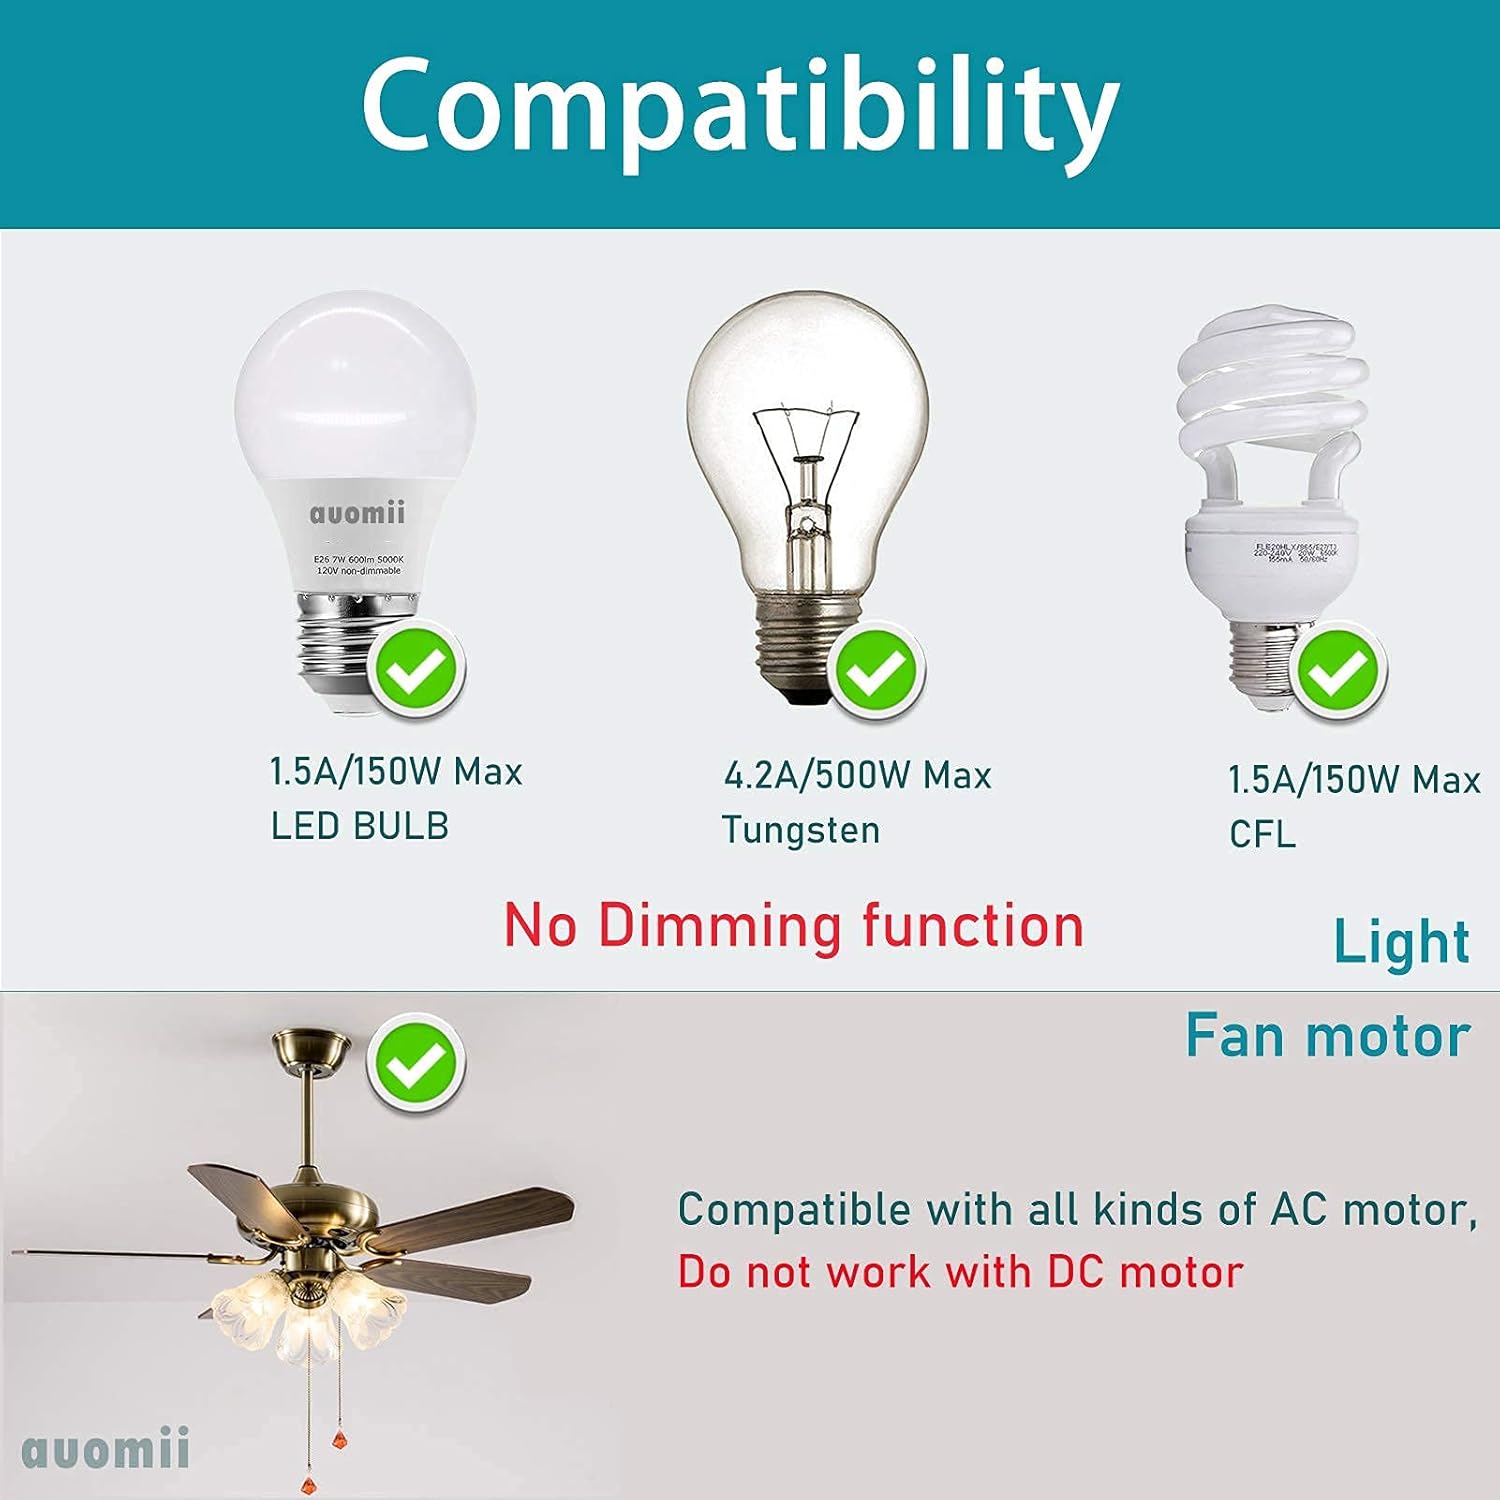
- סוג מנוע: Works with all kinds of AC motors. Does not work with DC motors.
- נורה: Supports LED bulbs (1.5A/150W Max), Tungsten bulbs (4.2A/500W Max), and CFL bulbs (1.5A/150W Max).
- פונקצית עמעום: The light control function is strictly ON/OFF and does not support dimming.
- שילוב בית חכם: This kit does not have WiFi functionality and cannot be controlled by Alexa or other phone applications.
מידע בטיחות
Please read and understand all safety instructions before attempting installation or operation. Failure to follow these instructions may result in electric shock, fire, or other hazards.
- ניתוק חשמל: Always disconnect power at the circuit breaker or fuse box before installing, cleaning, or performing any maintenance on your ceiling fan or light fixture.
- חשמלאי מוסמך: אם אינך בטוח לגבי חיווט או חיבורים חשמליים, התייעץ עם חשמלאי מוסמך.
- כרך ידtage: ודא את הכרךtage supply to your fan is compatible with the receiver unit.
- חיבורים מאובטחים: All electrical connections must be secure and properly insulated.
- מיקום מקלט: Ensure the receiver is installed in a location where it will not be exposed to moisture or extreme temperatures.
הוראות התקנה
The receiver unit is designed to be compact (approximately 2.07 x 3.0 x 1.0 inches) to fit within most ceiling fan canopies. Ensure there is sufficient space in your fan's canopy before proceeding.
- נתק חשמל: Turn off the power to your ceiling fan at the circuit breaker. Verify power is off before proceeding.
- חיווט גישה: Remove the canopy cover of your ceiling fan to access the existing wiring.
- זיהוי חוטים: Identify the AC Live Line (Black), AC Neutral Line (White), Live Line for Fan (Black), and Live Line for Light (Blue).
- Connect Receiver Input:
- חבר את חוט שחור from your house wiring (AC Live Line) to the Black input wire על המקלט.
- חבר את חוט לבן from your house wiring (AC Neutral Line) to the White input wire על המקלט.
- Connect Receiver Output:
- חבר את Black output wire מהמקלט אל ה- חוט שחור of your ceiling fan (Live Line for Fan).
- חבר את Blue output wire מהמקלט אל ה- חוט כחול of your ceiling fan (Live Line for Light).
- חבר את White output wire מהמקלט אל ה- חוט לבן of your ceiling fan (Neutral Line).
- אַנטֶנָה: The yellow wire on the receiver is the antenna. Do not break or cut the wire surface. Position it carefully within the canopy.
- חיבורים מאובטחים: Use the provided wire nuts to secure all connections. Ensure they are tight and properly insulated.
- מקלט מיקום: Carefully tuck the receiver unit and all wiring into the fan canopy. Ensure no wires are pinched.
- חבר מחדש את החופה: Securely reattach the fan canopy cover.
- התקן סוללות מרחוק: הכנס 2 סוללות AAA (לא כלולות) לשלט רחוק.
- החזר כוח: הפעל מחדש את החשמל במפסק החשמל.
- פונקציונליות בדיקה: Test all functions of the remote control (fan speeds, light on/off, timer).


הוראות הפעלה
Once installed, operate your ceiling fan and light using the remote control transmitter.
- בקרת מהירות מאוורר: הקש על נָמוּך, MED, או HI buttons to select the desired fan speed.
- מאוורר כבוי: הקש על לְהַפְסִיק כפתור לכיבוי המאוורר.
- אור הדלקה/כיבוי: הקש על אור מופעל/כיבוי button to toggle the fan light on or off. Note that this function is not dimmable.
- פונקציית טיימר: הקש על 1H, 2H, 4H, או 8H buttons to set the fan to automatically turn off after the selected duration.
- ביפ הפעלה/כיבוי: To toggle the audible beep sound (which occurs with each button press), press and hold the לְהַפְסִיק button for approximately 3-5 seconds until you hear a confirmation sound or the beep function changes.
פתרון בעיות
| בְּעָיָה | סיבה אפשרית | פִּתָרוֹן |
|---|---|---|
| Fan or light does not respond to remote. |
|
|
| Light turns on/off quickly or flickers. |
|
|
| Audible beep sound is annoying. | Beep function is enabled by default. | לחץ והחזק את לְהַפְסִיק button on the remote for 3-5 seconds to disable the beep sound. Repeat to re-enable. |
| Fan speeds do not change or seem incorrect. |
|
|
מפרטים
| מספר דגם | KLK19008 |
| מותג | auomii |
| Receiver Dimensions (LxWxD) | 3 x 2.07 x 1 אינץ' |
| משקל פריט | 0.006 אונקיות |
| סוללות נדרשות (שלט רחוק) | 2 סוללות AAA (לא כלולות) |
| מספר מרבי של מכשירים נתמכים | 2 (Fan and Light) |
| מכשירים תואמים | Ceiling fan and lights (AC motor only, non-dimmable light) |
| תכונות מיוחדות | Beep on/off setting, small size receiver, RF wireless remote, easy to install |

אחריות ותמיכה
For any questions, concerns, or support regarding your auomii Universal Ceiling Fan Remote Control Kit, please contact auomii customer service through the platform where the product was purchased. Please have your model number (KLK19008) and purchase details ready for faster assistance.
While specific warranty details are not provided in this manual, standard consumer protection laws apply. Please retain your proof of purchase for any warranty claims.