
1. הוראות בטיחות חשובות
When using electrical appliances, basic safety precautions should always be followed to reduce the risk of fire, electric shock, and injury to persons. Read all instructions carefully before operating this oven.
- Do not touch hot surfaces. Always use oven mitts or pot holders when handling hot items.
- כדי להגן מפני התחשמלות, אין לטבול את הכבל, התקעים או המכשיר במים או בנוזל אחר.
- יש צורך בהשגחה צמודה כאשר כל מכשיר נמצא בשימוש על ידי ילדים או בקרבתו.
- נתק מהשקע כאשר אינו בשימוש ולפני ניקוי. מניחים להתקרר לפני ששמים או מורידים חלקים.
- אין להפעיל כל מכשיר עם כבל או תקע פגומים, או לאחר שהמכשיר פגום או ניזוק בכל דרך שהיא.
- אין להשתמש בחוץ.
- אל תתנו לכבל להיות תלוי על קצה השולחן או השיש, או לגעת במשטחים חמים.
- אין להניח על או ליד מבער גז או חשמלי חם, או בתנור מחומם.
- יש לנקוט משנה זהירות בעת העברת מכשיר המכיל שמן חם או נוזלים חמים אחרים.
- אל תשתמש במכשיר לשימוש אחר מהשימוש המיועד.
- תמיד חברו תחילה את התקע למכשיר, ולאחר מכן חברו את הכבל לשקע בקיר. כדי לנתק, כבו כל בקר למצב 'OFF', ולאחר מכן הוציאו את התקע משקע הקיר.
2. המוצר נגמרview
The PowerPac PPT45 Electric Oven is a versatile kitchen appliance designed for cooking, grilling, toasting, and baking. It features a 50-liter capacity, convection function, rotisserie, and an internal light for monitoring cooking progress.
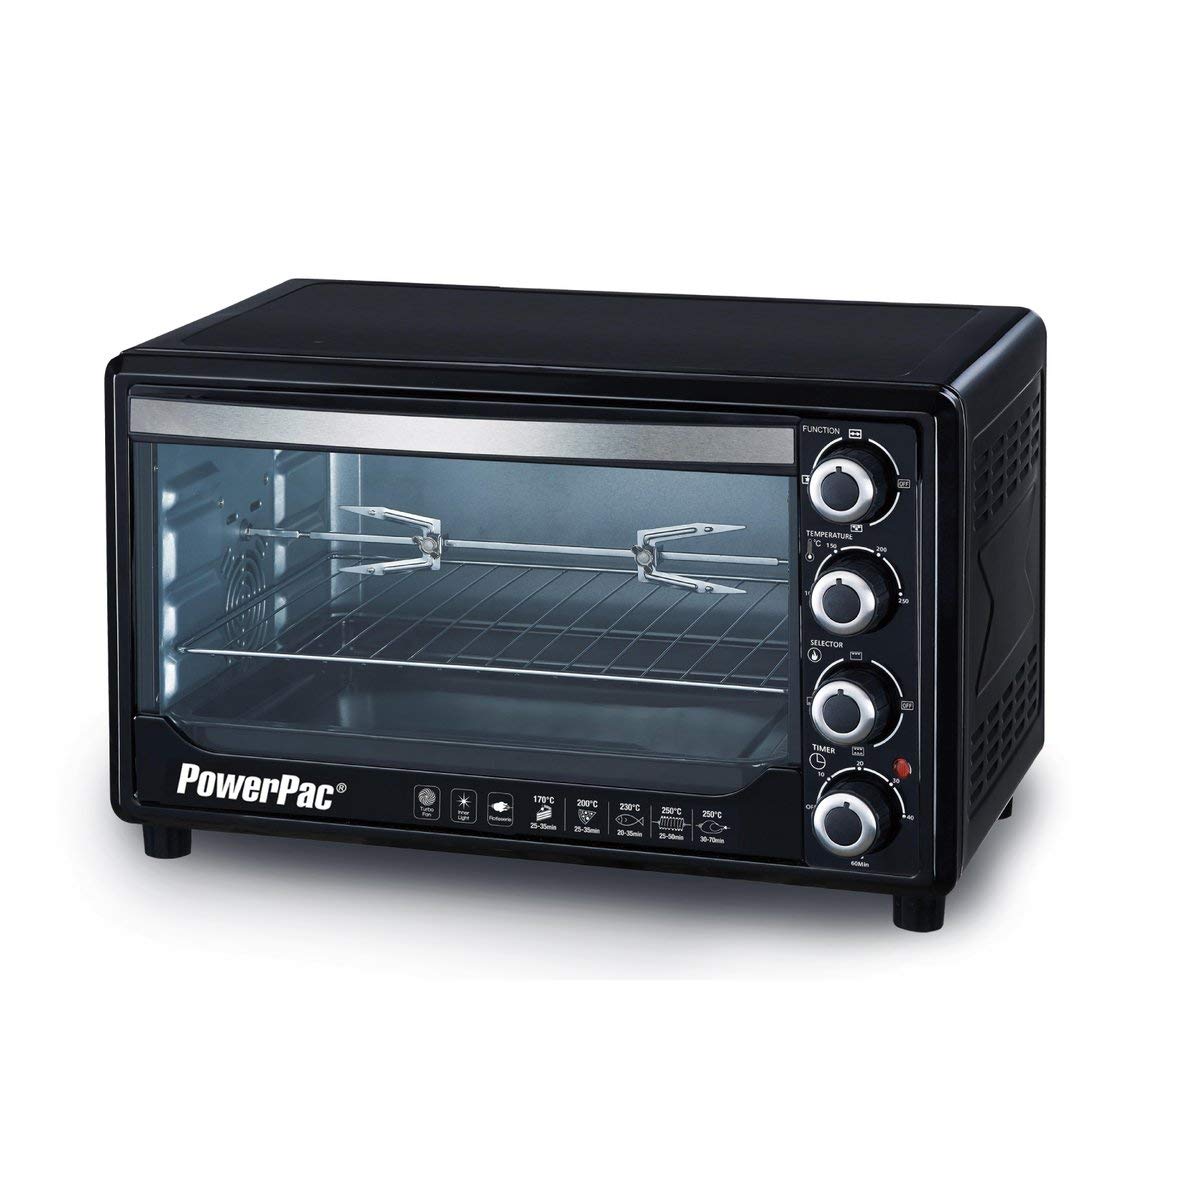
תמונה: חזית view of the PowerPac PPT45 Electric Oven, showcasing its control knobs, glass door, and internal racks.
תכונות עיקריות:
- פונקציונליות 4 ב-1: Cook, Grill, Toast, and Bake.
- פונקציית הסעה: Integrated turbo fan for even heat distribution.
- רוטיסרי: Includes a rotisserie fork for grilling poultry and roasts.
- בקרת טמפרטורה: Adjustable temperature from 100°C to 250°C.
- טיימר של 60 דקות: With an automatic shut-off and bell signal.
- אור פנימי: For easy monitoring of cooking status.
- אביזרים: Comes with 2 baking trays and 2 grill racks.
- גוף חימום נירוסטה: Durable and efficient heating.
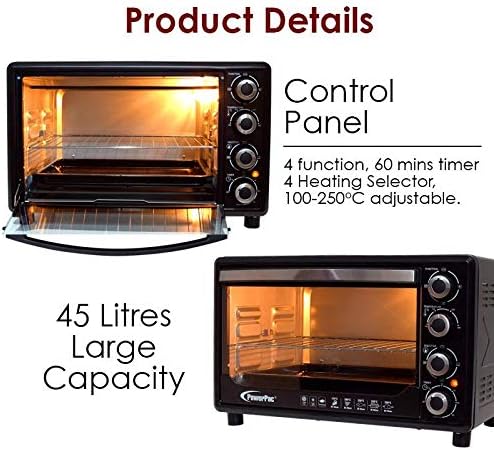
תמונה: מפורט view of the oven's control panel with four knobs for function, temperature, selector, and timer, alongside an indication of its 45-liter capacity.
רכיבים:
- יחידת תנור
- Baking Tray (2 pcs)
- Grill Rack (2 pcs)
- סט מזלגות רוטיסרי
- ידית מגש
- מגש פירורים (ניתן להסרה)
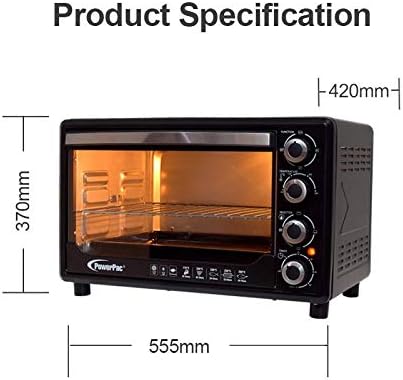
Image: Two black baking trays and two wire grill racks, illustrating the included accessories for the oven.
3. התקנה ושימוש ראשון
פריקת אריזה:
- הוציאו בזהירות את התנור ואת כל האביזרים מהאריזה.
- Remove any packing materials, stickers, or labels from the oven.
- בדוק אם יש נזק במהלך ההובלה. אם ניזוק, אין להפעיל אותו ולפנות לתמיכת הלקוחות.
מיקום:
- הניחו את התנור על משטח יציב, עמיד בחום ומאוזן.
- Ensure there is adequate ventilation around the oven (at least 10-15 cm clearance on all sides).
- אין למקם את התנור ליד חומרים דליקים או מקורות חום.
ניקוי ראשוני:
- נגב את החלק הפנימי והחיצוני של התנור עם מודעהamp בַּד.
- Wash all accessories (baking trays, grill racks, rotisserie fork) in warm, soapy water, rinse thoroughly, and dry completely.
שימוש ראשון (צריבה):
Before cooking food, operate the oven for approximately 15 minutes to burn off any manufacturing residues and odors.
- חברו את התנור לשקע חשמלי מוארק.
- כוונו את כפתור הטמפרטורה ל-250 מעלות צלזיוס.
- Set the function knob to 'Bake' (top and bottom heating elements).
- כוונו את כפתור הטיימר ל-15 דקות.
- A slight odor or smoke may be present; this is normal. Ensure the area is well-ventilated.
- Once the timer rings, turn all knobs to 'OFF' and unplug the oven. Allow it to cool completely.
4. הוראות הפעלה
Familiarize yourself with the control knobs before operation:
- כפתור פונקציה: Selects the cooking mode (e.g., Bake, Grill, Convection).
- ידית טמפרטורה: Adjusts the cooking temperature (100°C - 250°C).
- כפתור בורר: Chooses heating elements (top, bottom, or both) and activates convection/rotisserie.
- כפתור טיימר: Sets the cooking duration (up to 60 minutes).
תפעול כללי:
- Place food on the baking tray or grill rack, then insert into the desired rack position inside the oven.
- סגור היטב את דלת התנור.
- הגדר את ידית פונקציה to the desired cooking mode (e.g., Bake, Grill).
- הגדר את ידית טמפרטורה to the required temperature.
- הגדר את כפתור בורר to activate the appropriate heating elements (top, bottom, or both) and convection fan if desired.
- הגדר את כפתור טיימר to the desired cooking time. The oven will start heating. The indicator light will illuminate.
- When the set time elapses, the timer will ring, and the oven will automatically turn off.
- הוציאו בזהירות את המזון המבושל באמצעות כפפות תנור.
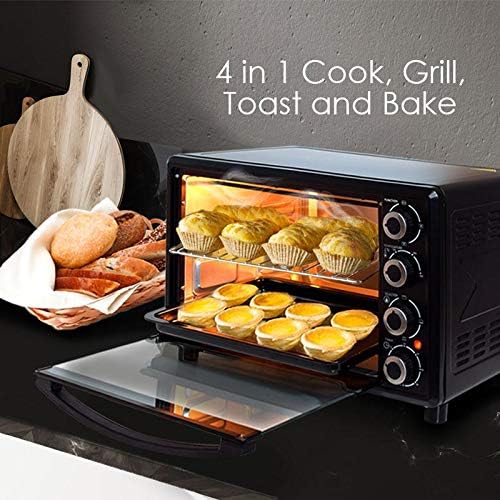
Image: The oven in use, showing baked goods on a tray, illustrating its baking and toasting capabilities.
שימוש בפונקציית הגריל:
- Prepare the food (e.g., chicken) and secure it onto the rotisserie fork.
- Insert the rotisserie fork into the designated slots inside the oven.
- הגדר את ידית פונקציה to 'Rotisserie'.
- הגדר את ידית טמפרטורה לטמפרטורה הרצויה.
- הגדר את כפתור בורר to activate the rotisserie motor and heating elements (usually top or both).
- הגדר את כפתור טיימר for the required cooking duration.
- Monitor cooking through the tempered glass window and internal light.
- Once cooking is complete, use the rotisserie handle to carefully remove the hot food.

Image: A whole chicken rotating on the rotisserie spit inside the oven, demonstrating the rotisserie and convection features.
5. תחזוקה וניקיון
ניקוי ותחזוקה קבועים יבטיחו את אורך החיים וביצועים אופטימליים של התנור שלכם.
לפני הניקוי:
- נתקו תמיד את התנור משקע החשמל.
- Allow the oven to cool down completely before cleaning any part.
ניקוי פנים:
- Remove the baking trays, grill racks, and crumb tray. Wash them in warm, soapy water. For stubborn stains, soak them before cleaning.
- נגב את הקירות הפנימיים עם מודעהamp מטלית ותמיסת ניקוי עדינה ולא שוחקת.
- Do not use abrasive cleaners, scouring pads, or metal utensils on the interior surfaces as they can damage the finish.
- ודא שהפנים יבש לחלוטין לפני השימוש הבא.
ניקוי החלק החיצוני:
- נגב את המשטחים החיצוניים עם רך, דamp בַּד.
- אין להשתמש בכימיקלים קשים או בחומרי ניקוי שוחקים.
- Ensure no water or cleaning solution enters the control panel area.
דלת זכוכית:
- נקו את דלת הזכוכית המחוסמת בעזרת חומר ניקוי זכוכית או מודפסamp בַּד.
- Avoid scratching the glass surface.
6. פתרון תקלות
אם נתקלתם בבעיות בתנור שלכם, עיינו בבעיות הנפוצות ובפתרונות הבאות:
| בְּעָיָה | סיבה אפשרית | פִּתָרוֹן |
|---|---|---|
| תנור לא נדלק. | לא מחובר לחשמל; כבה את החשמלtagה; טיימר לא מוגדר. | ודא שהתקע מחובר היטב לשקע; בדוק את מפסק החשמל הביתי; כוונן את כפתור הטיימר. |
| האוכל לא מתבשל באופן אחיד. | Incorrect rack position; oven overloaded; convection fan not activated. | Adjust rack position; avoid overcrowding; ensure convection fan is selected for even cooking. |
| עשן או ריח במהלך הפעולה. | Food residue; initial burn-in; excessive grease. | Clean oven interior and accessories; ensure proper ventilation during first use; clean up grease spills immediately. |
| הגריל לא מסתובב. | Food too heavy or unbalanced; rotisserie not properly installed; function not selected. | Ensure food is balanced and within weight limits; re-install rotisserie fork correctly; select 'Rotisserie' function. |
If the problem persists after trying these solutions, please contact PowerPac customer support.
7. מפרטים
| מותג: | PowerPac |
| דֶגֶם: | PPT45 |
| יְכוֹלֶת: | 50 ליטר |
| מקור כוח: | חַשׁמַלִי |
| כרך ידtage/תדר: | 220-240V ~ 50Hz (Standard for Singapore) |
| מידות (ב x H x D): | 555 מ"מ x 370 מ"מ x 420 מ"מ (בערך) |
| מאפיינים מיוחדים: | Temperature Control, Convection, Rotisserie, Internal Light, 60-Minute Timer, 4 Heat Selector |
| גוף חימום: | נירוסטה |
| רכיבים כלולים: | 2 Baking Trays, 2 Grill Racks, Rotisserie Fork Set, Tray Handle, Crumb Tray |
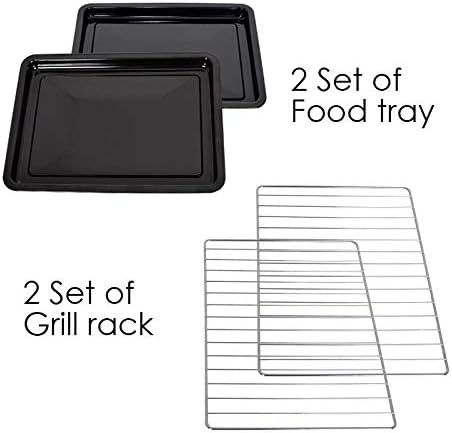
Image: Diagram showing the approximate dimensions of the PowerPac PPT45 Electric Oven: 555mm width, 370mm height, and 420mm depth.
8. אחריות ותמיכה
מידע על אחריות:
This PowerPac PPT45 Electric Oven comes with a 24 Months Local Manufacturer Warrantyאנא שמור את הוכחת הרכישה שלך לצורך תביעות אחריות.

Image: Graphics indicating 'Singapore Trusted Brand (22 Years)', '24 Months Local Manufacturer Warranty', and 'ISO 9001 Qualified Certification'.
תמיכת לקוחות:
For technical assistance, warranty claims, or spare parts, please contact PowerPac customer service. You can find more information and contact details by visiting the official PowerPac store: