1. הקדמה
1.1 נגמר המוצרview
The Habitex LED Ceiling Fan m.VTR 4500 is designed to provide efficient air circulation and illumination for your living spaces. This model features a very quiet DC motor, five speed settings, and five silver-finished blades. It offers two primary functions: ventilation and air circulation, with a dual rotation direction for seasonal use. The integrated LED light is dimmable and offers warm, neutral, and cold light modes. The fan is operated via a convenient remote control.
1.2 מידע בטיחות
אנא קרא בעיון את כל ההוראות לפני ההתקנה והשימוש. שמור מדריך זה לעיון עתידי.
- בטיחות חשמל: Ensure the power supply is disconnected at the main circuit breaker before installation, cleaning, or maintenance. All electrical connections must comply with local codes and standards. If you are unsure about wiring, consult a qualified electrician.
- הַרכָּבָה: The ceiling fan must be mounted to a structure capable of supporting its weight (approximately 7.84 kg) and the dynamic load of its operation. Ensure the mounting bracket is securely fastened.
- מרווח להב: Maintain a minimum clearance of 2.3 meters (7.5 feet) from the floor to the bottom of the fan blades and at least 0.5 meters (1.6 feet) from the wall to the blade tips.
- חלקים נעים: Avoid placing objects in the path of the fan blades. Do not insert hands or objects into the fan while it is operating.
- שְׁלַט רָחוֹק: Keep the remote control out of reach of children. Do not mix old and new batteries or different types of batteries.
- ניקוי: יש לנתק תמיד את החשמל לפני ניקוי. יש להשתמש במטלית רכה, דקהamp בַּד. אין להשתמש בחומרי ניקוי שוחקים.
2. תכולת החבילה
ודא שכל הרכיבים קיימים ולא ניזוקו לפני שתמשיך בהתקנה.
- יחידת מנוע מאוורר תקרה
- להבי מאוורר (5 יחידות)
- סוגר הרכבה וחומרה
- Downrod (if applicable, not explicitly mentioned but standard)
- חוּפָּה
- ערכת תאורת לד
- שְׁלַט רָחוֹק
- מדריך הוראות
הערה: 2 סוללות AAA לשלט רחוק אינן כלולות.
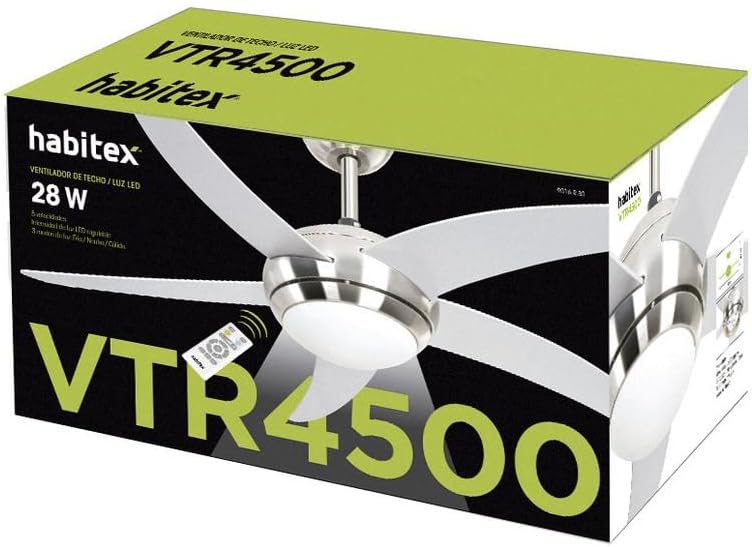
Figure 2.1: Packaging of the Habitex LED Ceiling Fan m.VTR 4500, showing the fan unit and remote control on the box.
3. התקנה והתקנה
Installation of this ceiling fan requires basic electrical knowledge and adherence to safety guidelines. If you are not comfortable performing the installation, it is recommended to hire a qualified electrician.
3.1 רשימת בדיקות לפני ההתקנה
- ודא שהחשמל כבוי במפסק החשמל.
- ודא שכל תכולת החבילה קיימת.
- אספו את הכלים הדרושים: מברג, מפשיט חוטים, סרט חשמלי, סולם.
- Verify the ceiling junction box is rated for fan support (typically 15.9 kg / 35 lbs minimum).
3.2 הרכבת המאוורר
- חבר את תושבת הרכבה: Secure the mounting bracket to the ceiling junction box using the provided screws. Ensure it is firmly attached to a structural beam or a fan-rated support box.
- Assemble Downrod (if applicable): If using a downrod, feed the motor wires through it and secure the downrod to the motor housing.
- Hang Fan Motor: Carefully lift the fan motor assembly and hang it onto the mounting bracket hook (if available) or have an assistant hold it while making electrical connections.
- חיבורי חשמל: Connect the fan's electrical wires to the household wiring according to the wiring diagram (typically black to black, white to white, ground to ground). Use wire nuts to secure connections.
- אבטחת המאוורר לתושבת: Once wiring is complete, secure the fan motor assembly to the mounting bracket using the screws provided.
- התקנת להבים: Attach the five fan blades to the motor housing using the screws provided. Ensure all screws are tightened securely.
- התקנת ערכת תאורת LED: Connect the LED light kit wires to the fan motor wires as per the instructions. Secure the light kit to the bottom of the fan motor housing.
- התקנת חופה: Slide the canopy up to the ceiling and secure it to cover the mounting bracket and wiring.
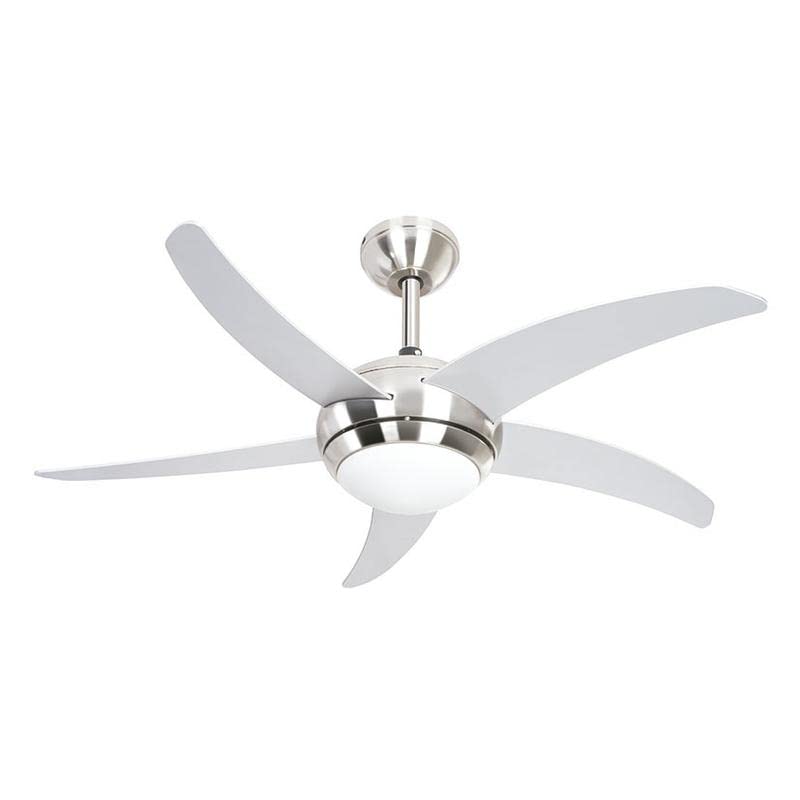
Figure 3.1: Detail of the Habitex LED Ceiling Fan motor housing with integrated LED light and blade attachment points.
4. הוראות הפעלה
The Habitex LED Ceiling Fan is operated using the included remote control.
4.1 פונקציות שלט רחוק
Before use, insert 2 x AAA batteries into the remote control.
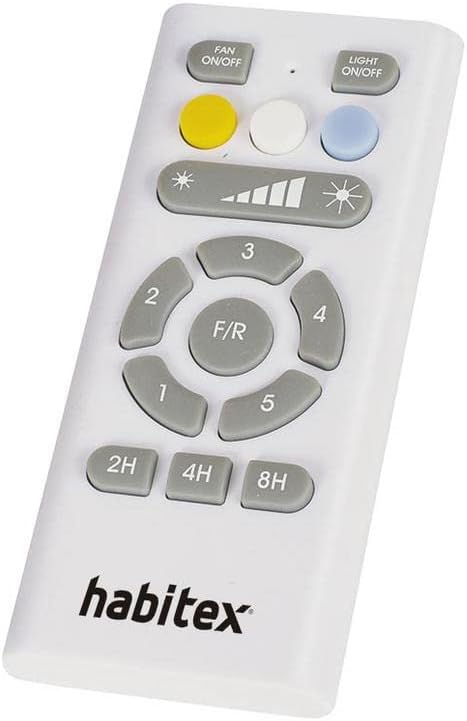
Figure 4.1: The remote control for the Habitex LED Ceiling Fan, showing buttons for fan speed, light control, and timer.
- מאוורר הפעלה/כיבוי: לחץ כדי להפעיל או לכבות את המאוורר.
- מדליק/כיבוי אור: לחץ כדי להדליק או לכבות את נורית ה-LED.
- Speed Control (1-5 buttons): Select desired fan speed from 1 (lowest) to 5 (highest). The remote also shows a visual indicator for speed.
- קדימה/אחורה (קדימה/אחורה): Press to change the direction of blade rotation.
- Forward Mode (Counter-clockwise): Creates a downward breeze, ideal for cooling during warm weather.
- Reverse Mode (Clockwise): Creates an upward airflow, circulating warm air near the ceiling, ideal for winter to redistribute heat.
- Light Color Temperature (Yellow, White, Blue buttons): Select between warm, neutral, or cold light modes.
- Light Dimming (Sun icon buttons): התאם את בהירות נורית ה-LED.
- Timer (2H, 4H, 8H buttons): הגדר את המאוורר לכיבוי אוטומטי לאחר שעה, שעתיים או 8 שעות.
5. תחזוקה
תחזוקה שוטפת מבטיחה ביצועים אופטימליים ומאריכה את תוחלת החיים של מאוורר התקרה שלכם.
- ניקוי: יש לנקות מעת לעת את להבי המאוורר ואת בית המנוע בעזרת מטלית רכה ונטולת סיבים. במקרה של לכלוך עיקש, יש לנקות מעטamp cloth can be used. Ensure the fan is completely dry before operating. Do not use abrasive materials or harsh chemicals.
- איזון להב: If the fan wobbles during operation, check that all blade screws are tight and that the blades are not bent or damaged. Balancing kits are available if needed.
- חיבורי חשמל: בדקו מדי שנה את כל החיבורים החשמליים לאיתנות.
- מקור אור: מקור תאורת ה-LED משולב ובדרך כלל אינו דורש החלפה. אם מתעוררות בעיות, פנו לתמיכת הלקוחות.
6. פתרון תקלות
לפני פנייה לתמיכת הלקוחות, עיין בבעיות הנפוצות ובפתרונות הבאים.
| בְּעָיָה | סיבה אפשרית | פִּתָרוֹן |
|---|---|---|
| המאוורר לא מופעל | No power supply; Loose wiring; Remote control issues. | בדוק את מפסק החשמל. ודא שכל חיבורי החיווט מאובטחים. החלף את סוללות השלט רחוק. |
| האור לא עובד | No power supply; Loose wiring; LED light kit issue. | Check circuit breaker. Ensure light kit wiring is secure. If LED is faulty, contact support. |
| מאוורר מתנדנד | ברגי להב רופפים; להבים לא מאוזנים; תושבת הרכבה רופפת. | Tighten all blade screws. Check for bent blades. Ensure mounting bracket is securely fastened to the ceiling. Use a blade balancing kit if necessary. |
| השלט רחוק לא עובד | Dead batteries; Incorrect pairing (if applicable); Obstruction. | Replace AAA batteries. Ensure no obstructions between remote and fan receiver. |
7. מפרטים
| תכונה | פְּרָט |
|---|---|
| מספר דגם | m.VTR 4500 |
| מותג | HABITEX |
| סוג מנוע | DC Motor (Very quiet) |
| מהירויות מאוורר | 5 מהירויות |
| מספר להבים | 5 |
| קוטר להב | 112 ס"מ (44 אינץ') |
| קיבולת זרימת אוויר | 171.96 מ"ק לדקה |
| רמת רעש | 40 דציבלים |
| פונקציות מאוורר | Ventilation, Air Circulation, Dual Rotation Direction |
| סוג אור | LED משולב ניתן לעמעום |
| וואט קלtage | 22 W |
| מצבי אור | Warm, Neutral, Cold |
| הגדרות טיימר | 2, 4, 8 שעות |
| סוג בקרה | Remote Control (2 x AAA batteries not included) |
| צריכת חשמל (מאוורר) | 28 W |
| מידות (קוטר x גובה) | Ø 112 cm x H 42 cm |
| משקל פריט | 7.84 ק"ג |
| חוֹמֶר | פלסטיק או אלומיניום |
| שיטת התקנה | הר תקרה |
8. אחריות ותמיכה
פרטי אחריות ספציפיים מסופקים בדרך כלל עם מסמכי הרכישה או בהוראות הרשמיות של היצרן. webאתר. אנא שמור את הוכחת הרכישה שלך לצורך תביעות אחריות.
For technical support, troubleshooting assistance beyond this manual, or warranty inquiries, please contact your retailer or the manufacturer directly.
- יַצרָן: HABITEX
- מספר דגם: m.VTR 4500
- תאריך זמינות ראשונה: 28 במאי 2019