
1. הקדמה
The GameMax Expedition is a compact Micro ATX PC gaming case designed for efficient cooling and component compatibility. This manual provides instructions for the proper installation, operation, and maintenance of your PC case.

Figure 1.1: GameMax Expedition MATX PC Gaming Case, White.
2. מידע בטיחות
- יש לנתק תמיד את החשמל מכל הרכיבים לפני התקנה או תחזוקה.
- ענדו רצועת כף יד אנטי-סטטית כדי למנוע נזק לרכיבים כתוצאה מפריקה אלקטרוסטטית (ESD).
- Be cautious of sharp edges inside the chassis.
- הרחיקו חלקים קטנים וברגים מהישג ידם של ילדים.
- Ensure proper ventilation around the case during operation.
3. תכולת החבילה
ודא שכל הפריטים נמצאים בחבילה:
- GameMax Expedition MATX PC Gaming Case
- קופסת אביזרים (ברגים, מרווחי כבלים, אזיקוני כבלים)
- 1 x 120mm Blue LED Fan (pre-installed at rear)
- מדריך למשתמש (מסמך זה)
4. תכונות מוצר
- Micro Gaming Chassis: Compact design optimized for gaming components.
- יציאות I/O: 1 x USB 3.0, 2 x USB 2.0, and HD Audio ports located on the top panel.
- הִתקָרְרוּת: Includes 1 x 120mm Blue LED fan. Supports additional fans for enhanced airflow.
- Side Window: Full side window panel allows visibility of internal components.
- Magnetic Dust Filter: Removable dust filter on the top panel for easy cleaning and improved system longevity.
- GPU Bracket: Integrated bracket provides support for graphics cards, preventing sag and accommodating larger cards.
5. רכיב מעלview
5.1 חיצוני Views

Figure 5.1: Front panel design with air intake and included 120mm fan illustration.

Figure 5.2: Top I/O panel featuring USB 3.0, USB 2.0, and audio ports.
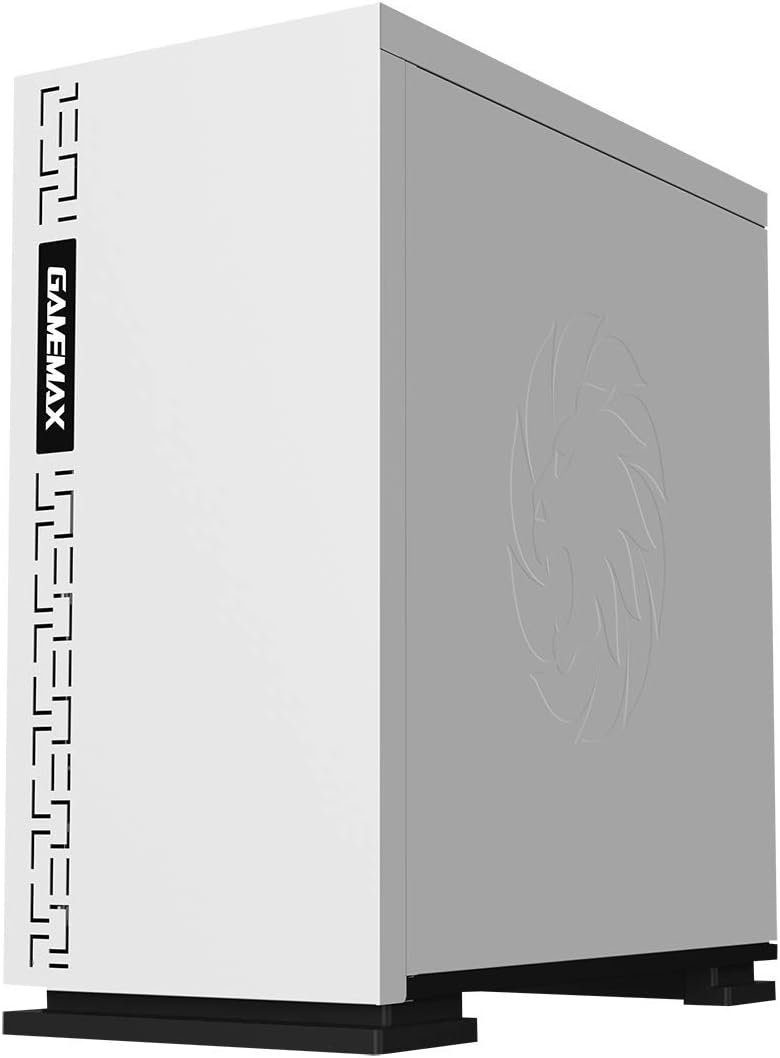
איור 5.3: למעלה view showing the magnetic dust filter for fan ventilation.
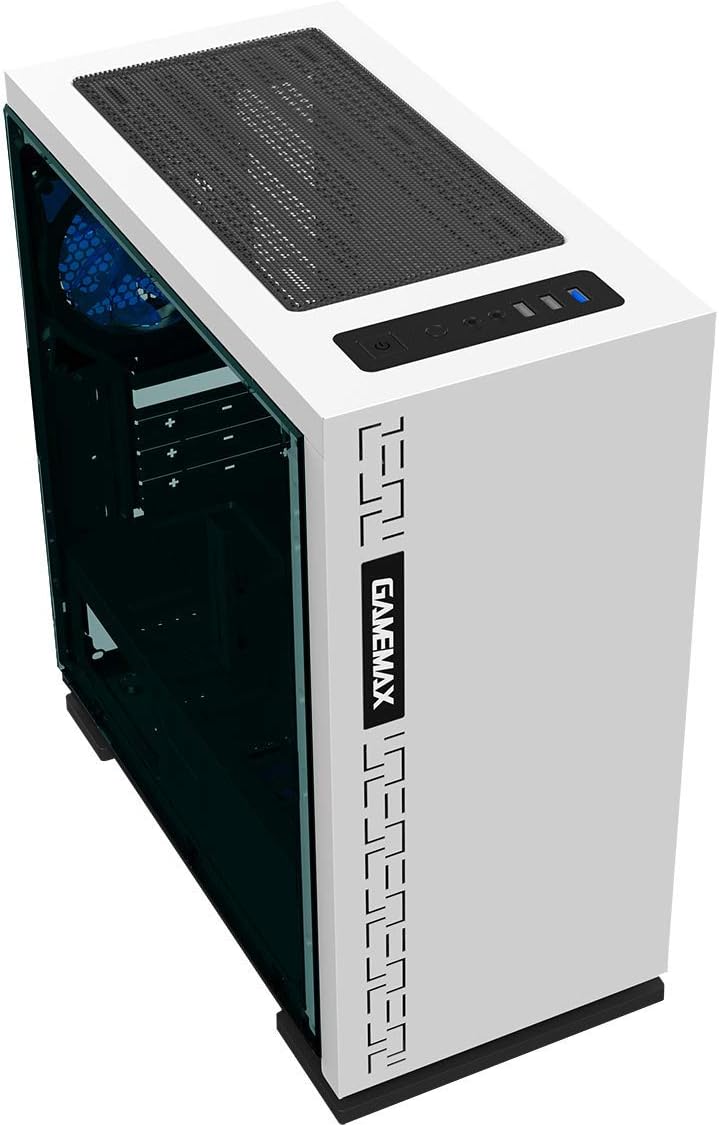
איור 5.4: אחורי view displaying expansion slots and the pre-installed 120mm fan.
5.2 Internal Layout

איור 5.5: פנימי view with the side panel removed, showing the motherboard tray and cable routing options.

Figure 5.6: Illustration of fan and radiator mounting points within the chassis.
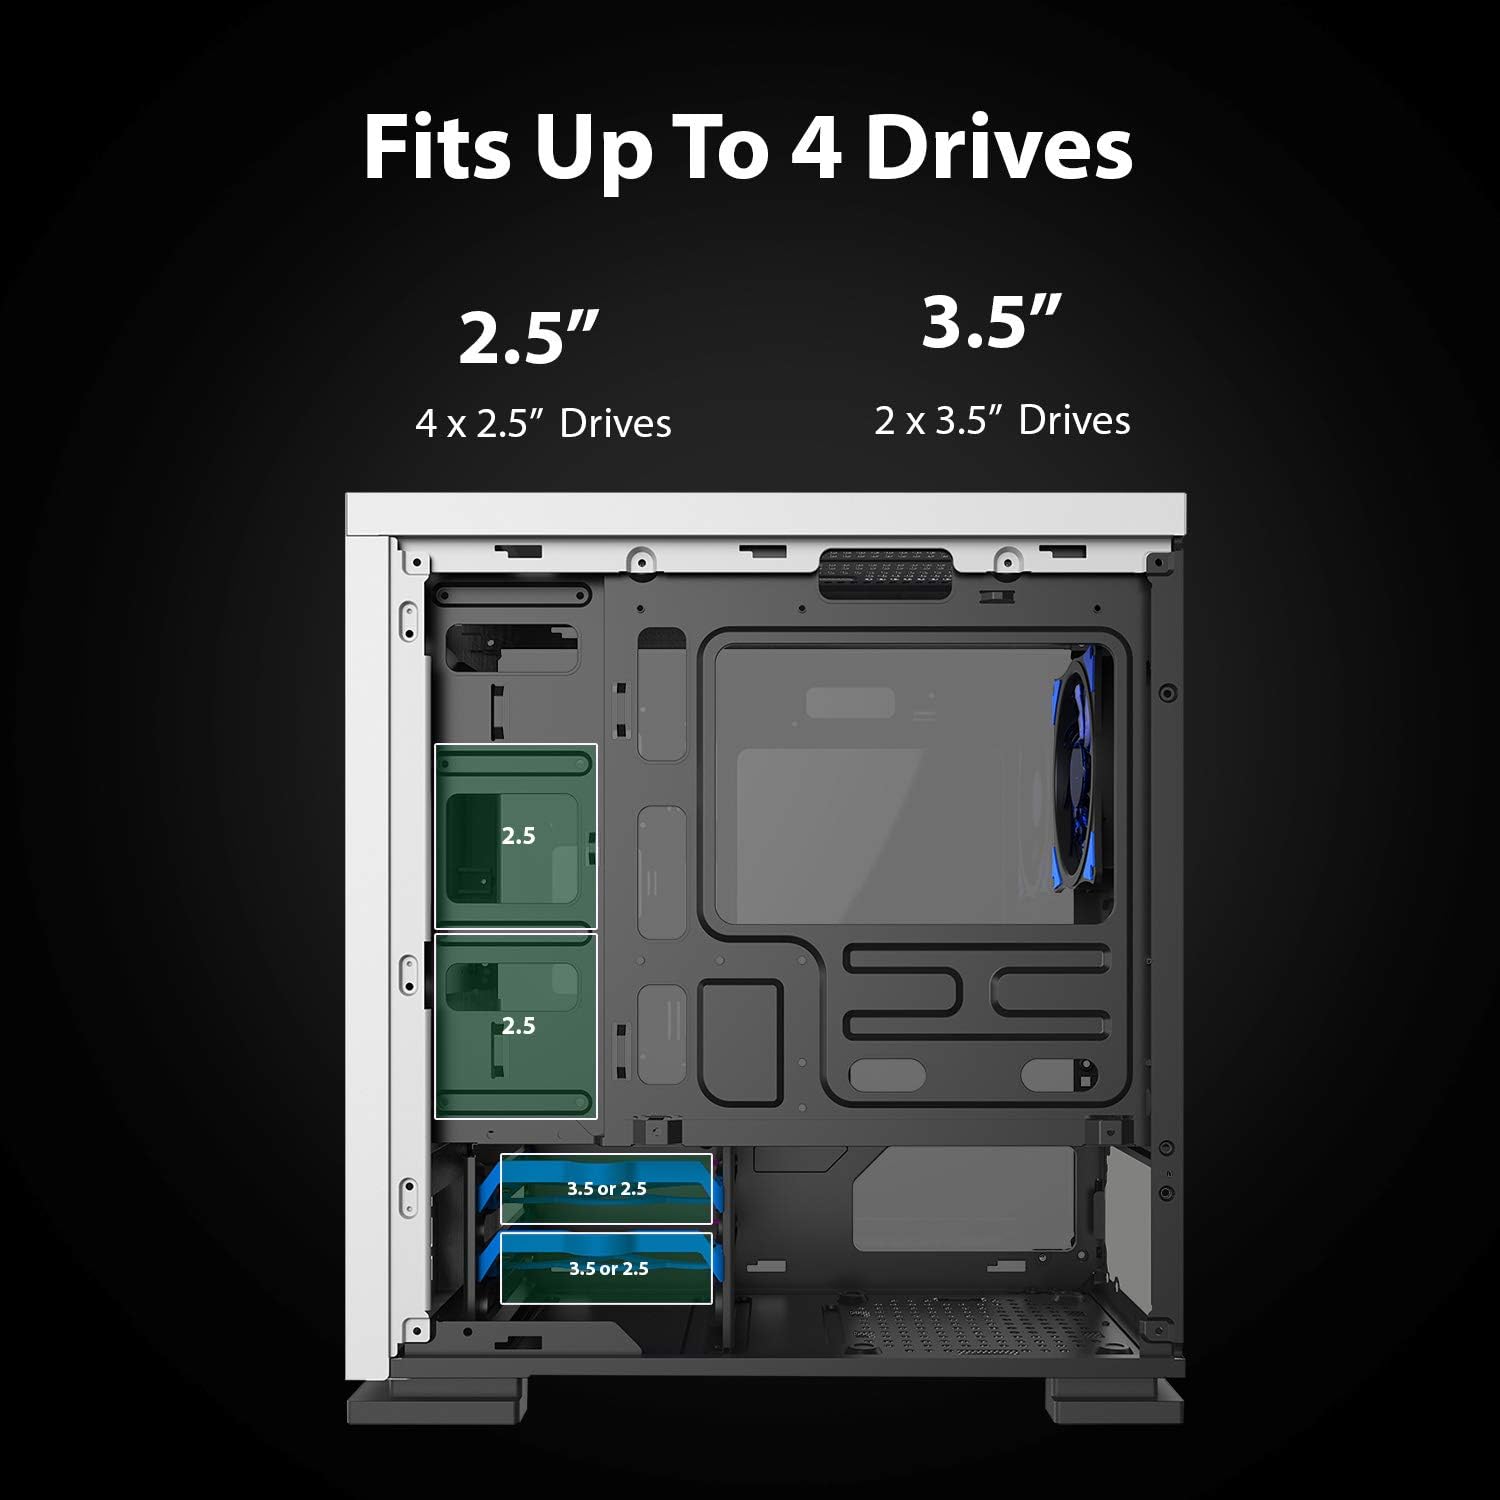
Figure 5.7: Drive bay locations supporting 2.5" and 3.5" storage devices.
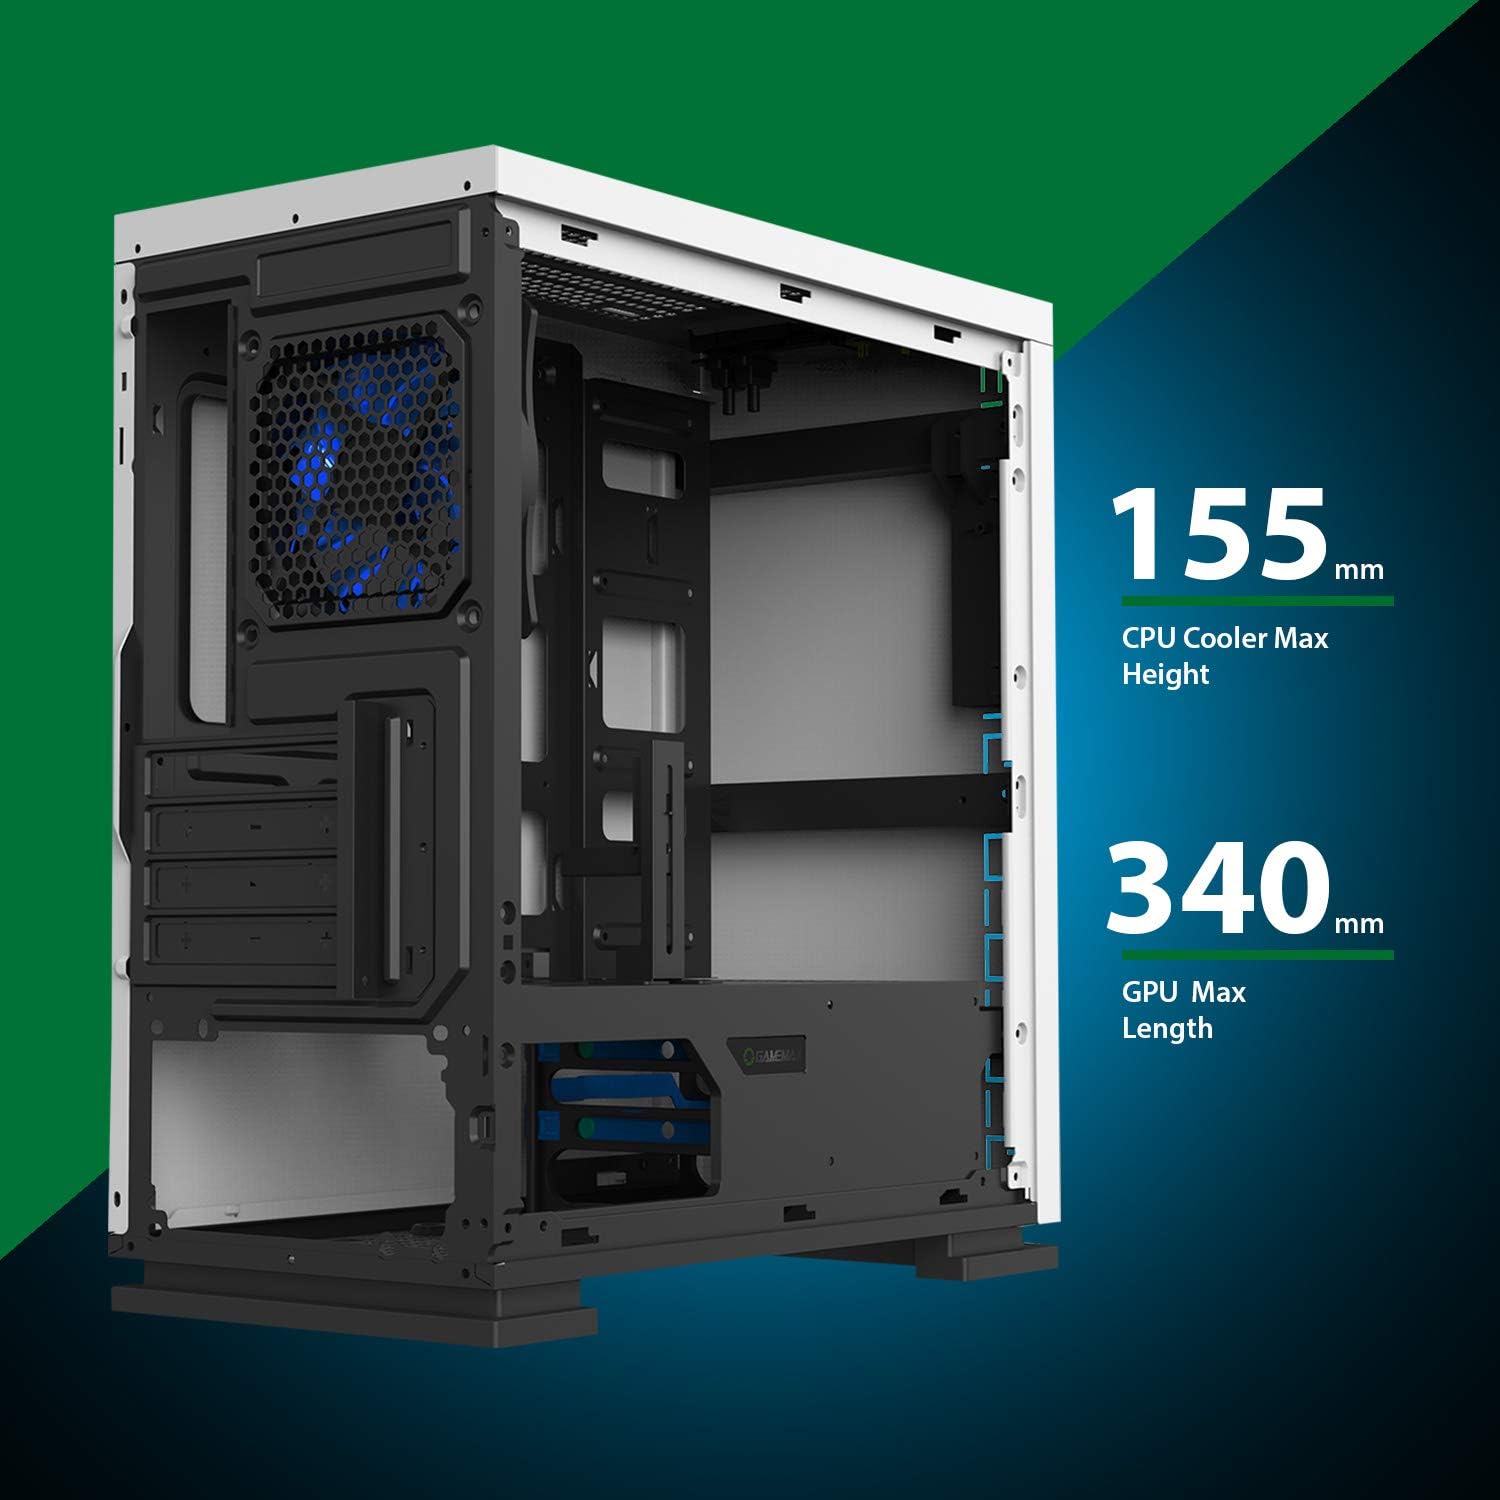
Figure 5.8: Maximum clearance for CPU coolers (155mm) and GPUs (340mm).
6. התקנה והתקנה
6.1 הכנה
- Unpack the chassis and remove all packaging materials.
- Remove the side panels by unscrewing the thumbscrews at the rear.
- Gather necessary tools: Phillips head screwdriver, cable ties.
6.2 התקנת לוח אם
- Install the I/O shield into the rear opening of the chassis.
- Align the motherboard with the pre-installed standoffs. Ensure the standoffs match your Micro ATX motherboard's mounting holes.
- אבטחו את לוח האם באמצעות הברגים המצורפים.
6.3 התקנת ספק כוח
- Place the power supply unit (PSU) into the dedicated compartment at the bottom rear of the case.
- Align the PSU with the screw holes on the rear of the chassis.
- Secure the PSU with the provided screws.
6.4 התקנת כונן אחסון
- כוננים בגודל 2.5 אינץ': Mount 2.5" SSDs/HDDs to the dedicated mounting points on the motherboard tray or within the drive cage using the provided screws.
- כוננים בגודל 3.5 אינץ': Install 3.5" HDDs into the drive cage located beneath the PSU shroud. Slide the drive into the tray and secure it.
6.5 התקנת כרטיס הרחבה (GPU)
- Remove the necessary expansion slot covers from the rear of the chassis.
- Insert your graphics card or other expansion card into the appropriate PCIe slot on the motherboard.
- אבטחו את הכרטיס בעזרת בורג.
- Utilize the adjustable GPU bracket to provide additional support for heavier graphics cards.
6.6 התקנת מאוורר וקירור
- The case comes with one 120mm Blue LED fan pre-installed at the rear.
- Additional 120mm fans can be installed at the top and front positions as needed.
- Ensure fans are oriented correctly for optimal airflow (intake or exhaust).
6.7 Front Panel Connector Installation
Connect the front panel cables (USB 3.0, USB 2.0, HD Audio, Power SW, Reset SW, Power LED, HDD LED) to their corresponding headers on your motherboard. Refer to your motherboard manual for exact pin layouts.
7. הפעלה
Once all components are installed and cables are connected, replace the side panels. Connect your monitor, keyboard, mouse, and power cable. Press the power button on the top panel to start your system. The pre-installed LED fan will illuminate upon power-on.
8. תחזוקה
- ניקוי מסנן אבק: Regularly remove and clean the magnetic dust filter located on the top panel to maintain optimal airflow and prevent dust buildup inside the case.
- ניקיון כללי: השתמש רך, דamp cloth to clean the exterior surfaces of the case. Avoid abrasive cleaners.
- הסרת אבק פנימית: Periodically use compressed air to clear dust from internal components and fans. Ensure the system is powered off and unplugged before performing internal cleaning.
9. פתרון תקלות
- המערכת לא נדלקת: Check all power connections, including the PSU to the wall outlet, PSU to motherboard, and front panel power switch cable to the motherboard.
- מאווררים שלא מסתובבים: Verify fan cables are securely connected to the motherboard or fan controller.
- יציאות USB לא עובדות: Ensure the front panel USB cables are correctly connected to the motherboard's USB headers.
- אין פלט תצוגה: Confirm the graphics card is properly seated and connected to power, and the monitor cable is connected to the graphics card, not the motherboard's integrated graphics port (unless using integrated graphics).
10. מפרטים
| תכונה | מִפרָט |
|---|---|
| שם הדגם | GMX EXPEDITION |
| מותג | GAMEMAX |
| סוג מקרה | Micro Tower (MATX) |
| תאימות לוח אם | מיקרו ATX |
| צֶבַע | Expedition White |
| חוֹמֶר | פוליקרבונט (PC) |
| מידות המוצר (LxWxH) | 14.96 x 7.4 x 13.78 אינץ' (380 x 188 x 350 מ"מ) |
| משקל פריט | 8.58 פאונד (3.9 ק"ג) |
| יציאות USB 3.0 | 1 |
| יציאות USB 2.0 | 2 |
| שיטת קירור | אוויר, מים |
| מאוורר כלול | 1 x 120mm Blue LED (Rear) |
| מקסימום גובה מצנן מעבד | 155 מ"מ |
| אורך GPU מקסימלי | 340 מ"מ |
11. אחריות ותמיכה
For warranty information and technical support, please visit the official GameMax webאתר או צרו קשר עם הקמעונאי המקומי שלכם.
רִשְׁמִי Webאֲתַר: gamemaxpc.com