
1. הקדמה
This manual provides detailed instructions for the safe and effective operation of your BENNING CM 12 True RMS Digital Power Clamp Multimeter. Please read this manual thoroughly before using the device and keep it for future reference. The BENNING CM 12 is designed for demanding measurement tasks in industrial and commercial environments, offering precise measurements of AC, AC+DC True RMS, inrush current, and more, with data logging and Bluetooth connectivity.
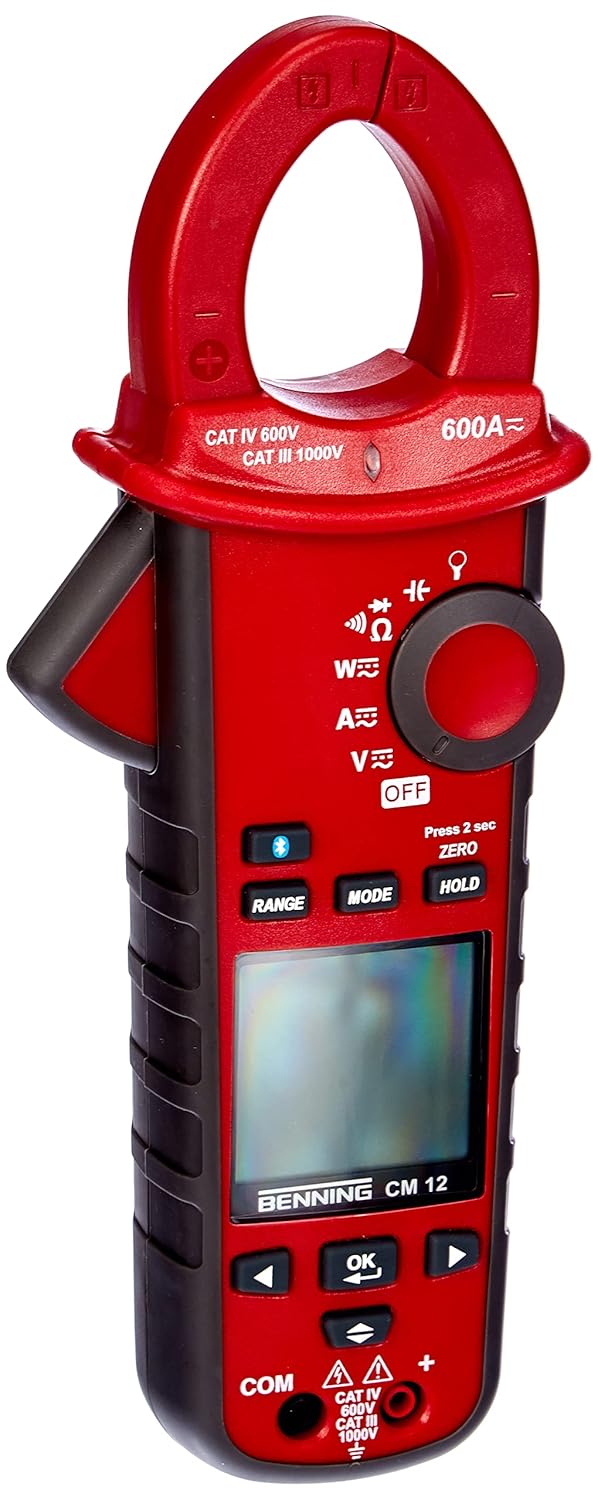
איור 1: The Benning CM 12 True RMS Digital Power Clamp Multimeter. This image displays the main unit with its red casing, clamp jaw, display screen, and control buttons.
2. מידע בטיחות
Always observe the following safety precautions to prevent personal injury and damage to the instrument:
- אין להשתמש במד אם הוא נראה פגום או אם הבידוד על חוטי הבדיקה פגום.
- ודא שהפונקציה והטווח הנכונים נבחרו לפני ביצוע המדידות.
- אין לחרוג ממגבלות הקלט המרביות עבור אף פונקציה.
- היזהר בעת עבודה עם כרךtagמעל 30V AC RMS, 42V שיא, או 60V DC, מכיוון שאלו מהווים סכנת התחשמלות.
- תמיד נתק את החשמל למעגל ופרק את כל המתח הגבוה.tagקבלים e לפני ביצוע בדיקות התנגדות, רציפות, דיודה או קיבול.
- הקפידו על חוקי הבטיחות המקומיים והארציים.
3. רכיבי המוצר
The BENNING CM 12 package includes the following items:
- BENNING CM 12 Digital Power Clamp מודד
- חוטי בדיקה (אדום ושחור)
- סוללות AAA (6 כלולות)
- תיק נשיאה
- מדריך למשתמש (מסמך זה)
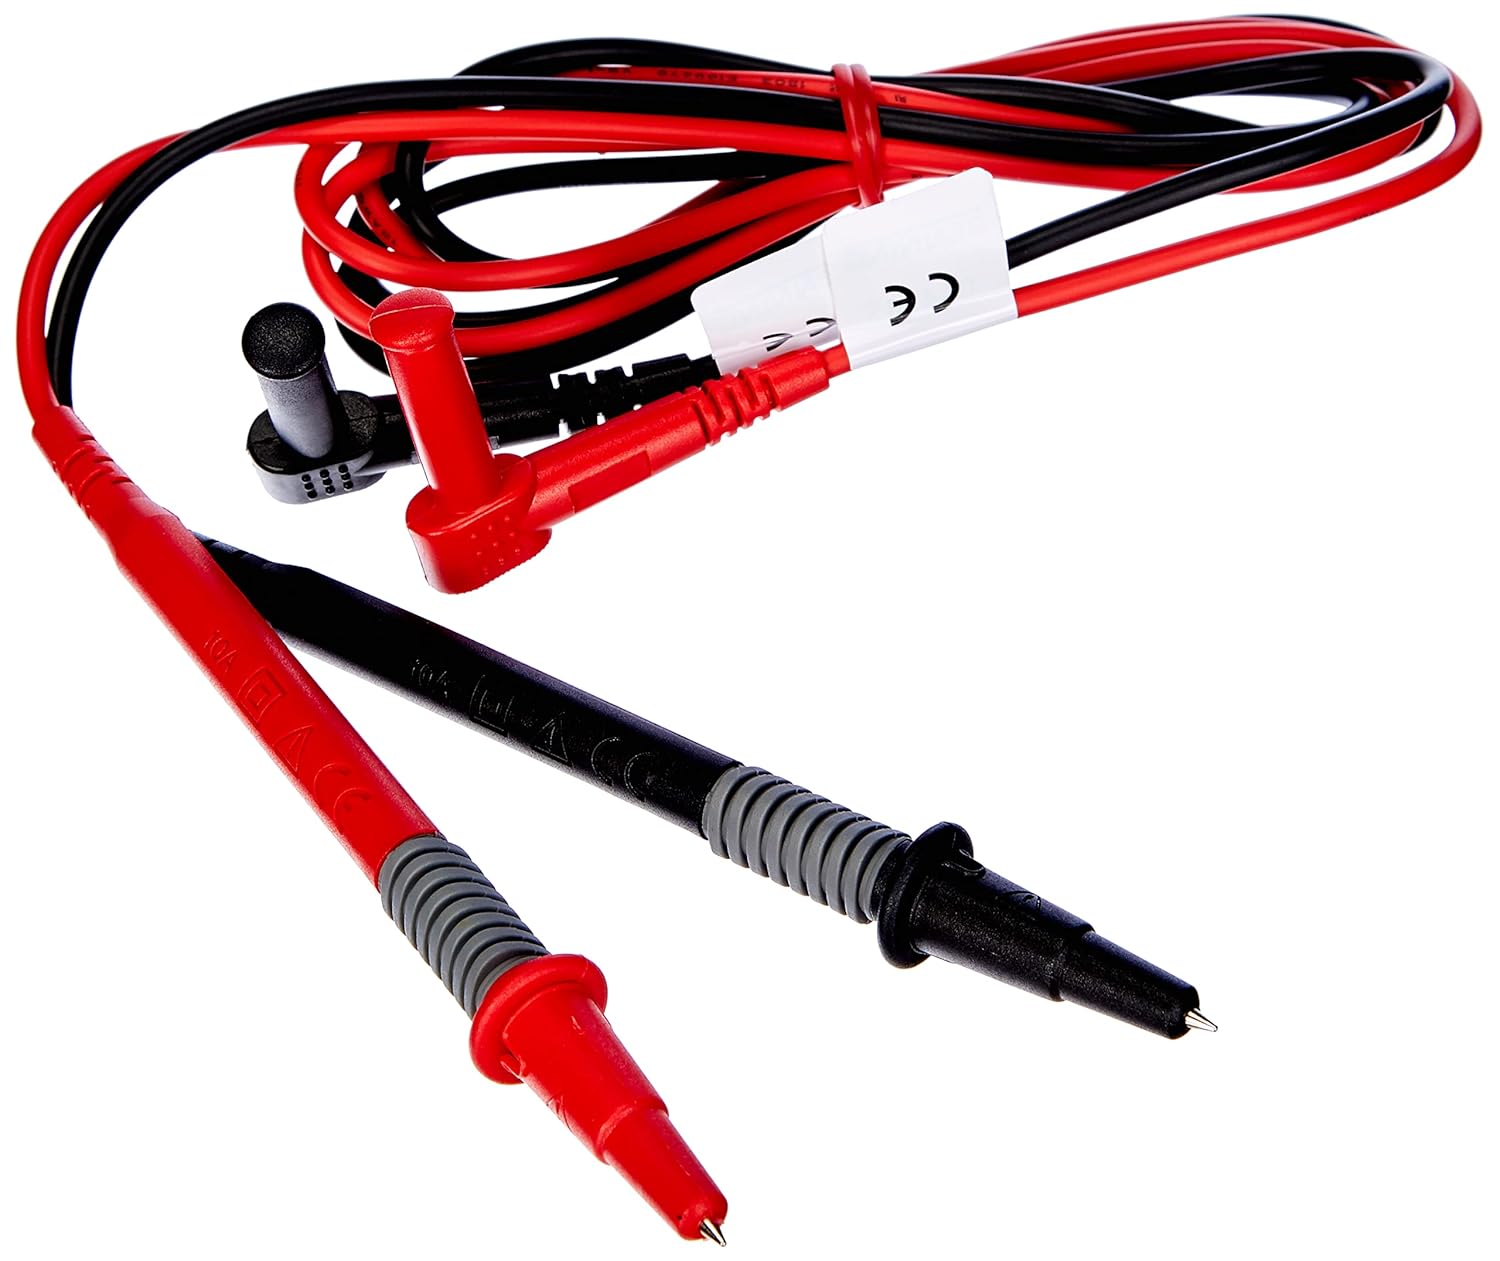
איור 2: Red and black test leads. These leads are used for voltage, resistance, continuity, and other measurements.

איור 3: Six AAA batteries. These batteries power the Benning CM 12 multimeter.

איור 4: Black carrying case. This case provides protection and portability for the multimeter and its accessories.
4. התקנה
4.1. התקנת סוללה
- אתר את מכסה תא הסוללה בחלקו האחורי של המכשיר.
- השתמש במברג כדי לפתוח את תא הסוללות.
- Insert six (6) AAA batteries, ensuring correct polarity as indicated inside the compartment.
- החזר את מכסה תא הסוללות למקומו ואבטח אותו באמצעות הבורג.
4.2. הפעלה ראשונית
Turn the rotary switch to any measurement function (e.g., V~ for AC Voltage) to power on the device. The display will illuminate, indicating the device is ready for use.
5. הוראות הפעלה
The BENNING CM 12 offers a variety of measurement functions. Select the desired function using the rotary switch.
5.1. מדידת זרם AC/DC (Clamp פוּנקצִיָה)
- סובב את המתג הסיבובי למצב 'A~' (זרם AC) או 'A=' (זרם DC).
- לחץ על clamp trigger to open the jaw.
- הקף מוליך יחיד עם ה-clamp לסת. ודא שהלסת סגורה לחלוטין.
- קרא את הערך הנוכחי על הצג.
- For AC+DC True RMS measurements, ensure the appropriate mode is selected if available via the MODE button.
5.2. כרךtagמדידה אלקטרונית (AC/DC)
- Insert the red test lead into the 'VΩ' input jack and the black test lead into the 'COM' input jack.
- Turn the rotary switch to 'V~' (AC Voltagה) או 'V=' (DC Voltagה).
- חבר את חוטי הבדיקה במקביל למעגל או לרכיב הנבדק.
- קרא את הכרךtagערך e בתצוגה.
5.3. Resistance and Continuity Measurement
- ודא שהמעגל מנותק מאנרגיה לפני המדידה.
- Insert test leads as for voltagמדידה אלקטרונית.
- Turn the rotary switch to 'Ω' (Resistance/Continuity).
- חבר את חוטי הבדיקה על פני הרכיב.
- For continuity, the meter will beep if resistance is below approximately 30Ω - 100Ω.
5.4. מבחן דיודה
- ודא שהמעגל מנותק מאנרגיה.
- Insert test leads as for voltagמדידה אלקטרונית.
- סובב את המתג הסיבובי לסמל 'דיודה'.
- חבר את המוליך האדום לאנודה ואת המוליך השחור לקתודה של הדיודה. נפח קדמיtage drop (approx. 0.8V) will be displayed. Reverse the leads for an open circuit reading.
5.5. מדידת זרם כניסה
This function measures the initial surge of current when a device (e.g., motor, lamp) is first turned on.
- סובבו את המתג הסיבובי למצב 'A~'.
- Press the 'INRUSH' button (if dedicated) or activate via 'MODE' button.
- Clamp the meter around the power conductor of the device.
- Turn on the device to measure the inrush current.
5.6. Power Measurement (W) and Power Factor
The BENNING CM 12 can simultaneously detect current (A) and voltage (V) to calculate active power (W) and power factor in AC/DC networks.
- Turn the rotary switch to the 'W' (Power) position.
- Connect the test leads for voltage measurement and clamp the jaw around the current conductor.
- The display will show active power (W) and power factor.
5.7. Data Logger Function (LOG) and Bluetooth Interface
The device features a data logger capable of storing 10,000 readings with a sampling rate from 1 second to 10 minutes. It also includes a Bluetooth interface for data connection to smartphones or tablets via the "BENNING MM-CM Link" app.
- Download and install the "BENNING MM-CM Link" app from your device's app store (iOS and Android compatible).
- Activate Bluetooth on your smartphone/tablet and on the BENNING CM 12 (refer to the device's specific button for Bluetooth activation, usually a dedicated button or a long press of 'MODE').
- Pair the device with the app.
- Use the app to configure logging parameters (sampling rate, start/stop logging) and to view/export recorded data.
5.8. Low-Pass Filter (HFR)
The HFR (High-Frequency Rejection) low-pass filter is used for accurate measurements on clocked motor drives or other noisy environments by filtering out high-frequency interference.
- Activate the HFR filter via a dedicated button or by pressing the 'MODE' button in relevant measurement functions (e.g., AC Voltage or Current).
- The display will typically show an indicator when the filter is active.
5.9. Total Harmonic Distortion (THD) Measurement
The THD function assesses network quality by measuring the total harmonic distortion of voltage or current waveforms.
- Select the THD function using the rotary switch or 'MODE' button in AC Voltage/Current modes.
- Connect the meter as appropriate for voltage או מדידת זרם.
- The display will show the THD value.
5.10. Two-Pole Rotary Field Testing
This function is used to determine the phase sequence in three-phase systems.
- Turn the rotary switch to the 'Rotary Field' symbol (if dedicated) or select via 'MODE' button in a relevant AC voltagהפונקציה.
- Connect the test leads to two phases of the three-phase system.
- The display will indicate the phase sequence (e.g., L1-L2, L2-L3).
6. תחזוקה
6.1. ניקיון
נגב את המארז עם המודעהamp מטלית וחומר ניקוי עדין. אין להשתמש בחומרים שוחקים או ממסים. יש לוודא שהמכשיר כבוי ומנותק מכל מעגל חשמלי לפני הניקוי.
6.2. החלפת סוללה
When the low battery indicator appears on the display, replace the batteries as described in Section 4.1. Remove batteries if the device will not be used for an extended period to prevent leakage.
6.3. אחסון
Store the multimeter in its carrying case in a cool, dry environment, away from direct sunlight and extreme temperatures. Remove batteries for long-term storage.
7. פתרון תקלות
| בְּעָיָה | סיבה אפשרית | פִּתָרוֹן |
|---|---|---|
| המד לא נדלק. | סוללות מתות או מותקנות בצורה שגויה. | בדוק את קוטביות הסוללה; החלף סוללות. |
| אין קריאה או מוצג "OL" (עומס יתר). | Incorrect range selected, open circuit, or measurement exceeds range. | Select appropriate range, check circuit connections, ensure measurement is within device limits. |
| קריאות לא מדויקות. | Poor test lead connection, external interference, or low battery. | Ensure secure connections, move away from strong electromagnetic fields, replace batteries. |
| בעיות בחיבור בלוטות'. | Bluetooth not activated on device/phone, app issues, or out of range. | Ensure Bluetooth is on for both devices, restart app, move closer to the meter. |
8. מפרטים
| תכונה | פְּרָט |
|---|---|
| מספר דגם | CM 12 |
| סוג מדידה | True RMS (AC, AC+DC) |
| Inrush Current | כֵּן |
| טען פרוfile הַקלָטָה | Yes (single-phase and three-phase) |
| מדידת הספק | Active Power (W), Power Factor |
| מבחן המשכיות | 30 אוהם - 100 אוהם |
| בדיקת דיודה | 0.8 וולט |
| Rotary Field Testing | שני מוטות |
| מסנן מעביר נמוך | HFR (High-Frequency Rejection) |
| Harmonic Measurement | THD (עיוות הרמוני מוחלט) |
| לוגר נתונים | 10,000 readings, 1s - 10min sampשיעור ling |
| מִמְשָׁק | Bluetooth (iOS and Android app "BENNING MM-CM Link") |
| מקור כוח | 6 סוללות AAA (כלולות) |
| מידות המוצר | 11.42 x 5.12 x 2.76 אינץ' |
| משקל פריט | 1.3 פאונד (590 גרם) |
| יַצרָן | בנינג |

איור 5: מְמַדִי view of the Benning CM 12 Multimeter, indicating its approximate height of 11 inches (27 cm).
9. מידע על אחריות
BENNING products are manufactured to high-quality standards. For specific warranty terms and conditions, please refer to the warranty card included with your product or visit the official BENNING webאתר. שמור את הוכחת הרכישה שלך לצורך תביעות אחריות.
10. תמיכת לקוחות
If you encounter any issues or have questions regarding your BENNING CM 12, please contact BENNING customer support. You can find contact information on the official BENNING webבאתר או דרך המפיץ המקומי שלך.
- Webאֲתַר: www.benning.de (אנא בדקו את האזור שלכם webאֲתַר)
- אֶלֶקטרוֹנִי: עיין ב website for specific contact emails.
- טֵלֵפוֹן: עיין ב webאתר למספרי טלפון ספציפיים ליצירת קשר.