
1. המוצר נגמרview
This manual provides instructions for the installation and maintenance of the Toro OEM Rear Wheel Gear Assemblies, part number 107-3709. These assemblies are designed for specific Toro Super Recycler Push Lawn Mower models to restore drive function and mobility.
תכונות עיקריות:
- Set of 2 genuine rear drive wheels (Part 107-3709).
- Designed for specific Toro Super Recycler models.
דגמים תואמים:
These rear wheel gear assemblies are compatible with the following Toro Super Recycler Lawn Mower models:
- 20384, 20383, 20382, 20381, 20380
- 20099, 20095, 20095C, 20093, 20093C
- 20092, 20092C, 20091, 20091C
- 20062, 20058, 20057, 20056, 20055, 20054
2. מידע בטיחות
Always prioritize safety when performing maintenance or repairs on your lawn mower. Failure to follow safety instructions can result in serious injury.
- נתק את מצת: Before beginning any work, always disconnect the spark plug wire to prevent accidental engine starting.
- לבשו ציוד מגן: יש להשתמש בציוד מגן אישי מתאים, כולל כפפות ומשקפי מגן.
- משטח יציב: Ensure the lawn mower is on a flat, stable surface and properly supported to prevent it from tipping.
- Read Mower Manual: Refer to your specific lawn mower's owner's manual for additional safety precautions and detailed instructions.
3. מפרטים
The following specifications apply to the Toro OEM Rear Wheel Gear Assemblies (Part 107-3709):
| מִפרָט | עֵרֶך |
|---|---|
| מספר חלק | 107-3709 |
| מותג | טורו |
| גודל גלגל | 8 אינץ' (קוטר) |
| חוֹמֶר | מַתֶכֶת |
| צֶבַע | אָפוֹר |
| משקל פריט | 2.13 Kilograms (per assembly) |
| ספירת יחידות | 2.0 Count (per set) |

איור 3.1: צד view of the wheel assembly, indicating a 2-inch width and 8-inch diameter.

איור 3.2: חזית view of the wheel assembly, showing an 8-inch diameter and 1/2-inch axle offset, with the gear visible.
4. הוראות התקנה
Follow these steps to replace the rear wheel gear assemblies on your Toro Super Recycler Push Lawn Mower.
כלים נדרשים:
- Wrench set (appropriate sizes for axle nuts)
- Pry bar or large screwdriver (optional, for stubborn wheels)
- כפפות עבודה
- משקפי בטיחות
מדריך שלב אחר שלב:
- הכנת מכסחת הדשא: Ensure the engine is off and cool. Disconnect the spark plug wire to prevent accidental starting. Place the mower on a stable, flat surface. You may need to tilt the mower onto its side (air filter side up) or use a jack stand to elevate the rear wheels.
- הסר את הגלגל הישן:
- Locate the axle nut(s) securing the wheel to the axle.
- Using the appropriate wrench, loosen and remove the axle nut(s). Keep track of any washers or spacers.
- Carefully pull the old wheel off the axle. It may require some force or a pry bar if it's seized.
- Inspect the Axle: Clean any debris or rust from the axle shaft. Inspect the axle for damage or wear.
- התקן את הגלגל החדש:

Figure 4.1: New wheel assembly with the gear mechanism.
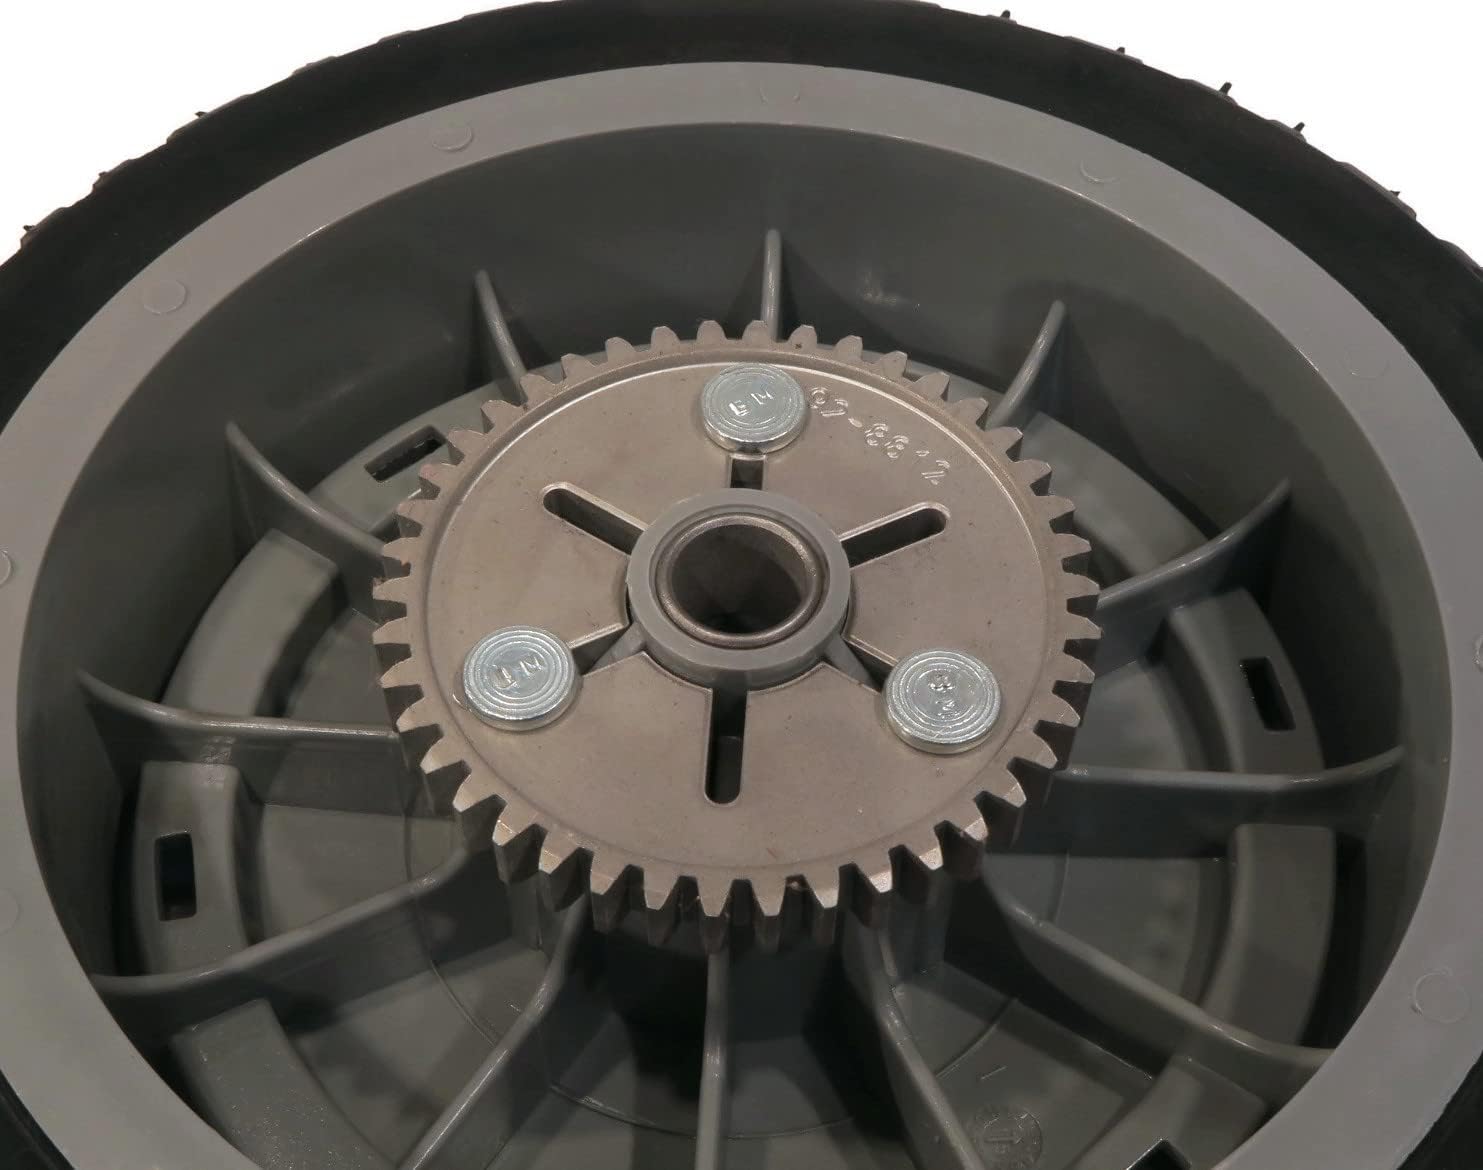
Figure 4.2: Close-up of the gear assembly.
- Align the new wheel assembly with the axle. Ensure the gear mechanism on the wheel properly engages with the drive shaft or pinion gear on the mower.
- Slide the new wheel onto the axle.
- Reinstall any washers or spacers, then thread the axle nut(s) back on.
- Tighten the axle nut(s) securely with the wrench. Do not overtighten, as this can damage the wheel or axle.
- Repeat for Other Wheel: אם מחליפים את שני הגלגלים, חזור על שלבים 2-4 עבור הצד השני.
- בדיקה סופית: Lower the mower (if elevated). Reconnect the spark plug wire. Manually rotate the wheels to ensure they spin freely and the drive mechanism engages correctly.
5. תפעול
After installing the new rear wheel gear assemblies, perform a brief test run of your lawn mower in a clear area. Observe the following:
- Drive Engagement: Ensure the self-propel function engages smoothly and the wheels provide consistent traction.
- תנועה חלקה: The mower should move forward without wobbling or unusual resistance from the wheels.
- רַעַשׁ: Listen for any abnormal noises coming from the wheel or gear areas.
If any issues are observed, refer to the Troubleshooting section or consult your mower's owner's manual.
6. תחזוקה
Regular maintenance of your lawn mower's wheels can extend their lifespan and ensure optimal performance.
- ניקוי: Periodically clean grass clippings, dirt, and debris from around the wheels and gear assemblies. This prevents buildup that can hinder movement or damage components.
- בְּדִיקָה: Regularly inspect the wheels for signs of wear, cracks, or damage to the tire tread and the gear teeth. Check for any looseness in the wheel attachment.
- סִיכָה: Consult your mower's owner's manual for specific lubrication requirements for the axle and gear components. Avoid over-lubricating, which can attract dirt.
- אִחסוּן: בעת אחסון המכסחה לתקופות ממושכות, ודאו שהגלגלים נקיים ויבשים.
7. פתרון תקלות
If you encounter issues after installing the new wheel assemblies, consider the following common problems and solutions:
- Wheel Does Not Turn Freely:
- Check for debris caught between the wheel and the mower deck.
- Ensure the axle nut is not overtightened.
- Verify the wheel is correctly seated on the axle and the gear is aligned.
- Self-Propel Not Engaging or Slipping:
- Confirm the gear on the new wheel is fully engaged with the mower's drive pinion.
- Inspect the drive belt and other drive components of the mower for wear or damage (refer to your mower's manual).
- Unusual Noise from Wheel:
- בדוק אם יש רכיבים רופפים או חפצים זרים.
- Ensure the wheel is properly tightened and seated.
For persistent issues or problems not listed here, consult a qualified service technician or refer to your specific Toro lawn mower's service manual.
8. אחריות ותמיכה
For information regarding the warranty of your Toro OEM Rear Wheel Gear Assemblies (Part 107-3709), please refer to the warranty documentation provided with your original purchase or contact Toro customer support directly. Keep your proof of purchase for warranty claims.
For technical assistance or further support, visit the official Toro webלאתר או לפנות למחלקת שירות הלקוחות שלהם.