
1. הקדמה
This manual provides detailed instructions for installing, configuring, and maintaining your GIGABYTE GA-B150M-D3H Micro ATX motherboard. The GA-B150M-D3H is designed to support 6th Generation Intel Core Processors and features Dual Channel DDR4 memory, PCIe Gen3 x4 M.2 connector, SATA Express, and 8-channel HD audio with Audio Noise Guard.
אנא קרא מדריך זה בעיון לפני תחילת ההתקנה כדי להבטיח התקנה ותפעול נכונים.
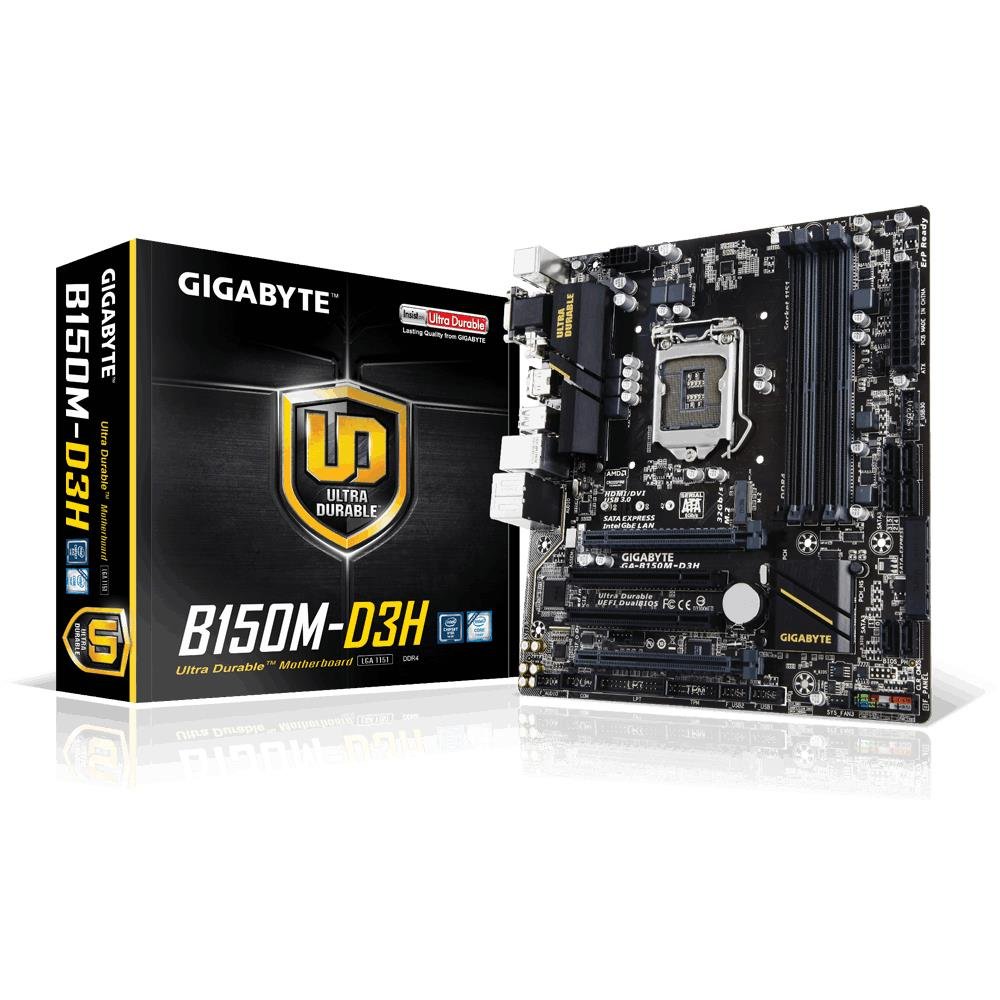
Image 1.1: GIGABYTE GA-B150M-D3H Micro ATX Motherboard. This image displays the overall layout of the motherboard, highlighting its compact Micro ATX form factor and various component slots.
2. מידע בטיחות
יש להקפיד על אמצעי הזהירות הבאים כדי למנוע נזק ללוח האם ופגיעה עצמית:
- יש לנתק תמיד את כבל החשמל משקע הקיר לפני נגיעה ברכיבים כלשהם.
- ענדו רצועת כף יד אנטי-סטטית או געו לעתים קרובות בחפץ מתכת מוארק כדי לפרוק חשמל סטטי.
- יש להחזיק את לוח האם בקצוותיו כדי להימנע ממגע עם רכיבים רגישים.
- הרחק את לוח האם מלחות וטמפרטורות קיצוניות.
- ודא אוורור נאות בתוך מארז המחשב כדי למנוע התחממות יתר.
3. תכולת החבילה
ודא שכל הפריטים נמצאים בחבילת לוח האם שלך:
- GIGABYTE GA-B150M-D3H Motherboard
- מדריך למשתמש
- מגן קלט / פלט
- כבלי SATA
- תקליטור/DVD של מנהל התקן
Note: Contents may vary slightly depending on region or revision.
4. פריסת לוח האם
Familiarize yourself with the various components and connectors on the GA-B150M-D3H motherboard.
Image 4.1: GIGABYTE GA-B150M-D3H Motherboard Layout. This image provides a visual reference for the location of key components such as the CPU socket, DIMM slots, PCIe slots, SATA ports, and M.2 connector.
מרכיבי מפתח:
- שקע מעבד LGA 1151: For 6th Generation Intel Core Processors.
- חריצי DIMM של DDR4 (4): Supports Dual Channel DDR4 memory up to 2133 MHz.
- חריצי PCIe: Includes PCIe Gen3 x16 for graphics cards and PCIe x1 slots for expansion.
- M.2 Connector: Supports PCIe NVMe & SATA SSDs with up to 32Gb/s data transfer.
- SATA Express Connector: For up to 16Gb/s data transfer.
- יציאות SATA 6Gb/s: For connecting traditional SATA storage devices.
- מחבר חשמל ATX בעל 24 פינים: קלט חשמל ראשי.
- 8-Pin ATX 12V Power Connector: CPU power input.
- כותרות הפאנל הקדמי: For power button, reset button, LED indicators, and USB ports.
- מחברי שמע: 8-channel HD Audio with high quality capacitors and Audio Noise Guard.
5. התקנה והתקנה
בצע את השלבים הבאים להתקנה נכונה של לוח האם והרכיבים שלך.
5.1. התקנת המעבד
- Locate the LGA 1151 CPU socket.
- פתח את ידית שקע המעבד והרם את לוח הטעינה.
- ישר בזהירות את המעבד עם השקע, וודא שהמשולש הזהוב על המעבד תואם למשולש שעל השקע. אל תדחף את המעבד בכוח לתוך השקע.
- הורד את משטח המטען ואבטח אותו בעזרת הידית.
5.2. התקנת מקרר המעבד
Refer to your CPU cooler's instruction manual for specific installation steps. Ensure thermal paste is applied correctly between the CPU and cooler base.
5.3. התקנת זיכרון (RAM)
- פתחו את הקליפסים בשני קצוות חריצי ה-DDR4 DIMM.
- יישר את מודול הזיכרון עם החריץ, וודא שהחריץ במודול תואם למפתח בחריץ.
- לחץ בחוזקה על שני קצוות מודול הזיכרון עד שהקליפסים יתייצבו במקומם.
- For dual-channel performance, install memory modules in matching colored slots (e.g., DIMM1 and DIMM2).
5.4. Installing Expansion Cards
- Remove the metal bracket from the desired PCIe slot on your computer case.
- יישר את כרטיס ההרחבה עם חריץ ה-PCIe ולחץ בחוזקה כלפי מטה עד שייכנס למקומו כהלכה.
- חברו את הכרטיס בעזרת בורג למארז המחשב.
5.5. Connecting Storage Devices
- התקני SATA: Connect one end of the SATA data cable to a SATA 6Gb/s port on the motherboard and the other end to your hard drive or SSD. Connect the SATA power cable from your power supply to the device.
- SSD M.2: הכנס את כונן ה-SSD מסוג M.2 לחריץ ה-M.2 בזווית, לאחר מכן דחף אותו בעדינות כלפי מטה ואבטח אותו בעזרת הבורג המצורף.
- SATA Express: If using a SATA Express device, connect it to the designated SATA Express connector.
5.6. חיבור מחברי לוח קדמי
Connect the cables from your computer case's front panel (power button, reset button, HDD LED, power LED, front USB, front audio) to the corresponding headers on the motherboard. Refer to the motherboard layout diagram for exact locations and pin assignments.
5.7. חיבור ספק הכוח
- Connect the 24-pin ATX main power connector from your power supply to the 24-pin power socket on the motherboard.
- Connect the 8-pin ATX 12V CPU power connector to the 8-pin socket near the CPU.
- ודא שכל חיבורי החשמל מאובטחים.
6. הוראות הפעלה
6.1. אתחול ראשון
After assembling all components, connect your monitor, keyboard, and mouse. Power on the system. The system should display the GIGABYTE splash screen and then enter the BIOS/UEFI setup or attempt to boot from a connected storage device.
6.2. הגדרת BIOS/UEFI
כדי להיכנס להגדרות BIOS/UEFI, לחצו על DEL key repeatedly during the boot process when the GIGABYTE logo appears. Here you can configure system settings, boot order, and monitor hardware status. The GA-B150M-D3H features GIGABYTE UEFI Dual BIOS for enhanced reliability.
6.3. התקנת דרייבר
After installing your operating system, install the necessary drivers for the motherboard components. These can be found on the included driver CD/DVD or downloaded from the official GIGABYTE website. Key drivers include chipset, audio (Realtek ALC892 codec), LAN, and any integrated graphics drivers.
6.4. התקנת מערכת הפעלה
Insert your operating system installation media (USB drive or DVD) and configure the boot order in the BIOS/UEFI to boot from it. Follow the on-screen instructions to install your preferred operating system (e.g., Windows 8.1, Windows 10).
7. תחזוקה
7.1. ניקיון
נקו באופן קבוע את פנים מארז המחשב כדי למנוע הצטברות אבק, אשר עלול להוביל להתחממות יתר. השתמשו באוויר דחוס כדי להסיר אבק ממאווררים, גופי קירור ורכיבי לוח האם. ודאו שהמערכת כבויה ומנותקת מהחשמל לפני הניקוי.
7.2. עדכוני BIOS
GIGABYTE periodically releases BIOS updates to improve system stability, compatibility, and performance. Visit the official GIGABYTE website for your motherboard model (GA-B150M-D3H) to check for the latest BIOS version and follow the provided instructions for updating. Exercise caution during BIOS updates, as an interruption can render the motherboard inoperable.
8. פתרון תקלות
סעיף זה עוסק בבעיות נפוצות שאתה עשוי להיתקל בהן.
8.1. No Power / System Does Not Turn On
- Check if the power supply is connected correctly to the motherboard (24-pin and 8-pin connectors).
- ודא שמתג ספק הכוח נמצא במצב פתוח.
- ודא שכבל לחצן ההפעלה של הלוח הקדמי מחובר כהלכה לראש לוח האם.
- בדוק את ספק הכוח באמצעות מערכת אחרת או בודק ספק כוח.
8.2. אין פלט תצוגה
- Ensure the monitor is connected to the correct graphics output (either integrated graphics on the motherboard or a dedicated graphics card).
- התקן מחדש את כרטיס המסך ואת מודולי הזיכרון.
- Try booting with only one memory module installed.
- בדוק אם הצג דולק ומכוון למקור הקלט הנכון.
8.3. חוסר יציבות מערכת / קריסות
- בדוק את טמפרטורות המעבד והכרטיס הגרפי כדי לוודא שהן נמצאות בטווח הפעולה הבטוחה.
- Verify that all drivers are installed and up to date.
- הפעל כלי אבחון זיכרון כדי לבדוק אם יש זיכרון RAM פגום.
- Ensure the power supply provides sufficient and stable power to all components.
9. מפרטים
Detailed technical specifications for the GIGABYTE GA-B150M-D3H motherboard:
| תכונה | מִפרָט |
|---|---|
| שם הדגם | GA-B150M-D3H |
| גורם צורה | Micro ATX (24.4 ס"מ x 22.5 ס"מ) |
| שקע מעבד | LGA 1151 |
| מעבדים תואמים | 6th Generation Intel Core Processors |
| ערכת שבבים | Intel B150 Express Chipset |
| טכנולוגיית זיכרון | DDR4 |
| חריצי זיכרון | 4 x DDR4 DIMM sockets (Dual Channel) |
| קיבולת זיכרון מקסימלית | 16 ג'יגה-בייט |
| מהירות שעון זיכרון | 2133 מגה-הרץ |
| חריצי PCIe | 1 x PCI Express x16, 1 x Total PCIe Ports |
| ממשקי אחסון | PCIe Gen3 x4 M.2, SATA Express, SATA 6Gb/s |
| Codec אודיו | Realtek ALC892 codec, 8-channel HD Audio |
| יציאות USB | סה"כ 8 יציאות USB (כולל USB 2.0) |
| מחבר חשמל ראשי | 24 פינים ATX |
| מחבר מתח למעבד | 8-Pin ATX 12V |
| תכונות ייחודיות | GIGABYTE UEFI Dual BIOS, Audio Noise Guard with LED Trace Path Lighting, App Center (Easy Tune, Cloud Station) |
10. אחריות ותמיכה
For warranty information, please refer to the warranty card included in your product package or visit the official GIGABYTE webאתר. תנאי האחריות עשויים להשתנות בהתאם לאזור.
For technical support, driver downloads, BIOS updates, and further product information, please visit the GIGABYTE official support webאֲתַר:
https://www.gigabyte.com/Support
When contacting support, please have your motherboard model (GA-B150M-D3H) and serial number ready.