
1. הקדמה
The ASUS Z170-DELUXE is a high-performance desktop motherboard designed for Intel Z170 chipset and LGA 1151 socket processors. It offers advanced features for enhanced speed, stability, and connectivity, making it suitable for demanding computing tasks and gaming. This manual provides essential information for setting up, operating, and maintaining your motherboard.
תכונות מפתח כוללות:
- אופטימיזציה 5-כיוונית: Dynamic system tuning for performance, efficiency, digital power, fan control, and networking.
- ASUS PRO Clock Technology: Dedicated base-clock generator for extended overclocking margins.
- קריסטל סאונד 3: Advanced audio solution for clear and immersive sound.
- 3x3 Dual-Band 802.11ac Wi-Fi + BT4.0: Integrated high-speed wireless connectivity.
- NVME U.2 Device Support and Hyper M.2 x4 Mini Card Support: Next-generation storage options for ultra-fast data transfer.
- USB 3.1 Type-A and Type-C Ports: High-speed USB connectivity with reversible Type-C.
- 5X Protection II: Hardware-level safeguards for long-term durability and reliability.
- Intel Ethernet: Optimized network performance with reduced CPU overhead.
2. התקנה והתקנה
This section guides you through the physical installation of the ASUS Z170-DELUXE motherboard and its components.
2.1. הכנת המערכת
- Ensure your power supply is disconnected from the wall outlet.
- Prepare your computer case and ensure adequate space for installation.
- Gather necessary tools, including a Phillips head screwdriver.
2.2. התקנת לוח אם
- Carefully place the motherboard into your computer case, aligning it with the standoffs.
- אבטח את לוח האם באמצעות ברגים.
- Install the CPU (Intel LGA 1151) into the socket, ensuring correct orientation.
- מרחו משחה תרמית והתקינו את מקרר המעבד.
- Install DDR4 RAM modules into the designated slots (4 available). For optimal performance, refer to your CPU and RAM manufacturer's guidelines for dual-channel configuration.
- Connect the 24-Pin main power connector and the 8-Pin CPU power connector from your power supply to the motherboard.
- Connect front panel headers (power button, reset button, USB ports, audio jacks) using the provided Q-Connector for easier installation.

Figure 1: ASUS Z170-DELUXE Motherboard layout.
2.3. Storage and Expansion Card Installation
- התקני SATA: Connect SATA storage drives (HDDs/SSDs) to the available SATA 3 ports (6 total).
- M.2/U.2 Devices: For NVMe M.2 SSDs, insert the module into the M.2 slot and secure it. The motherboard supports NVMe U.2 devices via an adapter (sold separately).
- PCIe Cards: Install graphics cards or other expansion cards into the appropriate PCIe slots (7 total).
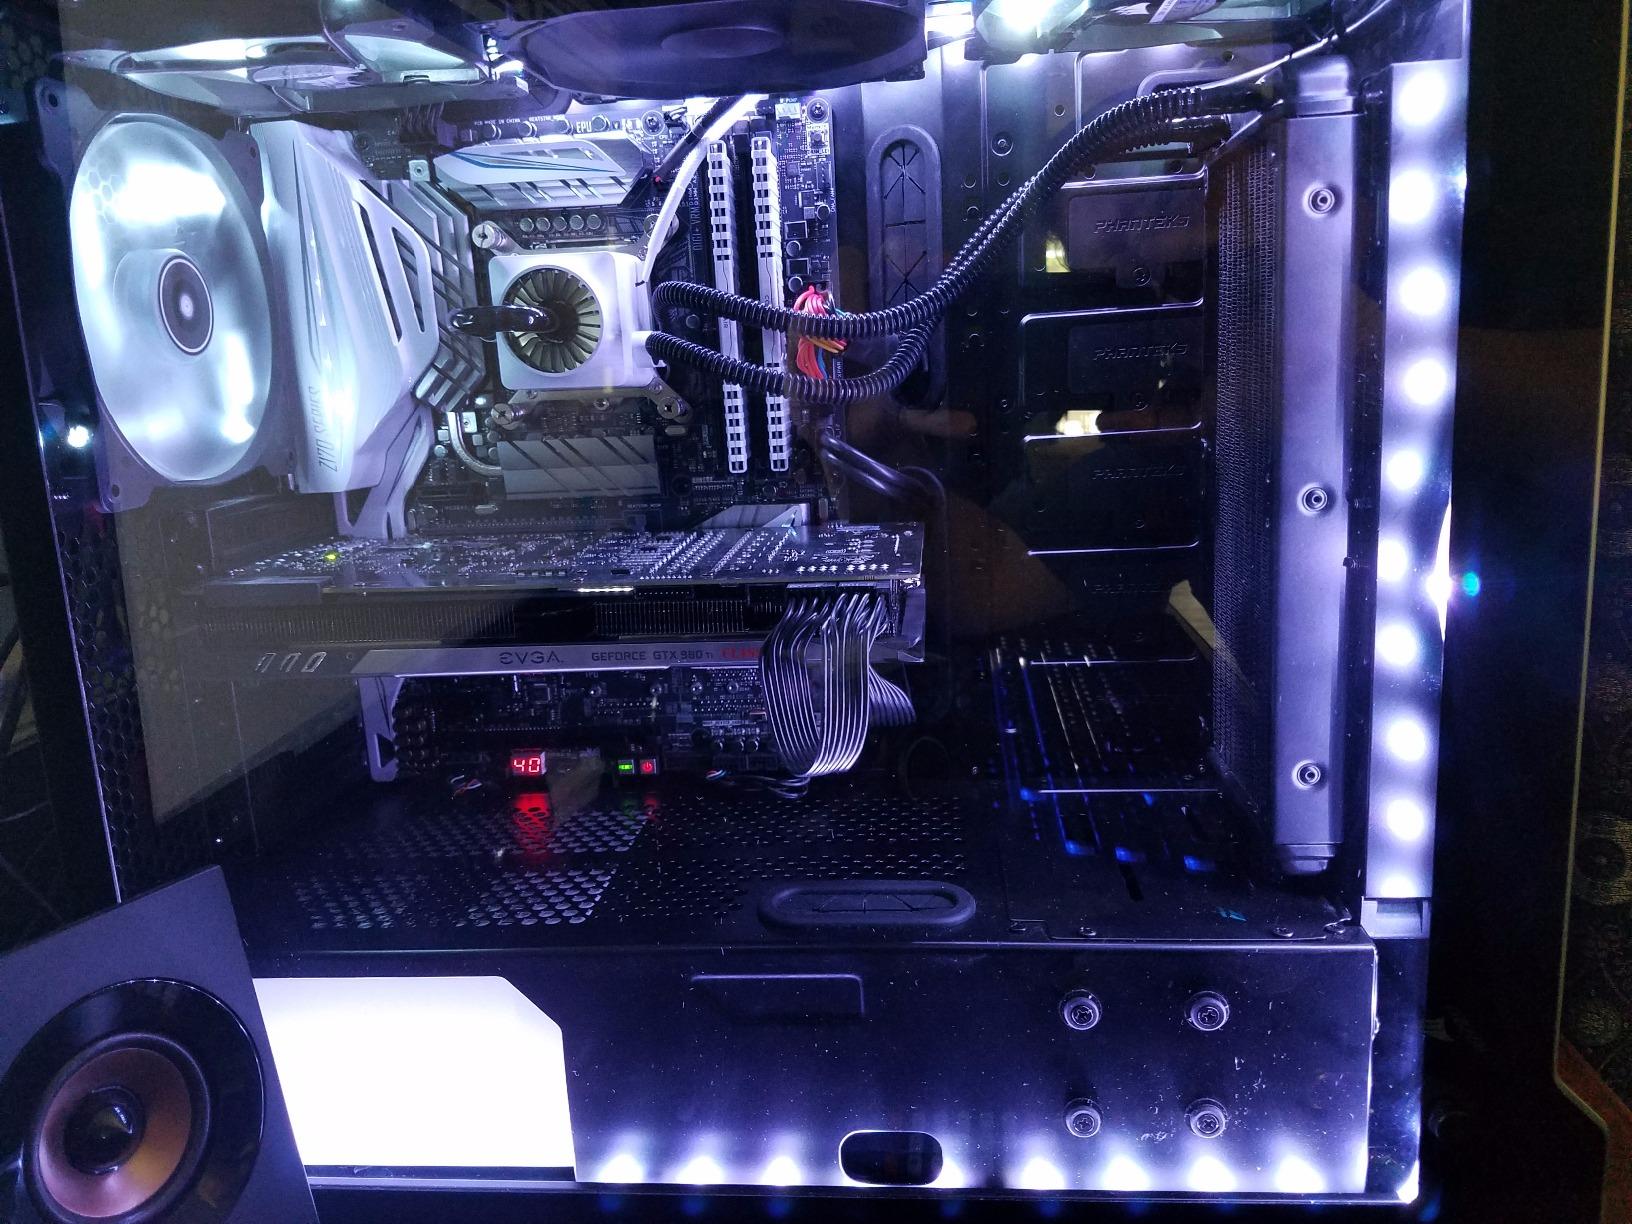
Figure 2: ASUS Z170-DELUXE Motherboard installed in a system, showcasing component layout.
3. הוראות הפעלה
This section covers the basic operation and key features of your ASUS Z170-DELUXE motherboard.
3.1. אתחול ראשוני והגדרת BIOS
- לאחר חיבור כל הרכיבים והציוד ההיקפי, הפעל את המערכת.
- הקש על DEL or F2 key during startup to enter the UEFI BIOS.
- In the BIOS, you can configure boot order, enable XMP for RAM, adjust fan speeds, and manage other system settings.
- The ASUS UEFI BIOS provides an intuitive interface for easy navigation and configuration.
3.2. התקנת תוכנה ומנהלי התקנים
- Install your operating system (e.g., Windows 10).
- Install the latest drivers for the Z170 chipset, audio, LAN, Wi-Fi, and other integrated components from the ASUS support website or the provided driver disc.
- Utilize ASUS utilities like AI Suite 3, הכולל FAN Expert for advanced fan control and אופטימיזציה 5-כיוונית for system tuning.
3.3. תכונות קישוריות
- USB 3.1: Utilize the high-speed USB 3.1 Type-A and reversible Type-C ports for fast data transfer with compatible devices.
- Wi-Fi ובלוטות': Connect to wireless networks using the integrated 3x3 Dual-Band 802.11ac Wi-Fi. Bluetooth 4.0 allows connection to wireless peripherals.
- Intel Ethernet: Benefit from stable and high-throughput wired network connections.
4. תחזוקה
תחזוקה נכונה מבטיחה את אורך החיים והביצועים האופטימליים של לוח האם שלך.
- שמור על ניקיון: Regularly clean dust from the motherboard and case interior using compressed air. Ensure fans are free of obstructions.
- עדכוני BIOS: בדוק מעת לעת את התמיכה של ASUS website for BIOS updates. Updating the BIOS can improve compatibility, stability, and performance. Use the ASUS EZ Flash utility for safe BIOS updates.
- עדכוני דרייבר: Keep all drivers (chipset, audio, LAN, etc.) updated to their latest versions for optimal performance and security.
- ספק כוח: Ensure your power supply provides stable and sufficient power to all components. Unstable power can lead to system instability.
5. פתרון תקלות
This section addresses common issues you might encounter with your ASUS Z170-DELUXE motherboard.
- No POST (Power-On Self-Test) / Error Code 55:
- Error code 55 typically indicates a memory issue.
- ודא שמודולי ה-RAM יושבים במלואם בחריצים שלהם.
- Try booting with only one RAM stick, testing each slot and module individually to identify a faulty stick or slot.
- Verify RAM compatibility with the motherboard's QVL (Qualified Vendor List) on the ASUS webאֲתַר.
- Update the BIOS to the latest version, as this often includes memory compatibility improvements.
- אין פלט וידאו:
- Ensure your monitor is connected to the correct video output (integrated graphics or dedicated graphics card).
- If using integrated graphics with a 4K display at 60Hz via HDMI, you might experience a blank screen. The integrated HDMI port on the Z170 chipset may be limited to 30Hz at 4K resolution. Consider using a DisplayPort connection or a dedicated graphics card for 4K 60Hz output.
- Reseat your graphics card if applicable.
- Check monitor input selection.
- חוסר יציבות מערכת / קריסות:
- Ensure all power connectors are securely attached.
- בדוק את טמפרטורות המעבד והכרטיס הגרפי. התחממות יתר עלולה לגרום לחוסר יציבות.
- Verify RAM stability using memory diagnostic tools.
- If using RAID, ensure Intel Rapid Storage Technology (IRST) drivers are compatible. Some IRST driver versions (e.g., 14.8.1.1042 or 15.2.0.1020) have been reported to cause issues with certain configurations. Try using an older stable version (e.g., 14.0.0.1143 or 14.5.0.1081) or uninstall IRST if not using RAID.
- Ensure your power supply is sufficient for your components.
- לא זוהה ציוד היקפי:
- בדוק חיבורים פיזיים.
- התקן או עדכן מנהלי התקנים רלוונטיים.
- Test the peripheral on another port or system.
6. מפרטים
| תכונה | פְּרָט |
|---|---|
| מותג | ASUS |
| שם הדגם | Z170-DELUXE |
| שקע מעבד | LGA 1151 |
| סוג ערכת שבבים | אינטל Z170 |
| מעבדים תואמים | Intel Celeron, Core i7 (and other LGA 1151 compatible CPUs) |
| טכנולוגיית זיכרון RAM | DDR4 |
| מהירות שעון זיכרון | 2133 מגה-הרץ (בסיס, תומך בתדר גבוה יותר באמצעות XMP) |
| חריצי זיכרון זמינים | 4 |
| גודל מקסימלי של זיכרון RAM | 64 ג'יגה-בייט |
| Total SATA Ports | 6 |
| סך כל יציאות USB | 15 (including USB 3.1 Type-A and Type-C) |
| מספר יציאות אתרנט | 2 (Intel Ethernet) |
| Total Number of HDMI Ports | 1 |
| Total PCIe Ports | 7 |
| ממשק כרטיס מסך | Integrated, PCI Express |
| משקל פריט | 0.8 קילוגרם |
7. אחריות ותמיכה
למידע מפורט על האחריות, אנא עיינו בכרטיס האחריות המצורף למוצר שלכם או בקרו באתר התמיכה הרשמי של ASUS webאתר. ASUS מספקת תמיכה טכנית ומשאבים שיסייעו בכל שאלה הקשורה למוצר.
- תמיכה של ASUS Webאֲתַר: www.asus.com/support/
- מידע ליצירת קשר: עיין ב-ASUS website for regional contact details and customer service options.
הערה: תנאי האחריות עשויים להשתנות בהתאם לאזור. אנא שמור את הוכחת הרכישה שלך לצורך תביעות אחריות.