
מָבוֹא
This manual provides detailed instructions for the safe and proper installation, operation, and maintenance of your Progress Lighting Inspire Collection 9-Light Off-White Linen Shade Traditional Chandelier in Brushed Nickel. Please read all instructions carefully before beginning installation and retain this manual for future reference.
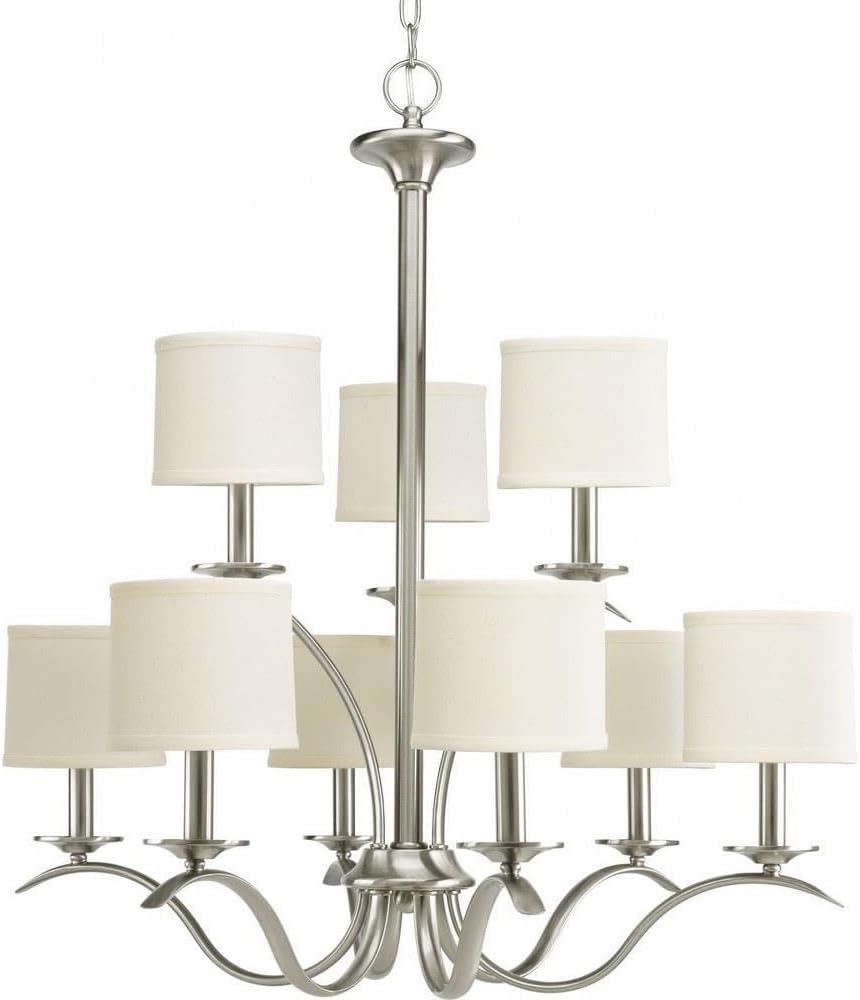
Image: The Inspire Collection 9-Light Chandelier featuring a brushed nickel finish and off-white linen shades.
מידע בטיחות
אַזהָרָה: To reduce the risk of fire, electric shock, or personal injury, always turn off the main power supply at the circuit breaker before installation, removal, or servicing. This product requires professional installation. Always consult a qualified electrician if you are unsure about the installation process.
אזהרה הצעה 65: מוצר זה עשוי להכיל כימיקלים הידועים למדינת קליפורניה כגורמים לסרטן ולפגמים מולדים או לנזק רבייה אחר. שטפו ידיים לאחר הטיפול.
- Ensure all electrical connections are in accordance with local codes and ordinances.
- השתמש רק בסוג הנורה המצוין ובוואטtagה כדי למנוע התחממות יתר.
- Do not hang anything from the fixture.
תוכן החבילה
ודא שכל הרכיבים קיימים לפני תחילת ההתקנה:
- Chandelier fixture assembly
- 9 Off-white linen shades
- Ceiling chain (6 feet of 9 gauge chain supplied)
- חיווט חשמלי
- Mounting hardware (may require additional screws not included)
- גיליון התקנה
התקנה והתקנה
Professional installation is recommended for this chandelier. Follow these general steps, referring to the included installation sheet for specific details.
1. היכונו להתקנה
- כבה את החשמל במפסק החשמל.
- Carefully unpack the fixture and components.
- Determine the desired hanging height. For an 8-foot ceiling, the bottom of the chandelier should be 30-36 inches above a dining table. For higher ceilings, divide the vertical space into thirds and position the chandelier two-thirds of the distance from the floor, ensuring at least 7 feet of clearance from the floor in areas where people walk underneath.
2. התקנת גוף התאורה
- חבר את תושבת ההרכבה לקופסת החיבורים שבתקרה.
- Adjust the chain length as needed. The supplied chain is 6 feet long.
- Thread the electrical wires through the chain and canopy.
3. חיבורי חשמל
- Connect the fixture's ground wire to the ground wire from the junction box.
- Connect the fixture's 'white or identified' wire (often with ridges) to the white (neutral) wire from the junction box.
- Connect the fixture's 'plain or black' wire to the black (hot) wire from the junction box.
- אבטח את כל החיבורים בעזרת אגוזי חוט וסרט חשמלי.
4. הרכבה סופית
- אבטח את החופה לתקרה.
- Install 9 candelabra-shaped bulbs (E26 base, maximum 60 watts each). Note: Only candelabra-shaped bulbs can be used with the shades.
- Attach the off-white linen shades to each light socket.
- החזר את החשמל במפסק החשמל.
מדריך התקנה ויזואלית
וידאו: סקירה מקיפהview of chandelier installation by Progress Lighting, demonstrating key steps and considerations for proper setup.
מידות המוצר

Image: Dimensional drawing of the chandelier, indicating a width of 29.38 inches and a height of 31 inches.
הוראות הפעלה
Once properly installed, your chandelier can be operated using a standard wall switch. If your electrical setup includes a dimmer switch, ensure it is compatible with incandescent bulbs for optimal performance.
The fixture's switch type is listed as 'Pull Chain' in some specifications, however, the primary control is typically via a wall switch for chandeliers of this design. Please refer to your specific home wiring and switch setup.
תַחזוּקָה
ניקוי
- תמיד כבו את החשמל לפני ניקוי.
- נגב את המתקן עם מטלית רכה ויבשה.
- אין להשתמש בחומרי ניקוי שוחקים או ממסים מכיוון שהם עלולים לפגוע בגימור.
- The linen shades can be gently dusted or spot cleaned with a damp בד במידת הצורך.
החלפת נורה
- Ensure power is off and bulbs have cooled before replacing.
- Unscrew old bulbs and screw in new E26 candelabra-shaped bulbs.
- אל תחרוג מהוואט המרביtage של 60 וואט לכל נורה.
פתרון בעיות
If your chandelier is not functioning correctly, refer to the following common issues:
- אין אור: Check the circuit breaker, ensure bulbs are securely screwed in, and verify all electrical connections are tight.
- אורות מהבהבים: Ensure bulbs are fully tightened. If using a dimmer, confirm it is compatible with the bulb type and that the bulbs are dimmable.
- Loose Fixture: Re-check mounting hardware and ensure it is securely fastened to the ceiling junction box.
אם הבעיות נמשכות, פנו לחשמלאי מוסמך.
מפרטים
| מותג | תאורת התקדמות |
| שם הדגם | לְעוֹרֵר |
| מספר חלק | P4638-09 |
| צֶבַע | ניקל מוברש |
| חוֹמֶר | סגסוגת פלדה |
| חומר הצללה | פִּשׁתָן |
| סִגְנוֹן | מָעֳבָר |
| צורת גוף תאורה | נִברֶשֶׁת |
| מידות המוצר | אורך 29.38 אינץ', רוחב 29.38 אינץ', גובה 31 אינץ' |
| משקל פריט | 15 פאונד |
| מספר מקורות האור | 9 |
| בסיס נורה | E26 |
| מהtage | 60 וואט (לכל נורה) |
| כרך ידtage | 120 וולט |
| שימוש בפנים/חוץ | מקורה |
| תכונה מיוחדת | רשימת UL |
מידע על אחריות
This Progress Lighting product is covered by a אחריות מוגבלת לשנה. This warranty guarantees your complete satisfaction with your purchase and includes professional after-sales customer service support. Please retain your proof of purchase for warranty claims.
תמיכת לקוחות
For further assistance, technical support, or warranty inquiries, please visit the official Progress Lighting website or contact their customer service department. Refer to the packaging or the Progress Lighting webאתר לקבלת פרטי קשר עדכניים.