
פיק טק P 3131
PeakTech True RMS P 3131 Clamp מדריך למשתמש של מד עם מולטימטר
Model: P 3131 | Brand: PeakTech
1. הקדמה
This manual provides comprehensive instructions for the safe and effective use of the PeakTech True RMS P 3131 Clamp Meter with Multimeter. This device is designed for measuring AC/DC currents without circuit interruption, as well as AC/DC voltage and resistance, with continuity testing capabilities. It features a 3 3/4 digit LCD display with True RMS measurement for accurate readings.
אנא קרא מדריך זה בעיון לפני הפעלת המכשיר ושמור אותו לעיון עתידי.
2. מידע בטיחות
WARNING: Improper use of this meter can cause damage, shock, injury, or death. Always follow all safety precautions.
- הקפד תמיד על חוקי הבטיחות המקומיים והארציים.
- Do not use the meter if it appears damaged or if the insulation on test leads is compromised.
- Ensure the meter is set to the correct function and range before making measurements.
- הימנע ממגע עם מעגלים חיים. השתמש בציוד מגן אישי (PPE) מתאים.
- The device is rated for CAT II 600V. Do not exceed these limits.
- החלף סוללות מיד כאשר מופיע מחוון סוללה חלשה.
- אין להפעיל את המונה בסביבות נפיצות.
3. המוצר נגמרview ורכיבים
The PeakTech P 3131 is a robust and reliable clamp meter. Familiarize yourself with its main components:

איור 1: חזית view of the PeakTech P 3131 Clamp מד, המציג את ה-clamp jaw, function selector, LCD display, and input terminals.
- Clamp לֶסֶת: For non-contact AC/DC current measurement.
- חוגת בורר פונקציות: To select measurement modes (A~, A=, V~, V=, Ω/Continuity, OFF).
- תצוגת LCD: מציג קריאות מדידה, יחידות ומחוונים.
- כפתורים: AC/DC, ZERO, H/MAX (Data Hold/Max Hold).
- מסופי קלט: COM (common) and VΩ (voltage/resistance) for test leads.
- מגן ידיים: Provides protection against accidental contact.
4. התקנה
4.1 התקנת סוללה
The PeakTech P 3131 requires two 1.5V AAA batteries (included). To install or replace batteries:
- ודא שהמכשיר כבוי.
- אתר את מכסה תא הסוללה בחלקו האחורי של המונה.
- השתמש במברג כדי לפתוח את התא.
- Insert the two AAA batteries, observing correct polarity (+ and -).
- החזר את מכסה תא הסוללות למקומו ואבטח אותו באמצעות הבורג.
When the low battery indicator appears on the display, replace the batteries immediately to ensure accurate measurements.
4.2 חיבור חוטי בדיקה
עבור כרךtage, resistance, and continuity measurements, connect the supplied test leads:
- הכנס את כבל הבדיקה השחור לתוך COM מסוף קלט (משותף).
- הכנס את כבל הבדיקה האדום לתוך VΩ מסוף קלט.

Figure 2: PeakTech P 3131 Clamp Meter shown with its carrying case, test leads, batteries, and user manual.
5. הוראות הפעלה
5.1 הפעלה/כיבוי
Rotate the function selector dial from the "OFF" position to any desired measurement function to power on the meter. To power off, rotate the dial back to "OFF". The meter features an automatic power-off function (can be deactivated) to conserve battery life.
5.2 מדידת זרם AC/DC (Clamp)
To measure current without breaking the circuit:
- סובבו את חוגת בורר הפונקציות למצב A~ (זרם AC) או A= מיקום (זרם ישר).
- הקש על AC/DC button if you need to switch between AC and DC current modes (if the dial position combines them).
- הקש על אֶפֶס button to zero the display before measuring DC current, especially for small currents, to compensate for residual magnetism.
- פתח את ה-clamp לסת על ידי לחיצה על ההדק.
- Enclose only אֶחָד conductor with the clamp לסת. ודא שהלסת סגורה לחלוטין.
- קרא את הערך הנוכחי בצג ה-LCD.
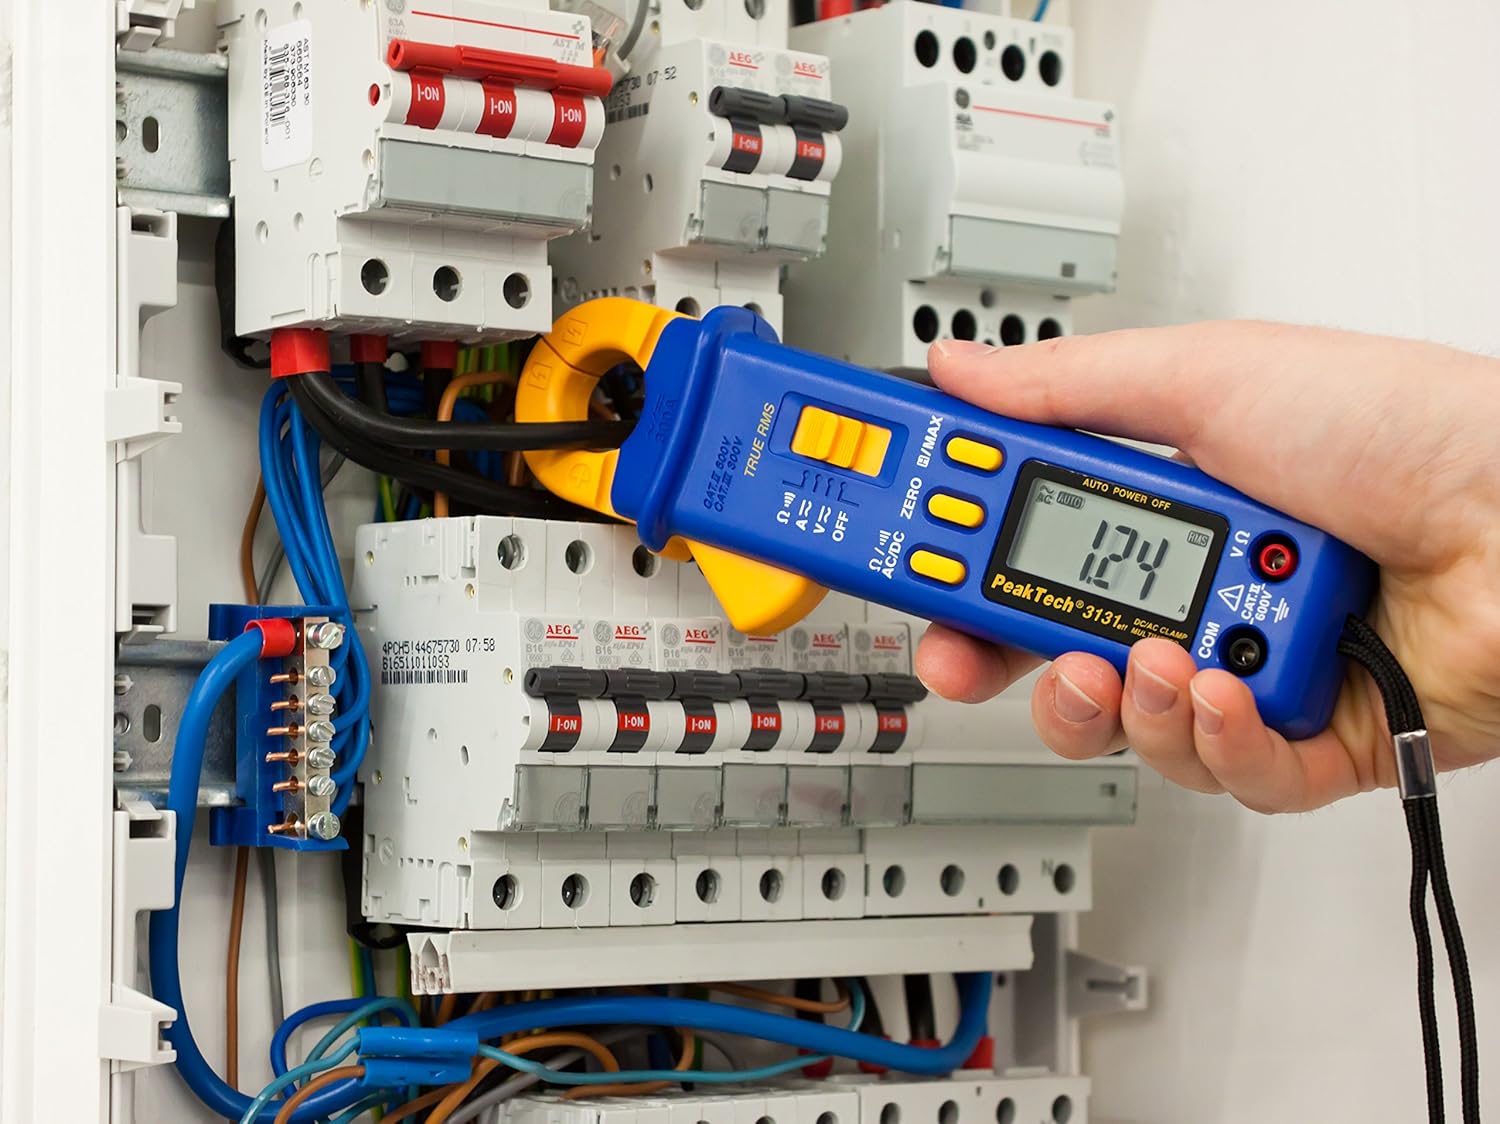
Figure 3: The PeakTech P 3131 Clamp Meter in use, measuring current on a single conductor within an electrical panel.
5.3 AC/DC כרךtagה מדידה
כדי למדוד כרךtage:
- חבר את חוטי הבדיקה כמתואר בסעיף 4.2.
- סובבו את חוגת בורר הפונקציות למצב V~ (עוצמת זרם חילופיןtagה) או V= (DC Voltagה) עמדה.
- חברו את חיישןי הבדיקה במקביל למעגל או לרכיב שברצונכם למדוד.
- קרא את הכרךtagערך e בתצוגת ה-LCD.
5.4 מדידת התנגדות ורציפות
כדי למדוד התנגדות או לבדוק רציפות:
- חבר את חוטי הבדיקה כמתואר בסעיף 4.2.
- סובבו את חוגת בורר הפונקציות למצב Ω/))) (Resistance/Continuity) position.
- For resistance: Connect the test probes across the component. Ensure the circuit is de-energized.
- For continuity: Touch the test probes to the two points you want to check. A continuous beep indicates a low-resistance path (continuity).
- קרא את ערך ההתנגדות על גבי צג ה-LCD.
5.5 פונקציות מיוחדות
- RMS אמיתי: The meter measures True Root Mean Square values for AC voltage וזרם, ומספק קריאות מדויקות עבור צורות גל שאינן סינוסואידליות.
- שמירת נתונים (H): הקש על H/MAX לחץ לחיצה קצרה על הלחצן כדי להקפיא את הקריאה הנוכחית בתצוגה. לחץ שוב כדי לשחרר.
- Maximum Value Hold (MAX): לחץ והחזק את H/MAX button to capture and display the maximum measured value. Press again to exit.
- פונקציית אפס: Used to zero the display for DC current measurements to eliminate offset errors.
- טווח אוטומטי: The meter automatically selects the appropriate measurement range.
- כיבוי אוטומטי: The meter automatically turns off after a period of inactivity to save battery. This feature can typically be disabled by holding a specific button during power-on (refer to the device's on-screen indicators or a more detailed manual if available).
6. תחזוקה
6.1 ניקוי
נגבו את מארז המונה עם מודעהamp מטלית וחומר ניקוי עדין. אין להשתמש בחומרים שוחקים או ממסים. יש לוודא שהמד יבש לחלוטין לפני השימוש.
6.2 החלפת סוללה
Refer to Section 4.1 for instructions on battery replacement. Always use two fresh 1.5V AAA batteries. Remove batteries if the meter is not used for an extended period to prevent leakage.
6.3 אחסון
יש לאחסן את המונה במקום קריר ויבש, הרחק מאור שמש ישיר וטמפרטורות קיצוניות. יש להשתמש בנרתיק הנשיאה המצורף להגנה.
7. פתרון תקלות
| בְּעָיָה | סיבה אפשרית | פִּתָרוֹן |
|---|---|---|
| המד לא נדלק. | סוללות מתות או מותקנות בצורה שגויה. | בדוק את קוטביות הסוללה; החלף סוללות. |
| "OL" או "OVER" מוצגים. | המדידה חורגת מהטווח שנבחר או מהקיבולת המקסימלית של המונה. | Select a higher range (if manual ranging) or ensure measurement is within meter's limits. |
| Inaccurate DC current reading. | Residual magnetism in clamp לֶסֶת. | הקש על אֶפֶס button before measurement. |
| אין צפצוף המשכיות. | מעגל פתוח או התנגדות גבוהה. | Check connections; ensure circuit is complete. |
If problems persist, contact PeakTech customer support or a qualified service technician.
8. מפרט טכני
| פָּרָמֶטֶר | מִפרָט |
|---|---|
| לְהַצִיג | 3 3/4 digit LCD, max. 3999 counts |
| DC כרךtage (DCV) | 0.1 mV to 600 V (Accuracy: 0.5% + 2 digits) |
| AC כרךtagה (ACV) | 1 mV to 600 V (Accuracy: 1.5% + 5 digits) |
| זרם DC (DCA) | 10 mA to 300 A (Accuracy: 1% + 2 digits) |
| זרם AC (ACA) | 10 mA to 300 A (Accuracy: 1% + 3 digits) |
| התנגדות (Ω) | 0.1 Ω to 40 MΩ (Accuracy: 0.9% + 2 digits) |
| מבחן המשכיות | פונקציית זמזם |
| RMS אמיתי | Yes, for AC measurements |
| פתיחת הלסת | 22 mm max. conductor diameter |
| דירוג בטיחות | EN 61010-1, CAT II 600 V |
| ספק כוח | 2 x 1.5V AAA סוללות |
| מידות (L x W x H) | 192 x 66 x 27 מ"מ (בערך 7.56 x 2.6 x 1.06 אינץ') |
| מִשׁקָל | 205 גרם (כ-0.45 פאונד) |
9. אחריות ותמיכה
PeakTech products are manufactured under strict quality control. This product is covered by a standard manufacturer's warranty against defects in materials and workmanship. Please refer to the warranty card included with your product or visit the official PeakTech webבאתר לקבלת תנאי האחריות המפורטים.
For technical support, service, or calibration inquiries, please contact your local PeakTech distributor or the PeakTech customer service department. Contact information can typically be found on the PeakTech webבאתר או באריזת המוצר.
Ask a question about this manual
Ask about setup, troubleshooting, compatibility, parts, safety, or missing instructions. Manuals+ will review the question and use this page’s manual context to help answer it.