מָבוֹא
This manual provides essential instructions for the safe and efficient operation, installation, and maintenance of your Sharp R-25AM microwave oven. Please read this manual thoroughly before using the appliance and retain it for future reference. Proper use will ensure optimal performance and extend the lifespan of your microwave oven.
הוראות בטיחות חשובות
בעת שימוש במכשירים חשמליים, יש להקפיד על אמצעי זהירות בסיסיים, לרבות:
- קרא את כל ההוראות לפני השימוש במכשיר.
- אין לנסות להפעיל תנור זה כאשר דלתו פתוחה, שכן הדבר עלול לגרום לחשיפה מזיקה לאנרגיית מיקרוגל.
- אל תניח חפץ כלשהו בין החזית הקדמית של התנור לדלת ואל תאפשר לאדמה או לשאריות מנקה להצטבר על משטחי האיטום.
- אין להפעיל את התנור אם הוא פגום. חשוב במיוחד שדלת התנור תיסגר כראוי ושלא ייגרם נזק לדלת, לצירים או לאטמים.
- רק אנשי שירות מוסמכים צריכים לכוונן או לתקן מכשיר זה.
- ודא שהמכשיר מקורק כהלכה.
- אין לחמם נוזלים או מזון אחר במיכלים אטומים מכיוון שהם עלולים להתפוצץ.
- השתמשו תמיד בכלי בישול המתאימים למיקרוגל.
המוצר נגמרview
Familiarize yourself with the components of your Sharp R-25AM microwave oven.
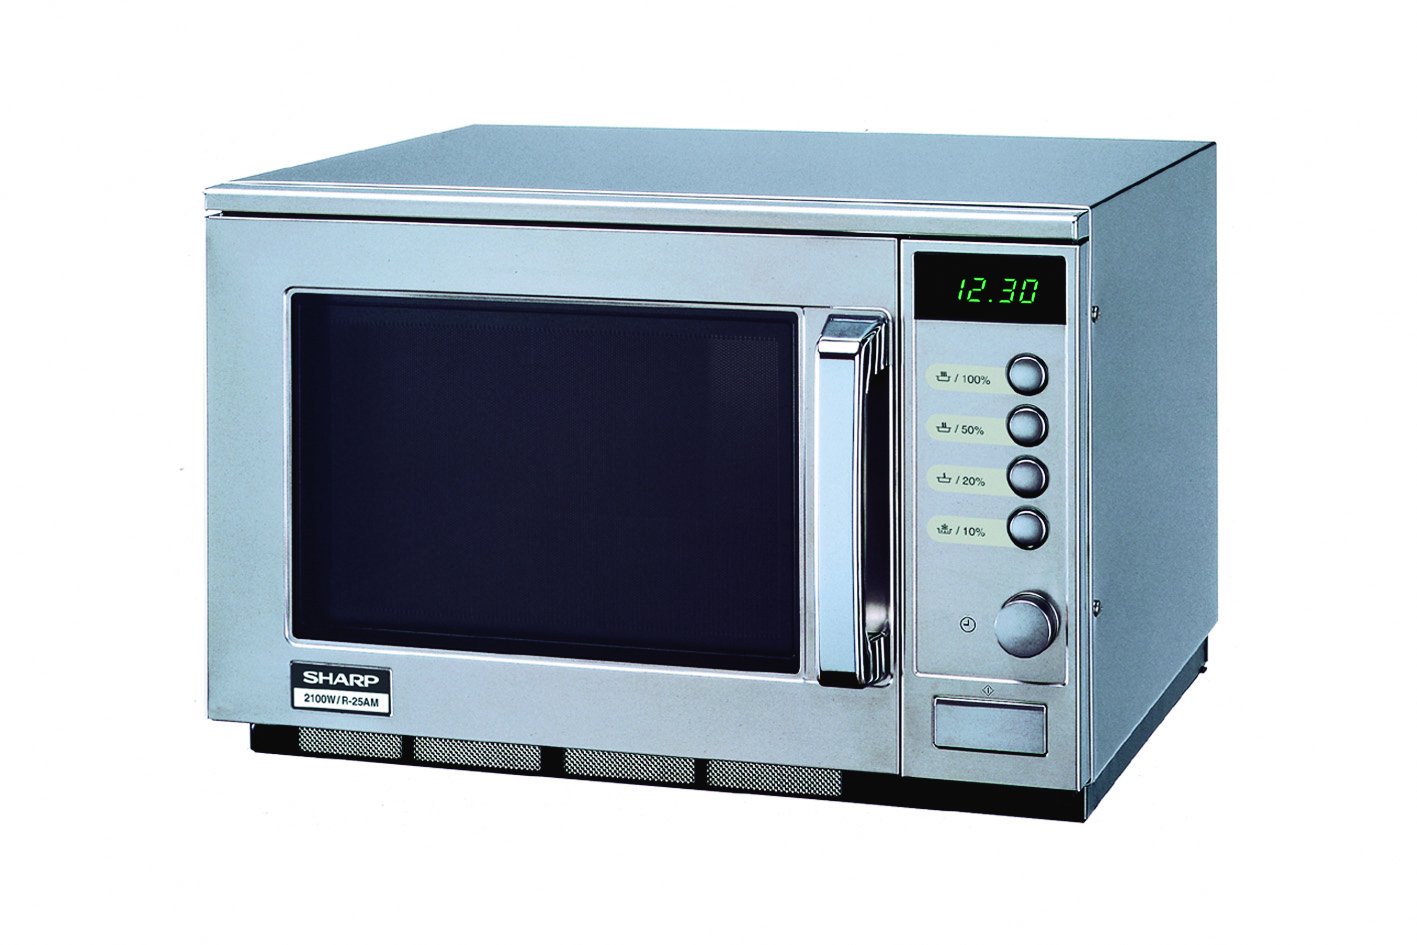
This image displays the front of the Sharp R-25AM microwave oven. It features a stainless steel finish, a dark glass door with a chrome handle, and a control panel on the right. The control panel includes a digital time display (showing '12.30'), four power level buttons (100%, 50%, 20%, 10%), and a rotary dial for setting time or weight. The model number '2100W/R-25AM' is visible on the lower left of the unit.
- חלל התנור: החלל הפנימי בו מניחים מזון לצורך בישול.
- פטיפון זכוכית: מסובב מזון לבישול אחיד.
- הרכבת דלת: כולל את הדלת, הבריח ו viewחלון ing.
- לוּחַ בַּקָרָה: Contains the digital display, power level buttons, and rotary dial for setting cooking time and functions.
- ידית: Used to open and close the oven door.
התקנה והתקנה
- פריקת אריזה: Remove all packaging materials from inside and outside the oven. Check for any damage. Do not remove the waveguide cover.
- מיקום:
- Place the oven on a flat, stable surface strong enough to hold the oven and the food being cooked.
- Ensure adequate ventilation. Leave a minimum of 10 cm (4 inches) clearance at the rear, 20 cm (8 inches) at the top, and 5 cm (2 inches) on both sides.
- אין לחסום פתחי אוורור.
- הרחיקו את התנור ממקורות חום ומשדות מגנטיים חזקים.
- חיבור לחשמל:
- Plug the power cord into a properly grounded electrical outlet (230V, 50Hz, 16A).
- אין להשתמש בכבלים מאריכים או מתאמים.
הוראות הפעלה
הגדרת השעון
- Ensure the oven is plugged in. The display will show '0:00' or the current time if previously set.
- הקש על שָׁעוֹן button (often indicated by a clock icon next to the rotary dial).
- Turn the rotary dial to set the hour. Press the שָׁעוֹן כפתור שוב.
- Turn the rotary dial to set the minutes. Press the שָׁעוֹן לחצו פעם נוספת כדי לאשר.
בישול במיקרוגל
- אוכל במקום: Put food in a microwave-safe container on the glass turntable. Close the oven door securely.
- בחר רמת עוצמה: Press one of the power level buttons (100%, 50%, 20%, 10%) to choose the desired cooking intensity. For example, press '100%' for full power (2100W).
- הגדרת זמן בישול: Turn the rotary dial to set the desired cooking time. The display will show the time counting down.
- התחל לבשל: The oven will start automatically after setting the time. Some models may require pressing a separate 'Start' button.
- סוף הבישול: The oven will beep when cooking is complete. Open the door and carefully remove the food.
הַפשָׁרָה
The defrost function allows you to thaw frozen foods efficiently.
- הניחו את המזון הקפוא על צלחת החימום המסתובבת.
- הקש על להפשיר button (if available, or use a lower power setting like 20% or 50%).
- Turn the rotary dial to set the defrost time or weight, depending on the model's features.
- The oven will begin defrosting. It may be necessary to turn the food over halfway through the defrosting process for even thawing.
תחזוקה וניקיון
Regular cleaning and maintenance will ensure your microwave oven operates effectively and safely.
- ניקוי פנים:
- לאחר כל שימוש, נגבו את פנים האריזה עם מודעהamp מטלית להסרת כתמי אוכל.
- For stubborn stains, place a bowl of water with lemon juice inside and microwave for 2-3 minutes. The steam will loosen the grime, making it easier to wipe clean.
- אין להשתמש בחומרי ניקוי שוחקים או בכריות קרצוף.
- ניקוי החלק החיצוני:
- נגב את המשטחים החיצוניים עם רך, דamp בַּד.
- עבור משטחי נירוסטה, השתמשו בחומר ניקוי מיוחד לפלדת אל-חלד כדי לשמור על הגימור שלה.
- ניקוי הפטיפון: The glass turntable and roller ring can be removed and washed in warm, soapy water or in a dishwasher. Ensure they are completely dry before placing them back in the oven.
- אטמי דלת: נקו באופן קבוע את אטמי הדלת והחלקים הסמוכים בעזרת מודעהamp בד כדי להבטיח איטום נאות ולמנוע דליפה במיקרוגל.
פתרון בעיות
לפני פנייה לשירות הלקוחות, אנא עיינו בבעיות הנפוצות ובפתרונות הבאות:
| בְּעָיָה | סיבה אפשרית | פִּתָרוֹן |
|---|---|---|
| התנור לא מתחיל. | כבל החשמל לא מחובר; הדלת לא סגורה כראוי; נתיך שרוף או מפסק חשמלי הופעל. | Ensure plug is firmly in outlet; close door securely; check household fuse or reset circuit breaker. |
| אוכל לא מתחמם. | Door not closed properly; incorrect cooking time or power level set. | Ensure door is closed; verify cooking time and power level settings. |
| אור לא עובד. | נורה צריכה החלפה. | צור קשר עם אנשי שירות מוסמכים להחלפת נורה. |
| פטיפון לא מסתובב. | Turntable not properly placed; debris under turntable. | Ensure turntable and roller ring are correctly positioned; clean any debris. |
מפרטים
Key technical specifications for the Sharp R-25AM microwave oven:
- דֶגֶם: R-25AM
- מותג: חַד
- יְכוֹלֶת: 20 ליטר
- תפוקת חשמל: 2100 וואט
- כרך ידtage: 230 וולט
- תֶדֶר: 50 הרץ
- סוג התקנה: משטח עבודה
- חוֹמֶר: נירוסטה
- מידות המוצר (L x W x H): 470 x 510 x 335 מ"מ (בערך 18.5 x 20.1 x 13.2 אינץ')
- מִשׁקָל: 33.12 ק"ג (כ-73 פאונד)
- סוג בקרה: כפתור, חוגה סיבובית
אחריות ותמיכה
For warranty information, please refer to the warranty card included with your purchase or visit the official Sharp website. For technical support or service inquiries, please contact Sharp customer service directly. Keep your purchase receipt as proof of purchase for warranty claims.
Note: Availability of spare parts is currently unavailable as per product information.