
Oster CKSTBR9050
Oster Expressbake Bread Maker Instruction Manual
Model: CKSTBR9050-NP | Brand: Oster
מָבוֹא
Welcome to the world of homemade bread with your new Oster Expressbake Bread Maker. This appliance is designed to simplify the bread-making process, offering a variety of settings for different bread types, doughs, and even jams. Enjoy fresh, delicious bread with minimal effort.
המוצר נגמרview ותכונות עיקריות
The Oster Expressbake Bread Maker (CKSTBR9050-NP) is a versatile kitchen appliance designed for ease of use and consistent results. It features a compact design and intuitive controls.
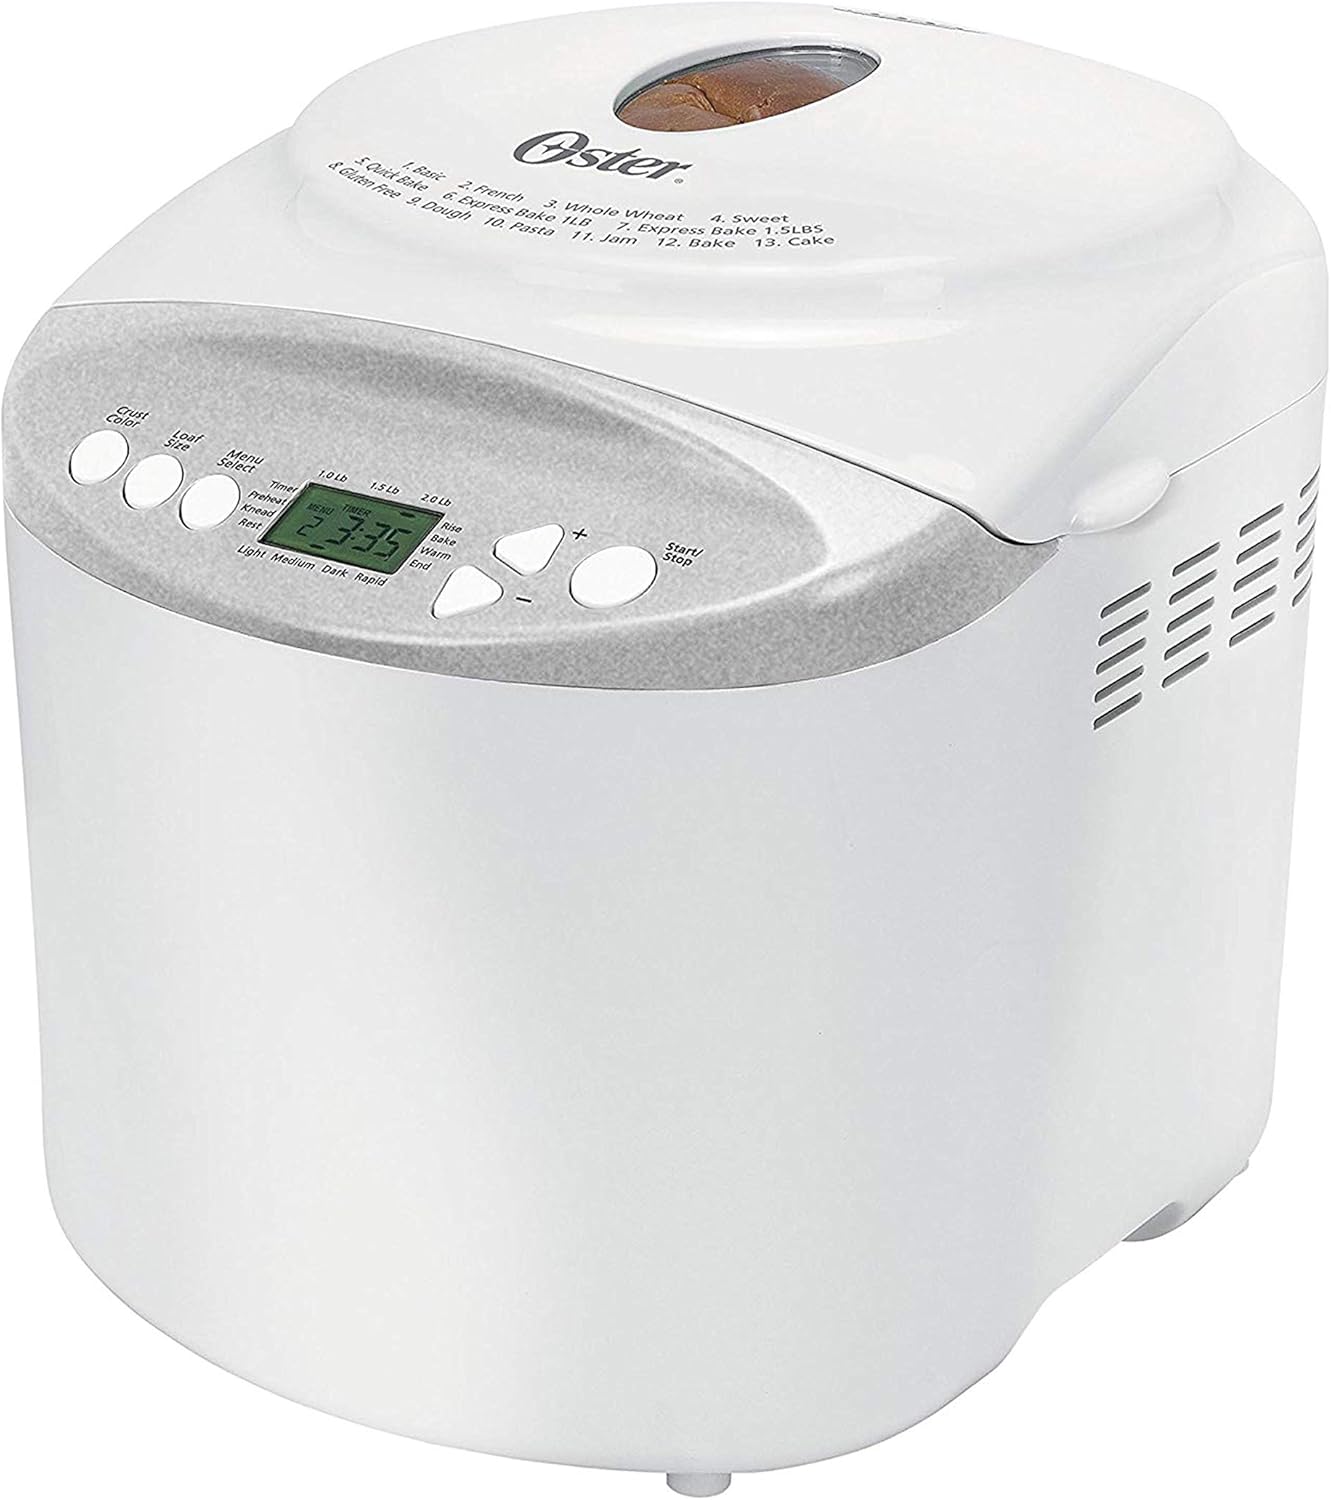
חֲזִית view of the Oster Expressbake Bread Maker, showing the control panel and viewחלון ing.

פְּנִימִי view highlighting the removable lid, nonstick aluminum pan, and easy-to-read LCD display.
תכונות עיקריות:
- 2-Pound Loaf Capacity: Ideal for families, allowing for larger bread batches.
- 13 הגדרות: Offers a wide range of options for various breads, doughs, and jams.
- Gluten-Free Setting: Dedicated program for preparing gluten-free bread.
- Express Bake Setting: Bakes bread in under an hour for quick results.
- Crust Color Selection: Choose from light, medium, or dark crusts.
- טיימר לתכנות 13 שעות: Allows for delayed baking, so you can wake up to fresh bread.
- אביזרים נוחים: Includes a measuring cup and spoon.
Product Features Video: A Closer Look
סרטון זה מספק תמונה מפורטת שלview of the Oster Expressbake Bread Maker, showcasing its various components and features, including the bread pan, kneading paddle, and control panel. It highlights the ease of use and the different settings available.
מדריך התקנה
- פריקת אריזה: הסירו בזהירות את כל חומרי האריזה ממכונת הלחם ומהאביזרים שלה.
- ניקוי: Before first use, wash the bread pan and kneading paddle with warm, soapy water. Wipe the exterior of the unit with a damp מטלית. ודאו שכל החלקים יבשים לחלוטין לפני ההרכבה.
- מיקום: Place the bread maker on a stable, flat, heat-resistant surface, away from direct sunlight and heat sources. Ensure adequate ventilation around the unit.
- התקנת תבנית לחם: Insert the kneading paddle onto the shaft inside the bread pan. Place the bread pan into the bread maker, ensuring it clicks securely into place.
- חיבור חשמל: חבר את כבל החשמל לשקע חשמל מוארק.

The included measuring cup and spoon are essential for accurate ingredient measurement.

The control panel displays the 13 available settings for various bread types and functions.
הוראות הפעלה
בצעו את השלבים הבאים לאפיית לחם מוצלחת:
- הוסף מרכיבים: Always add liquid ingredients first, followed by dry ingredients. Create a small well in the dry ingredients for the yeast, ensuring it does not come into direct contact with liquids or salt initially.
- בחר תוכנית: Press the "Menu Select" button to choose from the 13 available settings (e.g., Basic, French, Whole Wheat, Sweet, Gluten-Free, Express Bake, Dough, Jam, Cake).
- בחר גודל כיכר לחם: Press the "Loaf Size" button to select your desired loaf size (1.0 lb, 1.5 lb, or 2.0 lb).
- בחר צבע קרום: Press the "Crust Color" button to choose your preferred crust shade (Light, Medium, or Dark).
- התחילו לאפות: Press the "Start/Stop" button to begin the baking cycle. The machine will automatically knead, rise, and bake the bread.
- Delayed Baking (Optional): To use the 13-hour programmable timer, add ingredients, then set the desired delay time before pressing "Start/Stop".
טיפים חשובים לתוצאות הטובות ביותר:
- Ensure all ingredients are at room temperature unless otherwise specified in the recipe.
- Measure ingredients precisely. Use the provided measuring cup and spoon for accuracy.
- During the kneading cycle, use a rubber spatula to scrape down any flour from the sides of the pan to ensure all ingredients are incorporated.
- Avoid opening the lid during the baking cycle, especially during the rising phase, as this can affect the bread's texture.
תחזוקה וניקיון
תחזוקה נאותה מבטיחה את אורך החיים והביצועים האופטימליים של מכונת הלחם שלכם.
- לאחר כל שימוש: Unplug the bread maker and allow it to cool completely before cleaning.
- תבנית לחם ומרית לישה: Remove the bread pan and kneading paddle. Wash them with warm, soapy water. Do not use abrasive cleaners or scouring pads, as this can damage the nonstick coating. Rinse thoroughly and dry completely.
- חִיצוֹנִי: נגבו את החלק החיצוני של מכונת הלחם בעזרת מטלית רכהamp מטלית. אין לטבול את היחידה במים או בכל נוזל אחר.
- מִכסֶה: The inner lid is detachable for easy cleaning. Wipe it down with a damp בַּד.
- אִחסוּן: Store the bread maker in a dry, cool place when not in use.
פתרון בעיות
אם נתקלתם בבעיות עם מכונת הלחם שלכם, עיינו בבעיות הנפוצות ובפתרונות שלהלן:
| בְּעָיָה | סיבה אפשרית | פִּתָרוֹן |
|---|---|---|
| Bread is too dense or flat | Too much liquid, old yeast, or incorrect ingredient order. | Reduce liquid slightly. Ensure yeast is fresh. Always add liquids first, then dry ingredients, with yeast last in a well. |
| Bread did not rise | Inactive yeast, water too hot/cold, or too much salt/sugar. | Check yeast expiration. Use water between 77°-85°F. Measure salt and sugar accurately. |
| כף לישה תקועה בלחם | תופעה שכיחה. | Allow bread to cool. Use the provided metal hook to carefully remove the paddle. |
| המכונה לא מתחילה | Not plugged in, lid not closed, or incorrect program selection. | Ensure power cord is securely plugged in. Close the lid firmly. Verify program settings. |
מפרט מוצר
- מספר דגם: CKSTBR9050
- צֶבַע: לָבָן
- קיבולת כיכר: עד 2 פאונד
- מספר תוכניות: 13
- מידות המוצר: 12.1" D x 13.5" W x 13.2" H
- משקל פריט: 8 פאונד
- יַצרָן: אוסטר
- UPC: 750343688389, 034264440203
- תאריך זמין ראשון: 17 בינואר 2011

Detailed dimensions of the Oster Expressbake Bread Maker.
אחריות ותמיכה
For detailed warranty information and customer support, please refer to the official user guide provided with your product or visit the Oster website. A digital version of the user guide is often available for download.
לסיוע נוסף, ניתן גם לעיין ב- מדריך למשתמש (PDF).
Ask a question about this manual
Ask about setup, troubleshooting, compatibility, parts, safety, or missing instructions. Manuals+ will review the question and use this page’s manual context to help answer it.