1. הקדמה
This manual provides detailed instructions for the installation, operation, and maintenance of your Foxconn TSAA725 ATX Tower Case. Please read this manual thoroughly before beginning installation to ensure proper setup and safe use of the product. Keep this manual for future reference.
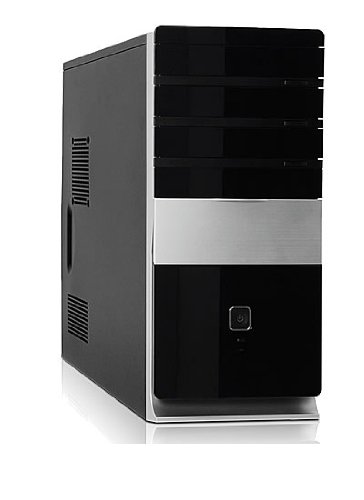
תמונה: חזית view of the Foxconn TSAA725 ATX Tower Case, showcasing its design and front panel ports.
2. מידע בטיחות
יש להקפיד על אמצעי הזהירות הבאים כדי למנוע נזק למוצר או פגיעה עצמית:
- Always disconnect the power supply from the wall outlet before opening the computer case or performing any installation/maintenance.
- Handle internal components with care to avoid electrostatic discharge (ESD) damage. Use an anti-static wrist strap if available.
- ודא אוורור נאות סביב המארז כדי למנוע התחממות יתר.
- Do not expose the case to moisture or extreme temperatures.
- הרחק חלקים קטנים מילדים.
3. תכולת החבילה
ודא שכל הפריטים נמצאים בחבילה:
- Foxconn TSAA725 ATX Tower Case
- 350W Power Supply (pre-installed)
- Accessory kit (screws, standoffs, cable ties)
- מדריך הוראות זה
4. תכונות עיקריות
The Foxconn TSAA725 ATX Tower Case offers the following features:
- חוֹמֶר: 0.5mm SGCC Alloy Steel construction for durability.
- תמיכה בלוח אם: Compatible with ATX and Micro ATX motherboards.
- מפרצי כונן:
- 3x 5.25" External Bays
- 2x 3.5" External Bays
- 4x 3.5" Internal Bays
- מערכת קירור:
- 1x 80/92/120mm rear fan support (fan not included)
- Optional 1x 80/92/120mm front fan support (fan not included)
- 80mm Air Duct for CPU cooling.
- פאנל קלט/פלט קדמי:
- 2x יציאות USB 2.0
- שקע אוזניות אחד
- 1x Microphone jack
- ספק כוח: Integrated 350W Power Supply.
5. התקנה והתקנת רכיבים
Follow these steps to install your computer components into the Foxconn TSAA725 case:
- הכינו את התיק:
Place the case on a flat, stable surface. Remove the side panel(s) by unscrewing the thumbscrews at the rear of the case and sliding the panel backward.
- התקן לוח אם:
Install the necessary standoffs onto the motherboard tray according to your motherboard's form factor (ATX or Micro ATX). Carefully place the motherboard onto the standoffs, aligning the screw holes. Secure the motherboard with screws provided in the accessory kit.
- Install Drives (HDD/SSD):
For 3.5" internal drives, slide the drive into an available 3.5" internal bay and secure it with screws from the side. For 5.25" external drives (e.g., optical drives), remove the front panel bay cover, slide the drive in from the front, and secure it with screws.
- התקנת כרטיסי הרחבה:
Remove the appropriate expansion slot covers at the rear of the case. Insert your graphics card or other expansion cards into the PCIe/PCI slots on the motherboard and secure them with screws.
- חבר כבלים:
Connect the power supply cables to the motherboard (24-pin ATX, 4/8-pin CPU), graphics card (if applicable), and drives (SATA power). Connect the front panel cables (USB, audio, power switch, reset switch, LED indicators) to the corresponding headers on the motherboard. Refer to your motherboard manual for header locations.
- ניהול כבלים:
Route cables neatly to improve airflow and aesthetics. Use cable ties from the accessory kit if needed.
- סגור את התיק:
Once all components are installed and cables are connected, reattach the side panel(s) and secure them with the thumbscrews.
6. הוראות הפעלה
After successful assembly, connect your peripherals (monitor, keyboard, mouse) and power cable to the case. Press the power button on the front panel to start your computer.
יציאות קלט/פלט בלוח הקדמי:
- יציאות USB 2.0: For connecting USB devices such as keyboards, mice, and external storage.
- שקע אוזניות: לחיבור אוזניות או רמקולים.
- שקע מיקרופון: לחיבור מיקרופון.
- לחצן הפעלה: כדי להפעיל או לכבות את המחשב.
- לחצן איפוס: To restart the computer.
7. תחזוקה
Regular maintenance helps ensure optimal performance and longevity of your computer case:
- ניקוי אבק: Periodically clean dust from inside the case, especially from fans and heatsinks, using compressed air. Ensure the computer is powered off and unplugged before cleaning.
- ניקוי חיצוני: נגבו את החלק החיצוני של המארז בעזרת מטלית רכהamp מטלית. הימנעו מחומרי ניקוי שוחקים או ממסים.
- ניהול כבלים: בדקו מעת לעת את ניתוב הכבלים כדי לוודא שאין כבלים שחוסמים את זרימת האוויר או את פעולת המאוורר.
8. פתרון תקלות
אם נתקלת בבעיות, עיין בפתרונות הנפוצים הבאים:
- Computer does not power on:
- Ensure the power cable is securely connected to both the case's power supply and the wall outlet.
- Check if the power supply switch (if present) is in the 'ON' position.
- ודא שכבל לחצן ההפעלה של הלוח הקדמי מחובר כראוי ללוח האם.
- אין תצוגה על המסך:
- Ensure the monitor is powered on and connected to the correct video output on your graphics card or motherboard.
- התקן מחדש את כרטיס המסך ואת מודולי ה-RAM.
- יציאות USB לא עובדות:
- Verify that the front panel USB cables are correctly connected to the motherboard's USB headers.
- נסה לחבר את המכשיר ליציאת USB אחרת.
9. מפרטים
| תכונה | פְּרָט |
|---|---|
| מותג | FOXCONN |
| דֶגֶם | TSAA725-ISO450 |
| חוֹמֶר | 0.5mm SGCC Alloy Steel |
| תאימות לוח אם | ATX, מיקרו ATX |
| מפרצי כוננים (חיצוניים) | 3x 5.25 אינץ', 2x 3.5 אינץ' |
| מפרצי כוננים (פנימיים) | 4x 3.5 אינץ' |
| תמיכה במערכת קירור | 1x 80/92/120mm rear fan, 1x 80/92/120mm front fan (optional), 80mm Air Duct |
| יציאות קלט / פלט קדמיות | 2x USB 2.0, 1x אוזניות, 1x מיקרופון |
| ספק כוח | 350W (Integrated) |
| מידות המוצר (LxWxH) | 50.17 x 24.13 x 54.61 ס"מ |
| משקל פריט | 6.96 ק"ג |
10. אחריות ותמיכה
For warranty information and technical support, please refer to the official Foxconn webאתר או צור קשר עם הספק המקומי שלך. שמור את הוכחת הרכישה שלך לצורך תביעות אחריות.
משאבים מקוונים: For additional support and updated drivers, visit the official Foxconn support page.
הערה: תנאי האחריות עשויים להשתנות בהתאם לאזור.