
1. הקדמה
The Intermatic EI400C Electronic Countdown In-Wall Timer is designed to provide automatic shut-off functionality for various electrical loads, including indoor and outdoor lighting, bathroom fans, whole house fans, and other appliances. This timer offers precise control from 1 second to 24 hours, enhancing convenience and energy efficiency in your home or office. Its silent operation and simple push-button interface make it user-friendly, while its no-neutral wire requirement simplifies installation in most standard wall boxes.
2. מידע בטיחות חשוב
אזהרה: סכנת התחשמלות. התקנה לא נכונה עלולה לגרום לפציעה חמורה או למוות.
- Always turn off power at the circuit breaker or fuse box before installing or servicing the timer.
- יש לבצע את ההתקנה על ידי חשמלאי מוסמך או בהתאם לכל תקנות החשמל המקומיות והארציות.
- Do not use this timer with sunlamps, saunas, or any loads that could cause personal injury if timed incorrectly or if the timer malfunctions.
- ודא שכל חיבורי החוטים מאובטחים ומבודדים כראוי.
- מכשיר זה מיועד לשימוש פנימי בלבד.
3. המוצר נגמרview
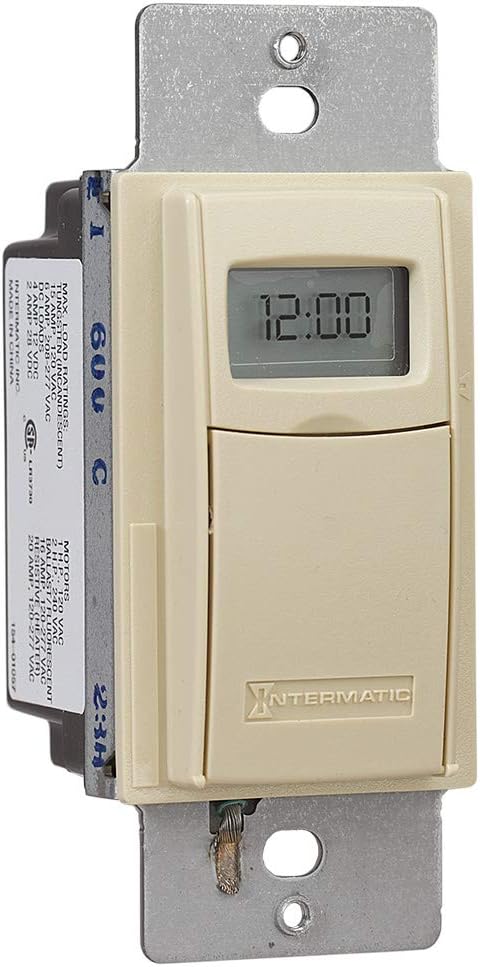
The Intermatic EI400C is an electronic countdown timer designed for in-wall installation. It features a digital display and intuitive controls for setting countdown durations.
3.1 רכיבים
- תצוגה דיגיטלית: Shows current time and countdown status.
- לחצן הפעלה/כיבוי: Activates or deactivates the timer.
- כפתורי פלוס (+) / מינוס (-): Adjust countdown duration.
- לחצן השהה: Temporarily stops the countdown.
- תא סוללות: Houses the CR2 lithium battery.
3.2 תמונות מוצר



4. התקנה והתקנה
The Intermatic EI400C timer is designed for easy installation, compatible with single-pole or 3-way switch configurations and does not require a neutral wire connection.
4.1 שלבים לפני התקנה
- כבה את הכוח: Locate the circuit breaker or fuse that controls the switch you are replacing and turn off the power. Verify power is off using a voltagבודק e.
- הסר מתג קיים: הסר בזהירות את לוחית הקיר ופתח את המתג הקיים מקופסת הקיר. נתק את החוטים מהמתג הישן.
4.2 הוראות חיווט
The EI400C timer is compatible with both single-pole and 3-way switch setups. Refer to the diagram provided with your product for specific wiring configurations. Generally, the timer will have two load wires and a ground wire. For 3-way applications, one of the traveler wires from the existing 3-way switch will be connected to the timer.
- Connect the timer's wires to the corresponding house wires using wire nuts.
- ודא שכל החיבורים הדוקים ומאובטחים.
- The EI400C does not require a neutral wire, simplifying installation in older homes.
4.3 Mounting and Finalizing Installation
- דחפו בזהירות את הטיימר החוטי לתוך תיבת הקיר.
- Secure the timer to the wall box with the provided screws.
- Attach the decorative wall plate.
- החזר כוח: הפעל מחדש את החשמל במפסק החשמל.
4.4 התקנת סוללה
The timer comes with a replaceable CR2 lithium battery, which powers the internal clock and settings memory. The battery is typically pre-installed or needs to be inserted upon initial setup.
- Open the small front cover of the timer to access the battery compartment.
- Insert the CR2 lithium battery, observing the correct polarity.
- סגור היטב את מכסה תא הסוללות.
5. הוראות הפעלה
The EI400C timer offers simple, push-button operation for setting countdown durations from 1 second to 24 hours.
5.1 Setting a Countdown Time
- בקרות גישה: Gently open the front cover of the timer to reveal the control buttons.
- התאם זמן: השתמש ב- + ו - buttons to set the desired countdown duration. The display will show the selected time.
- טיימר התחל: הקש על הפעלה/כיבוי button to activate the timer. The connected load will turn on, and the timer will begin counting down.
5.2 Turning Off Before Countdown Ends
If you wish to turn off the connected load before the set countdown time expires, simply press the הפעלה/כיבוי button again. This will immediately turn off the load and reset the timer.
5.3 פונקציית השהייה
הקש על הַפסָקָה button to temporarily halt the countdown. The connected load will remain on. Press הַפסָקָה שוב לחדש את הספירה לאחור.
5.4 Lockable Settings
The timer features lockable settings to prevent unintended changes to the program. Refer to the detailed instructions included in the product packaging for how to activate and deactivate this feature.
5.5 Visual/Audible Warnings
The EI400C can be configured to provide a visual or audible warning before the timer turns off. Consult the full product manual for steps on enabling and customizing these warning options.
5.6 סרטון הדרכה
הווידאו 1: An official Intermatic video providing an overview of their in-wall timers, including the EI400 series. This video demonstrates general features and benefits of Intermatic in-wall timers, which are applicable to the EI400C model.
6. תחזוקה
The Intermatic EI400C timer requires minimal maintenance, primarily focusing on battery replacement.
6.1 החלפת סוללה
The internal CR2 lithium battery provides power for the timer's memory and display, typically lasting up to three years. When the battery is low, a 'LoBatt' indicator may appear on the display.
- Open the front cover of the timer.
- Carefully remove the old CR2 battery from its compartment.
- Insert a new CR2 lithium battery, ensuring correct polarity.
- סגור היטב את המכסה הקדמי.
פֶּתֶק: Some users have reported that the battery compartment cover can be difficult to open or may not stay securely closed after multiple battery changes. Exercise care when opening and closing the compartment. If the cover does not stay closed, ensure the battery makes proper contact.
7. פתרון תקלות
This section addresses common issues you might encounter with your Intermatic EI400C timer.
| בְּעָיָה | סיבה אפשרית | פִּתָרוֹן |
|---|---|---|
| Timer display is blank or shows 'LoBatt' | Low or dead CR2 battery, or poor battery contact. | Replace the CR2 lithium battery. Ensure the battery is inserted correctly and the compartment cover is securely closed to maintain contact. |
| Timer shows 'NoOP' error | Indicates a problem with battery contact or internal operation. | Check and re-seat the CR2 battery. If the issue persists, the unit may require replacement. |
| Connected load does not turn on/off | No power to the timer, incorrect wiring, or faulty load. | Verify power at the circuit breaker. Double-check wiring connections according to the installation instructions. Test the connected load (e.g., light bulb) with a different switch or power source. |
| Difficulty opening battery compartment cover | Tight fit or worn plastic tabs. | Use a small, flat-head screwdriver to gently pry open the cover. Be careful not to damage the plastic tabs. |
| Timer does not hold settings after power outage | Dead or missing CR2 battery. | The CR2 battery maintains settings during power outages. Ensure it is installed and functional. |
8. מפרטים
| תכונה | פְּרָט |
|---|---|
| מספר דגם | EI400C |
| מותג | אינטרמטיקה |
| צֶבַע | שֶׁנהָב |
| חוֹמֶר | פּלָסטִי |
| כרך ידtage | 120-277 וולט |
| עומס מקסימלי | 20 Amps |
| טווח טיימר | 1 Second to 24 Hours |
| סוג מתג | חד-קוטבי או תלת-כיווני |
| סוג הרכבה | Standard Wall Box, Rectangular Decorator Wall Plate |
| נדרש סוללה | 1 CR2 Lithium (included) |
| חיי סוללה | עד 3 שנים |
| מידות | 4.13 x 1.75 x 1.2 אינץ' |
| משקל פריט | 6 אונקיות (0.38 פאונד) |
| הסמכה | מוסמך CSA |
| UPC | 078275101371 |
9. אחריות ותמיכה
9.1 מידע אחריות
The Intermatic EI400C Electronic Countdown In-Wall Timer comes with a אחריות מוגבלת לשנהאחריות זו מכסה פגמים בחומרים ובביצוע בשימוש רגיל. אנא שמור את הוכחת הרכישה שלך לצורך תביעות אחריות.
9.2 תמיכת לקוחות
For technical assistance, troubleshooting beyond this manual, or warranty inquiries, please contact Intermatic customer support. Refer to the official Intermatic webבאתר או באריזת המוצר לקבלת פרטי הקשר העדכניים ביותר.
משאבים מקוונים: בקר ב Intermatic Store on Amazon למידע נוסף על המוצר ומשאבים.