
1. הקדמה
This manual provides essential information for the safe and efficient installation, operation, and maintenance of the Eltako FSM61-UC Wireless Transmitter Module. Please read this manual thoroughly before using the device.
2. מידע בטיחות
אַזהָרָה: Electrical work must be performed exclusively by qualified electricians or under their direct supervision and guidance. Failure to comply may result in electric shock, fire, or serious injury.
Observe all local and national electrical codes and regulations during installation.
3. המוצר נגמרview
The Eltako FSM61-UC is a dual-channel wireless transmitter module designed for panel mounting. It features an internal antenna and operates without standby power loss. This module sends radio telegrams within the Eltako radio system.
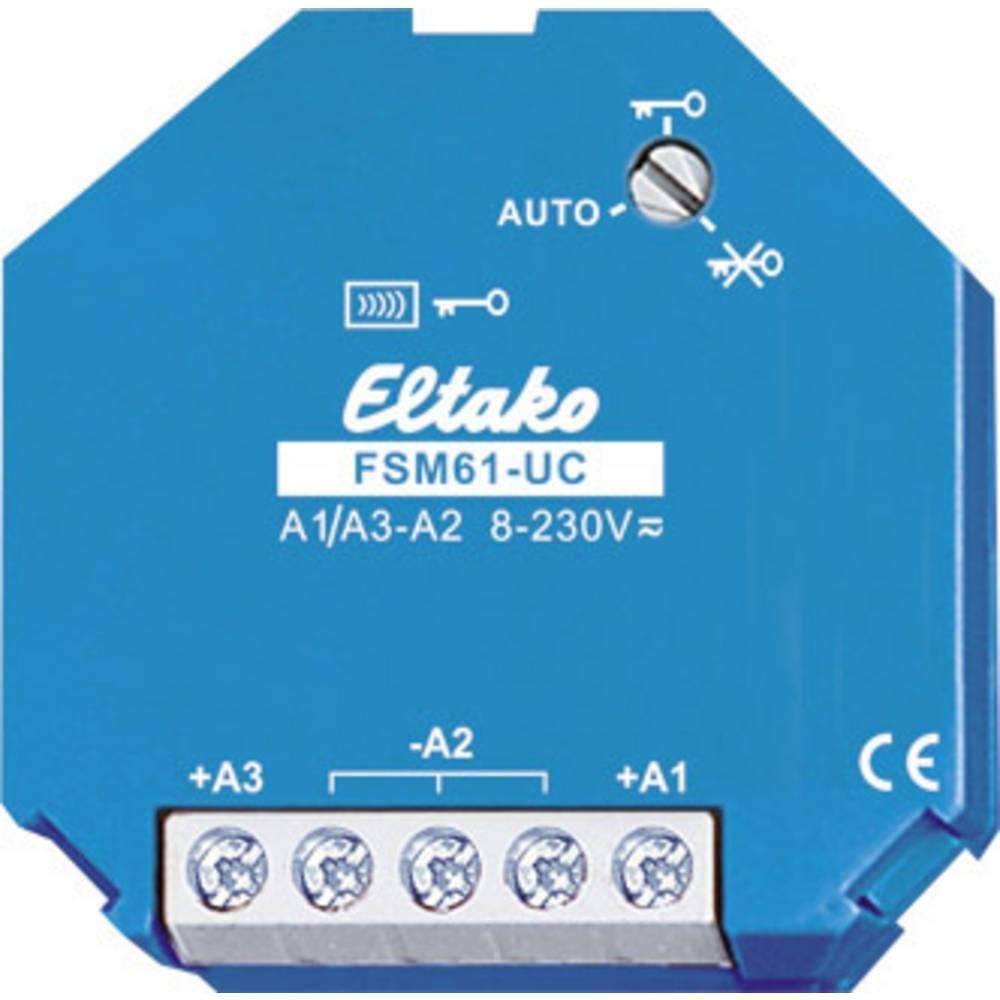
Image 1: Eltako FSM61-UC Wireless Transmitter Module. This image shows the compact design of the module, suitable for integration into electrical panels.
- סוּג: Dual radio emission module
- אַנטֶנָה: פְּנִימִי
- צריכת חשמל: No standby loss
- הַרכָּבָה: הרכבה ללוח
- מידות (L x W x D): כ-45 מ"מ x 45 מ"מ x 18 מ"מ
4. התקנה והתקנה
Follow these instructions for proper installation and wiring of the FSM61-UC module:
- כניסות בקרה:
- Terminal A1 sends a toggle-like radio telegram.
- Terminal A3 sends a toggle-like radio telegram.
- Opening both control contacts simultaneously sends a radio key telegram.
- שליטה בו זמנית: It is prohibited to control multiple wireless emission modules simultaneously from a single source.
- Universal Control Voltage: The +an/-A2 input processes control commands from 8 to 253 V AC or 10 to 230 V DC. The minimum duration for a control command is 0.2 seconds.
- Cable Capacitance: The maximum parallel capacitance for control cables at 230 V is 5 nF. This corresponds to an approximate cable length of 20 meters.
- Bridged Terminals (A1 and A3): If terminals A1 and A3 are bridged, an A3 radio telegram is sent once per minute as long as the control voltage is present. This feature is useful for central commands with priority.
5. הוראות הפעלה
The FSM61-UC module does not require continuous power, thus ensuring no standby power loss.
ניהול הצפנה
The rotary switch on the module is used to activate or deactivate encryption. The switch operates in AUTO mode.
- To Activate Encryption: Turn the rotary switch to the right stop (indicated by a key symbol) and then press the associated keys once.
- To Deactivate Encryption: Turn the rotary switch to the left stop (indicated by a crossed-out key symbol) and then press the associated keys once.
6. תחזוקה
The Eltako FSM61-UC module is designed for maintenance-free operation under normal conditions. Ensure the module is kept free from dust and moisture. No user-serviceable parts are inside.
7. פתרון תקלות
If the module does not function as expected, verify the following:
- Ensure all wiring connections are secure and correct according to the installation instructions.
- אשר כי כרך הבקרהtage is within the specified range (8-253 V AC or 10-230 V DC) and applied for at least 0.2 seconds.
- Check the encryption settings using the rotary switch as described in the Operating Instructions.
- Ensure no other wireless emission modules are being controlled simultaneously from the same source.
- אם הבעיות נמשכות, פנו לחשמלאי מוסמך.
8. מפרטים
| תכונה | מִפרָט |
|---|---|
| מספר דגם | FSM61-UC |
| יַצרָן | אלתקו |
| מידות (L x W x D) | 9 x 6.5 x 2.2 cm (approx. 45 x 45 x 18 mm for module body) |
| מִשׁקָל | 40 גרם |
| שליטה כרךtage קלט | 8-253 V AC or 10-230 V DC |
| Minimum Control Pulse Duration | 0.2 שניות |
| Max. Parallel Cable Capacitance (230V) | 5 nF (approx. 20 meters) |
| נוֹהָג | Professional and domestic |
9. אחריות ותמיכה
Information regarding specific warranty terms and customer support for the Eltako FSM61-UC module is not available in the provided product details. Please refer to the manufacturer's official website or contact your point of purchase for warranty details and technical support.